To quote Miles Finch from the movie Elf, “I’ve got one idea that I’m especially psyched out of my mind about. Ya’ know, it’s one of those ideas where you’re just like, YES!” This sums up how I feel about today’s project! My Lowe’s Creative Ideas Blogger challenge this month was to create holiday decor using some items from Lowe’s. I came up with the idea to create DIY Oversized Ornaments using light globes, tuna cans, and eye hooks. Oh my!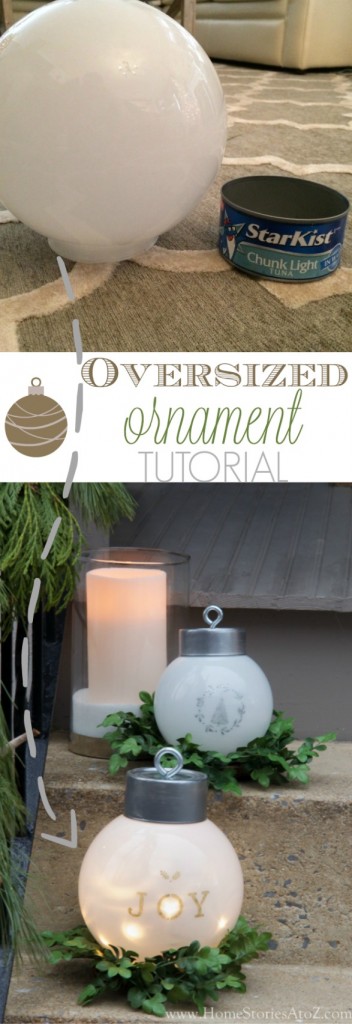
I really wish you could see me as I brainstorm ideas for these projects. You would be amused. Perhaps many of you fellow creatives can relate. My creative process typically consists of me wandering the aisles of Lowe’s while staring intently at all of the shelves. Sometimes I’ll just stop and stare at a section for much longer than is normal, or socially appropriate. I’ll place random items in my cart from plumbing, and lighting, and hardware, and heating and cooling, and then lay them all out on the Lowe’s concrete floor trying to get a picture of how they might all come together. Usually this is when I get a, “Um…can I help you?” And that is inevitably followed with me turning bright red. I blush easily. So just be grateful that blushing and social weirdness will not be part of your creative experience if you choose to do this project! I already got that part out of the way for you. 🙂
DIY Oversized Ornament Materials Needed:
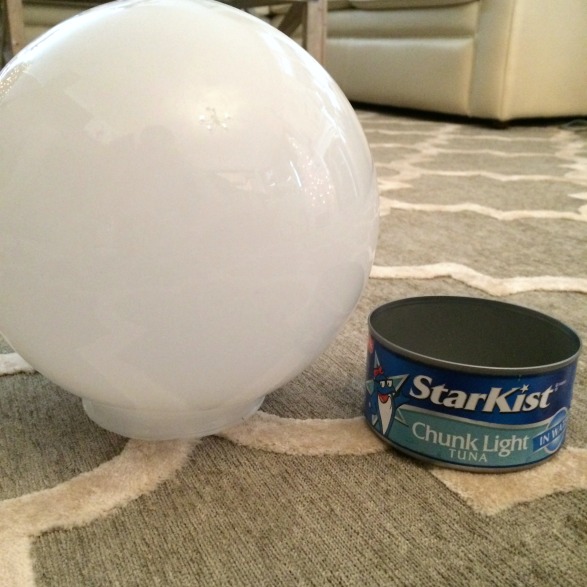
- Globe lights (I purchased two 8 inch and two 6 inch frosted white globe shades. I am having trouble finding the exact matches online, so check your local store for availability. UPDATE: Not sure why both of these aren’t listed online, but I found these in the lighting section at Lowe’s with other globe shades. The small ones are item number #33686 3 1/4×6-in Opal Globe and cost $4.98 each. The large globes are item #33631 4×8-in White Globe and cost me $7.98 a piece. Prices WILL vary depending on your location.)
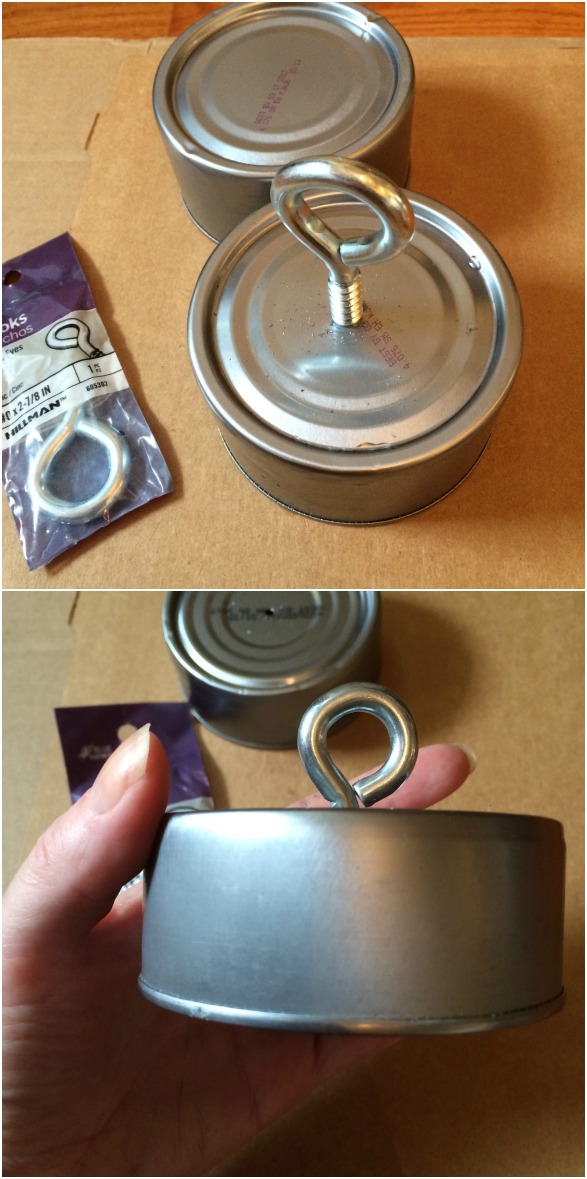
- Cleaned tuna cans (I used two large tuna cans and two small tuna cans. They fit their respective shades perfectly.)
- Screw eye hooks (For the large tuna cans, I used Hillman #0x2-7/8 inch eye hooks and for the small cans I used Hillman #104×2-1/16 inch.)
- Drill and bits
- Silver leaf Rub ‘n Buff (or metallic spray paint)
- (Optional) Stencils and paint
- LED Battery Operated Lights
Step 1: Clean your globe shades and tuna cans with a solution of vinegar and rubbing alcohol.
To create four ornaments-two large and two “small”-I used two large tuna cans and two small ones. Of course I didn’t have any empty tuna cans in recycling, so yes, I emptied four cans of tuna into a tupperware container. Guess what’s for lunch kids?! Tuna melts anyone? If you don’t like tuna, keep up your crazy-DIY-persona by posting a call out on facebook for tuna cans. I’m sure someone has some that they will be willing to donate to the oversized ornament cause!
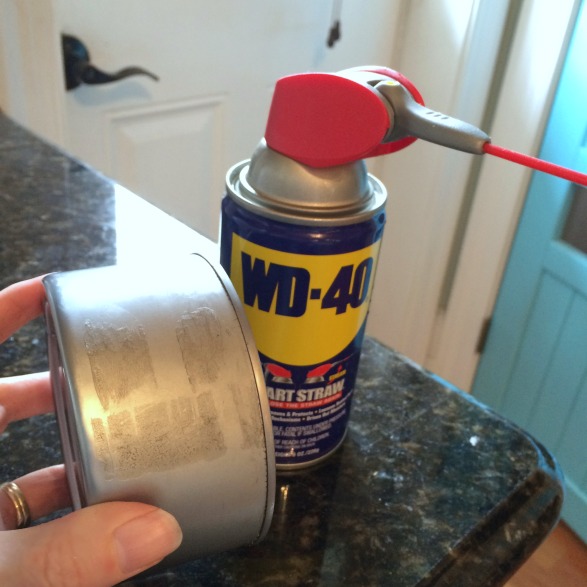
Be sure to remove the sticky label residue from your cans before proceeding. Here is a quick tip that you may or may not already know. My favorite method to remove stubborn sticker adhesive (i.e. duct tape residue, price-tags, label glue, etc.) is to spray it with WD-40. I’ve tried Goo Gone, Goof Off, rubbing alcohol, Krud Kutter, some citrus product and good ‘ole WD-40 remains my fav. Just spray on and scrub with a paper towel. (Use care when using as it contains petroleum distillates, so be sure to wear chemical resistant gloves and use in a well-ventilated area. Avoid rubbing your hands all up in it–and ignore those viral facebook posts claiming it cures arthritis. It does not.)
Step 2: Drill a hole in center of each cleaned tuna can.
To determine the size of bit to use, hold your eye hook up to your bits and choose a size or two down from the eye hook. I used a 1/8 inch drill bit on the small tuna cans. I can’t remember what I used on the larger ones.
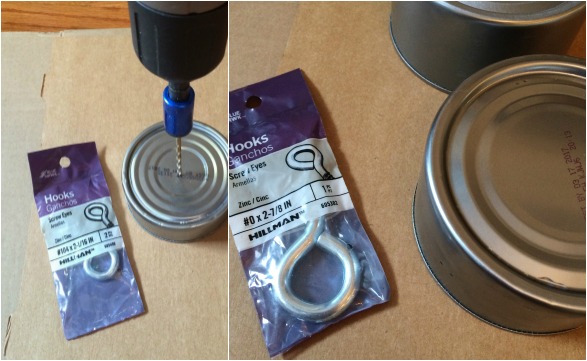
Step 3: Screw your eye hooks into the top of your tuna cans.
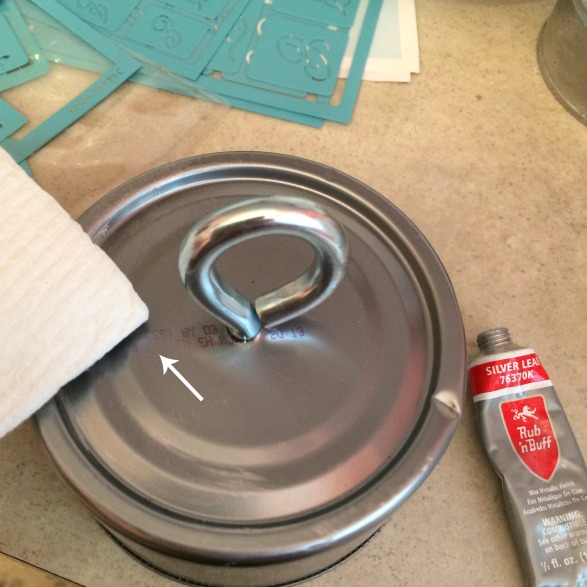
Step 4: Use Silver Leaf Rub ‘n Buff
Your tuna cans will have some writing on them which detracts from your project. Rub ‘n Buff will cover this up. You could also spray paint, or paint the cans in the color of your choice.
(Optional) Step 5: Paint ornaments with stencils and paint.
I used Martha Stewart brand stencils and glass paint (found at a craft store) to create my silver and gold designs. This is completely optional but definitely adds some wow-factor to your completed project.
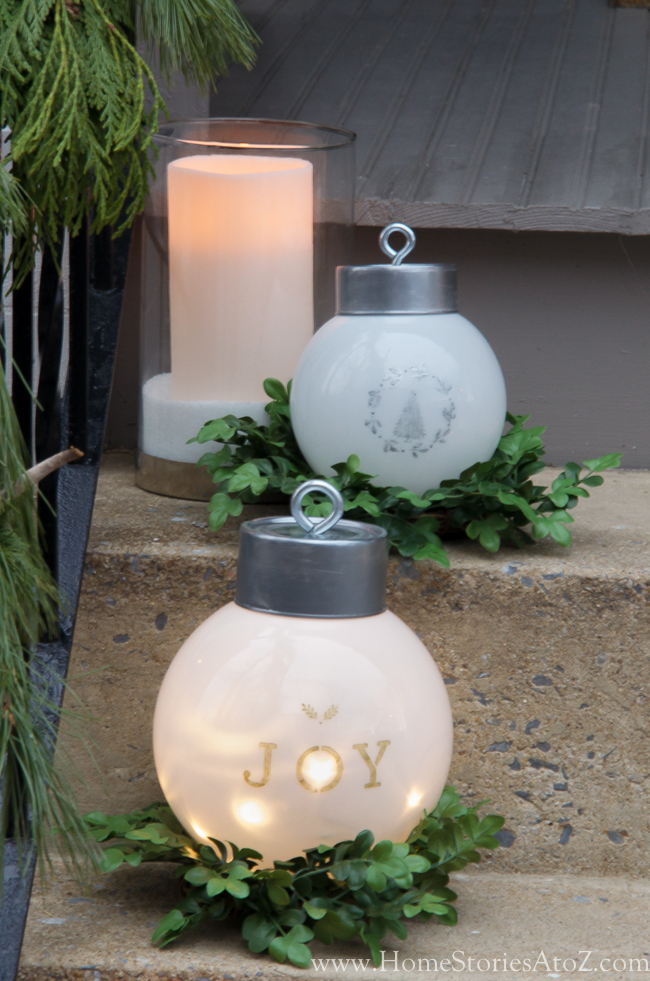
Step 6: Place battery operated lights inside of globes.
I love these little LED lights inside the ornaments! They really make them come to life. I found them to be a bit pricey so only bought two for the large ornaments.

And that is all there is to it! Aren’t they beautiful?
To display my ornaments, I used small wreaths as a base for each. If you don’t have small wreaths, you’ll need to brainstorm some solutions to keep the ornaments from rolling off your surface and shattering to the ground! Some solutions might be strips of silicone caulk on the bottom, furniture pads, or hot glue dots. I haven’t tested these methods out, so you’ll have to see what works and report back! I also did not secure the tuna cans to the top of the globes. I wanted to be able to turn my string lights on and off so left them as loose caps instead.

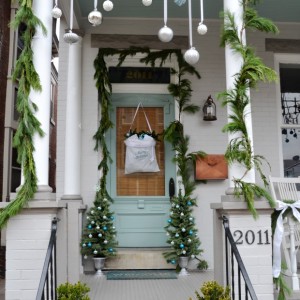
You can see that I staged my ornaments on my front porch for fun, but I don’t recommend using these outdoors. I don’t think they would do well in wind and rain. The lanterns and LED candles are also from Lowe’s and can be found in their holiday section.
Thanks for visiting me. I’m supa-stoked to share my entire Christmas porch with you soon, so I hope you’ll subscribe! By subscribing, you can receive emails each time I post so you’re up to date on all the latest here at Home Stories A to Z.
For more Lowe’s Creative Ideas, be sure to check out their free magazine and the other projects by fellow Lowe’s Creative Ideas Bloggers.
![]()
Disclosure: This post is sponsored by Lowe’s. I am part of the Lowe’s Creator’s & Influencers Network and was issued a gift card to complete this challenge. All ideas and thoughts are my own.


For the issue of your ornaments rolling around… Why not just use the globes with the opening at the bottom as the base. Then just glue your tuna cans to the top? Then you can still put your wreath around the bottom and still have access to put lighting and be able to turn the lights on and off. 🙂
Definitely try whatever works best for you. The cans did not sit flush on the rounded part of the globe and securing them with glue may be messy. You can place sticky furniture pads on the globes to try and stabilize them, but I prefer the look of them nestled in little wreaths.
With a tight budget this year I was wondering if round glass vases from the dollar store would work?
What a cute gift idea! You could paint a family’s last name on them… Thanks for the idea!!!
Thanks for stopping by Jen and taking the time to leave a comment! I think it would make an adorable gift for a family.
Great idea!! Where did you place the battery pack on the ornament? I had planned to glue it to the bottom of the lid but it’s too long for the opening of the globe.
Thanks! I just nestled the battery pack at the bottom of the globe and positioned the lights towards the opening. Let me know if you make them. It’s always fun for me to see others’ creations!
i absolutely love this idea, thanks for sharing
I love this idea. I am going to try using cat food cans(2 cats,lots of cans)and a bowl that looks like a fish bowl from the dollar store. Lightly spray paint the bowl and insert lights. Not sure if I will do it the way you did or try something different. Maybe open side down on a white plate? My mind is going now. Thanks for the great idea.
So glad I could help get the creative wheels turning! I like your project ideas. 🙂 Thanks for stopping by!
I’m going to grab up every globe I can at yard sales between now and Christmas! Thanks!
You’re welcome! Glad you like it. 🙂
I buy the timer battery operated lights at Wal-Mart. unfortunately, I have only seem them at Christmas and at a very reasonable price.They have clear and multi-colored. Really want to make these! What a fun idea!
I love to buy craft supplies at Lowes too. I found an inexpensive piece of PVC in the plumbing section to use as a stand. I’m planning to spray paint it to match the vinyl design I choose for the front. I don’t remember what the piece is called but it says 31-1124 E on it. I can’t wait to put it all together. thanks for the idea!
The globes would sit nicely ON tuna cans as well for stability!
I am going to set some up as luminaries, globe atop tuna can w/ short pillar candle as my light source.
Very clever and creative, thanks for sharing!
I love these and we’re making them for our traditional Thanksgiving craft time 🙂 do you have links or the name of the stencil sets you used? I especially love the tree in the wreath!
Thanks!
I’m so glad you like them! 🙂 I used a stencil by Martha Stewart. I would look at your local Joann’s and Michaels to see what they have available because this stencil is rather old and I don’t think they make it any longer. Happy crafting!
I see these light globes at second hand stores all the time…what a great idea! I know what I am making.
What are the candles?
Such a awesome idea I love doing crafts. Lowe’s is my favorite store in the world could stay in there all day. Thanks for sharing
Thanks so much for visiting me! I’m glad you liked the post. 🙂
Did you glue the cans to the top of the globe? I think this is the cutest idea ever.
Thanks! I didn’t glue them on because I wanted to be able to fill them with LED lights.
My husband just replaced all the old bulb light covers in our house. I can’t wait to paint them (currently a dirty brown/clear) and making these ornaments for this Christmas!
I bought two of the same large globes at Lowe’s and four cans of tuna. None of the tuna cans fit on the top of the globes. I took an empty can to the store with me to see if I could find one that was a bit larger but no luck. Any ideas?
Well that’s a bummer. :-/ I wonder if the globe is a different brand or something. I used two standard-sized tuna cans for the small globes and two oversized tuna cans for the large globes and they worked perfectly. I’m sorry that they aren’t working for you.
great idea!
What a great idea. I have a couple of these light globes that I purchased at a local second hand store for under $1 a piece that I used in my garden. I had the electric Christmas lights inside. I’ll try this idea next Christmas.
These are great! You could probably find these WAY cheaper at a home supply recycling store. In Seattle we have a few and they always seem to have these. Goodwill types stores might too. I’m totally wanting to do this for next year!
You can also pick up Globes and “Bells” at your local Habitat for Humanity “Restore” store, for next to nothing. I shop there frequently looking for items I can turn into crafts, and the lighting sections are typically full of old globes and such. Old wood ladders, bricks, galvanized pipe to paint… the list is endless! Happy shopping and Holidays!
Love shopping at our Restore! Great tip!
These are genius! What a great thing to with those not so attractive globe lights. I will definitely be sharing your idea 🙂
These are really very clever. Have you thought about turning the globes over and attaching the tuna cans to the round part of the globe with a craft glue made for glass? Since you’re using batter powered lights (I hope they’re the LED/no heat kind), you can simply set the globe on its opening, and it will be stable.
Clever!
You have inspired me with your DIY oversized ornament project. Who would have thought…tuna cans! Thanks for the tip on getting the goo off items. Stores always put the sticker in a place you don’t want it to be! Happy holidays.
Brilliant!
Wow! How creative! They are amazing! Thanks for sharing!
Denture adhesive will secure the globes. It’s water soluble and non-toxic.
Great tip Elizabeth!
So cute! I love that rug! Where did you get that?
Thanks! The rug is from RugsUSA. It’s this one: http://www.rugsusa.com/rugsusa/rugs/rugs-usa-trellis-vl03/light-grey/200CFVL03A-5108.html
I love, love this idea!! My decor is beach themed.
. I wonder how they would look painted aqua and stenciled with starfish?
Absolutely. They would look amazing!
i LOVE them. Awesome idea. Thank you for sharing. You are a genius!
Thank you Debbie! 🙂
So creative! Love these, Beth!!
I am over the moon about these ornaments! I love them! I am like you…shopping and staring at stuff until an idea hits me! Happy Holidays!
What a clever beautiful idea!
These are so cool Beth! I’d love to make a bunch some day!
Oh Beth, these are freaking awesome!!!!
i love that! brilliant with the tuna cans.
b
As cute as can be !!!!
These are adorable!
FYI: I’ve had very good luck removing the print from cans and jars using acetone (fingernail polish remover works as well).
Good tip! Thanks for sharing. I’ll try that as well.
love these! As soon as I saw your post I had to make them! Love! I bought acrylic globes instead & painted one red then put “Merry Christmas” on it with vinyl. Wish I knew how to upload a picture!
Wonderful! I’d love to see it. You can email it to me at beth@homestoriesatoz.com if you’d like.
Really sweet idea, Beth! I just love how they illuminate too!
Thanks so much Donna!
This is such an awesome idea! I have got to make at least one of these!
That was creative
Awesome vision!! You are not the only one. I’m very socially inappropriate in those stores too. That’s when the best ideas happen – when you can see things other people don’t see because they’re just seeing a light fixture! But it could be so much more. Takes some weird staring to get to that point.
Ha! So true. Since I have to reinvent the same spaces over and over again in my home I will often just sit there and stare at a spot in the room. My entire family knows the look and will ask me what I “see”. Thank goodness for my mind’s eye!
Hello! I love this idea however I am having trouble finding light globes for under$50 each… Can you point me in the right direction or this how much I should expect to spend?
Oh yikes! Let me grab my receipt so I can see exactly what they are. I can’t find these online at Lowes to link to. Not sure why they aren’t listed, but I found them in the lighting section at Lowe’s with other globe shades. The small ones are item number #33686 3 1/4×6-in Opal Globe and cost $4.98 each. The large globes are item #33631 4×8-in White Globe and cost me $7.98 a piece. I hope that helps!
You’re awesome!!! Thanks so much!!!
Have you tried your local Habitat for Humanity? I’ve found them there for much less. (Can’t remember exactly what they cost but I think it was around $10 a piece)
Awesome idea! They are just beautiful!
Thanks girl!
I love love love these!
Do you think spray painting with metallic paint would work (skipping the lights)?
Thanks for this fun idea!
Thanks! Yes, you can paint them, but I would recommend painting the interior with spray paint. Spray paint doesn’t adhere to glass very well without a lot of work.
So clever and creative! Love them! I find myself frequently chuckling to myself as I waddle my 9-month pregnant self around the aisles of the hardware store picking out various parts of hardware to use as decor. I just imagine what the men who work there are thinking about me. Little do they know that we can turn some globe lights and eye-hooks into oversized ornaments or in my case, a handful of 1×2’s, some L brackets and chicken wire become a Christmas card holder. 🙂
Absolutely love these! I think I might actually have some glass domes I took down from a light fixture too!
You had me at the Miles Finch quote. The ornaments were a bonus!
BEAUTIFUL ! JUST BEAUTIFUL !!!
What a cute and clever idea!!
Thanks Diana!
BRILLIANT!!!! Well done.
Get out.
Have got to say Beth, those are stinking brilliant!!!!!
Happy Christmastime 🙂
Love this ornament idea!!! Thanks for sharing!
PS: I usually get the gummy/sticky residue off by rubbing olive oil on it.
Thank you! And yes, I like the olive oil idea better since it’s not a bunch of chemicals but haven’t had as much luck with stubborn residue and olive oil or coconut oil. Maybe I need to scrub harder.
Lemon essential oil works just like goo gone!
So cute! I have 3 of the globes on my tree with the battery operated lights inside but I hide the open end. The ornament idea is so cute and now I see a remodel in store! Just need to figure out a trick for turning them on easily on the tree. Thanks for sharing.
Yes, I wish my lights had a remote! I know some of them come with little remotes. That would make the process in the evenings much easier. Thanks for visiting me!
Absolutely brilliant idea!!! Thanks for the inspiration. They look great!!! I know what you mean about the creative process sometimes making people look at us strangely, as if we’ve lost our minds. I just had a moment like that on Monday when I decided to use a very old wooden step ladder as a Christmas “tree” in our dining room. It turned out great! The best ideas always seen to be worth the funny stares, rolled eyes, and cheeks turned crimson w/embarrassment 😉
How fun Heidi! I bet your step ladder tree looks amazing. I can picture it! 😉 Thanks for stopping by and taking the time to comment.
How fun and creative is this. I love this idea.
Thank you so much Marty!