The easiest way ever to make an envelope pillow cover in just minutes! Learn how to sew an envelope pillow cover using one piece of fabric.
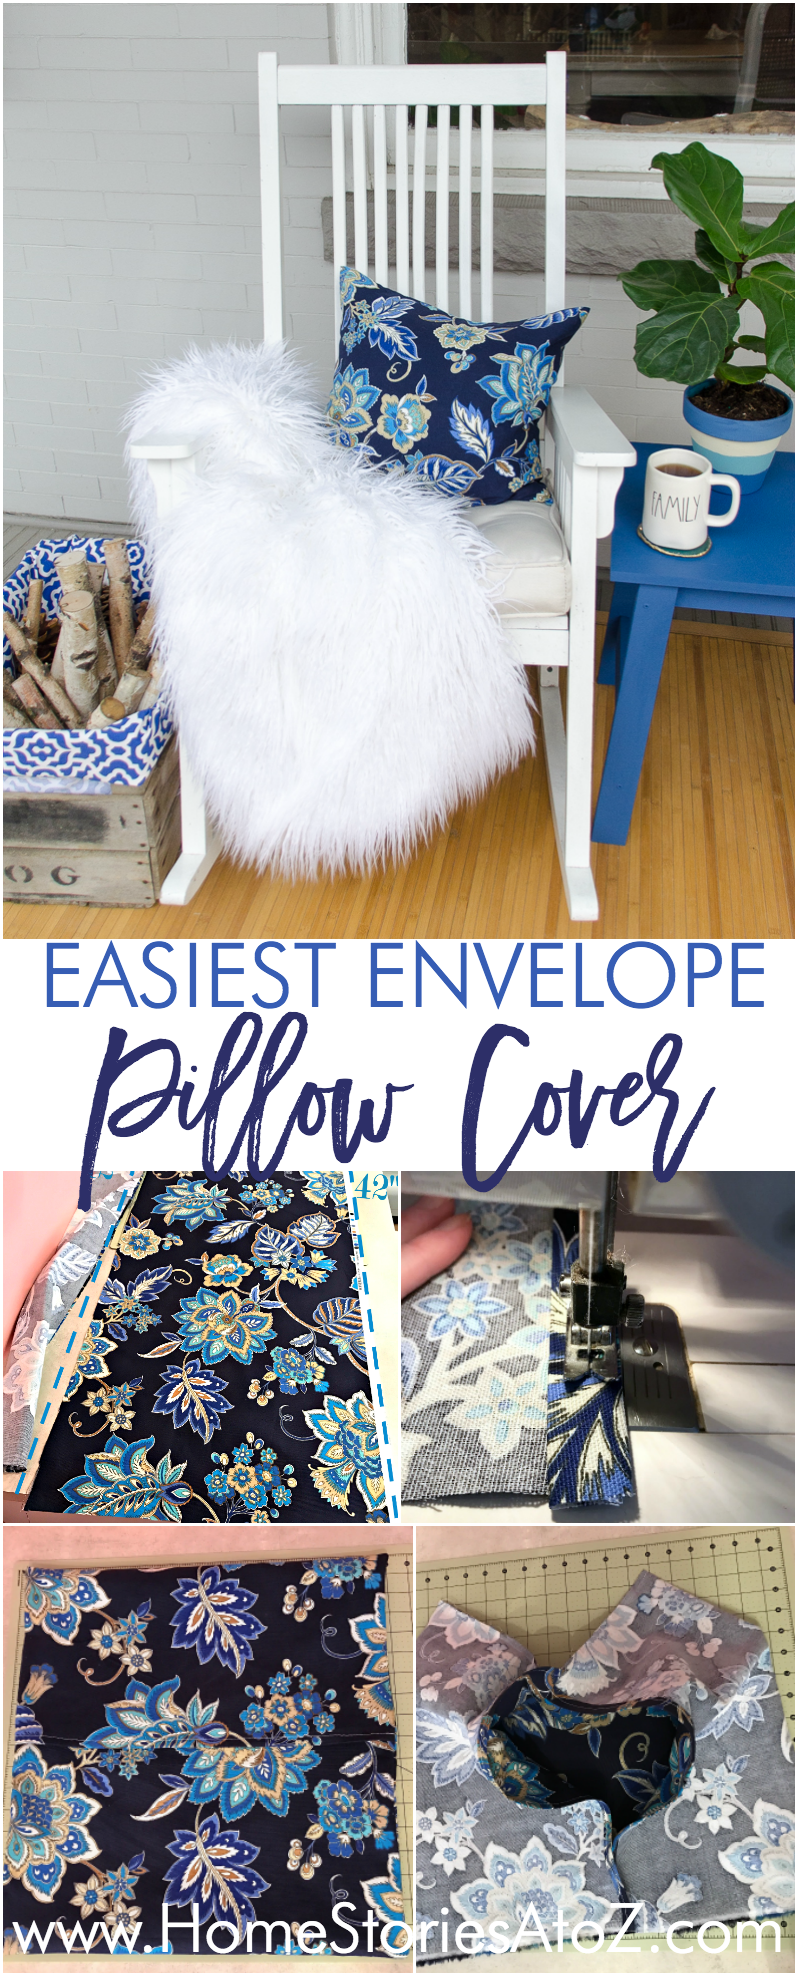
Easy One Piece Fabric Envelope Pillow Cover Tutorial
Thanks to Waverly Inspirations at Walmart for sponsoring this post. The favorable opinions of the incredibly cute fabrics, ribbons, and paint are 100% my own. Post contains affiliate links. Find my full disclosure policy here.
I will readily admit it. I have a bit of a toss pillow addiction. I’m not entirely sure how many toss pillows currently reside in my home, but I’m willing to guess that the number is easily over 50. Right now, as I type from my couch in the family room, I can count 14 toss pillows that are within sight. Addicted I tell you! As much as I love toss pillows I don’t love storing them all. Sewing inexpensive envelope pillow covers is a fantastic way of reusing your pillows and changing your look.
 Each month Waverly at Walmart sends me a box of supplies and challenges me to create something with their fabrics, ribbons, and/or paint. I absolutely LOVE this month’s box of supplies. The fabrics are beautiful and the Waverly chalk paint was wonderful to work with. I’ll circle back to give my review of the chalk paint in a separate post, but first let’s sew an envelope pillow cover!
Supplies Needed for Envelope Pillow Cover:
- Waverly Inspirations Fabric

- Scissors (here is a link to the gold pair I own)
- Sewing Machine
- Rotary cutter


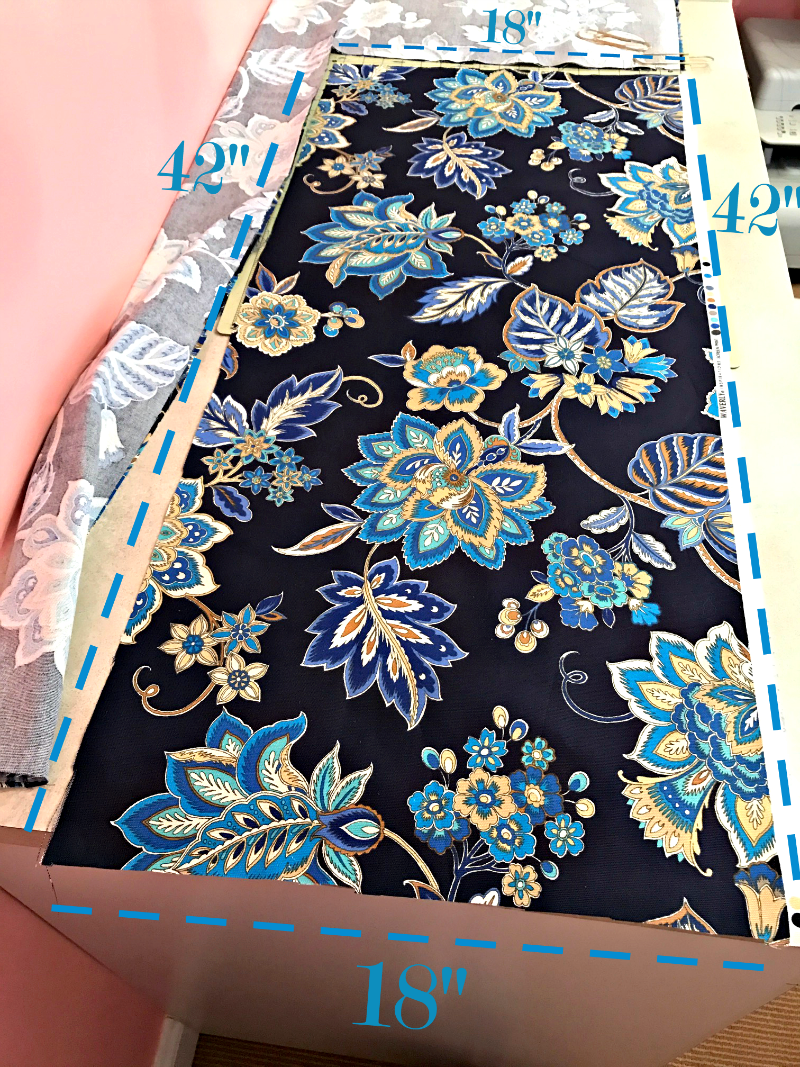
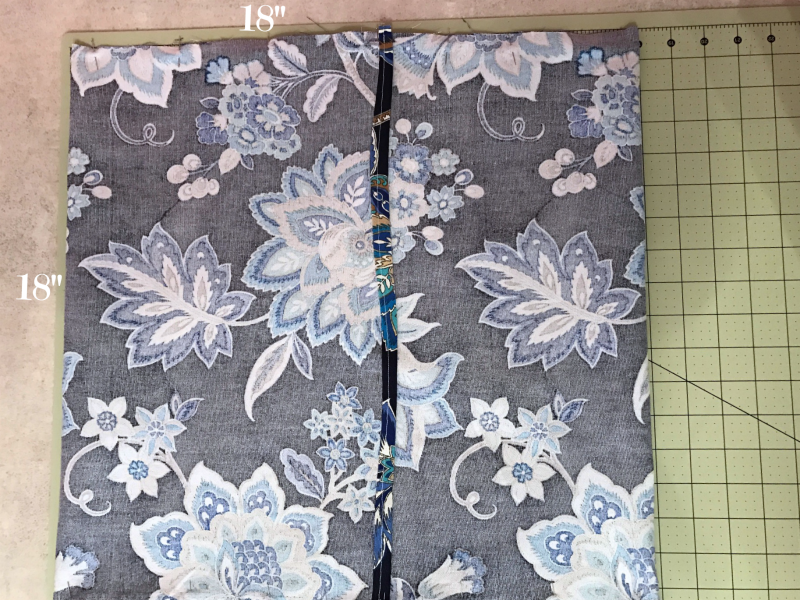
Envelope Pillow Cover Step 1: Measure the size of your pillow and cut your fabric.
To determine the size of fabric needed for your cover, first measure the size of your toss pillow. Look on the pillow tag or use a fabric tape measure to measure the size. My pillow is 18″ x 18″.
The formula for your fabric cut is your pillow size times 2 plus 6. So for example my pillow is 18″x18″— 18″ x 2 + 6″=42″. *I like my pillow covers to fit snuggly, so to avoid baggy covers I do not allow for a width seam allowance.
Stick with me. It’s just a tiny bit of math, and I’ll do some of it for you if you don’t want to think and just want to get on with it. 🙂
If your pillow is:
- 16″ x 16″ measure fabric 16″ x 38″
- 17″ x 17″ measure fabric 17″ x 40″
- 18″ x 18″ measure fabric 18″ x 42″
- 19″ x 19″ measure fabric 19″ x 44″
- 20″ x 20″ measure fabric 20″ x 46″
I use a cutting mat

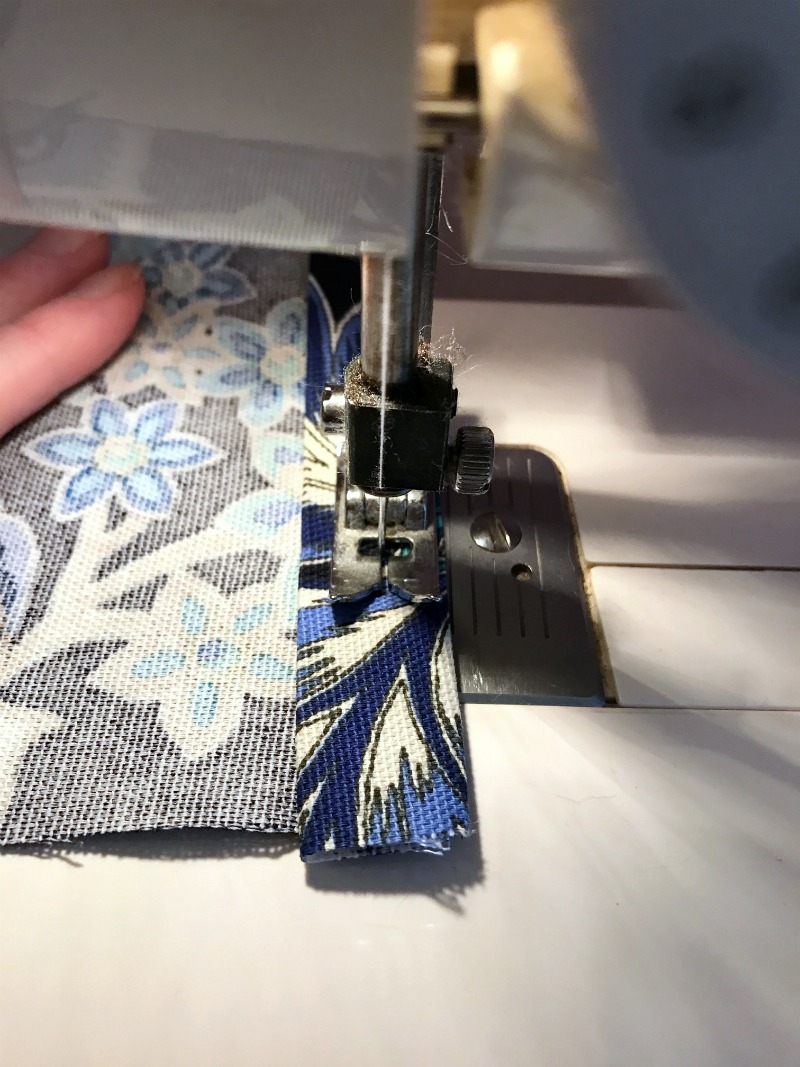
Envelope Pillow Cover Step 2: Iron a 1/2 inch seam on the short sides of your fabric and sew.
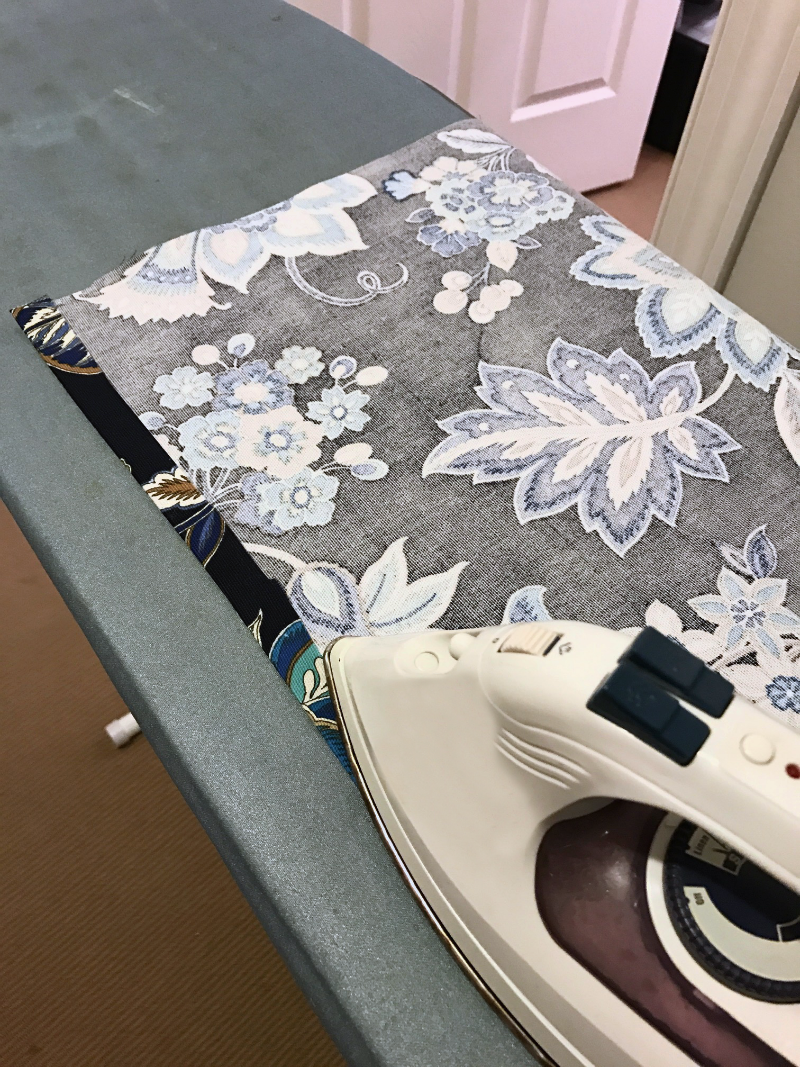
Fold and iron 1/4″ seam on the short sides of your fabric, then fold that 1/4″ seam over onto itself and iron again. This creates a 1/2 inch seam for you to quickly run through your sewing machine. Sew both seams.
Envelope Pillow Cover Step 3: Fold fabric to measurements of pillow, pin open ends, and sew sides closed.
Lay the fabric so that the pretty side is facing towards you. Fold each end of the fabric over itself so that it measures the size of your pillow. My square is 18″ x 18″. The two previously sewn seams will overlap each other in the center to create your envelope enclosure. Pin the two remaining open ends on the outer edges of the pillow cover and sew them closed.
Envelope Pillow Cover Step 4:
Turn your pillow cover right-side out and push corners out with the eraser side of a pencil.

Stuff your pillow inside your brand new cover and admire your handiwork! Great job! You did it!
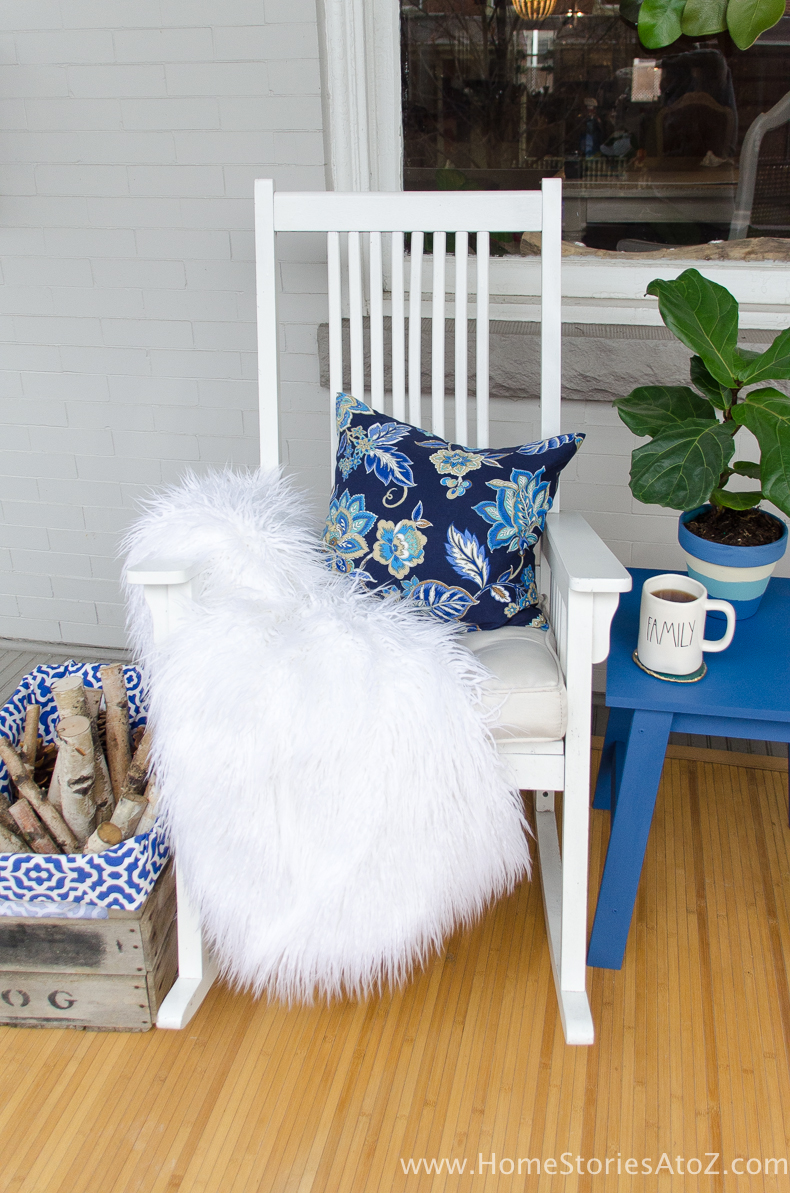
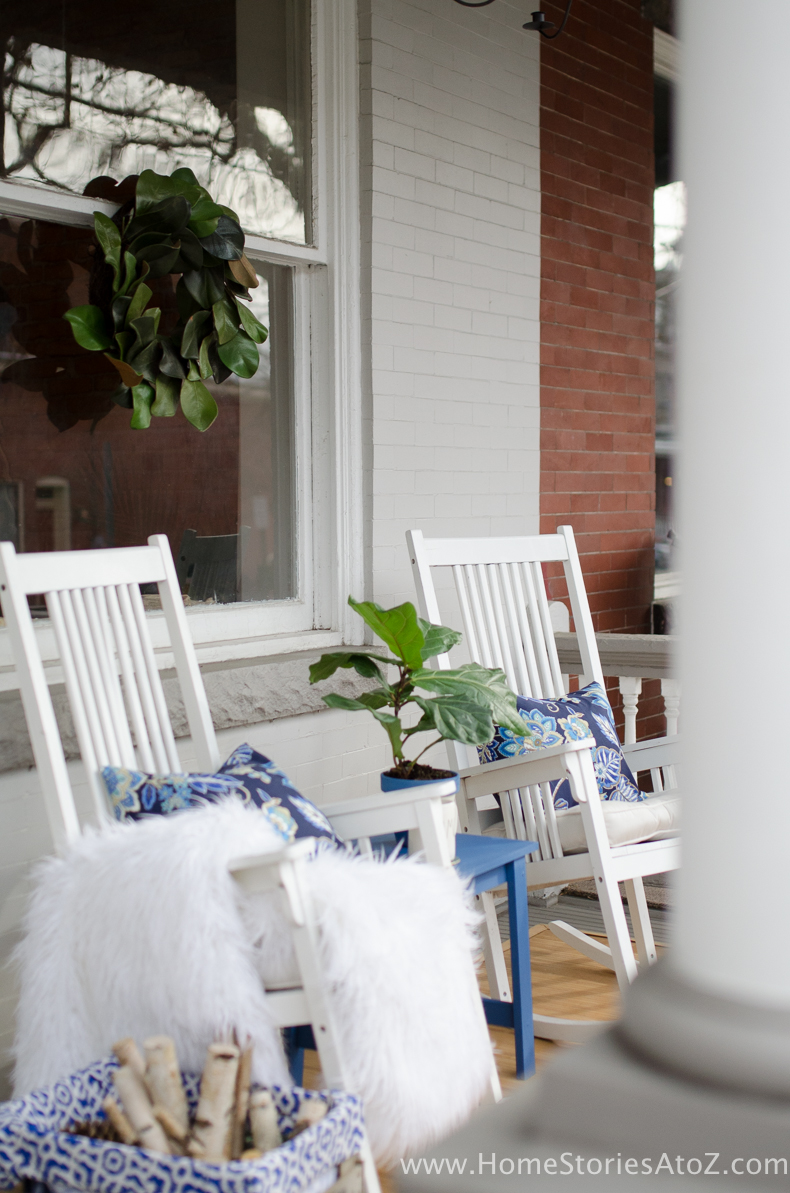
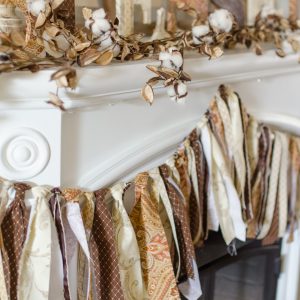
And here is a little sneak peek of my winter porch! I’ll post more pictures of it soon with my review of Waverly’s chalk paint, so stay tuned!
For more clever and easy ways to use fabric, check out my related posts below!


love how easy it is ti make up My question is what if you want to make an envelope cover for a queen size pillow and the pillow measures 20×36 how do I do the math?
I’m unfortunately terrible at the math as well. I would google it and I’m sure you’ll find the answer or formula.
My mom demanded one of these out of a cat fabric I bought, so I had to whip up a couple before the holiday. Easiest thing I’ve ever sewn! Thanks for the tutorial 🙂
This is very helpful, thanks for sharing! Does it matter where the grainline is when I cut the fabric?
It probably does, but I honestly don’t know. I usually just go for it and it always works out to look cute in the end! 🙂
Love this and so easy to do. And easy to put on and take off to wash.
Thanks for posting it!
I will be making more of these
I’d send pictures but not sure how to.
Changing up the pillow cover is an easy way to make a room’s décor look fresh and new. This DIY fix is easy to execute, as well, and doesn’t take a lot of time. It prevents you from having to buy new pillows every time!
I need a lot more covers, and a lot less inserts at my house!
Loving the fabric, tutorial and porch peak 😉
I love the colours and this easy way to make pillows! Definitely going to make some this way – feeling inspired! Thank you!
Thanks for stopping by and taking the time to comment! 🙂