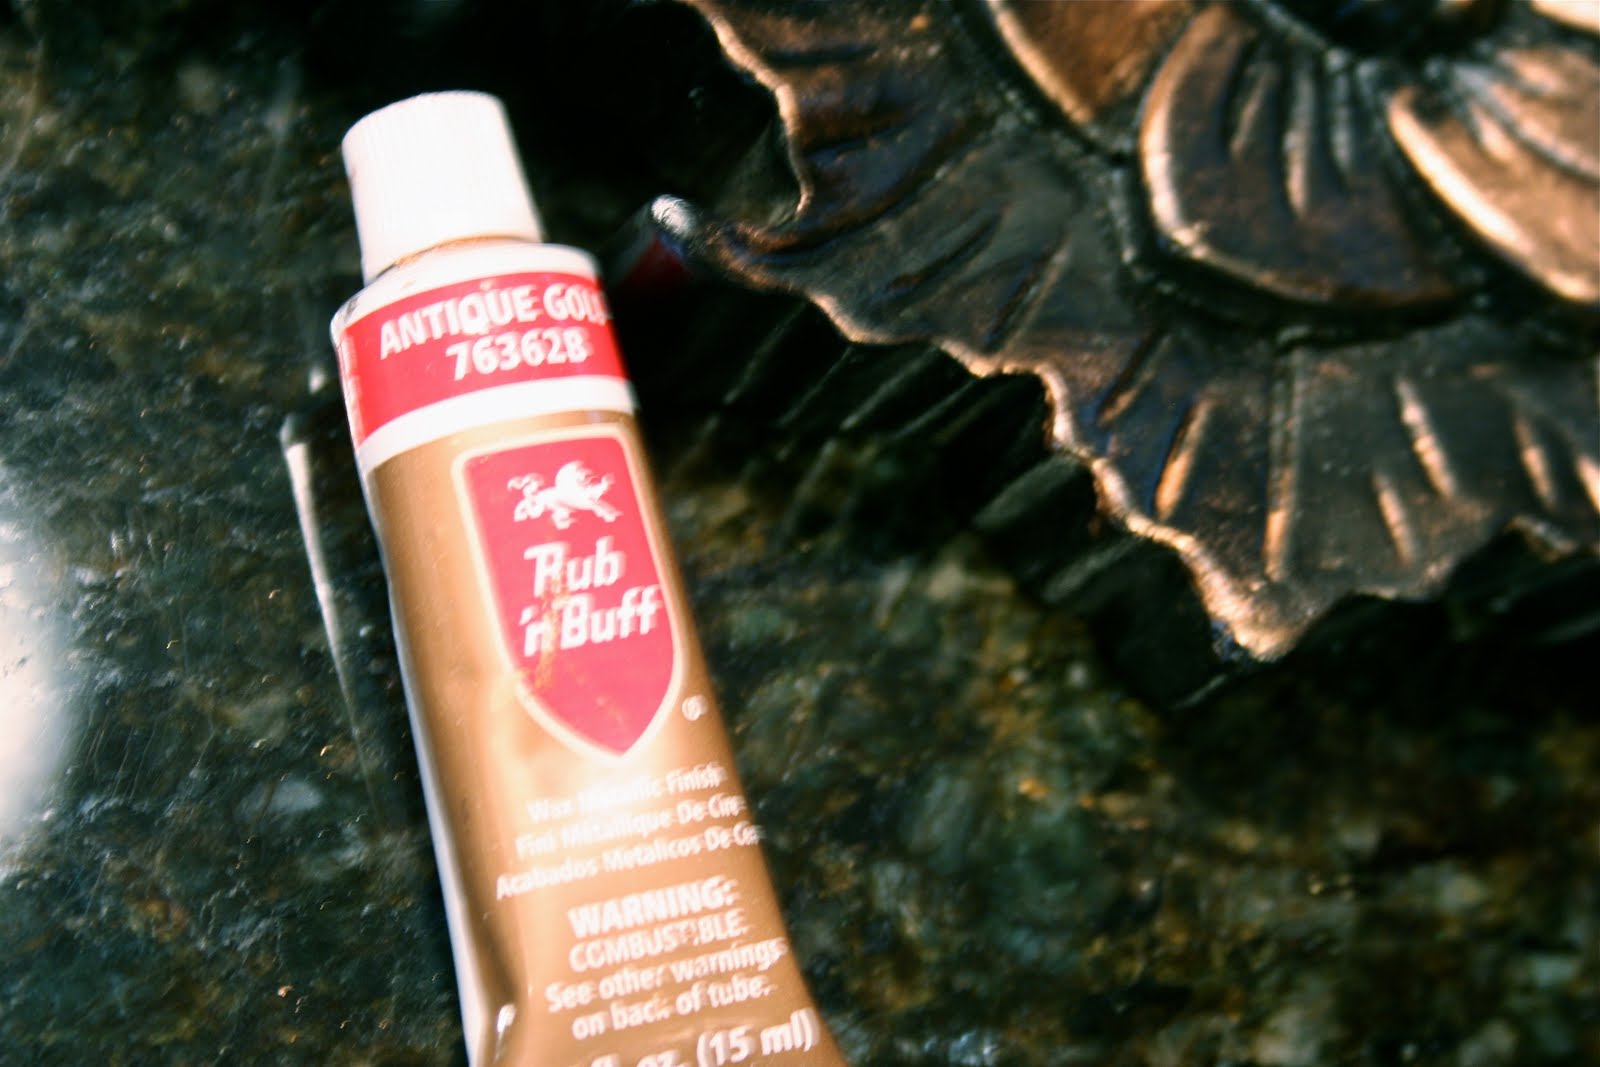
Amaco sent me some samples of Rub n’ Buff to play with, and oh my goodness how fun! Rub n’ Buff is a wax based paste that comes in a variety of colors and I am excited to try them all. I have seen other bloggers using this stuff and claiming that after using it once they were looking around their house for other things to rub it on. I totally understand that now!
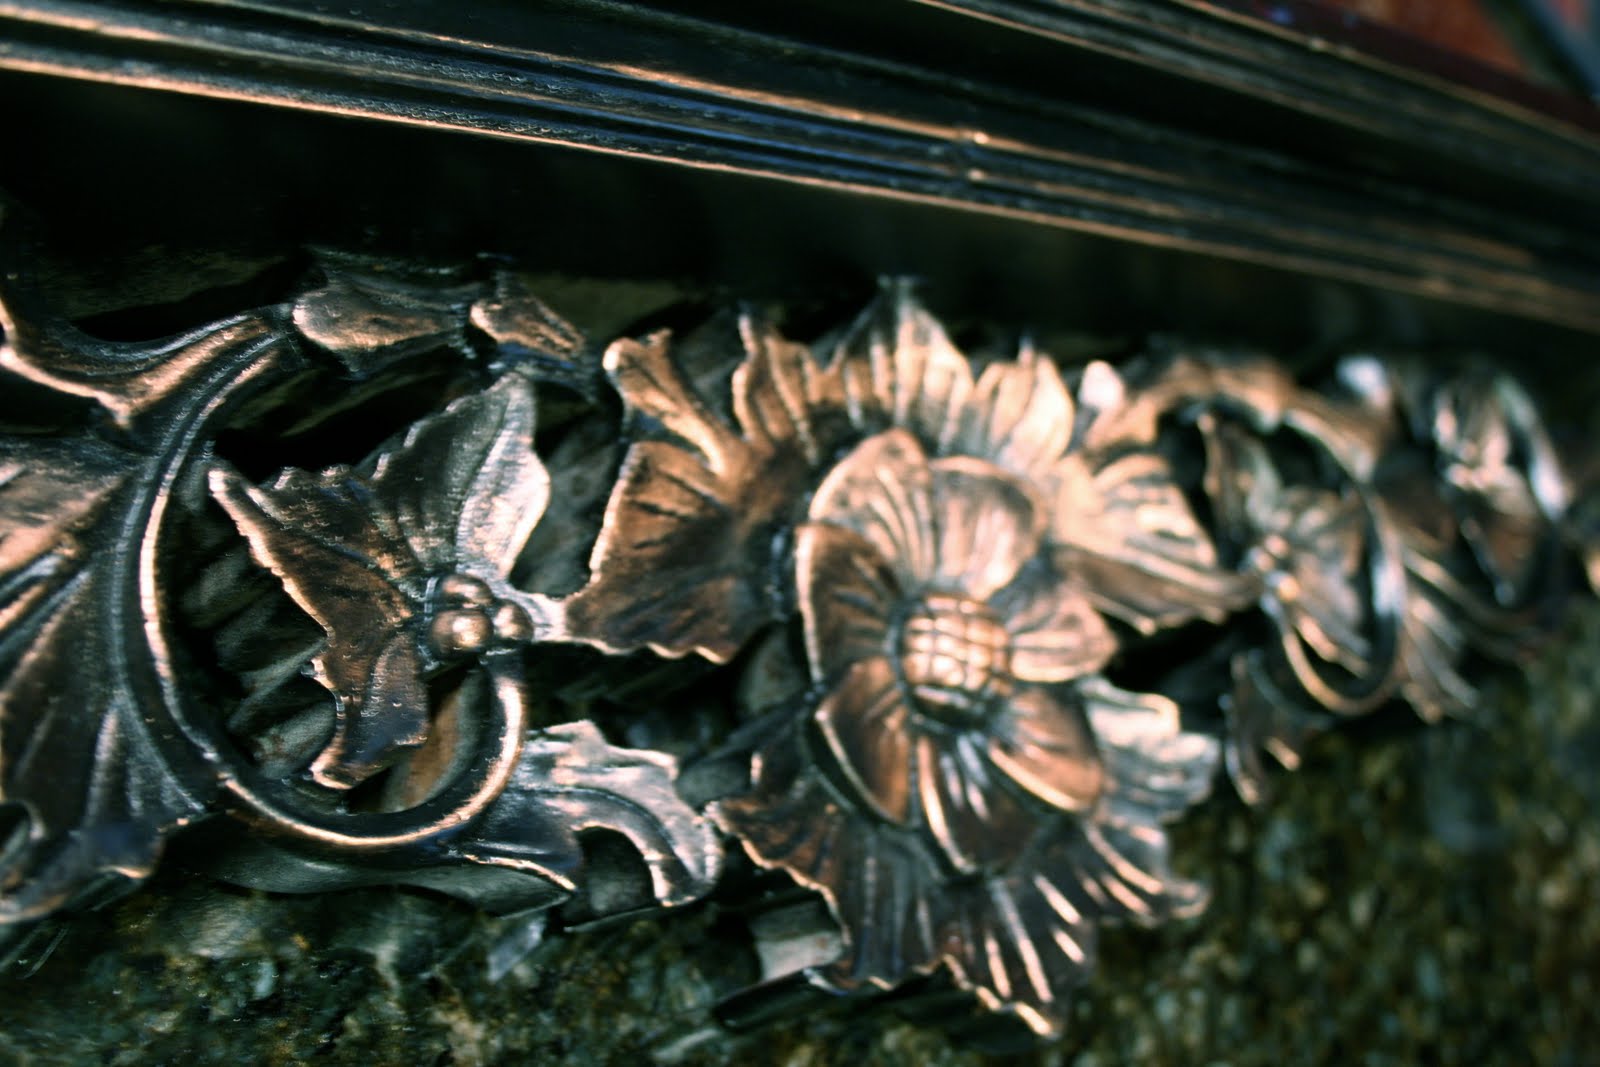
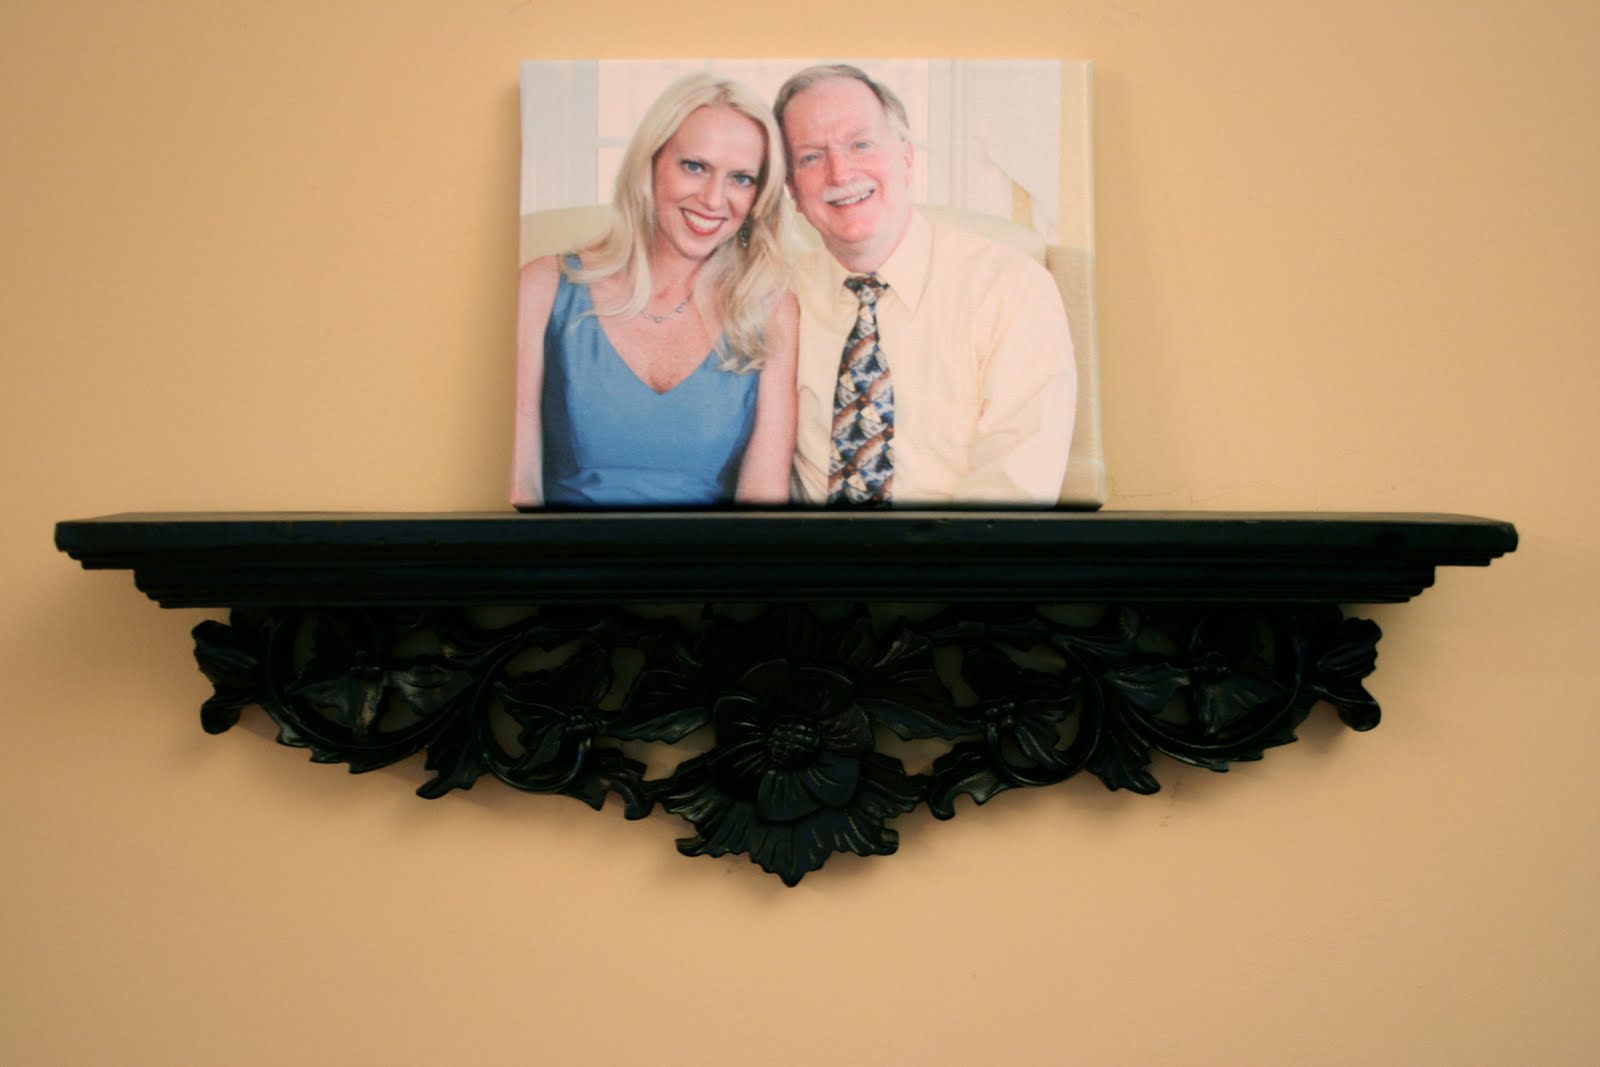
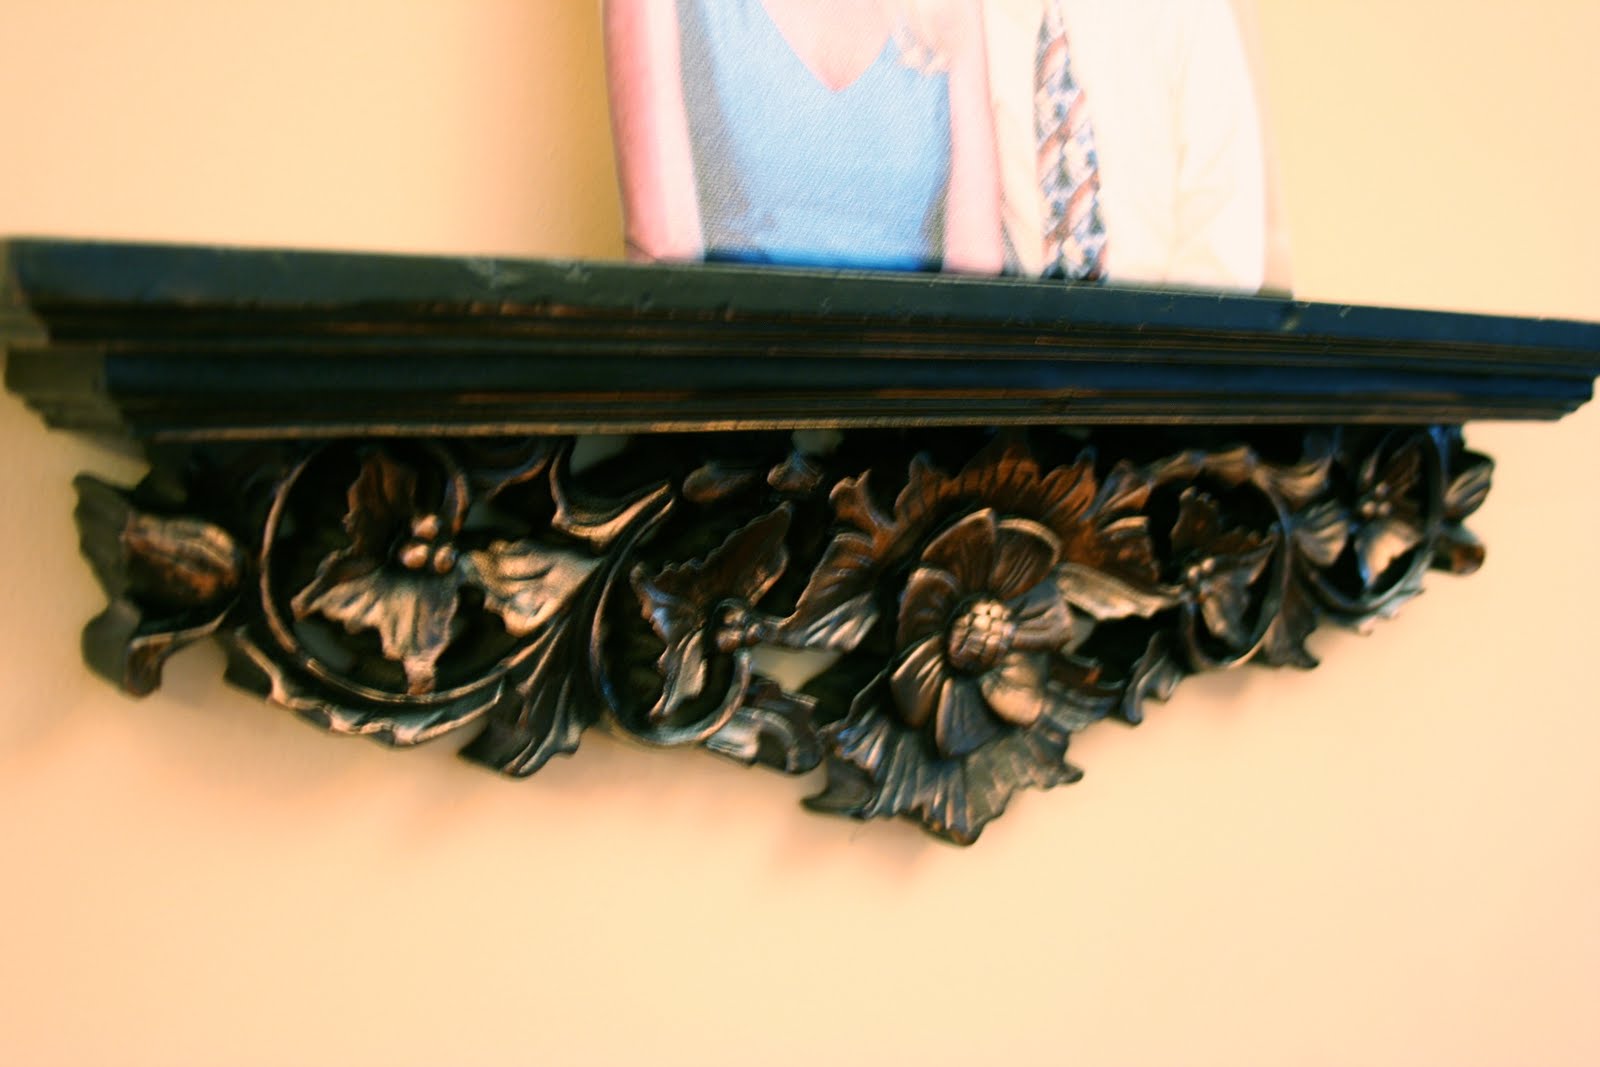
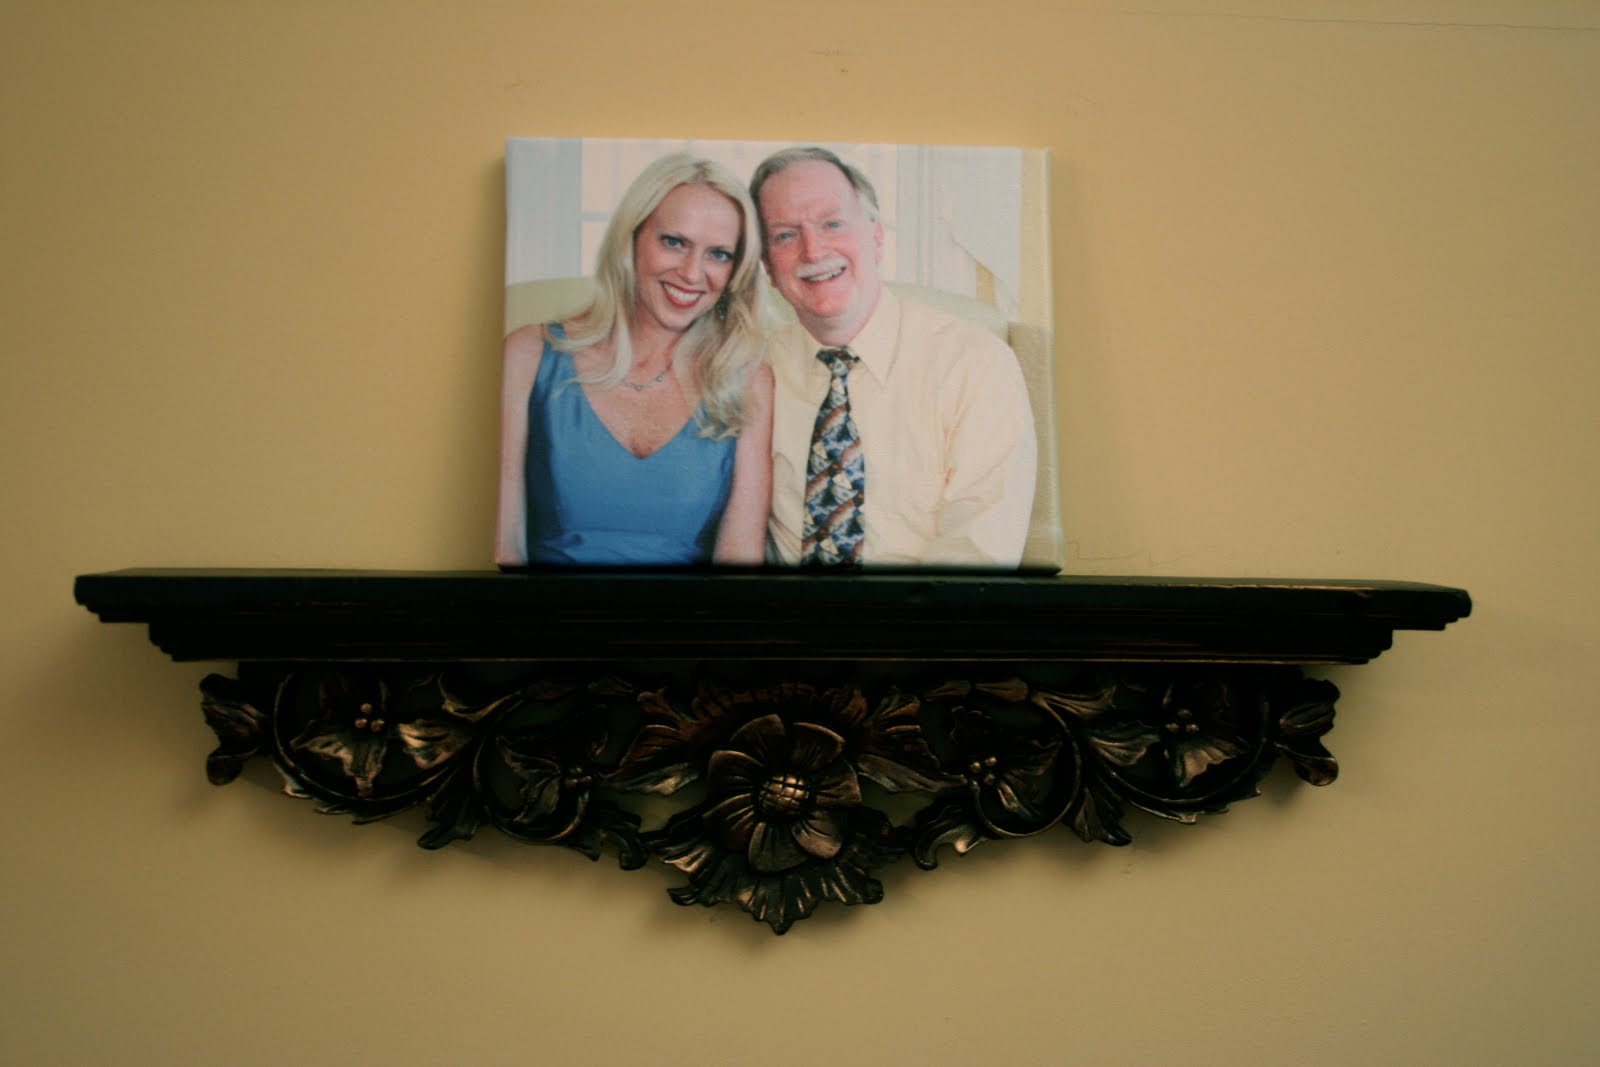
Below is a little shelf that I had spray painted black awhile ago. I was never happy with the way it turned out. The flowers and leaves just looked dull and boring.
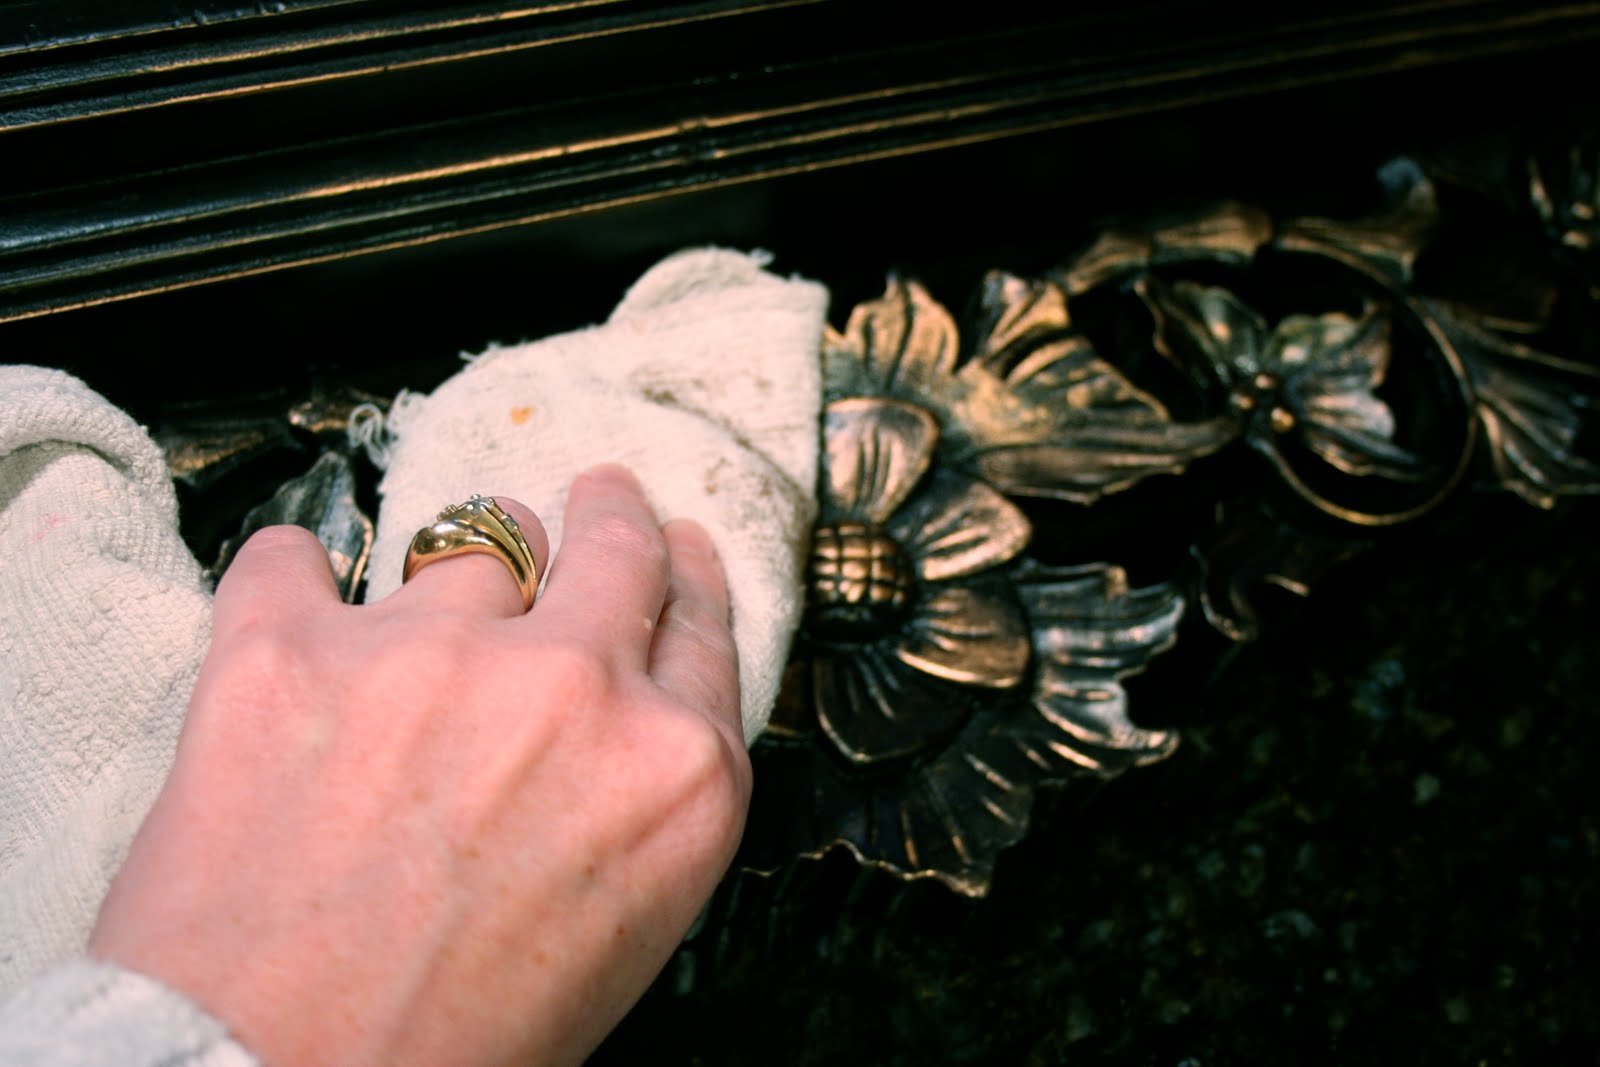
I took a tiny dab of Rub n’ Buff and placed it on an old rag. I was amazed by how little of this stuff you need!


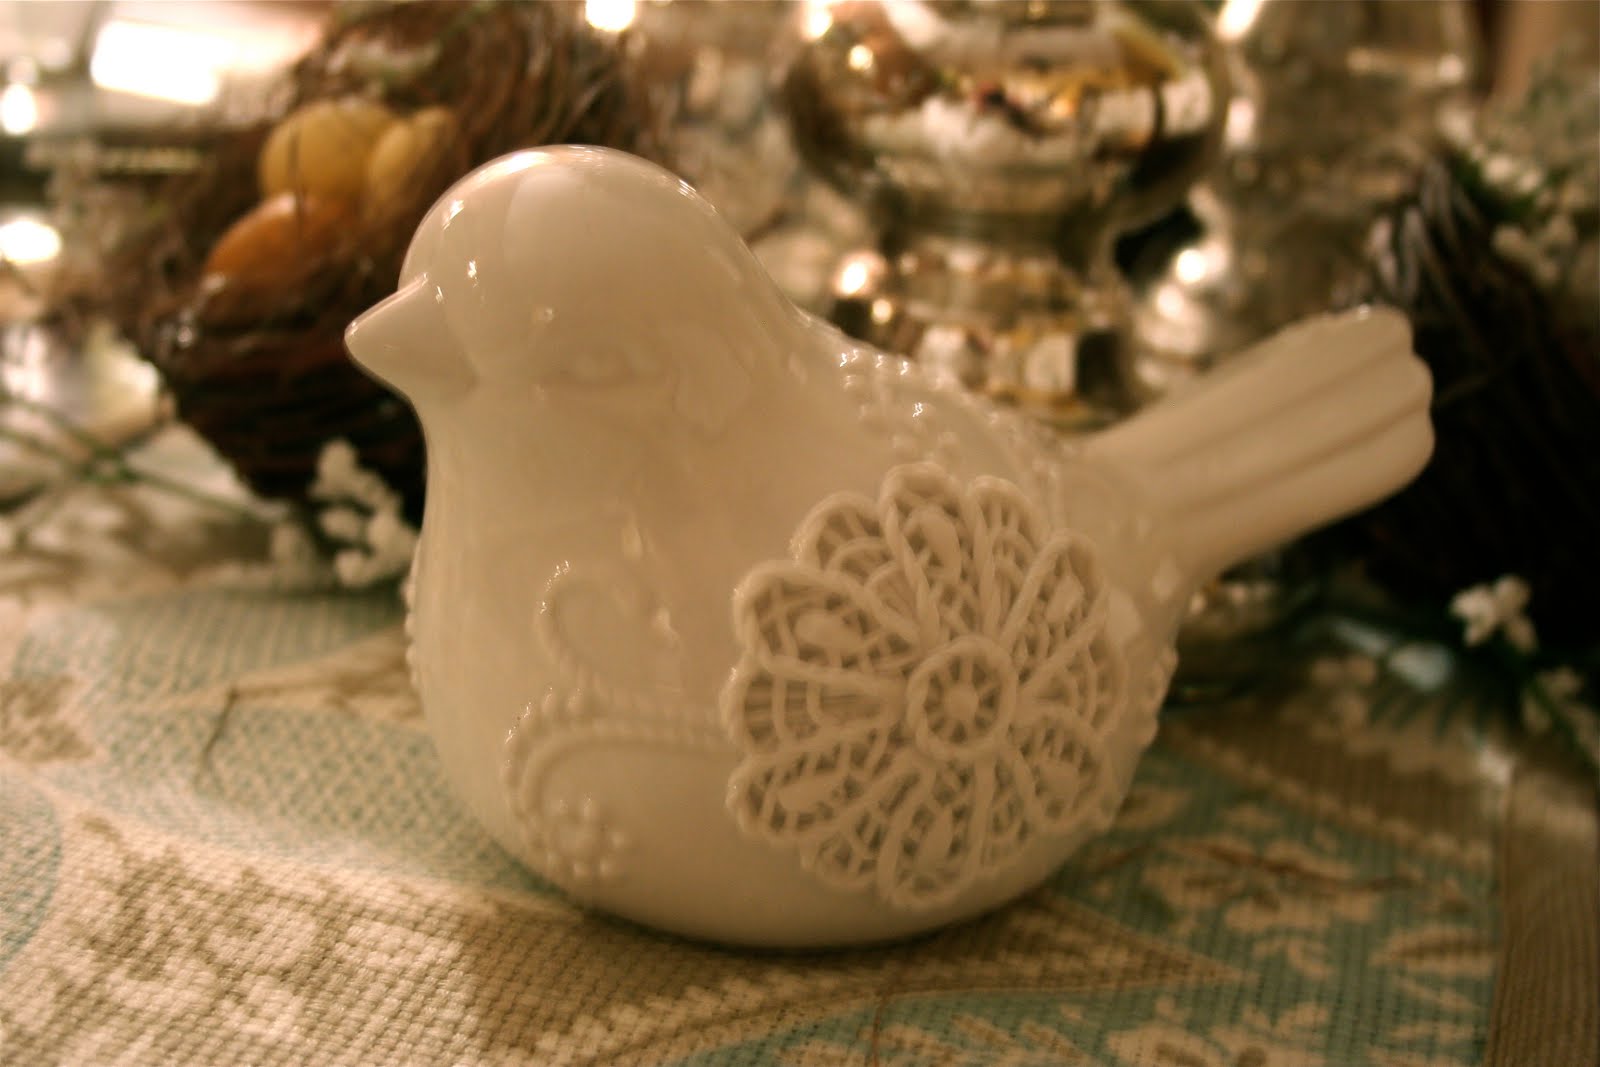
And then I picked up this adorable little birdie at 60% off at Michaels today. All of their spring stuff is on clearance right now. She was $2 and something cents.
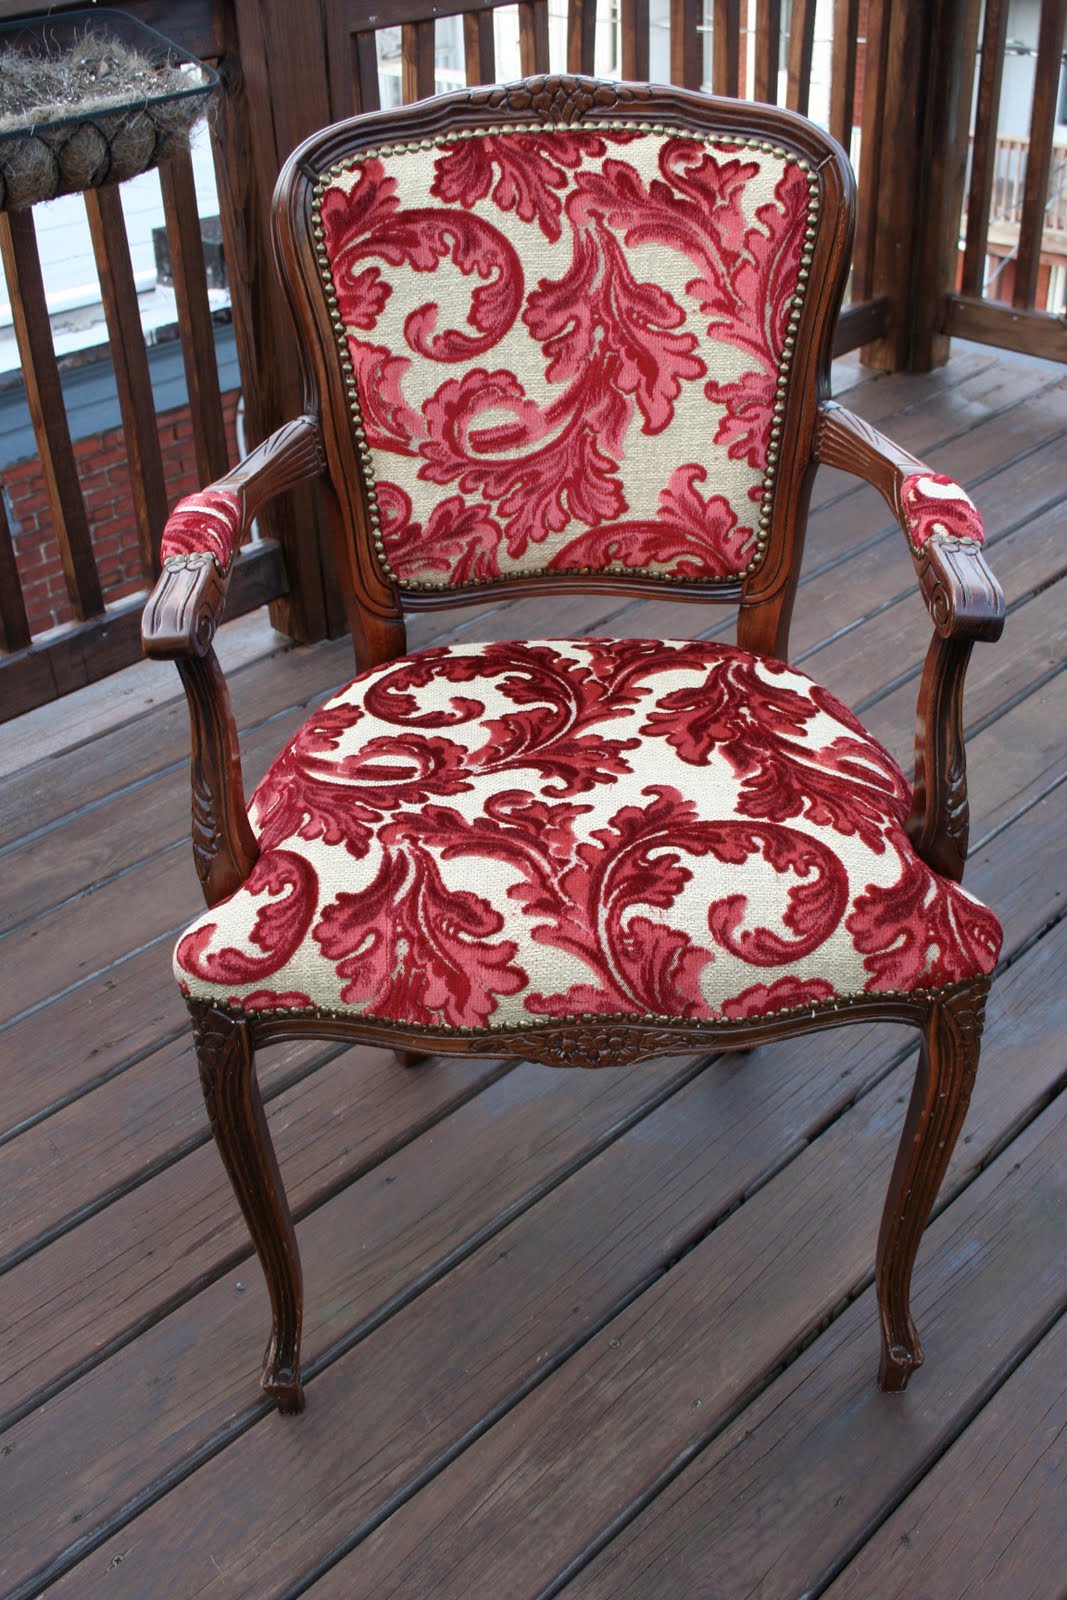
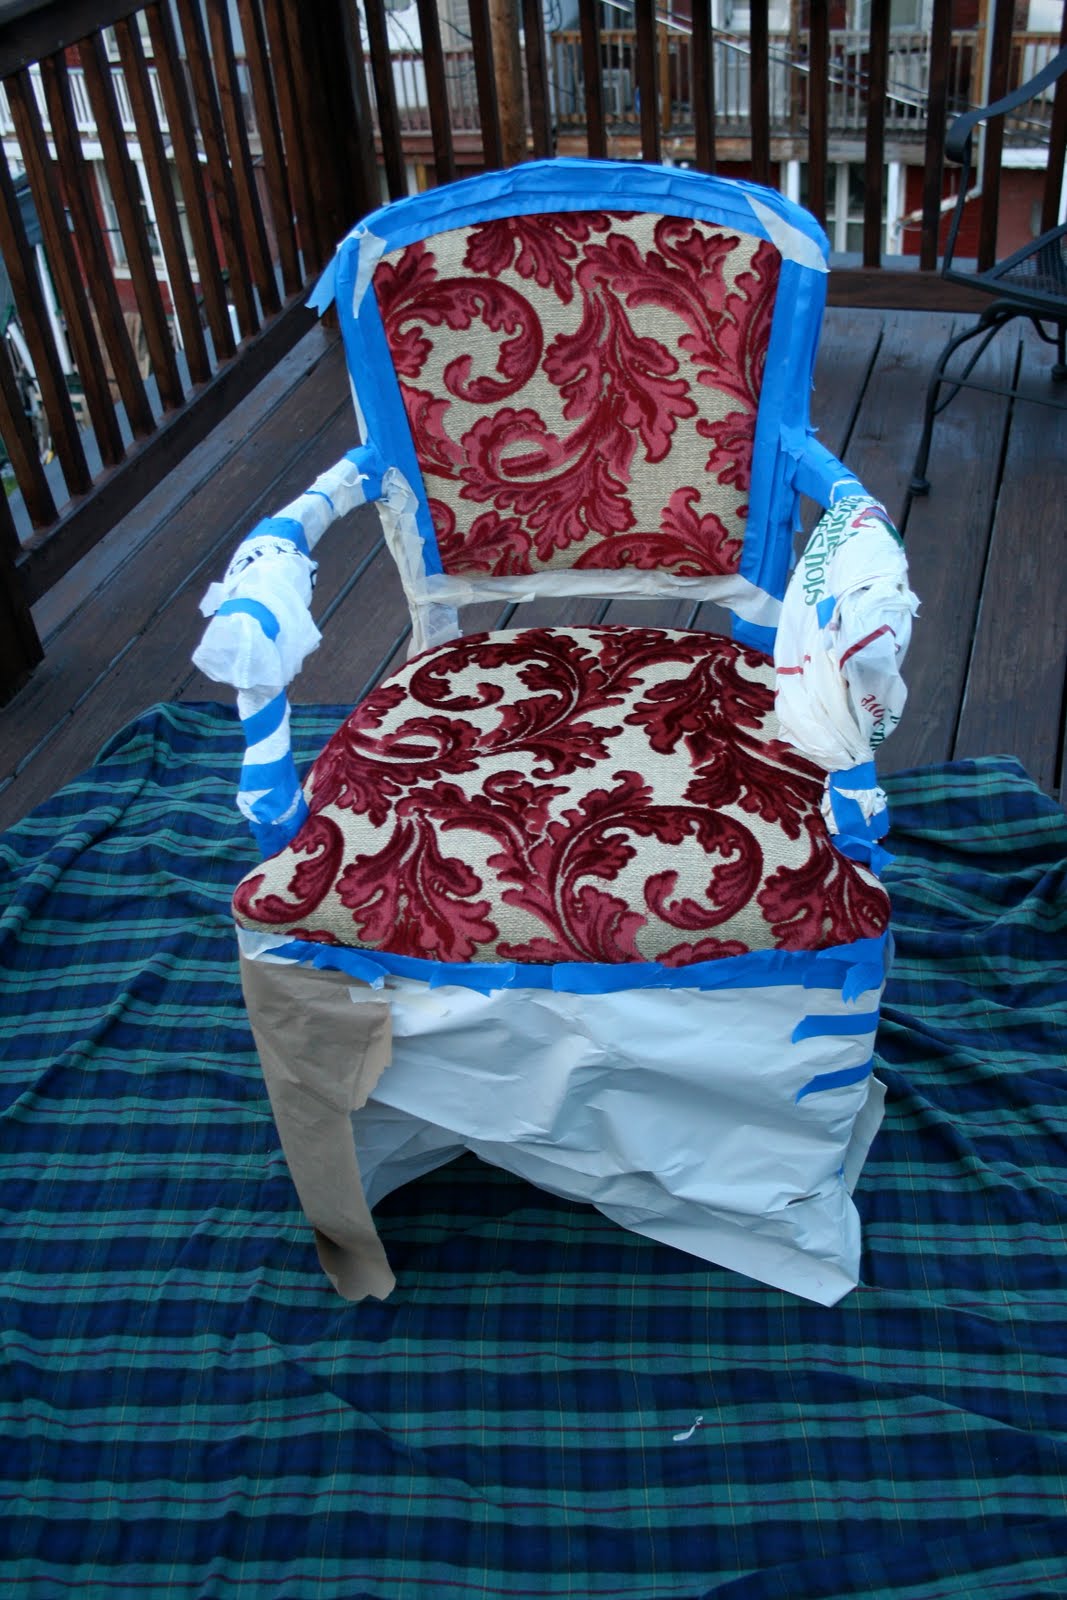
And then I had to blow a fabulous day by ruining a chair. I bought this chair at Ross about 7 years ago for around $50. I still love this chair but it sits in my bedroom and the red isn’t working for me. I had the brilliant idea that I would just spray paint it white.

Well, stuff happens, eh? I found your site, looking up rub and buff on line. I’m glad to know that I’m not the only one who makes boo-boo’s!
I love the look of the rub and buff! I will have to try that. http://www.thriftyideastoday.com/
Ok – I hope my dollartree gets some of those squoval plates in. I'll be packin' 'em up.
You've sooo gotta share your after picture. I'm dying to see it. I wish I could help with the upholstery question, but I screw up every project I do. Seriously.
lol – I already have that bird! I got her at 40% off at the start of the season, so you beat me in that regard. 🙂
This is SO like something I would do!
I know how to cover this! I have a chair very similar that I did.
You do have to remove the nail heads first, then the fabric is probably stapled underneath there, take those out too. Lift the piece of fabric off gently and use it as your pattern for the next piece. Staple it down and on mine, I glued some trim over the staples. It isn't hard at all, just a little tedious! But you will make it look fabulous!!
Lou Cinda 🙂
Remove the nail trim first – under there you will find the staples. Remove those and teh fabric is able to be pulled out. On the top there is probably a pad, large band of ribbon, etc to keep the back firm. Keep those for when you recover.
Beth, I love that chair! Sorry painting it didn't work out. I know you will be able to find some tutorials in blogland, but you may also look at your local library for some upholstery books. I have several, and they are easy to follow with great pics. They even show how to do the arm "thingys".
Blessings,
Traci
Just bought an assortment of the rub and buff!
Beth,
I recovered some similar chairs that now reside in my living room. I wrote a post about it here:
http://grosgrainfabulous.blogspot.com/2008/03/buttoned-up-and-beautiful.html
What I did was use a crowbar and staple gun.
You might loose some detailing like the brass studs. But I would pry all the fabric up then use a heavy duty staple gun and staple it back in.
I also added some extra padding in some places that needed it.
It might be too scary to try though. I imagine after you pried everything off it would look like a disaster but I think it's doable.
Darn it on the chair! I really like the red fabric, too bad. I'm sure you can find a way to recover it though, there are lots of tutorials out there.
And hey, Amaco needs to contact me too! I've talked about Rub N Buff many times on my blog & I've never heard from them. It's great stuff. 😉
Oh my, all I can say if good luck with the chair. I'm sure you will find something to do with it.
Love the shelf.
Brooke
Love the shelf Beth! You crack me up with the chair part tho! It is totally something I would've tried! LOL I luv the $ plates too:) GO U! I don't have any suggestons on the chair as I don't know much about that kinda thing but just a SMILE to send you:)
As luck would have it I found this blog and thought of you!
Here she uphoslters the same chair.
http://perfectlyimperfect-shaunna.blogspot.com/2010/04/darlas-reveal.html
P.S. I am too scared to spray paint any fabric– maybe I need to get out more.
That Rub N Buff is great, isn't it? I used it for the first time on that mirror I did in Oil Rubbed Bronze. Brings out the details beautifully! Hmmm, the chair. I haven't done one of these, usually I do the chairs that the seat unscrews, but it looks like you probably have to remove the nailheads. They may be covering staples. I know I've seen blogs where people have done chairs like this with that bit of fabric on the arms, but I can't remember exactly who. Maybe Centsational Girl? Or Kelly from Much To Do With Nothing?
Love what you did with the Rub 'n Buff – it's amazing how something so simple can have such a dramatic transformation! Rub 'n Buff is available at Hobby Lobby and Michaels.
Here's a link to a step by step to reupholster almost the exact chair you have:
http://charishumin.blogspot.com/2010/03/reupholstery-101-day-2.html
Good luck!! 🙂
Beth, I did a chair just like it. You can do it. Follow "Chair up's" instructions and let me know if you have any more questions.
lol, the last picture of the chair is so funny! It looks like a bad prom dress at Chair High Senior Prom. She's all dressed up and ready to go.
Hmmm…not sure why that comment showed up 3 times…?
I love that Rub N Buff…I can't wait to see what else you put it on. The plates are adorable, but I LOVE that bird. It's time for a trip to Michael's!! 🙂
I love that Rub N Buff…I can't wait to see what else you put it on. The plates are adorable, but I LOVE that bird. It's time for a trip to Michael's!! 🙂
Hi Beth, love all your budget finds!
On the chair, this is definitely a DIY if you're game. Just remove the nailhead trim, then the staples that are holding the fabric to the frame. If you do this carefully you can use the old fabric as a template for the new. Basically just take note of the steps to un-do the chair and then reverse them to put it back together. One tip when putting the fabric back on is to keep it snug as you don't want it loose fitting. Once you've stapled the new fabric on, just hot-glue some trim/braid of your choice around the edges to hind the staples. Same for the padded arms. You can do this, yes you can!!!
Angex
Beth, I'll bet you can fix it! We have all done something like that before. Here is a gal that does amazing work and will show you step by step how to re-upholster a chair. I hope she can help you!
http://charishumin.blogspot.com/2010/04/re-upholstery-201.html
She is doing a reupholstery project that she just posted!
Megan
you might have to take the chair for professional reupholstering, they do a really nice job just not sure about the price?! love the birdie, wish we had a michaels!
I like that plate shape. I bought some last year with a flower design at Target.
Sorry I am NO help re; the upholstery.
You are such a hoot !! I admire your "sticktoitness"…You inspire me!! I love love love the plates…I'm a cheapo too and would grab those up in a heartbeat..(and the birdie too):0)
Now, the chair … I had NO idea you could spray paint fabric so that's a new one! I definitely want a come back post on your redo of the chair. The Rub and Buff is a definite "thumbs up". Keep up the good work…You are getting me motivated girlfriend!!