Thanks to Waverly Inspirations at Walmart for sponsoring this post. The favorable opinions of the incredibly cute fabrics, stencils, and paints are 100% my own. Post contains affiliate links.
Here on Home Stories A to Z, I am committed to sharing affordable and obtainable do-it-yourself decorating ideas! One fun idea that I’ve wanted to try for years is embroidery hoop wall art. It is such a fun way to create an affordable focal point in a room when you have a large expanse of wall to fill.

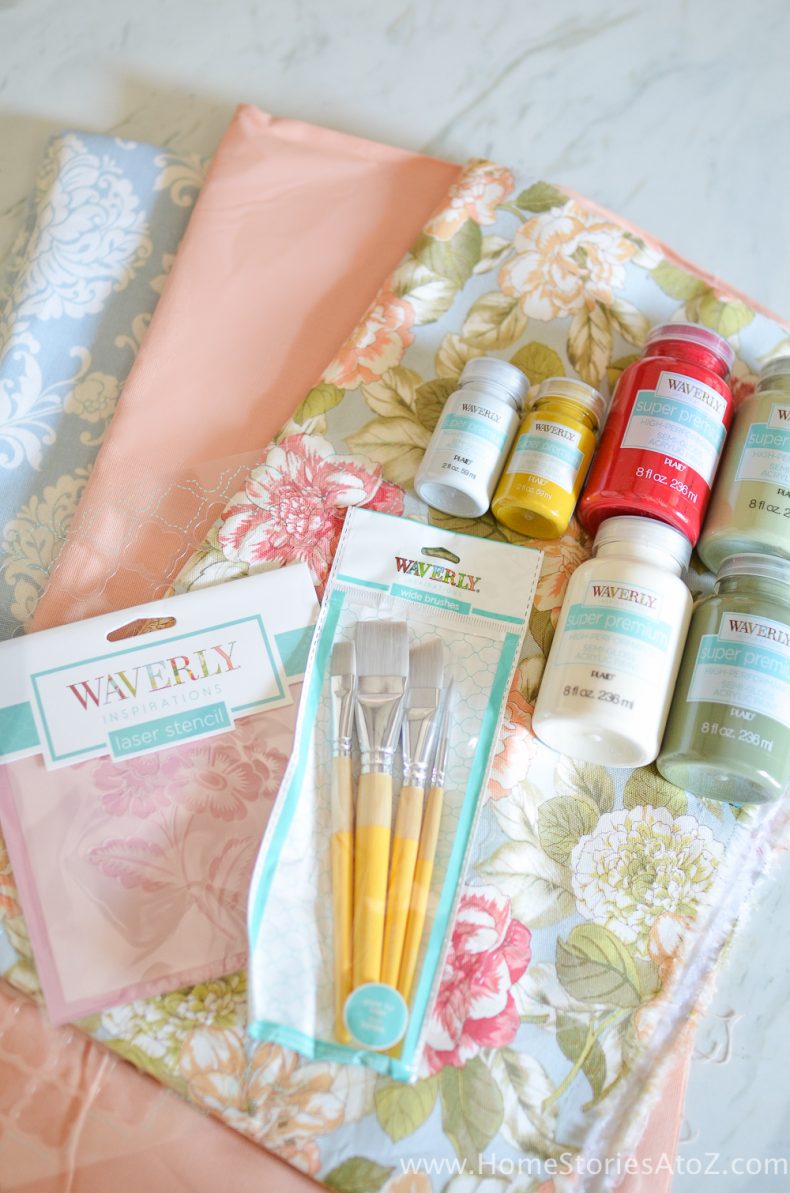
So when Waverly Inspirations at Walmart challenged me to make something from the fabrics, stencils, and paints pictured below, I knew it was a great opportunity to show you how to easily create custom embroidery hoop wall art!
DIY Embroidery Hoop Wall Art
Here are the supplies you will need for this project:
- Embroidery hoops
 (various sizes)
 - Waverly Inspirations fabrics
- Waverly Inspirations Acrylic Paints
- Stencils and stencil brush
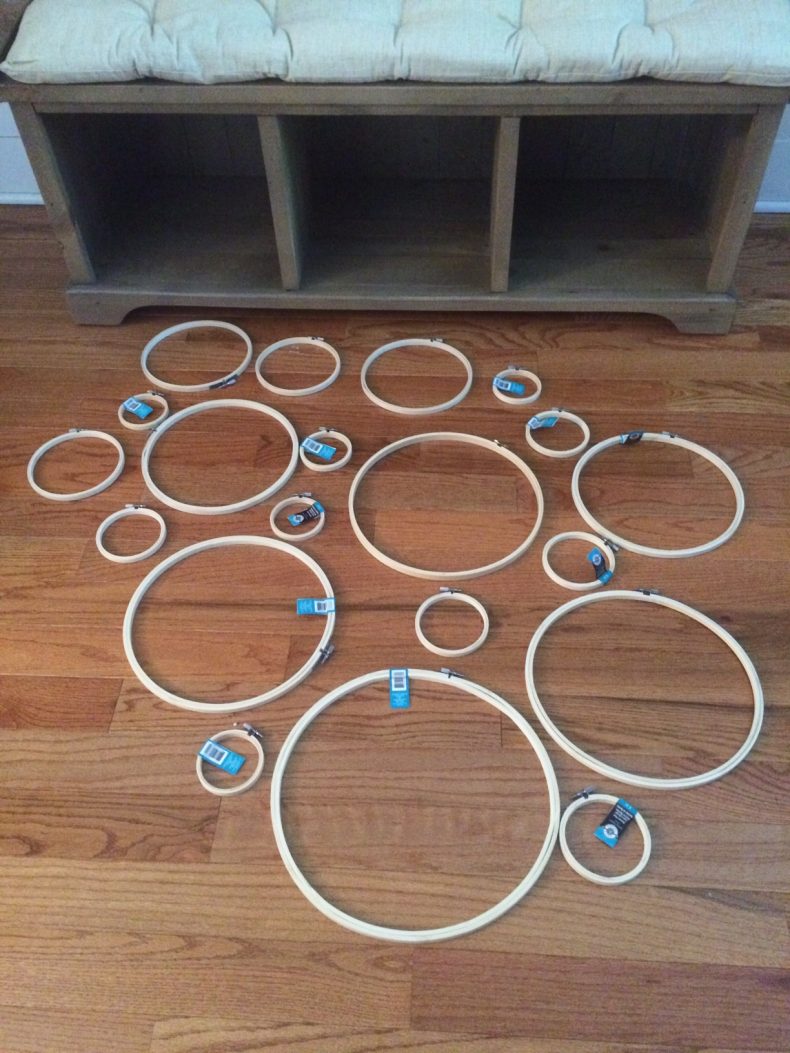
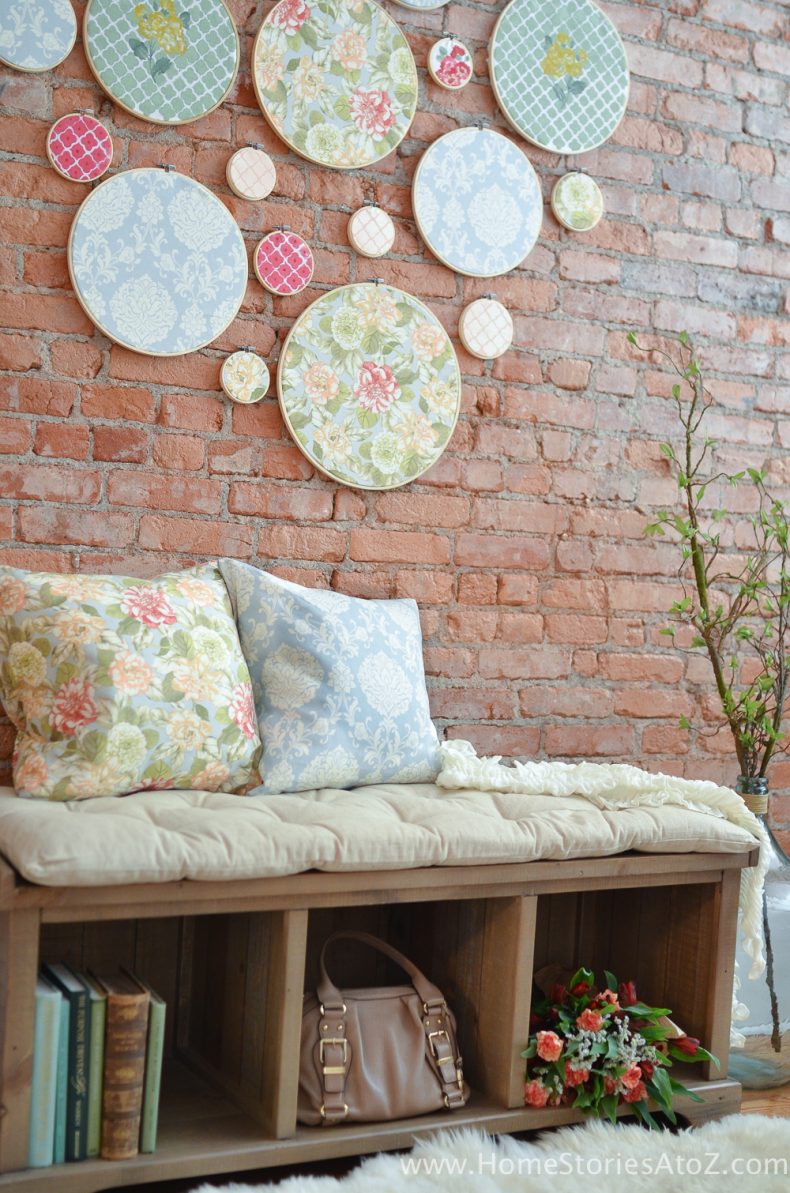
Step 1: Determine your hoop layout.
Starting with your largest hoops, place all of your embroidery hoops on the floor in front to the wall you plan to fill. Use the smaller 3″ and 4″ hoops to fill in the spaces between the larger hoops. Use the piece of furniture that will be below the hoop art to guide and ground your layout. There is no right or wrong way to place your hoops, but you do want the hoops to flow. Allow yourself some time to play around with the configuration until you find a layout that you like and works for your space.
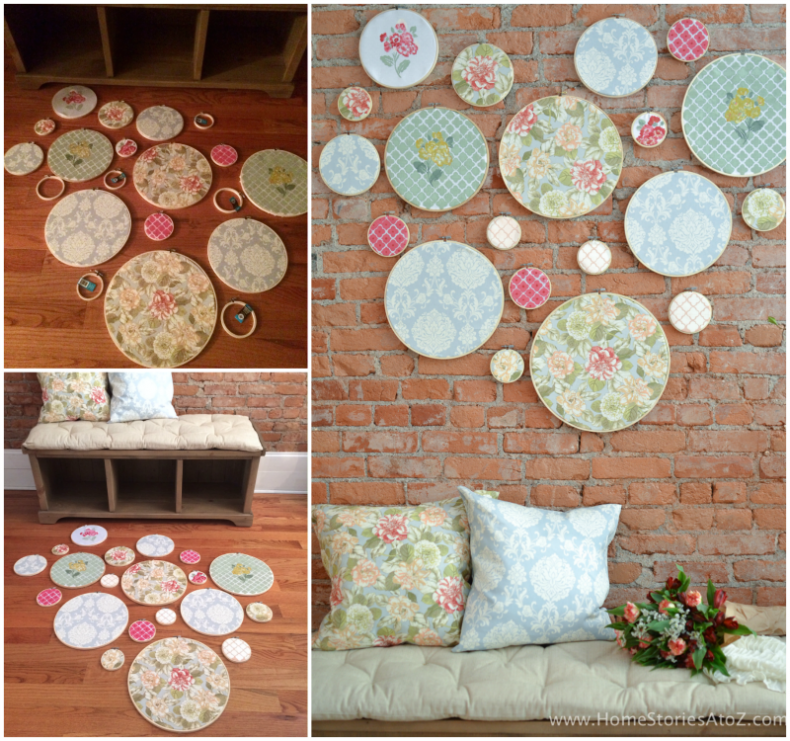
Step 2: Decide where to place your fabrics.
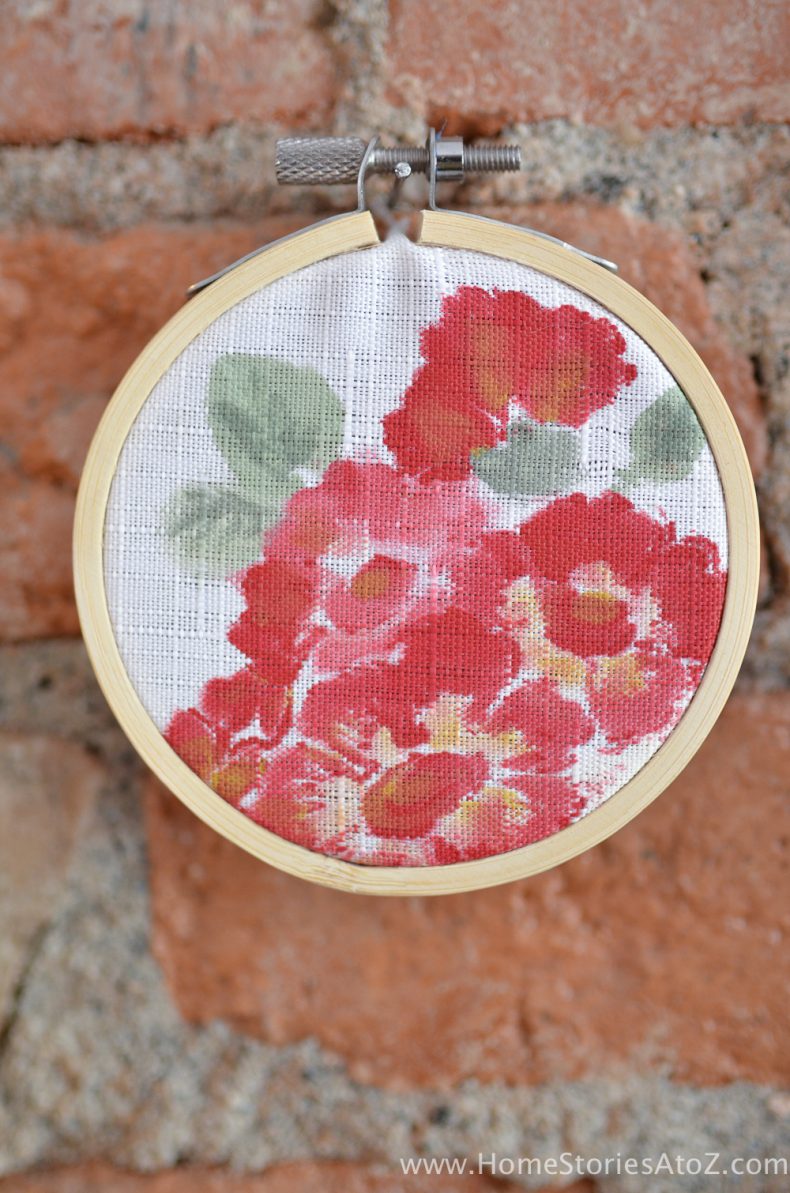
Again starting with your largest hoops, determine where you will place your fabrics and begin filling your hoops.
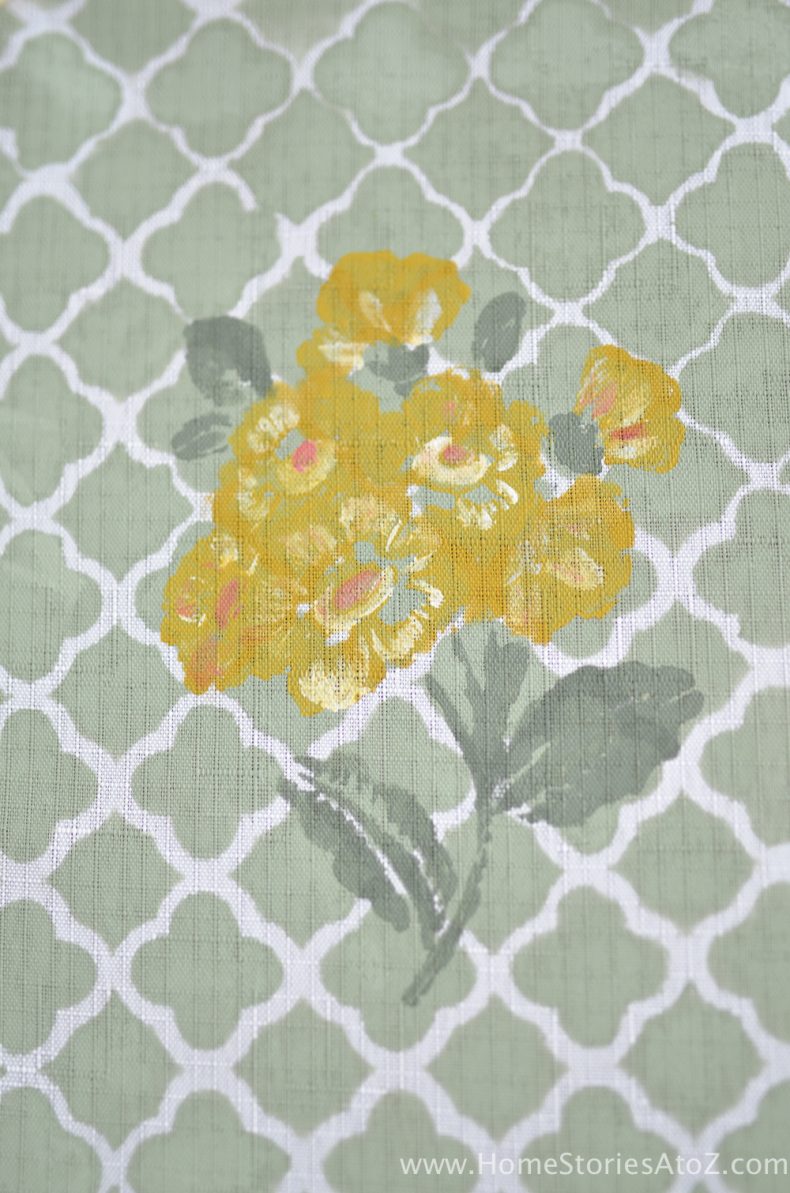
Step 3: Use stencils to create custom fabrics.
To create a custom look, use acrylic paints and stencils on white fabric. Tape down your stencil with painter’s tape and use a sponge brush or stencil brush to apply your paint. I find that using a tapping motion with the brush (rather than a traditional back and forth motion) works best to prevent the paint from bleeding.
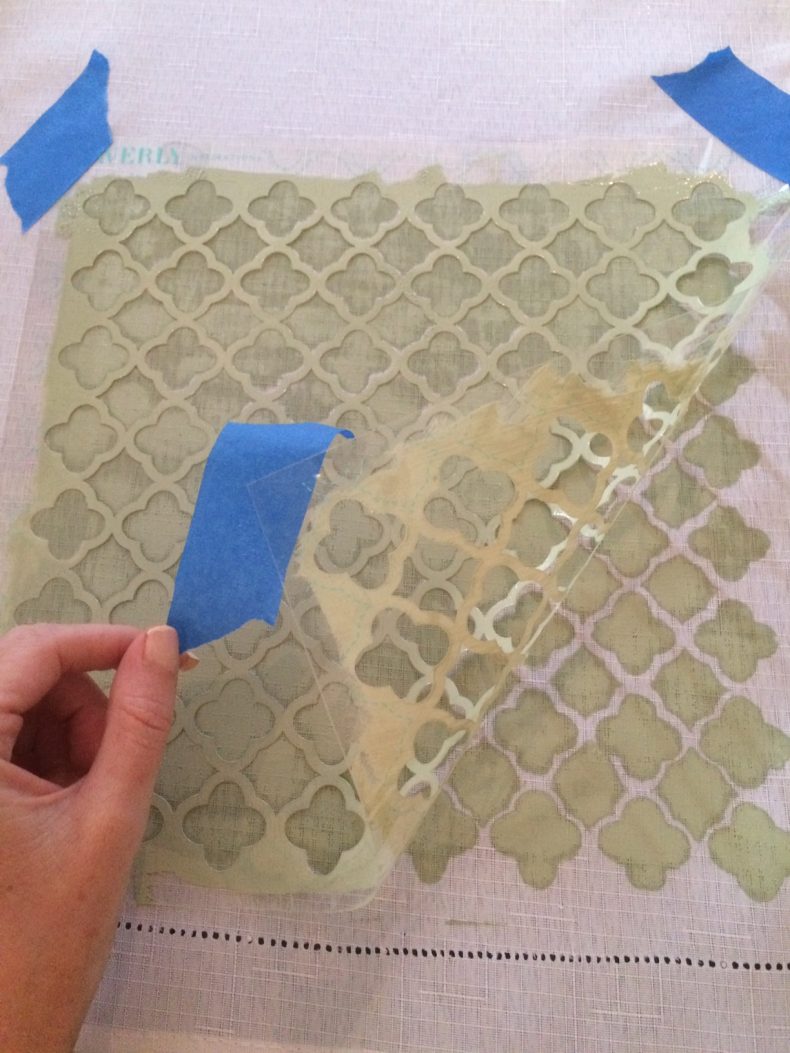
You can even layer your stencils over one another to create custom pieces. 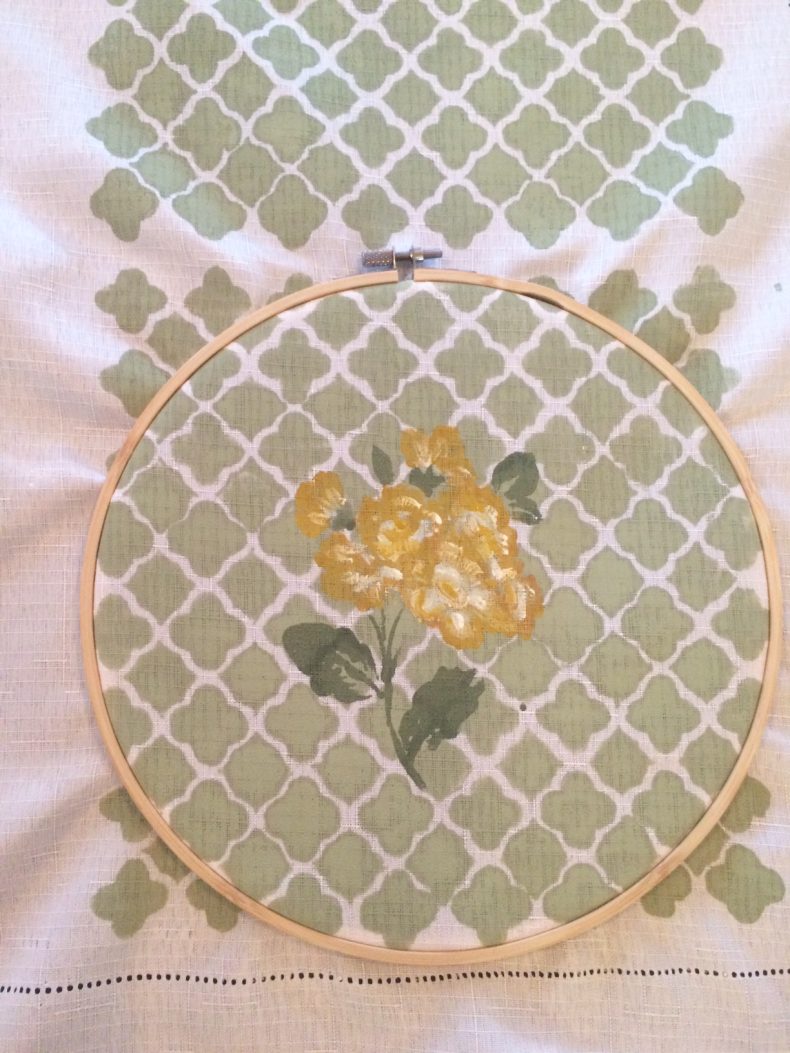
When your paint is fully dry, place your hoops on the material and cut out.

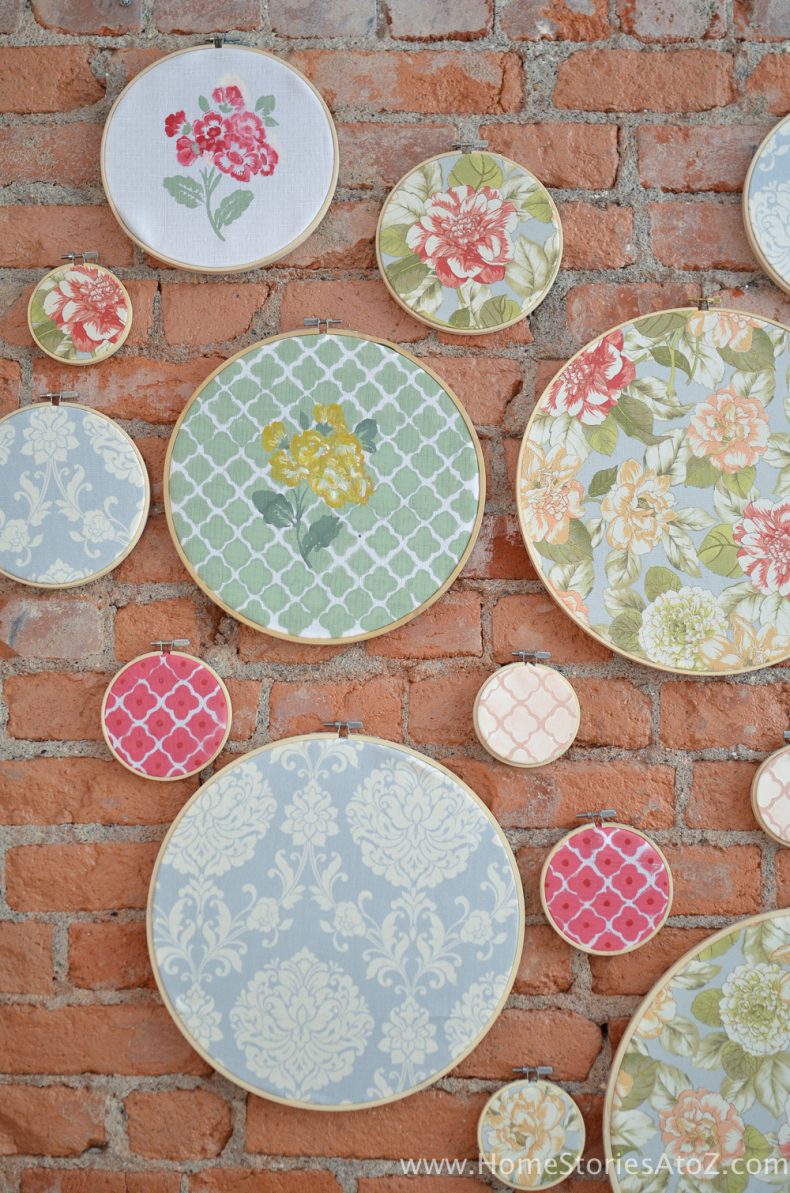
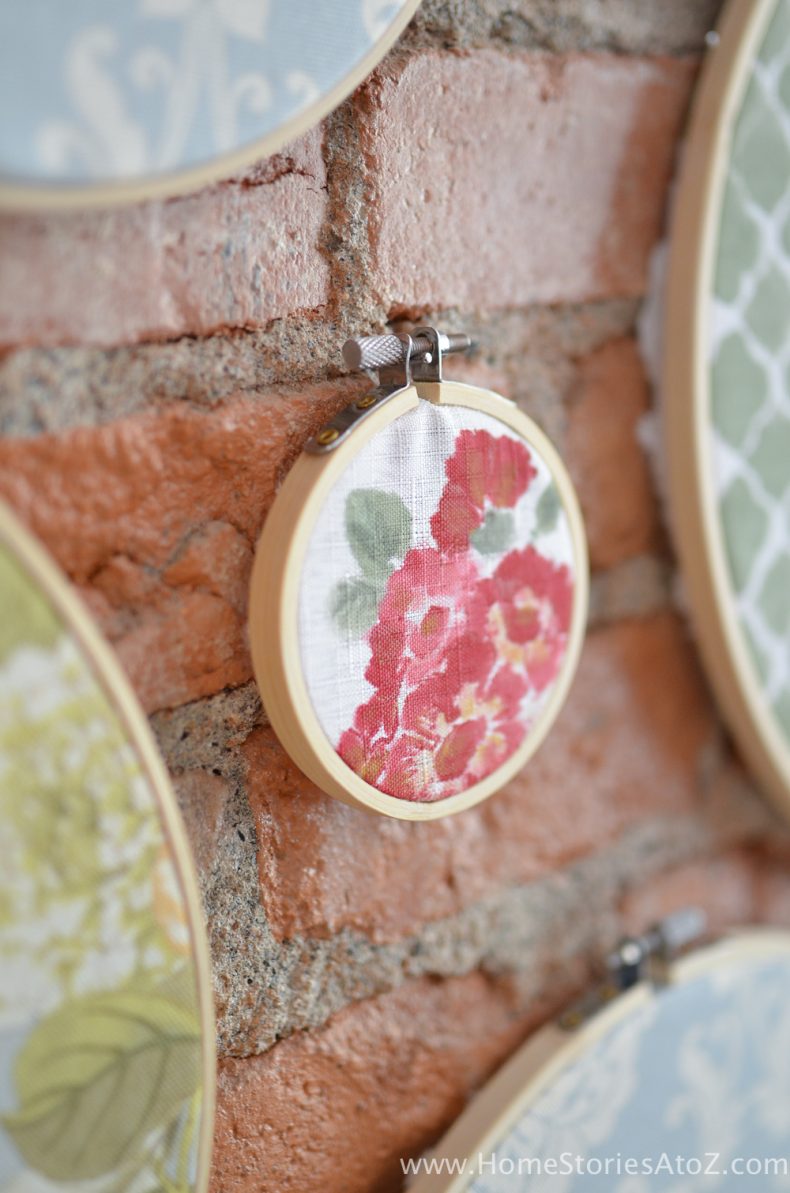
Step 4: Hang your hoop art.
I wrote an entire post on how to hang plates on the wall and the same principles, tips, and tricks apply to hoop art. I found it easiest to just eyeball each hoop on the floor and place it appropriately on the wall. If you aren’t as confident in your spatial relationship skills, I recommend reading the post linked above for some great tips on hanging a collage on the wall.
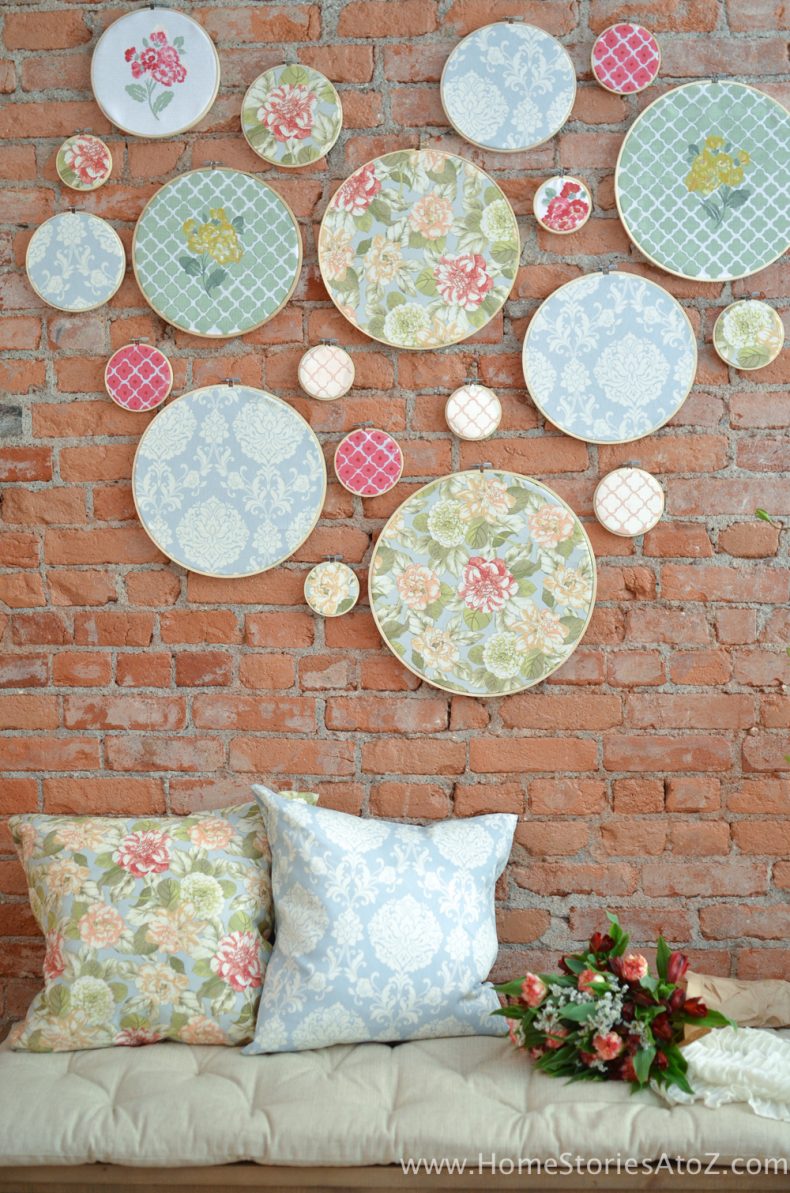
The painted flower stencils add a cute country cottage touch to the wall.


I hope this idea inspires you to create your own embroidery hoop wall art. You can find the new Waverly Inspirations products at your local Walmart and online!
If you liked these ideas, the I know you’ll love the Related Posts below. Feel free to pin any ideas you love to save for later!


Thank you so much for this idea, does Walmart have the stencils, oh my bad, I just saw that they could be found at the store and online!!
Hi Sharon, I didn’t see the stencils at all of our local Walmarts so you may need to check to see if your store carries them.
These are so pretty! Love it!
Thank you so much Krista!