Thanks to Waverly Inspirations at Walmart for sponsoring this post. The favorable opinions of the incredibly cute fabrics, ribbons, and paint are 100% my own. Post contains affiliate links.
I have a love/hate relationship with summer. I love it because…well…SUMMER! And I hate it because it’s the shortest season of the year. Just when I’ve settled into the swing of lazy mornings, pool days, and meals al fresco, it’s time to pack it all up (in a new school backpack) and prepare for the onslaught of all-things-BACK TO SCHOOL! 😱 I’m not ready. I just can’t face it yet! So when Waverly Inspirations at Walmart challenged me to create some Back to School themed items using their fun fabrics, I decided to channel my inner 19 year old and create some pretty DIY Dorm School Supplies! This was so much more fun than creating something for our family! I get to stay in denial that summer is almost over and my college-aged nieces get to receive some cute school supplies from the coolest Aunt ever! Win/win. 😉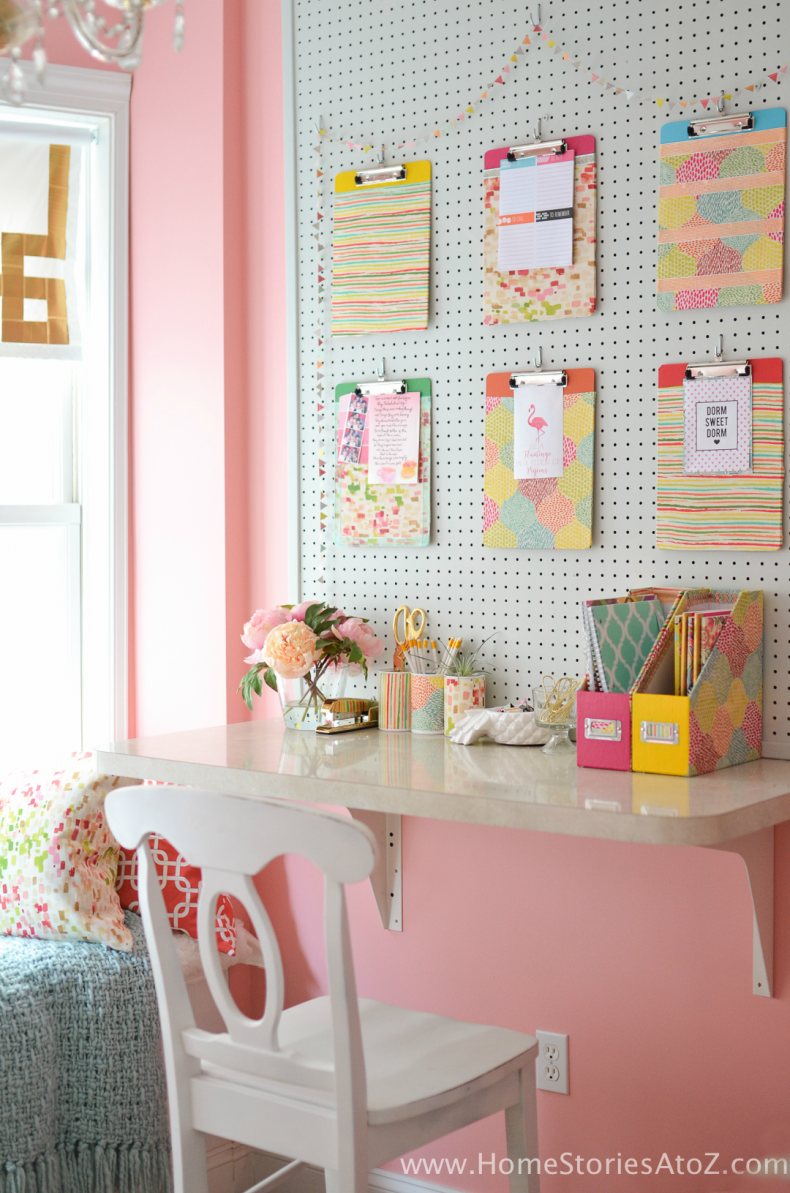
Waverly Inspirations Supplies
As part of the Waverly Inspirations Network, each month I receive a box filled with Waverly Inspirations products from Walmart along with the challenge theme for the month. My mission (if I choose to accept it) is to create something themey using all of the products and to then pass my ideas and tutorials on to you. Does it sound like a fun game? It is. Let’s play!
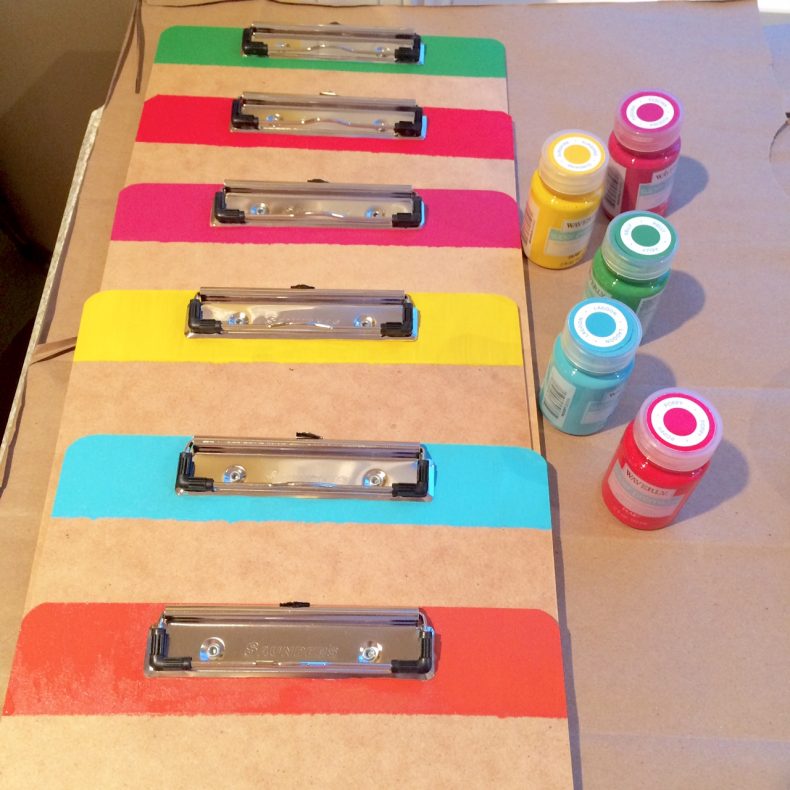
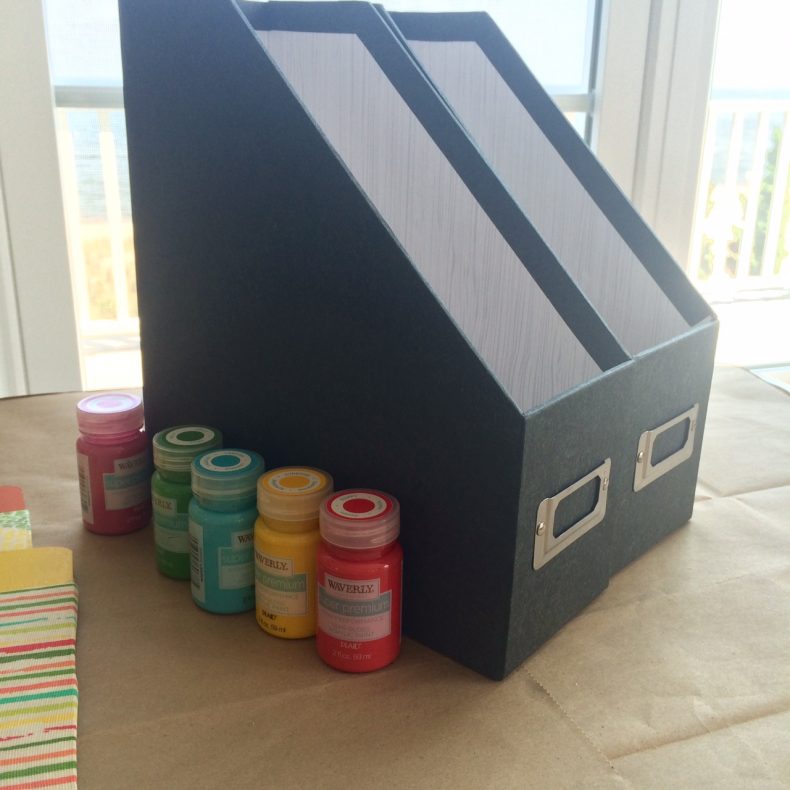
Here is what I received in my box this month:
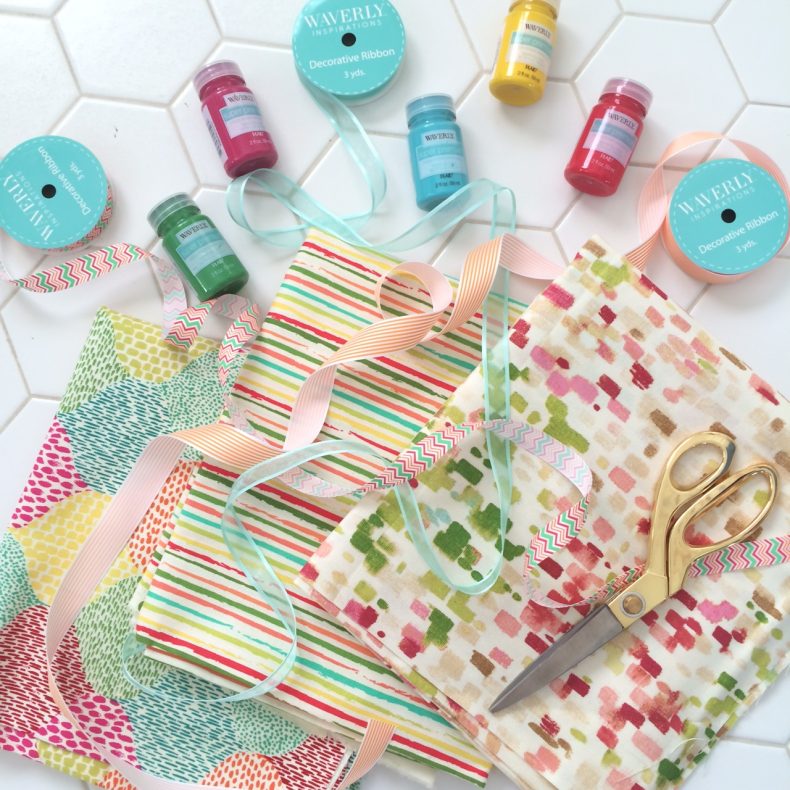
- Waverly Cut By Yard Dark Squares Coral

- Waverly Cut By Yard Teardrop Azu
- Waverly Cut By Yard Ministripe Lime
- Waverly Inspirations Ribbon
- Waverly Inspirations Paint
I decided to use all of the Waverly Inspirations products to create affordable, custom school supplies–perfect for a young woman’s dorm or apartment workspace. The best part is that all of the supplies, and nearly all of the accessories, can be purchased at Walmart’s everyday low prices! College is expensive. Cute school supplies don’t have to be!
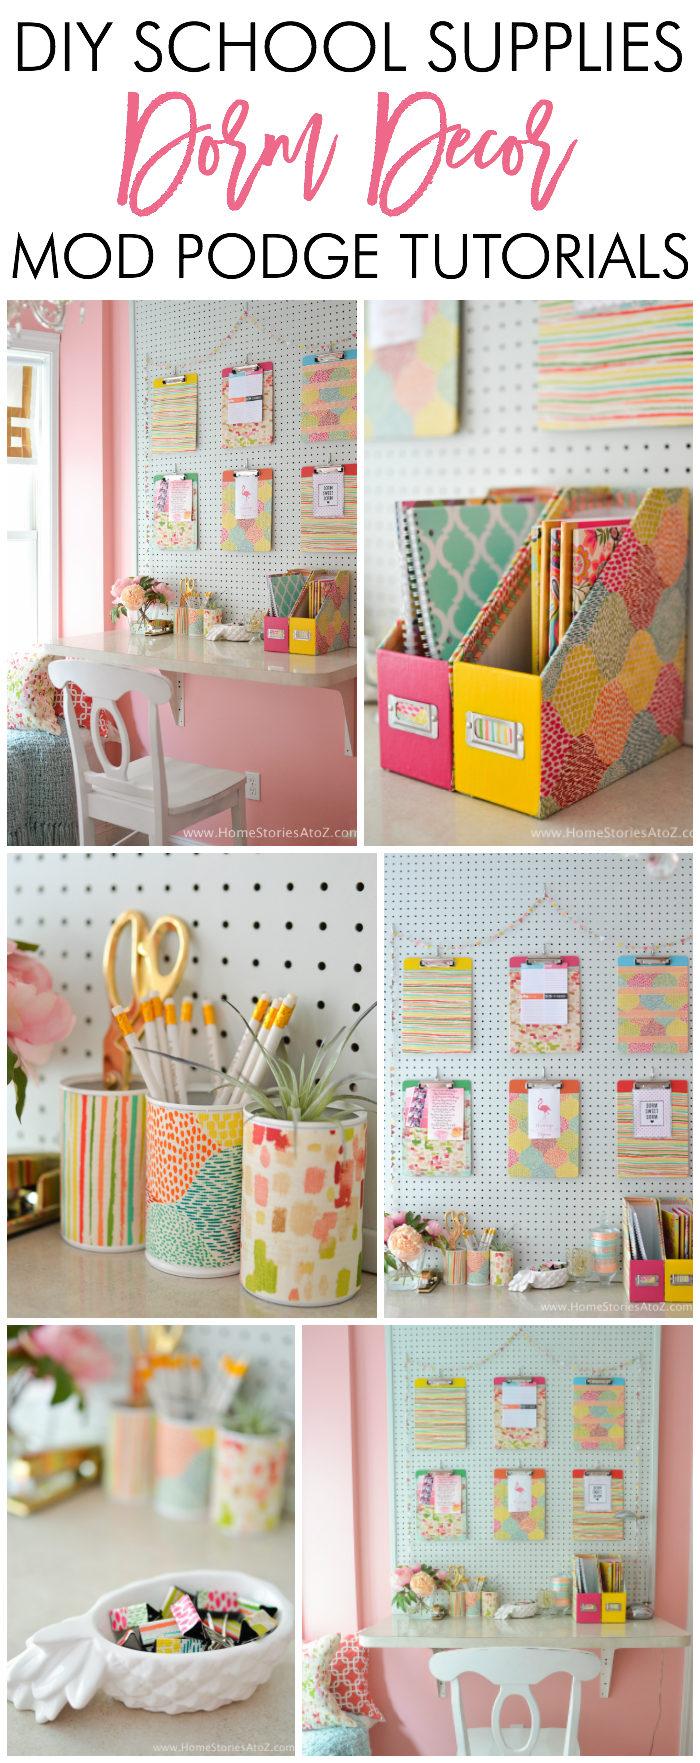
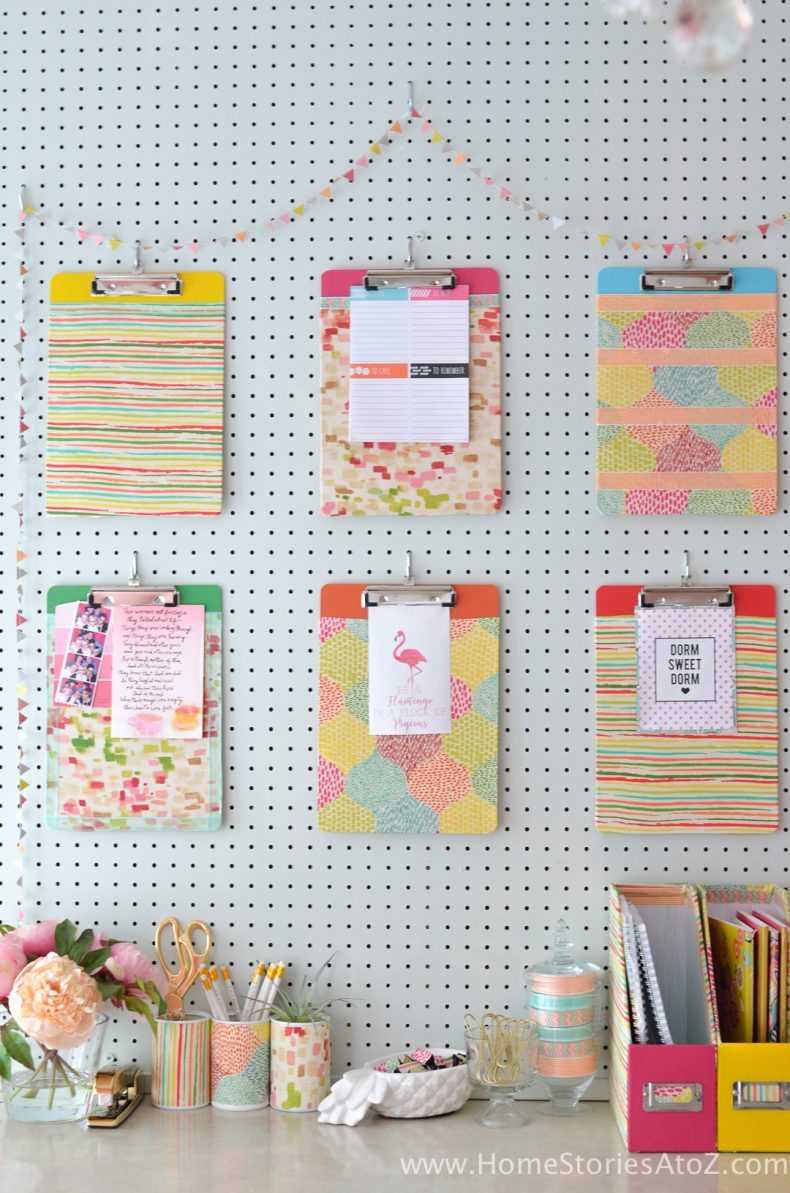
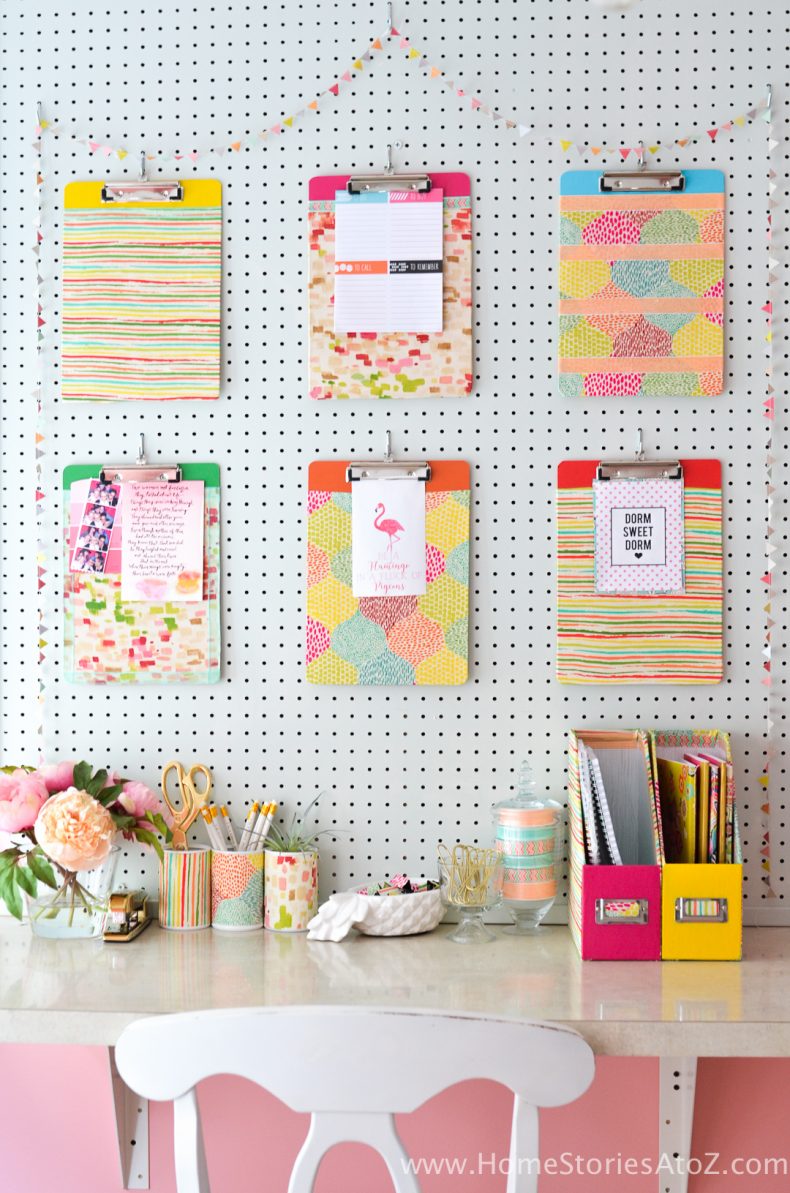
Today I will show you how to make fabric-covered clipboards, tin cans, binder clips, and magazine folders! Scroll down for each step-by-step tutorial.
DIY Dorm School Supplies: Mod Podge Clipboard Tutorial
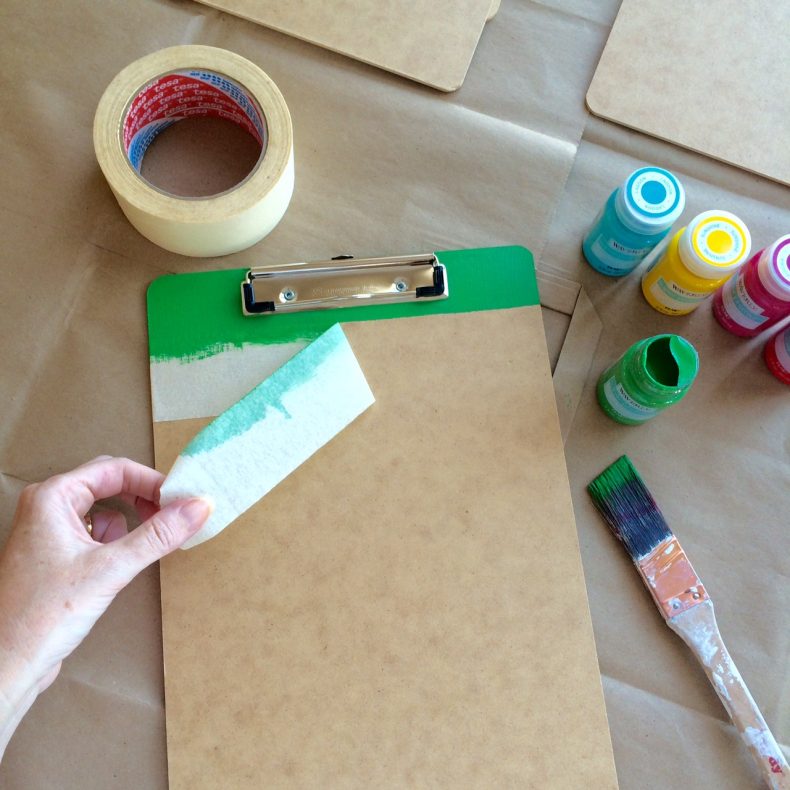
Supplies Needed:
- 6 clipboards
- Painter’s tape or masking tape
- Waverly Inspirations craft paint
- Waverly Inspirations fabrics
- Mod Podge, Matte
- Paint brush
- Scissors or rotary cutter
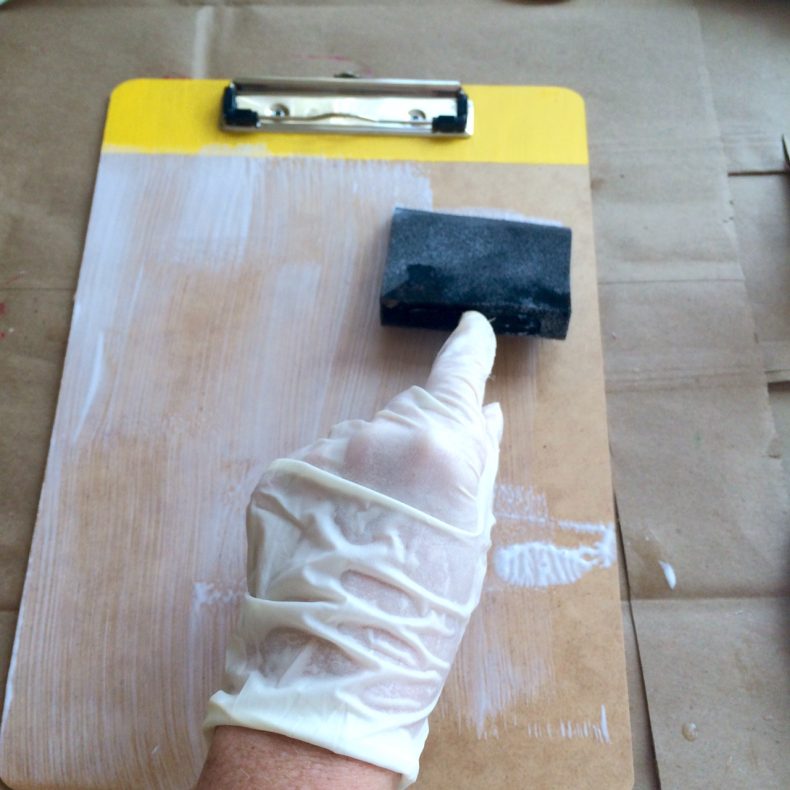
Step 1: Place tape underneath the clipping mechanism of your clipboard and paint the tops of your boards. Promptly remove the tape before the paint is dry. Painting the tops of your boards adds a fun design element and also makes this craft easier. Now you don’t have to worry about cutting the fabric around the clips!
Step 2: Cut your fabric to size. Using a disposable foam craft brush, paint on a layer of Mod Podge. I find it works best to cover both the board and the wrong-side of the material before positioning the fabric on the board.
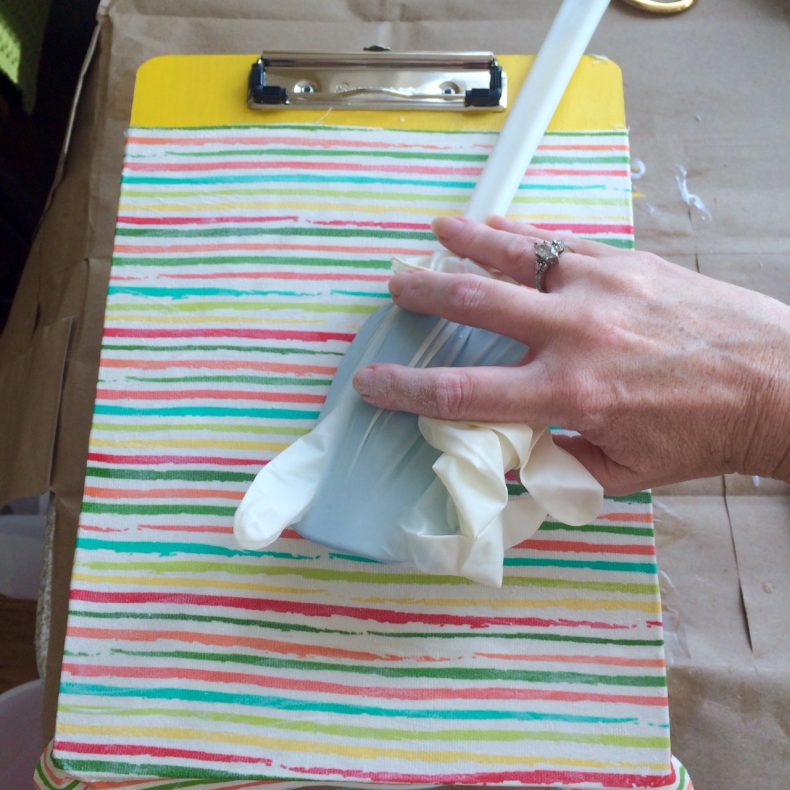
Step 3: Place more Mod Podge on top of the fabric and smooth out any air bubbles using a rubber scraper. Allow the boards to completely dry and then trim any excess fabric from the edges of the boards.
Step 4: Use Mod Podge on both sides of the ribbon to accessorize your boards as desired!
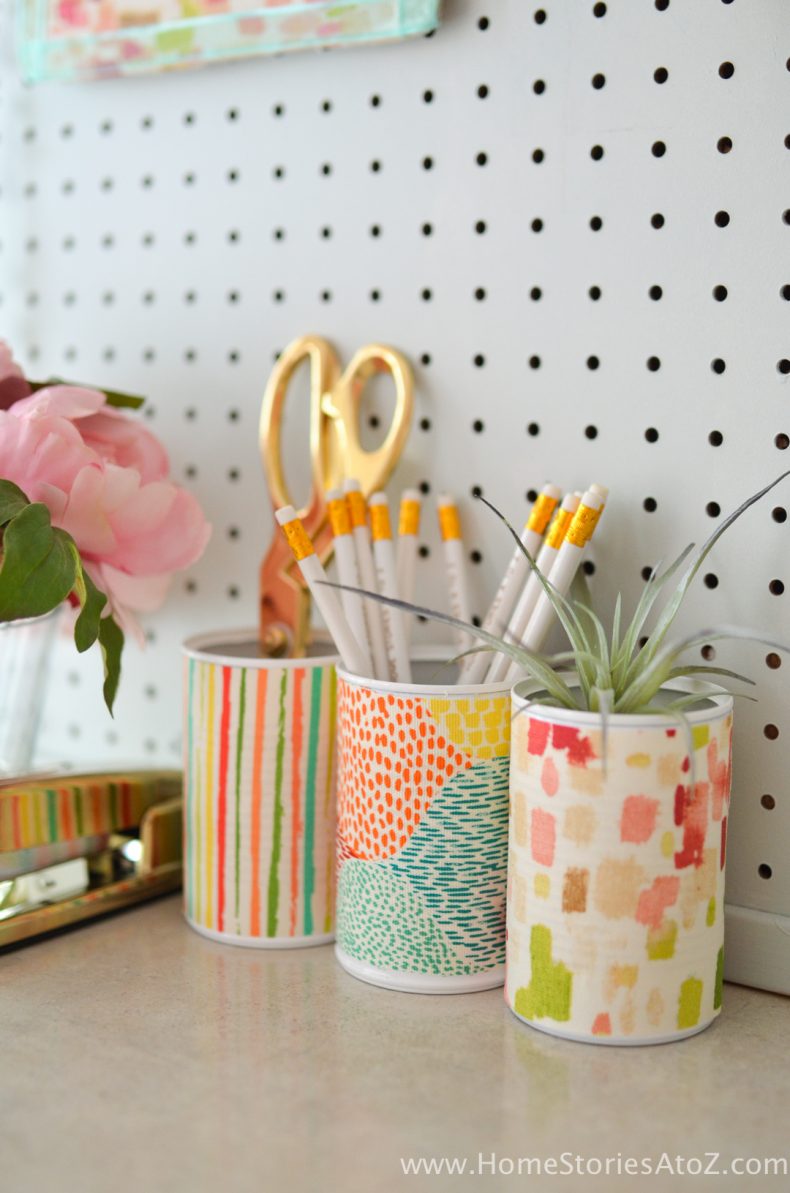
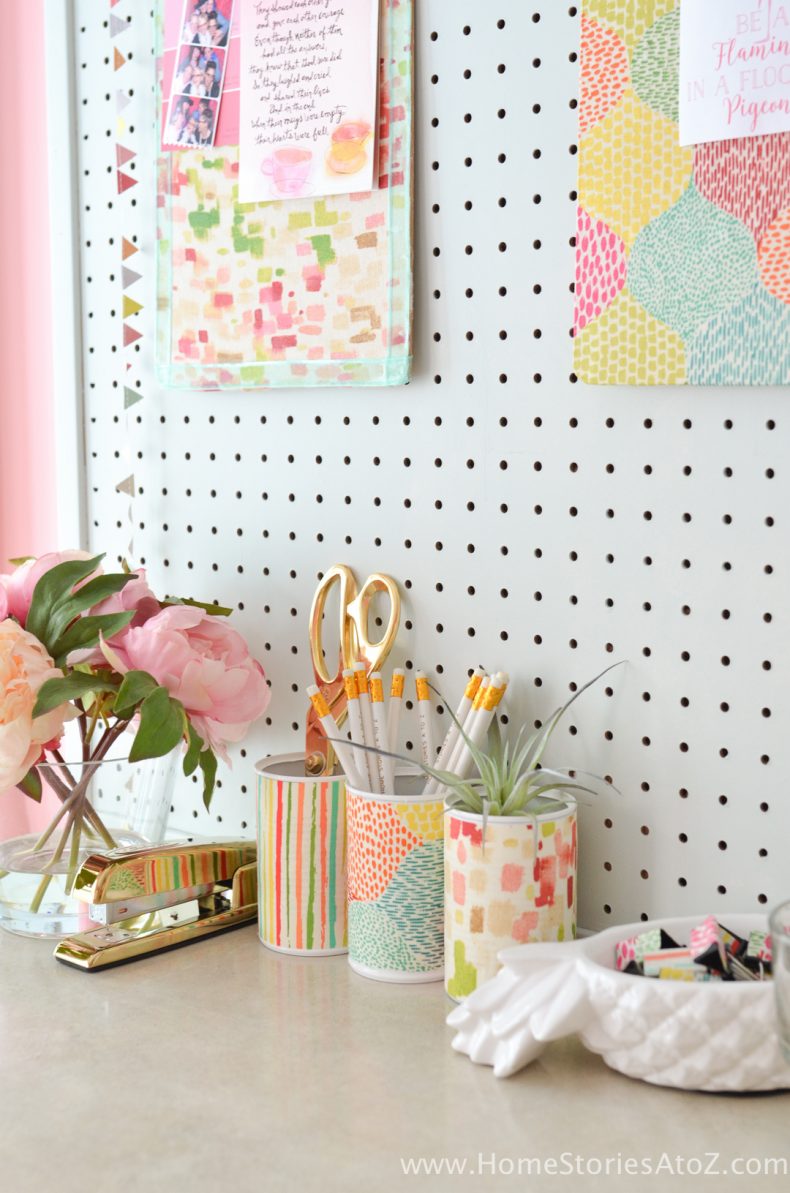
DIY Dorm School Supplies: Mod Podge Tin Cans Tutorial
Supplies Needed:
- Clean and dry tin cans pulled from recycling.
- RustOleum Paint + Primer Spray Paint
- Waverly Inspirations fabrics
- Mod Podge, Matte
- Craft brush
- Scissors or rotary cutter
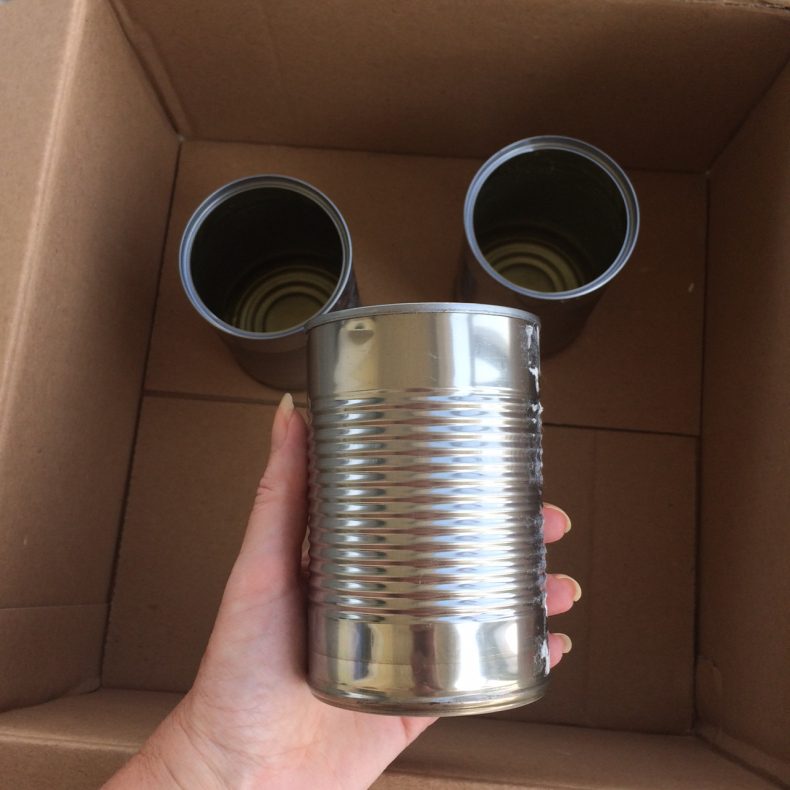
Step 1: Spray paint your clean and dry cans until completely covered. I find that two to three light coats with drying time in between works best.
Step 2: Once the spray paint is dry, cut the fabric to size and cover the cans and the wrong-side of the fabric with Mod Podge. Allow to dry and fill with cute office supplies or a succulent!
DIY Dorm School Supplies: Mod Podge Binder Clips Tutorial
Supplies Needed:
- Binder clips
- Waverly Inspirations fabrics
- Mod Podge, Matte
- Craft brush
- Scissors or rotary cutter
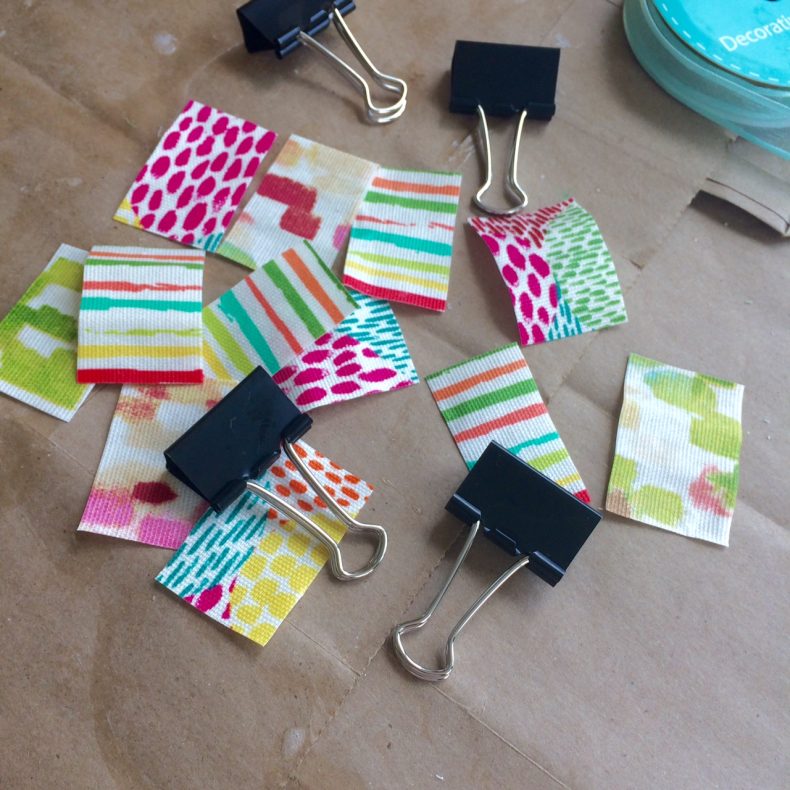
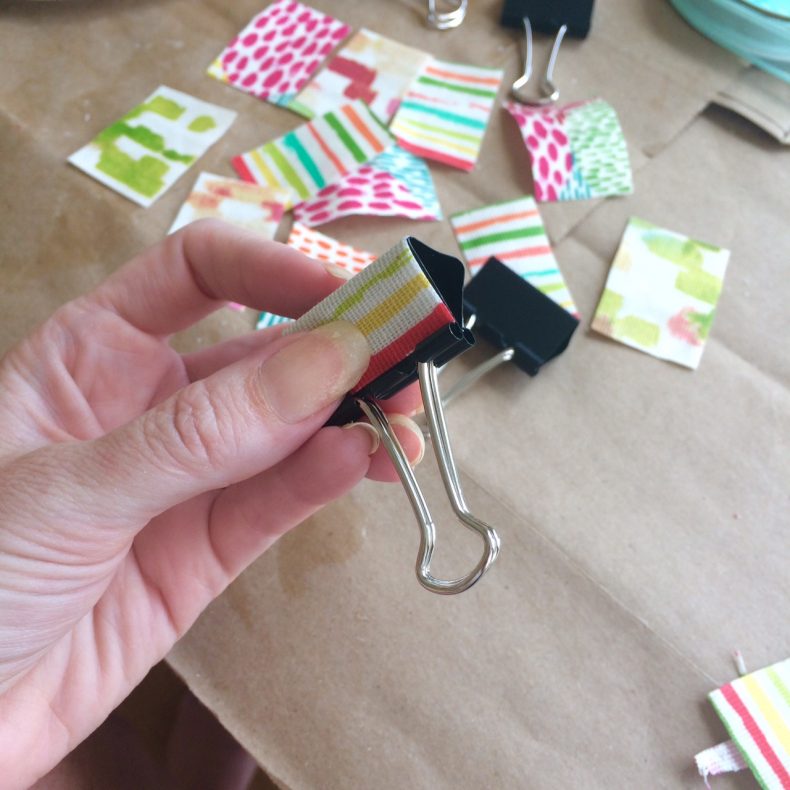
Step 1: This step is optional but recommended. Cut your fabric into strips and coat both sides of the fabric with Mod Podge. Hang the fabric to dry using a clip hanger. This will stiffen your fabric, prevent fraying, and allow for easier handling.
Step 2: Cut the fabric stips into appropriate sizes. The size will vary depending on the size of your binder clips. I simply folded the fabric over the clips to gauge the size and then cut.
Step 3: Cover the clip and wrong-side of the fabric strips with Mod Podge and smooth into place on the clips. Allow the clips to completely dry before handling.
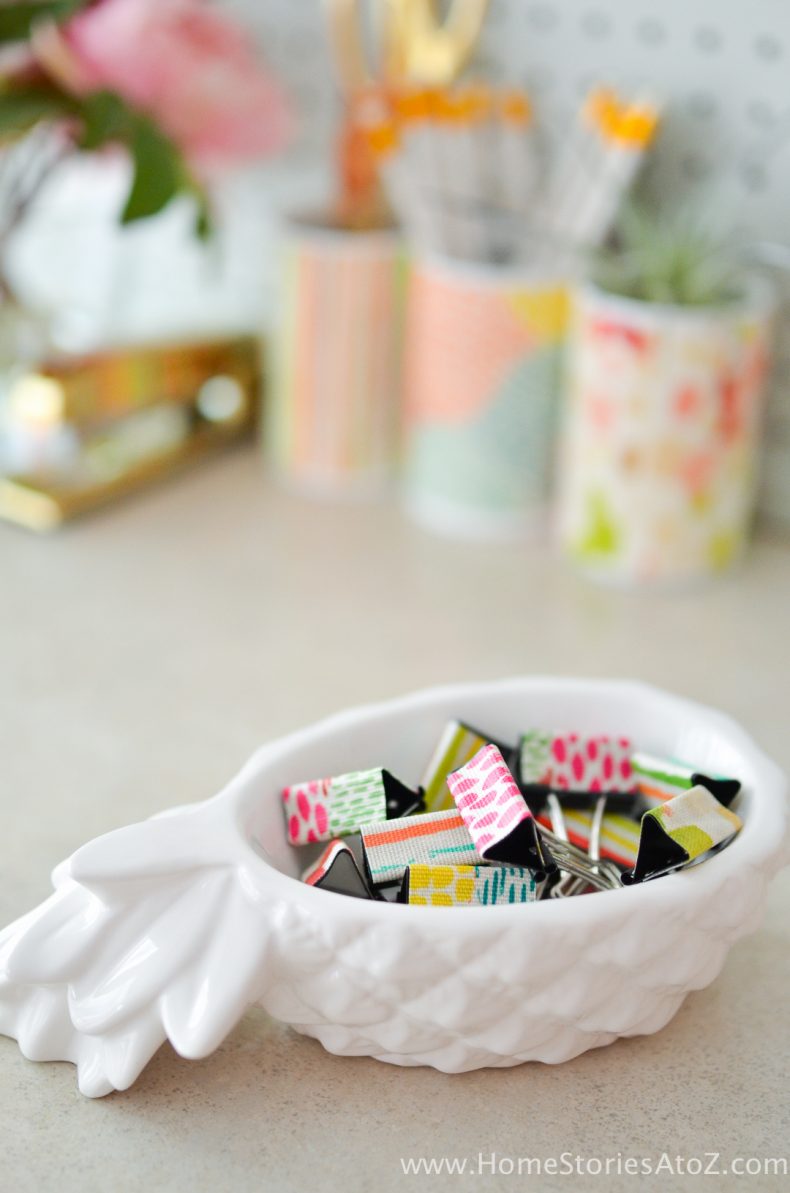
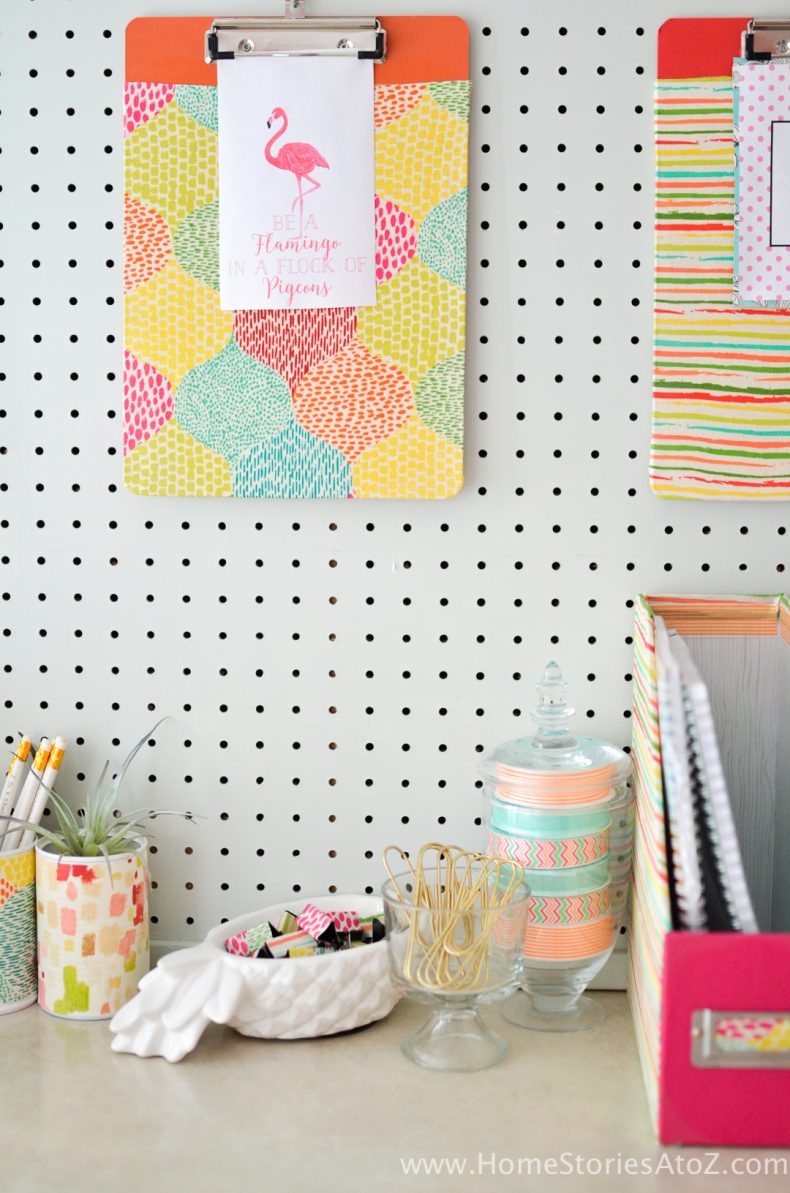
They look so pretty on the desk and are great for organizing.
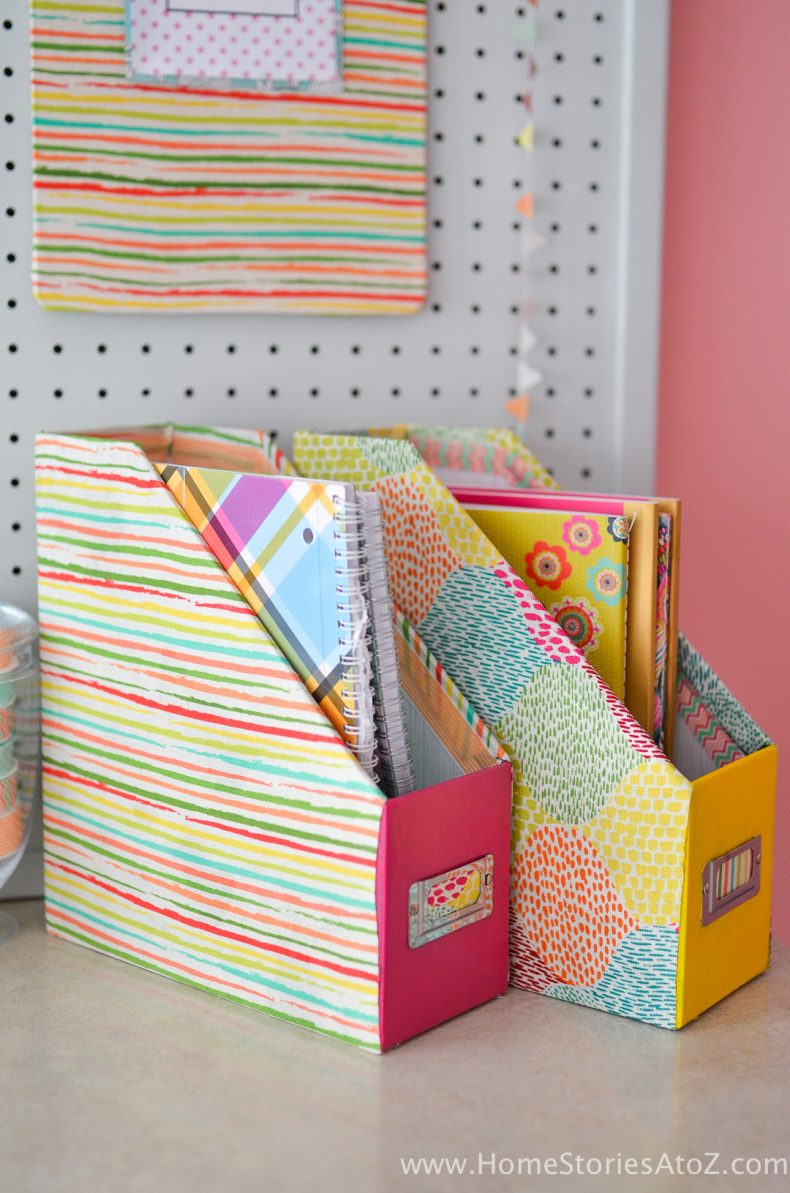
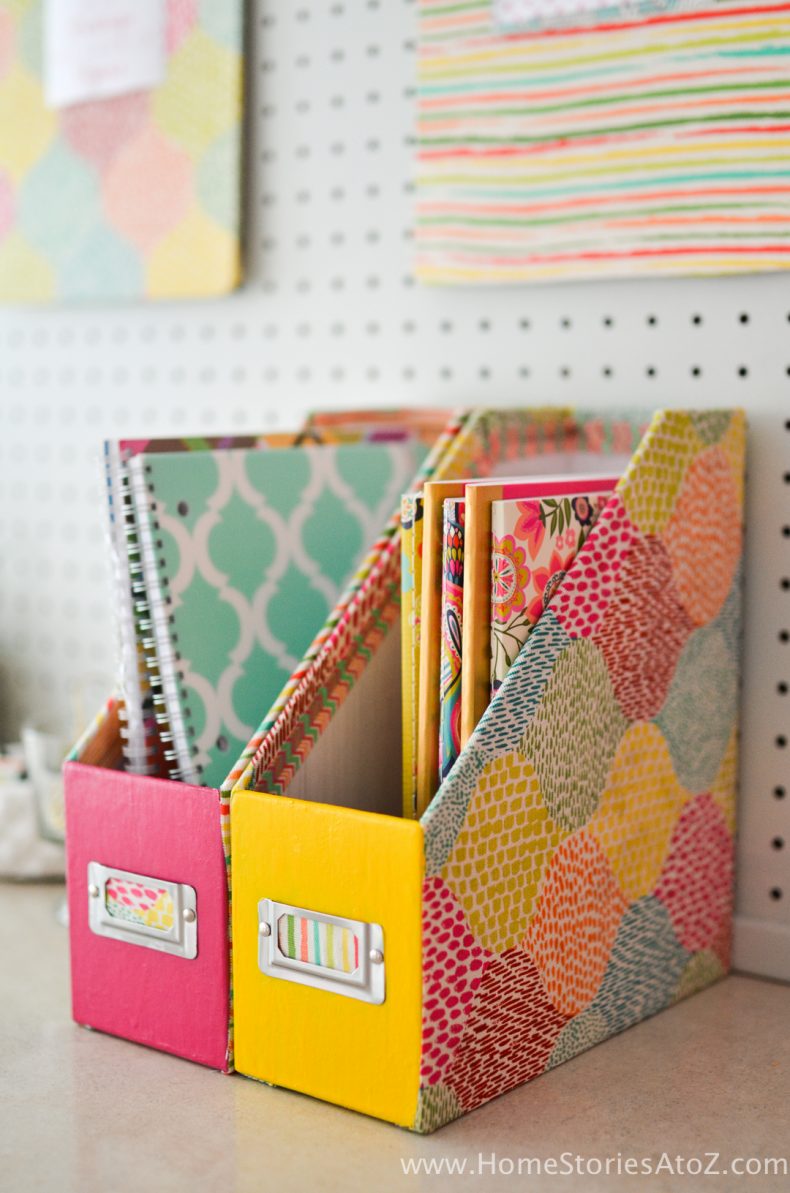
DIY Dorm School Supplies: Mod Podge Magazine Folders Tutorial
Supplies Needed:
- Magazine file holders
- Paper (to create pattern)
- Waverly Inspirations craft paint
- Waverly Inspirations fabrics
- Mod Podge, Matte
- Paint brush
- Scissors or rotary cutter
Step 1: Paint the front of the folders with craft paint.
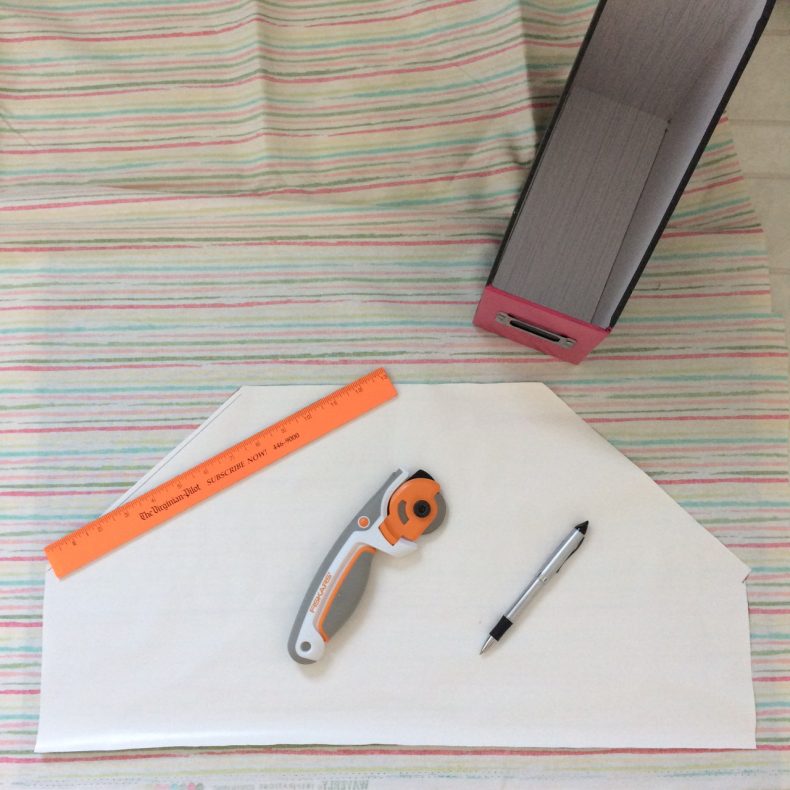
Step 2: Lay the folder on its side on a sheet of wrapping paper or butcher paper. Trace around the perimeter of the folder to create a pattern, leaving a half inch inseam.
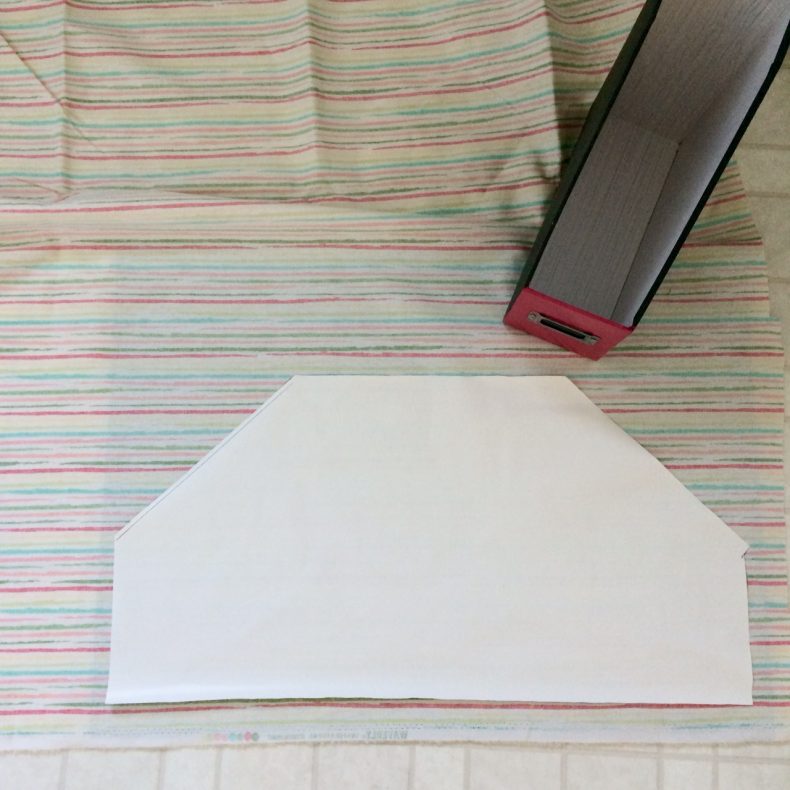
Step 3: Trace the pattern onto your ironed fabric and cut out.
Step 4: Use Mod Podge on the wrong-side of the fabric and on the folder. Smooth out any air bubbles as you go. Line the inside seams with Mod Podge and ribbon if desired. Allow to completely dry before using.
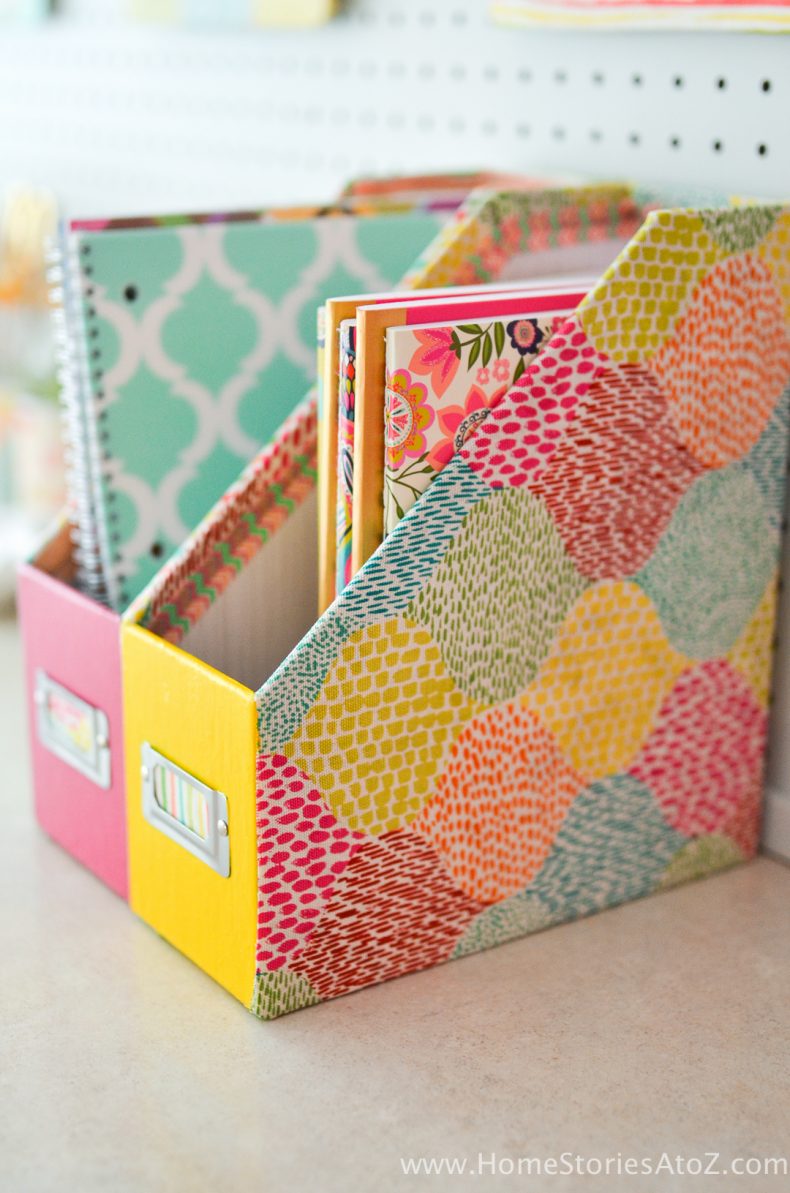
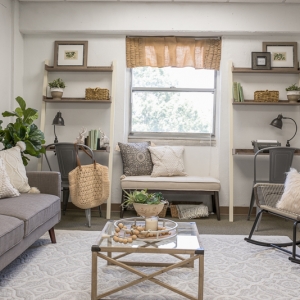
What do you think? Do you know a young woman who might enjoy this work space in her dorm? Forget the dorm, I think many of us grown woman would enjoy this work space in our craft rooms! 🙂
You can find the new Waverly Inspirations products at your local Walmart and online!

If you liked these ideas, the I know you’ll love the Related Posts below. Feel free to pin any ideas you love to save for later!


LOVED all your ideas…and the material designs are adorable. Im doing a craft ‘area’ for my Grand daughter and ‘stay organized space’ for my teen. Thank you Beth! (Great name btw)
You’re welcome! I’m glad you found the ideas helpful. Thanks for stopping by!
Thanks for sharing this great idea. I love it very much! It so beatiful and creative. Can I share your idea to quotev?
Wow, these ideas are so good, my daghuter turned her room to the exact way your room is.
I’m glad you found them helpful!
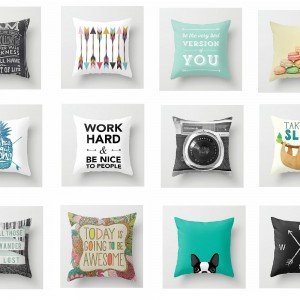
Love everything! The colors are perfect. Where did you find the adorable pineapple dish?
Thanks Katie! I found the pineapple dish at HomeGoods.
This room is an absolute sheer delight! It is a fabulous dorm room, but I can very easily see this with a few changess, being perfect for a grade schooler, tween or teen. If a school girl had someplace this pretty to call her own, there would never be homework problems again!!
Thank you so much Judy for your sweet and thoughtful comment! 🙂
Love it! So creative and your nieces are so lucky! Have a great time at Haven!!! So sorry I’m not going to be there this year!
Great ideas! Now I want to move into a dorm just to decorate. Such beautiful fabrics too.
Thanks Sarah!
Everything turned out so pretty! Love these ideas!
Thank you!