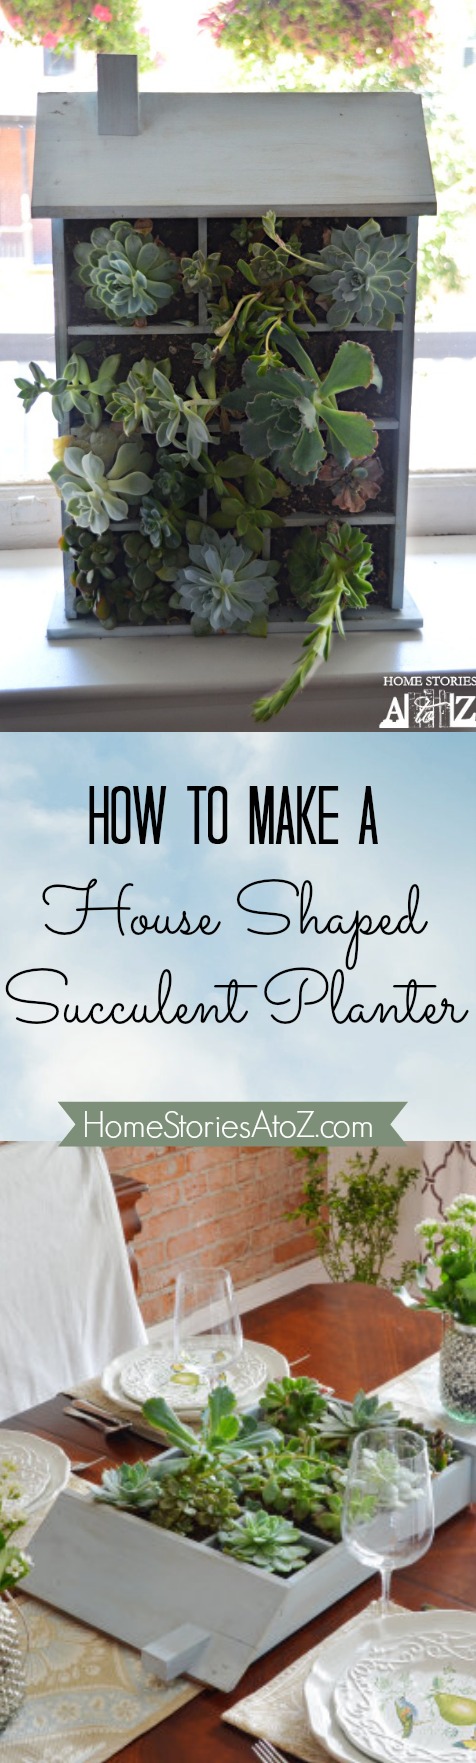
For my August Lowe’s Creative Ideas Blogger challenge, I was asked to create a planter for succulents. I decided it would be cute to make a house shaped planter for my succulents. If you are lucky, you can find one of these house-shaped shelves in a thrift store. But if you can’t find one, no worries. With some scrap wood left over from former projects you can make your own. I have outlined all of the materials, tools, cuts, and directions to follow in case you want to make your own!
Materials & Tools
*This project works best if you have scrap wood on hand.
1 – 3/4 sheet of plywood. You will use this for the sides, base, and top.
1 – 1/4″ sheet of plywood. You will use this for the inside dividers.
1 – 1×2 (chimney)
1 – 1/8″ piece of hardboard cut to 12″ x 18″ (for the
safety goggles
measuring tape
pencil
nail gun
wood glue
circular saw
jigsaw
clamps
Cut List
2 – 3/8″ plywood @ 2 1/2″ wide x 18″ long (sides). Cut one end of each piece at 45• angle.
1 – 3/8″ plywood @ 3″ wide x 13 1/2″ long (base).
1 – 3/8″ plywood @ 5″ wide x 13 1/2″ long (top). Cut each end at 45• angle.
3 – 1/4″ plywood @ 2 1/2″ wide x 3 1/4 long (vertical dividers).
3 – 1/4″ plywood @ 2 1/2″ wide x 11 7/16″ long (horizontal dividers).
1 – 1/4″ plywood @ 2 1/2″ wide x 7 1/8″ long (top vertical divider).
Cut one end of your 1 x 2 at a 45• angle. Cut a straight cut an inch or so past the angled cut to create a chimney.
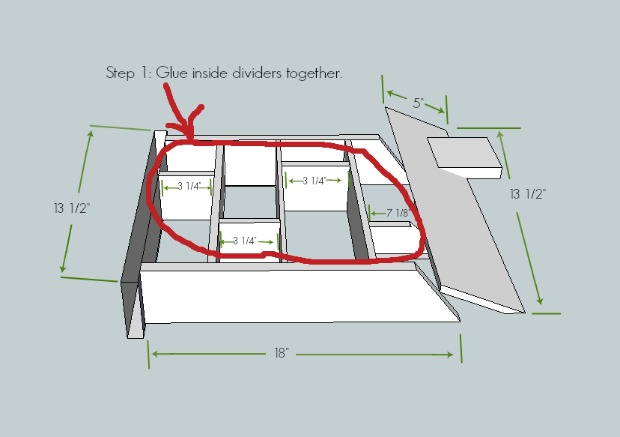
Step 1:
Start by gluing together all of the inner dividers with wood glue and clamps. Take your 3 – 2 1/2″ x 3 1/4 long pieces and glue them to the 2 1/2″ wide x 11 7/16″ long horizontal dividers. Glue the 2 1/2″ wide x 7 1/8″ long top vertical divider on the top horizontal piece. In the picture below, you are working on creating the middle section first.
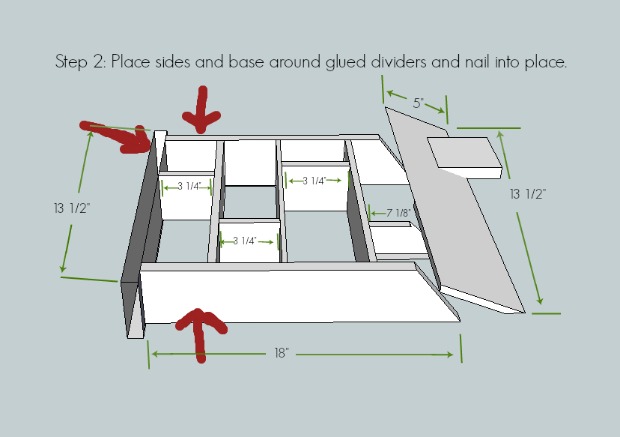
Step 2:
Place your inner dividers perpendicular to the 3″ wide x 13 1/2″ long base and then place the 2 1/2″ wide x 18″ long sides on either side of your dividers. Use your nailgun to nail in place.
Step 3:
Glue chimney to the top of the 5″ wide x 13 1/2″ long top piece. Glue piece on top and nail into place.
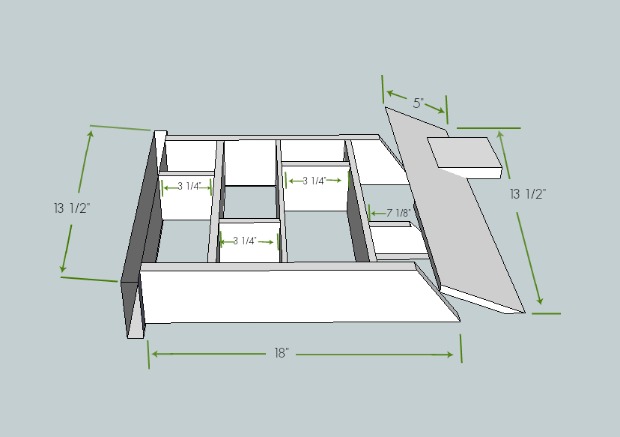
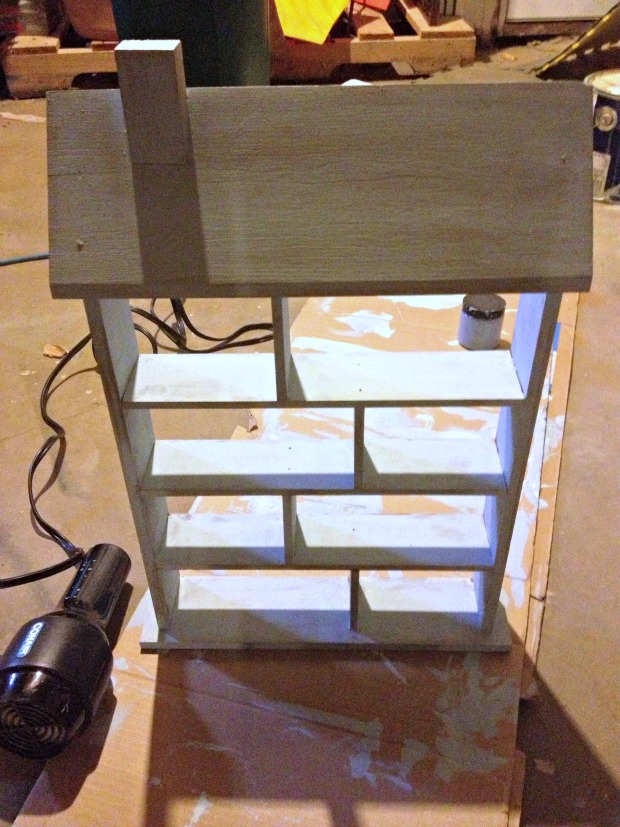
Step 4:
At this point, your house should look like the picture below. All that is left to do is place the back on your house.
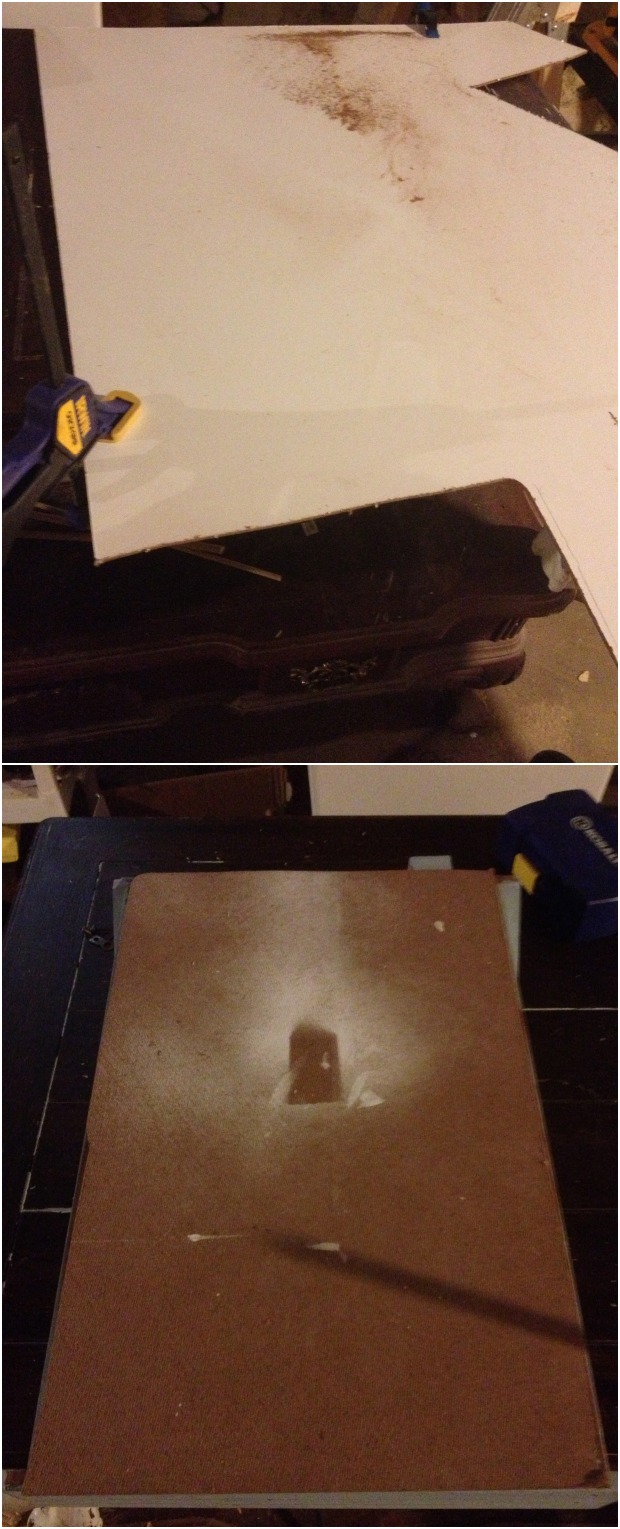
Use your jigsaw to cut out a 12″ x 18″ piece of hardboard and nail it to the back.
Step 5:
Paint or stain your planter and then fill with soil and succulents.
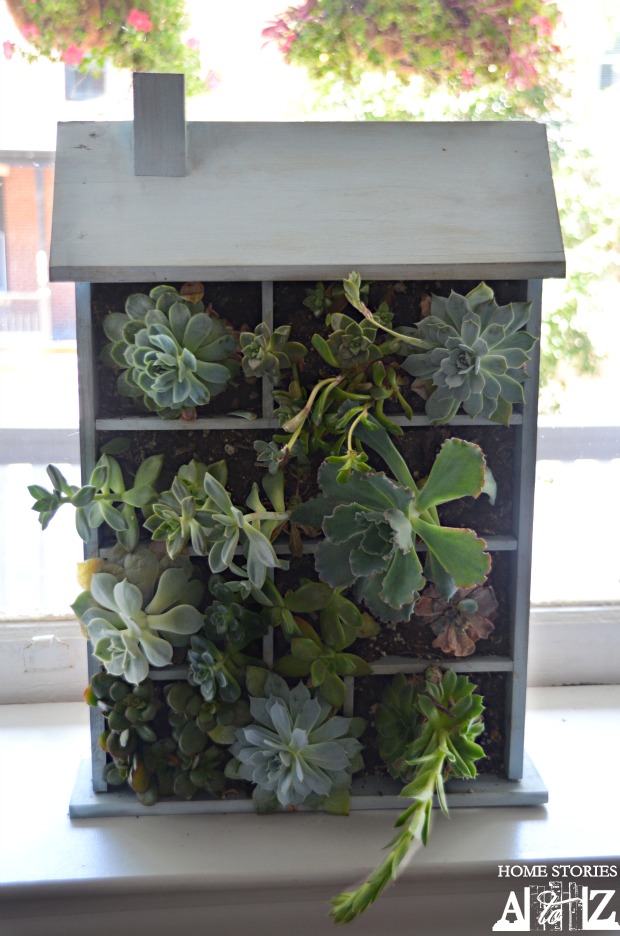
I keep my planter lying flat by my front window so that it gets plenty of sunlight. I water it about once a week and so far it is doing well. You’ll have to let me know if you make your own! If you enjoyed this project, I hope you’ll pin it or share it :).
Thanks to Lowe’s for sponsoring this post. If you want even more inspiration, check out the projects by other Lowe’s Creators or download the Lowe’s Creative Ideas app on the iphone and ipad. Psst. You might see me a few times in the online magazine as well as other bloggers you love.
![]()
Disclosure: I am part of the Lowe’s Creative Team and was provided with a Lowe’s gift card to create this project. All opinions are 100% mine. Thanks for supporting sponsors that allow me to create new content for Home Stories A to Z.

I love the drop cloth curtain ideas!!!! I have a living room long and narrow with 11 windows in it. Would love to use drop cloths – so inexpensive. Any ideas. Thanks for the advice.
What a cute idea! I love this!
Thank you Ashley :).
Love this adorable succulent house!
Thanks so much Katie!
So cute, creative and unique! Will be pinning and sharing on FB!
Heather
Thanks so much for the shout-outs Heather!!
This is super cute! What a unique idea! Pinned it!
Thanks Kimmy!
How do you always come up with such awesome ideas? Not only do you think “outside the box,” but you turn that box into a home…I am once-again impressed! Thanks for sharing.
Thank you! It was a fun project :).