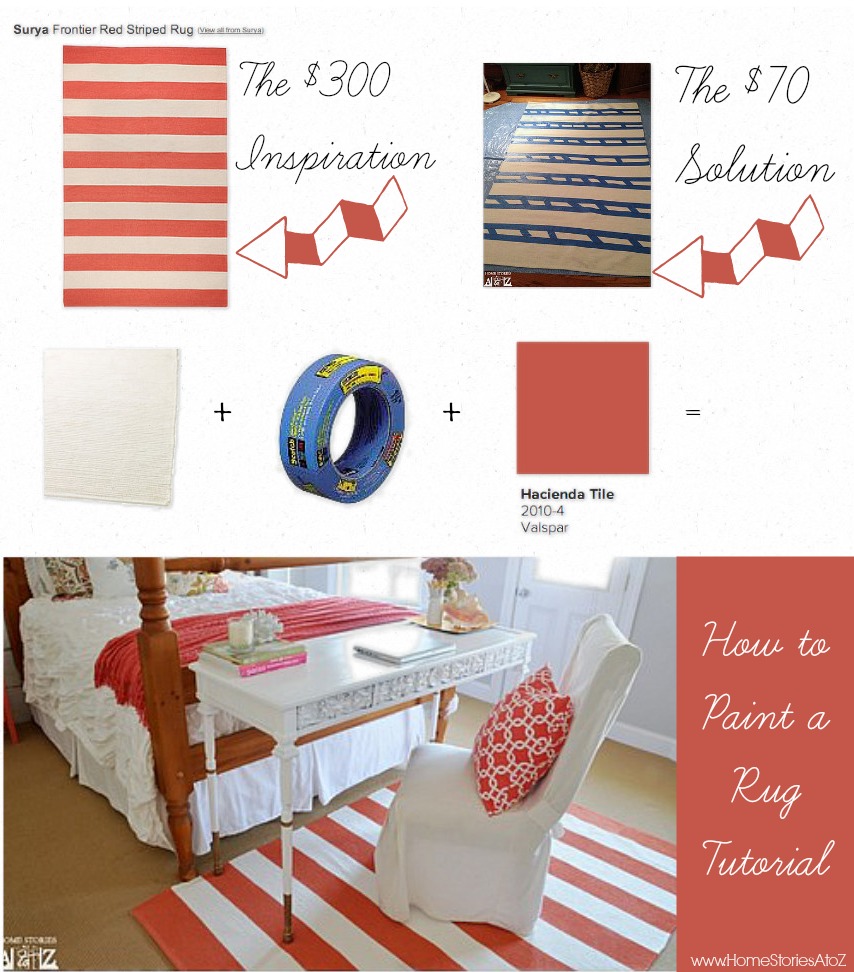
I love all of the painted rugs that our niche has created over the last few years. Two years ago, I did a round-up post of 17 Painted Rug Tutorials and was so inspired by all of the rugs that I ran out and purchased an Ikea Erslev rug in order to make my own. Two years later and I finally got around to painting it! Today I am going to share a step-by-step tutorial on how to paint a rug with stripes in case you would like to create your own.
Supplies needed to paint a rug:
- A flat weave rug. Unfortunately Ikea no longer carries their Erslev rug. A good replacement rug for the Ikea Erslev might be this one or this one that I found on Amazon.
- Painter’s tape
- A small foam paint roller
- Measuring tape and a paint stick
- Smoothing tool (like what you use to smooth wallpaper).
- Quart of latex paint (I used a paint and primer in one in a flat sheen.)
- Fabric protectant spray (optional)
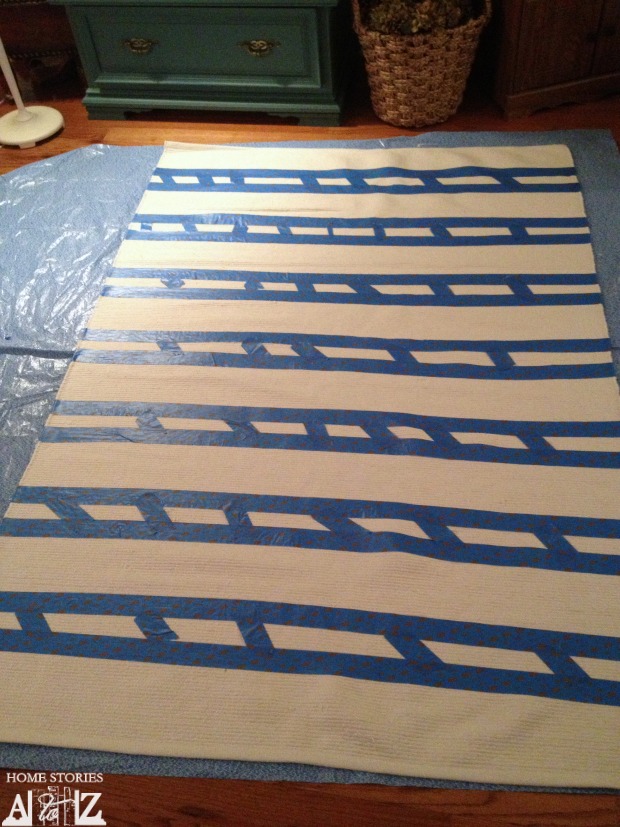
Step 1: Measure and tape off your rug.
My inspiration rug had 15 stripes and I loved the way it looked. I knew that I wanted my rug to begin and end with a colored stripe, and I wanted the stripes to be at least 5 inches thick. I measured the length of my rug which was 78″ and divided that by 15 (the number of stripes I wanted) which gave me 5.2 inches. I measured 5.2 inches on a paint stick and cut the stick to size. I highly recommend doing this so you don’t have to keep pulling out the measuring tape. Simply take your cut paint stick to determine where your tape should go on your rug to create stripes.
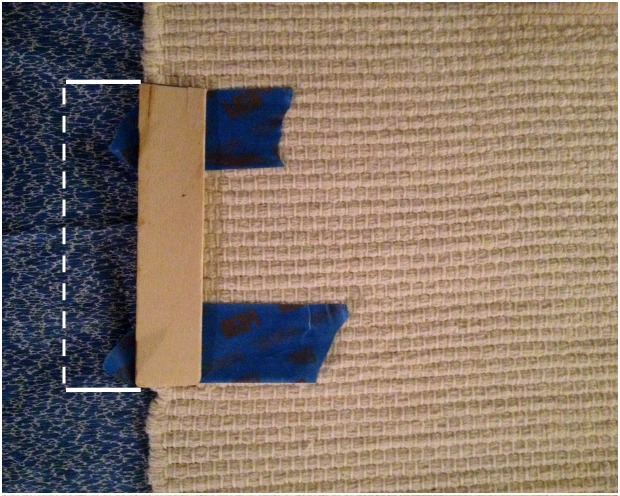
Step 2: Use your cut paint stick to keep your tape lines straight.
I ran my cut paint stick down the rug as I taped to make sure that my tape was staying relatively straight and even.
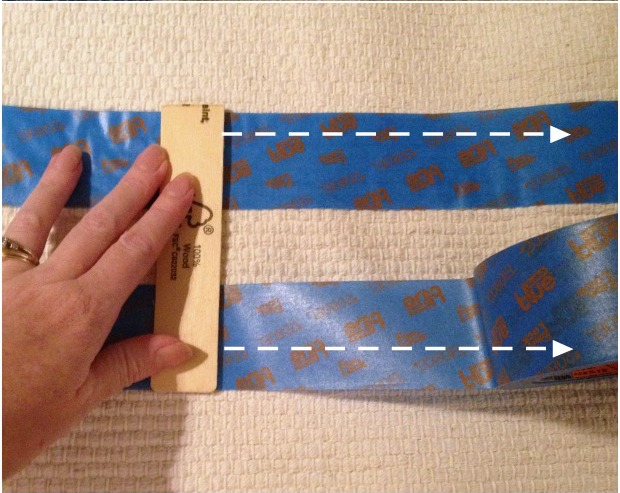
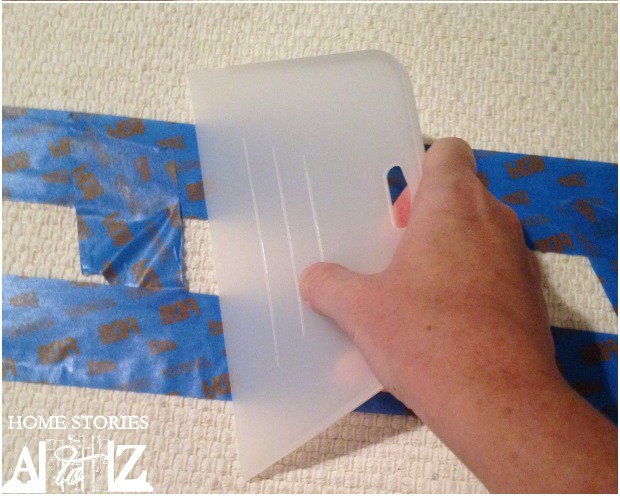
Step 3: Smooth your tape lines down.
Bleeding paint is not an option when you are painting on fabric. It’s important to really smooth down your tape to ensure a clean line. I used a wallpaper smoother to smooth my tape.
Step 4: Place markers with tape over the stripes you will not be painting.
To make life easier on yourself so you don’t have to think while painting,—who wants to have to THINK *wink*—be sure to place “x’s” or some other kind of cue that reminds you which stripes you will not be painting.
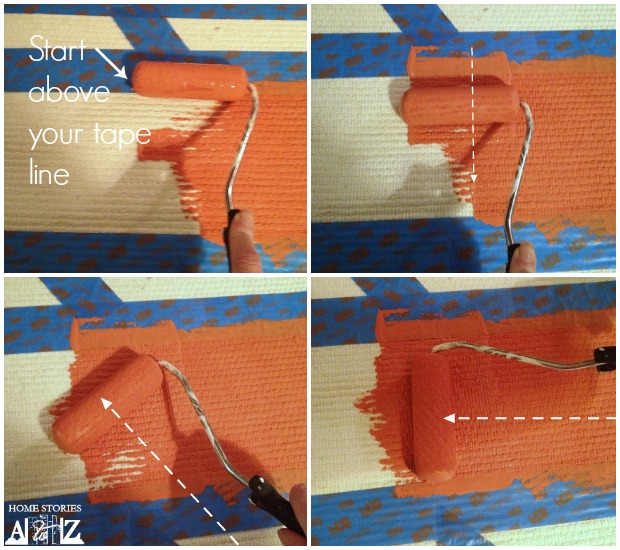
Step 5: Load your foam roller and paint away from your tape lines.
Try not to push any paint into your tape lines. I started on the line and always rolled away from the tape. Paint in all directions to ensure that the rug is fully saturated with paint.
Step 6: Remove your tape, allow to dry, and spray on a fabric protectant spray.
You can remove your tape as you go if you’d like. It’s incredibly fulfilling to see a nice clean stripe! You don’t want to allow your paint to dry on the tape or it may lead to peeling of your paint. Once the rug is dry you can spray it with a fabric protector to protect your hard work. Enjoy your new rug at a fraction of the cost!


Thank you so much for the inspiration!! I’ve had a round outdoor taupe/sage woven rug for a few years and now we are going for a different color scheme and all I want is a bright yellow round rug. I’ve searched the internet for hours trying to find one for under $100 with no luck. I can’t wait to paint it now!!
It’s like you were reading my mind. I’ve been thinking about doing this lately. Thanks for the tip of a good price on Amazon!
Wonderful tutorial! I definitely have a rug that could use a touch up!
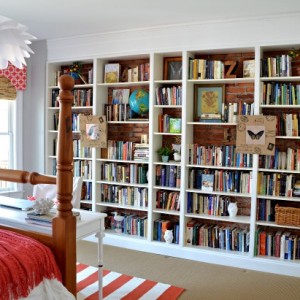
Beth! This room is phenomenal!!! I love it! Great job, girl!
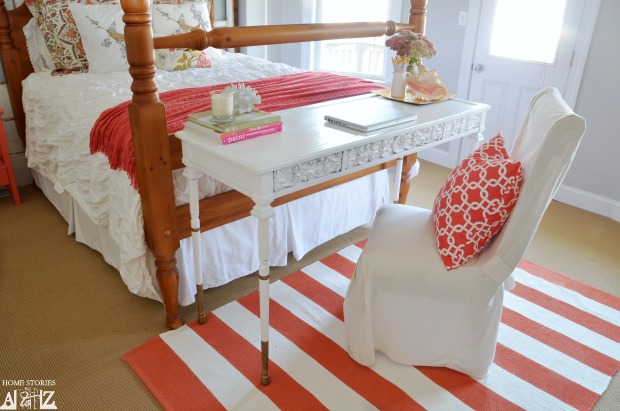
Great rug. I also like the little table. Where did you get it?
The nightstand is something I’ve had forever and just freshened it up with coral spray paint. The desk/console is made from an old coffee table with the legs sawed off and replaced with table legs.
I’m wondering if you can make this rug durable for outside on a patio? I have been looking for a rug for outside that is affordable and have even thought about just painting a “rug’ on the patio. I bookmarked this page.
Hi Kate, yes you can paint a rug and use it outdoors. If you choose an indoor/outdoor rug it will work best; however, if the rug will be on a porch or covered area you can use the fabric protectant to prolong the life of the rug. I know that Jen from Tatertots and Jello has had success in painting an outdoor rug.
Love the color Beth! Actually, I love the whole room – nice work.
Great tutorial! Like I commented in a previous post, I love the color of this rug and the room.
This is something I’ve been considering doing for my dining area! Now to find a plain long dining rug… 🙂
Absolutely gorgeous! I love the color and how affordable the project is!
Now that I don’t have pets or children, I can do this and have it looking fresh for a long time.
This is a great-looking rug! I love the color you picked. What do you mean by fabric protector spray? Is that to protect the paint, or just something you spray on all of your rugs?
I actually spray it on the rugs in my house that get the most wear and tear. This rug shouldn’t get too much abuse but fabric protectant spray (like Scotchguard) just prevent spills and stains from being absorbed and will protect the paint. It’s optional but it will help keep the rug looking clean and bright longer. I used Thompson’s fabric seal on my rug: http://www.homestoriesatoz.com/outdoor/how-to-waterproof-outdoor-items.html
Great, thank you! I’ve got a rug in my kitchen myself that I was wondering how to keep clean (looking).
I love this!! Now the finished rug looks to have white stripes, but the beginning rug looked a natural jute color. Did you do something more than there is in the tutorial?
Thanks so much Melissa! The rug started off as a cream color, and I didn’t paint the cream white. (The tutorial pictures were taken at night with my iPhone so they aren’t the best quality or color representation.) If you wanted to paint the alternating stripes, you would follow the tutorial, remove the tape, allow to dry and then tape off again to protect your colored stripes and add your new color.
I’m loving stripes right now! Thanks for sharing this awesome idea!
-Amber
Great tutorial! I am going to have to try this one day.
Super cute Beth! I have yet to try this one. The bed looks so pretty in there!
Fancy seeing you over here girl! Thanks for dropping by :).