Summer is drawing to a close, and in just a few short weeks my boys will be back in school. I have really mixed feelings about them returning so soon. My husband has summers off, and our family has had an AMAZING time together these past few months. I will really miss them! And yet…I’m definitely looking forward to reclaiming my work days as my own.

In preparation for all of those upcoming dreaded homework hours, today I whipped up a DIY lazy susan homework caddy. My boys do their homework at the kitchen table, so I currently have a kitchen cabinet and portion of a closet devoted to the boys’ homework supplies and craft supplies. However, no matter how hard I try to teach them to keep these spaces organized, they inevitably end up a disaster area and supplies magically disappear into the black hole of the cabinet. Our system wasn’t working. I am very optimistic that our new and improved lazy susan system will save my sanity this year and cut down on the, “Mommy, I can’t find _______,” conversations. Well, a mother can hope & dream anyhow… 🙂
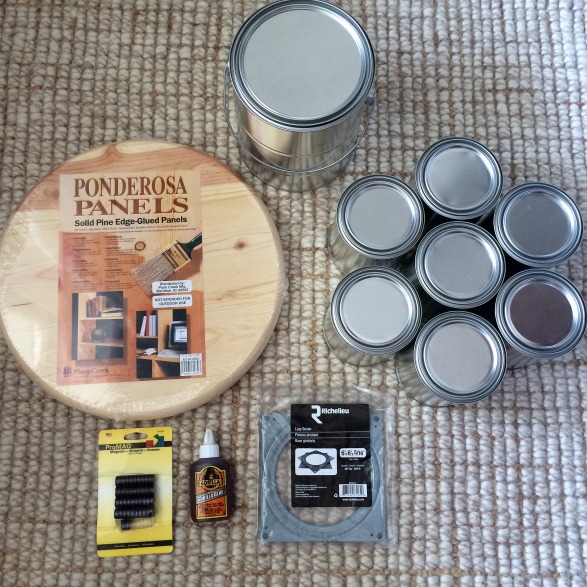
Supplies Needed for DIY Lazy Susan
- 1 1″x15″x15″ wood round
- 1 Richelieu 6-in drawer slide (lazy susan hardware)
- 7 1 quart empty paint cans
- 1 Valspar gallon empty paint can
- Gorilla glue original
- Magnets
- Drill
- 4 wood screws
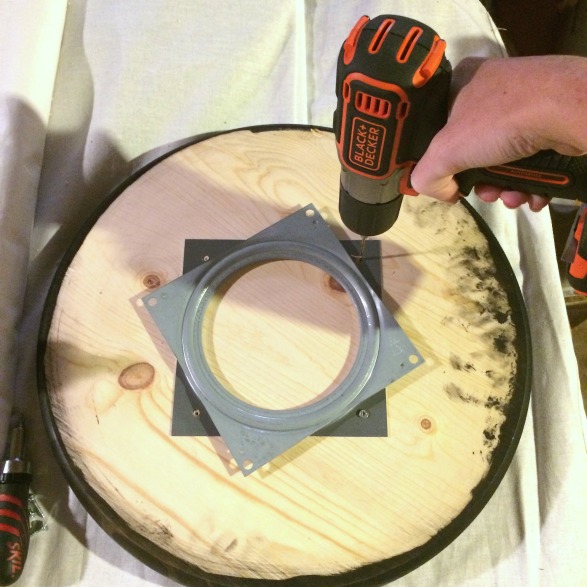
Step 1: Attach the Lazy Susan Hardware
I first stained my wood round with Rustoleum Ebony Wood Stain. This step is completely optional. After the stain was dry, I attached my lazy susan hardware with four small wood screws.
Step 2: Glue Magnets to Lazy Susan with Gorilla Glue
I didn’t want to permanently attach the metal tins to the board. It was important to me that the boys could remove just one bucket if needed. I thought I was a genius by coming up with a magnet solution! But a quick search on Pinterest revealed that my friend Beckie from Infarrantly Creative is also a genius. She did a similar treatment on a similar project!
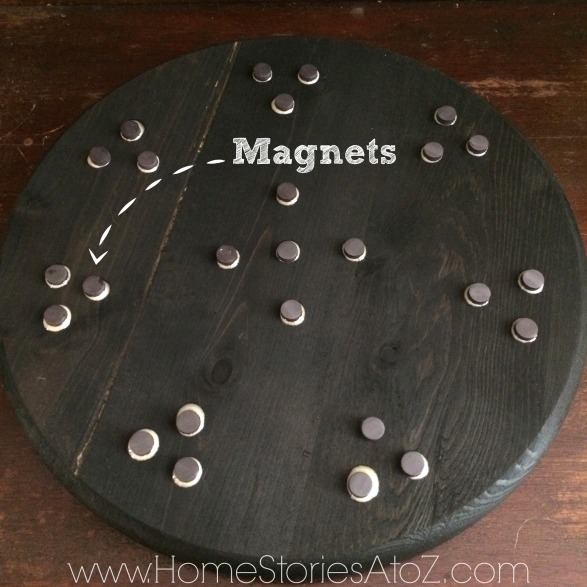
The magnets are strong enough to hold the metal tins in place when transporting the lazy susan, but each container can easily be removed.

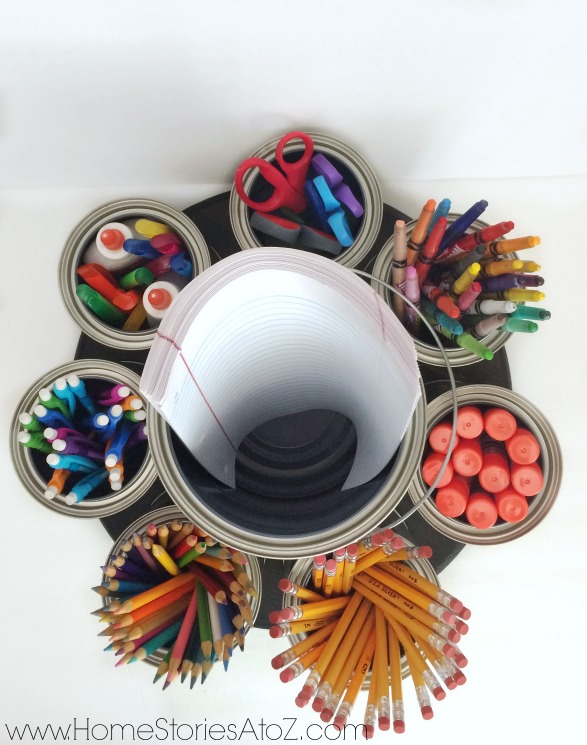
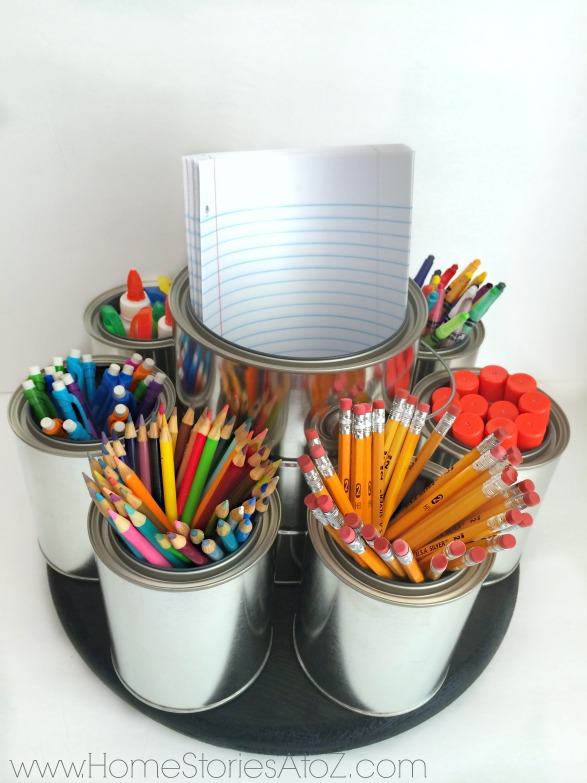
Step 3: Place Metal Tins on Lazy Susan and Fill
I chose to keep my metal tins in their lovely nakey form. You could paint them, cover them with scrapbook paper, label them with washi tape, etc. if you need more bling in your life. I chose the school supplies that I know both of my boys use most often: scissors, twistable crayons, glue sticks, pencils, colored pencils, mechanical pencils, Elmer’s glue and highlighters. In the center, I placed a ream of wide-ruled paper. I will also add a mechanical pencil sharpener to the center.
Okay dreaded homework hours! We are ready for you. Bring it.
Thanks for stopping by to check out my project. You can find many more DIY project ideas at Lowe’s Creative Ideas and also by following Lowe’s on Instagram, and Pinterest. I really love the Creative Ideas magazine and app! You can find me featured in there occasionally. Sign up for free by clicking the picture below.
![]()
Disclosure: I am a member of the Lowe’s Creative Ideas Blogger Network. I was given a gift card to complete this challenge. Ideas, tutorials, opinions are my own.


What was the total cost of this project?
This is really pretty and such a good idea and on a Lazy Susan, and then we can turn to which can we need to get the writing item. Thanks for the idea!
This is so creative and awesome! The magnets on the bottom were a brilliant idea. Thanks for sharing 🙂
Genius with the magnets on the bottom! I love it!
Thanks so much Brenna!
Just the kind of craft/school supply solution I was looking for! Brilliant!
Oh the dreams we dream in hopes that homework hour {or hours!} will be a less stressful time. I am making one of these for my three!
Pinning! I would love for you to share this project at my Show-Licious Craft and Recipe Party. We go live on Saturday morning at 8:00 EST.
~ Ashley
this is so cute!!! and it looks so easy to do (: I hope you enjoy what you have left of your summer with your boys!!!!
Thank you Brittany!