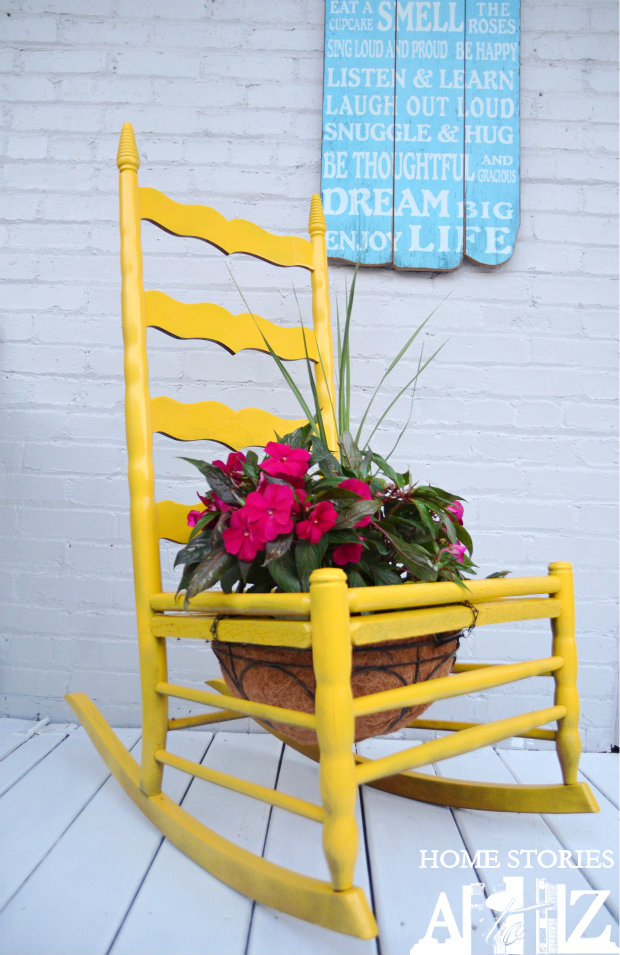
We are having the most glorious spring weather right now which has me finding every excuse possible to spend time outdoors! I’m not much of a gardner, but I adore flowers and can typically keep most things alive in a container (as long as I remember to water them *wink*). I have been busy sprucing up my outdoor living spaces and recently created a chair planter from an old rocking chair. Today I am going to teach you step-by-step how to make a chair planter of your own. Are you ready?
Here is what you will need:
- Old chair (I bought this old rocking chair for $10 on Craigslist.)
- Cleaner and rags
- Minwax Wood Filler
- Fine-grit sandpaper
- Tack cloth
- Valspar Paint + Primer Spray Paint or Rustoleum Spray Paint
- Hanging planter with coconut liner
- Pliers
- Plant
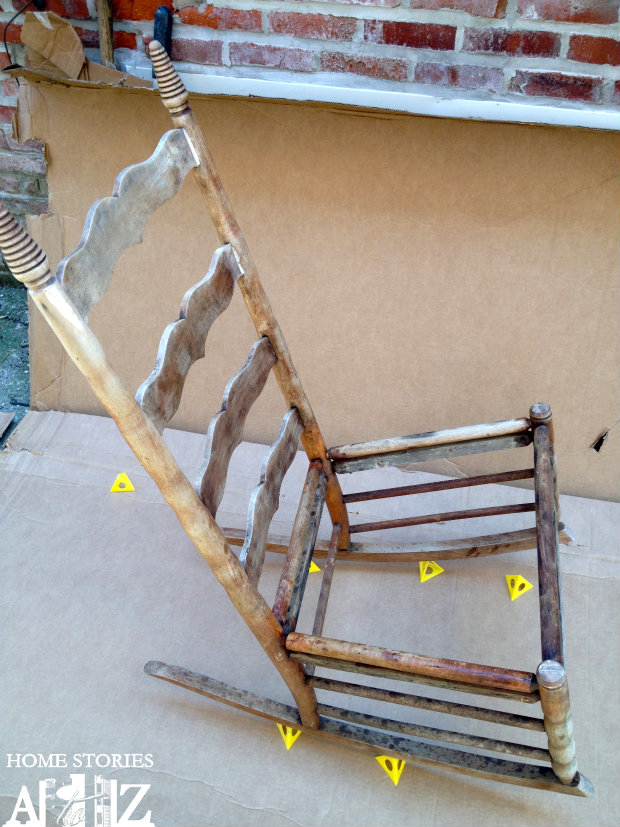
Below is a picture of what my chair looked like in it’s before state. It was in pretty sad shape.
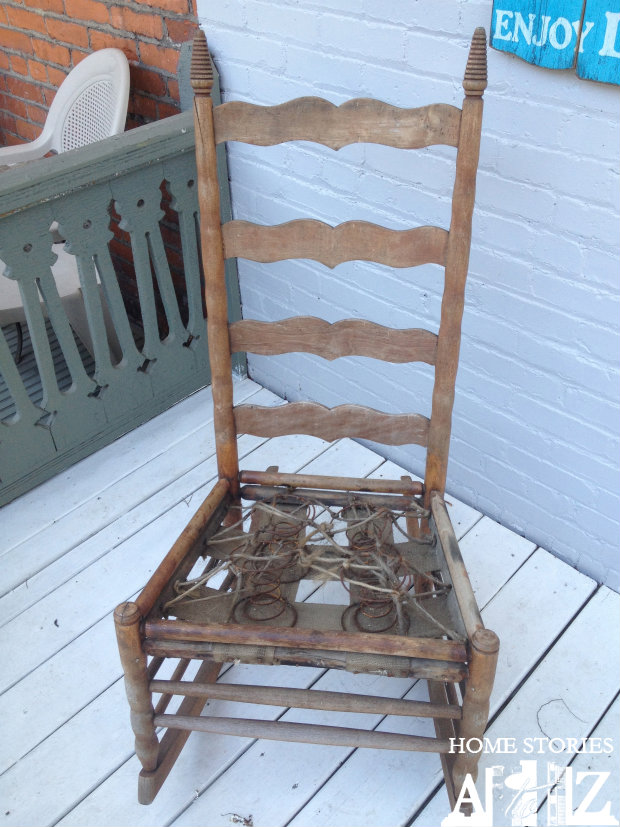
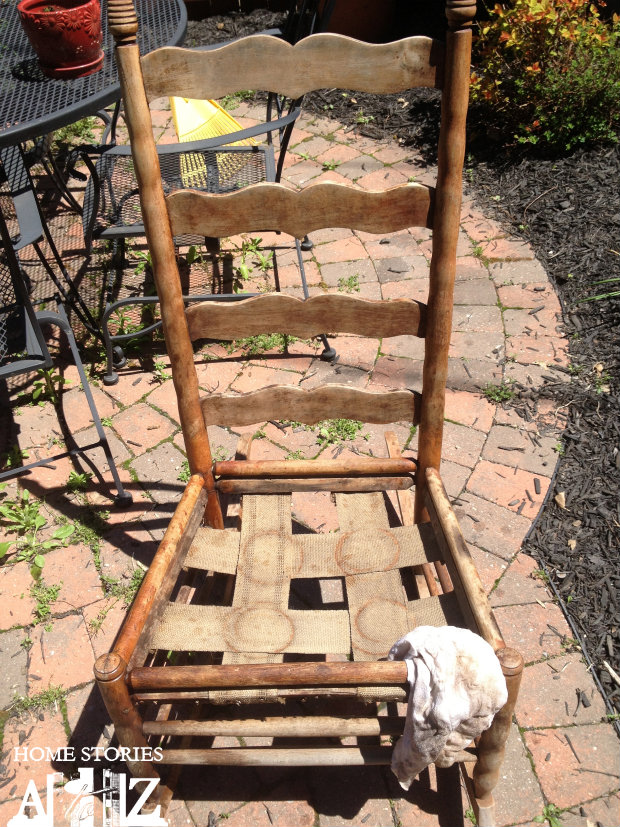
Step 1: Remove all upholstery, springs, nails, tacks, etc. and thoroughly clean your chair. I used an outdoor cleaner I had on hand. I allowed the chair to dry and then used a tack cloth to remove dust.
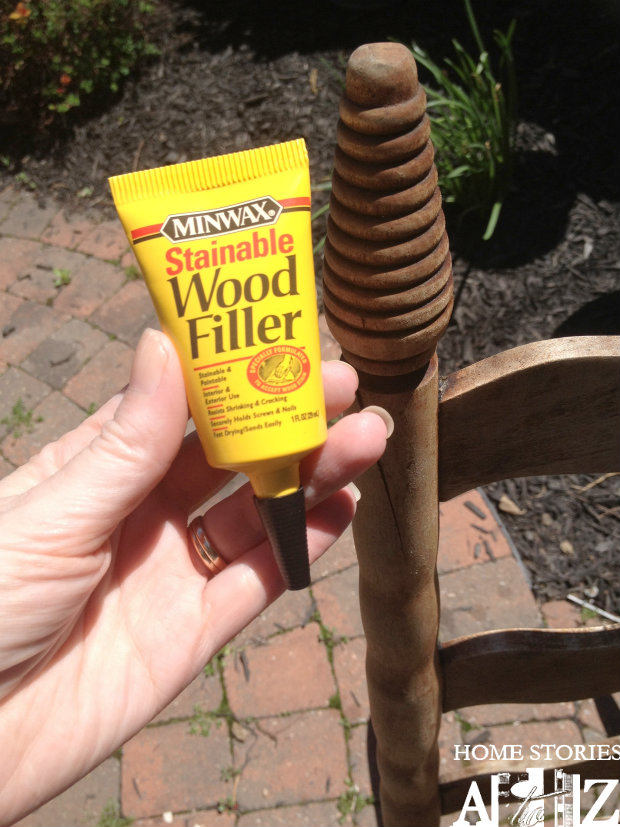
Step 2: Fill any nail holes or cracks with wood filler, allow to dry, and then sand smooth.
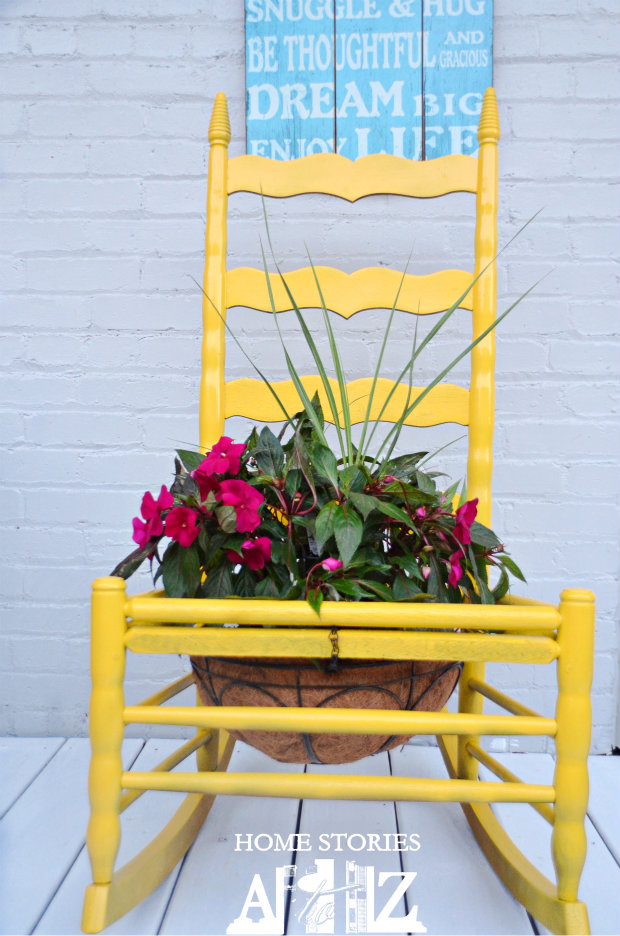
Step 3: Paint chair with spray paint plus primer. I used Valspar’s Gold Abundance Spray Paint + Primer. I’ve used other Valspar spray paints in the past and really like them, but I have to say I wasn’t a fan of the yellow. The coverage was poor and the paint splattered quite a bit. It might have just been a faulty can because I’ve used a ton of other colors and never had any trouble. Once dry, I had to sand off the splatters and go over it with a coat of Rustoleum in a similar shade of yellow.
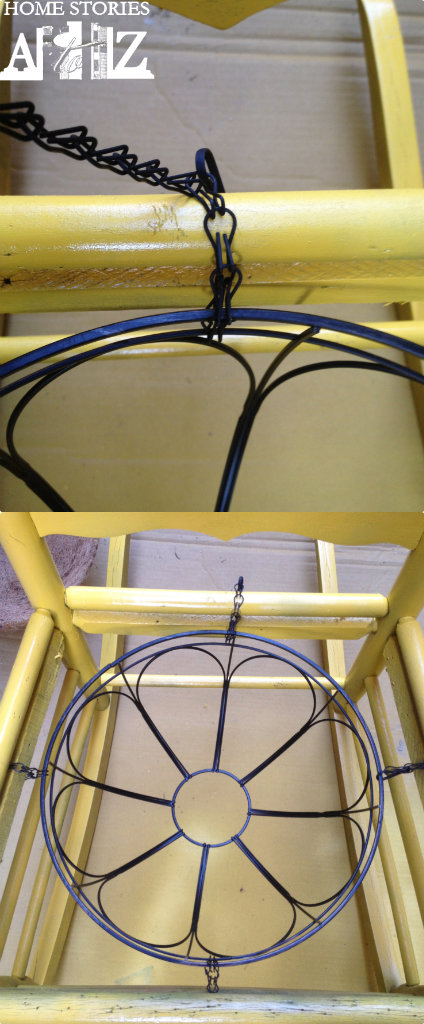
Step 4: Attach a hanging basket to the center of your chair. I used the chain that came with the basket to attach the basket to the chair. Simply use pliers to release the extra chain links and shorten the chain to the desired length. See the pictures below to get a better idea of how the basket is attached.
Step 5: Plant your flowers or plants in your chair and don’t forget to water. Enjoy!
For even more ideas, visit Lowes Creative Ideas and follow along with Lowe’s on Pinterest or on Instagram. You can also sign up to receive the free Creative Ideas Magazine, which is full of all kinds of ideas & inspiration! There’s also a magazine app for you to download.
![]()
Disclosure: I am a member of the Lowe’s Creative Ideas Creators & Influencers Network and receive a Lowe’s gift card to complete my projects. However, all ideas, opinions, & experiences are entirely my own.


Love your stuff
Thank you Judith!
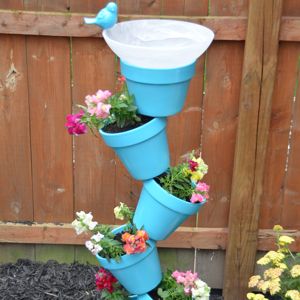
Followed a link to the Garden tower planter/bird bath from DIY Showoff and boy am I glad I did! The tutorial for the planter was great (you had me at “boob light fixture, that is what I call them!) but then I saw this project. As it would happen I have two adorable chairs I got at a yard sale ($7 for both) that I planned on making planters out of (old cane seats busted out) but was not sure how to pull it off, this is it! Simple and I already have everything at home, just have to decide what color to paint them!. Thanks, I am an instant fan!
Roeshel is a good friend :). I’m glad you hopped on over and thanks so much for the sweet comment. Good luck on your chair project and send me a pic when you’re finished. I’d love to see how they turn out!
So cute and fresh, Beth! I think I need one!
xo Heidi
This is BY FAR the easiest and best tutorial I have seen for this! Genius 🙂
very cute 🙂
What a great idea! I love it! The yellow is gorgeous!
Leslie
Lovely project! I did a similar thing last year. If you’d like to see, http://basicorganization.wordpress.com/2012/06/15/i-found-a-curbside-treasure/. I like that I can move the chairs around in the yard – sun, shade, whatever suits me. I have an old wooden rocker that I might “redo” this year and use more color, like you did. Thanks.
nice! I went over to take a peek.