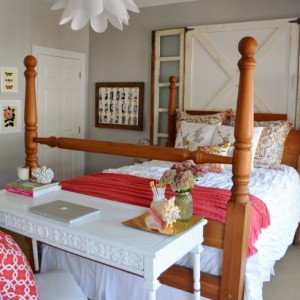
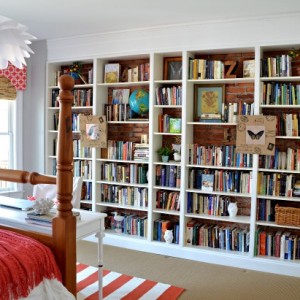
I have been sprucing up our guest bedroom, and I am very close to the big reveal! The bookshelves are completely built and styled, the rug has been painted, the desk is rebuilt, the window cornices are almost done, and the spray paint on some furniture is drying. I still need to install the blinds and change out a light fixture—and then of course photograph it all and write up the posts but we are in the final haul! I missed you guys, so thought I’d pop in quickly to give you some quick gallery-wall picture hanging tips.
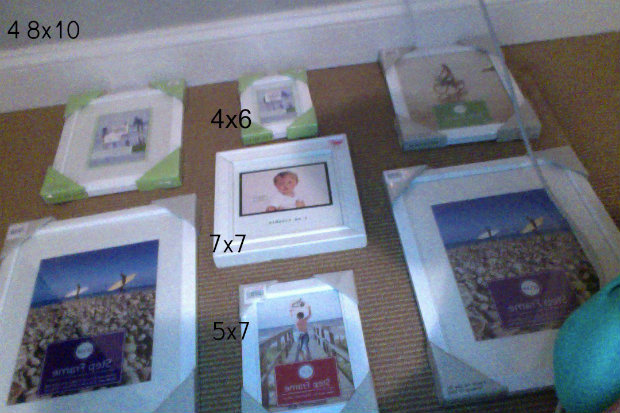
Step 1: Gather your frames and arrange them on the floor.
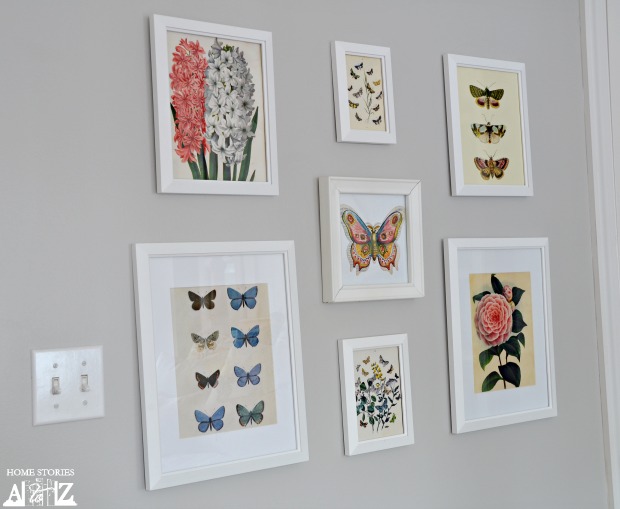
I knew I wanted to create a botanical gallery wall in this room. I bought a bunch of inexpensive frames from a store we have here called the Christmas Tree Shop. It’s a great resource for cheap frames. Other places to look for cheap frames are Ollies, Ikea and Big Lots. You can also find frames at second hand stores. I looked at GoodWill first, but the prices were comparable to retail and I would have had to use primer and spray paint to get the look I wanted. Next, start playing with your frames on the floor until you achieve the look you want.
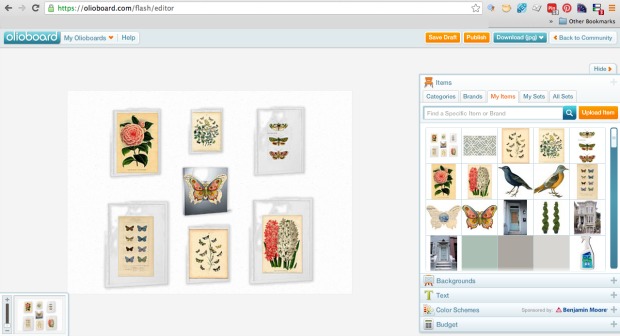
Step 2: Use Olioboard to choose your photo layout.
I love to use Olioboard to “try on” all types of design ideas before I implement them. I knew I wanted to use free vintage botanical images from The Graphics Fairy, but I wasn’t sure which ones. Grabbing the images and popping them into my virtual frames helped solidify my decision in a snap!
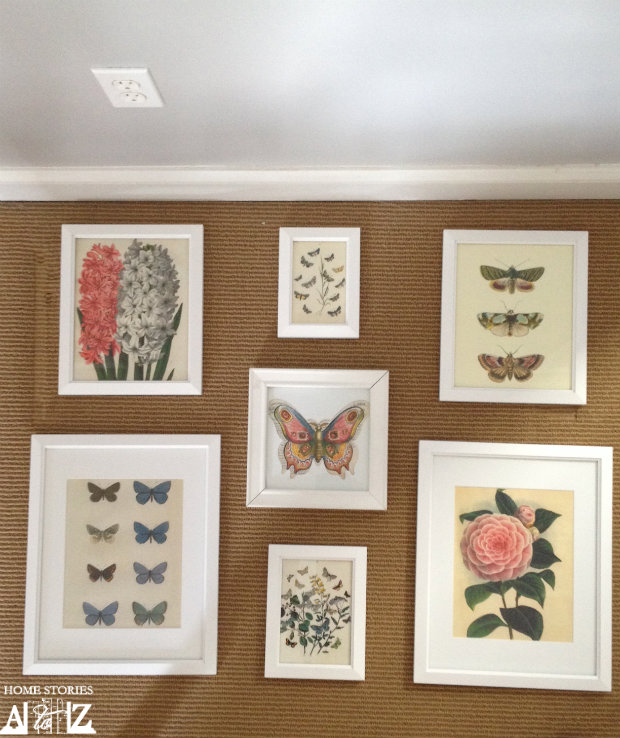
Step 3: Print out your photos, place in frames, and arrange.
I used my Laserjet printer to print out my artwork and placed them in my frames. Next, I took a picture of how I wanted my gallery wall to look.
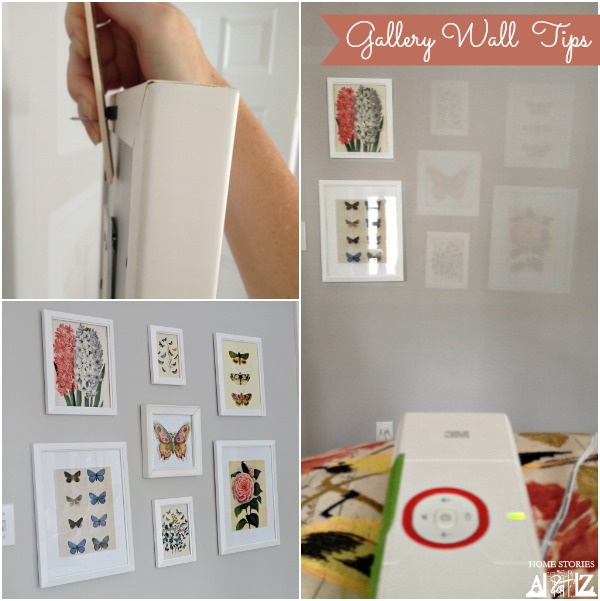
Step 4: Project your gallery wall image onto your wall or use paper cut-outs.
I own a 3M Mobile Projector and I LOVE this thing. I had no idea what good use we would get out of it when we received it. Besides using it for family fun to watch movies on the wall or on an outdoor screen, I also use it to project any image from my computer onto an object. I used my 3M projector to create the art on my cornhole toss boards and also on the canvas art I did for the dining hall makeover. Here you can see I am using it to project my gallery wall onto the wall! It made hanging my frames so incredibly easy. Granted, I wasn’t a perfectionist when I snapped the picture I used for my wall, so I had to make my own adjustments when hanging the camellia print. If you don’t have a projector, you could of course trace butcher paper, cut it out, and hang the butcher paper with painter’s tape before hanging your frames to the wall. But if you DO have a projector, I highly recommend this little trick!

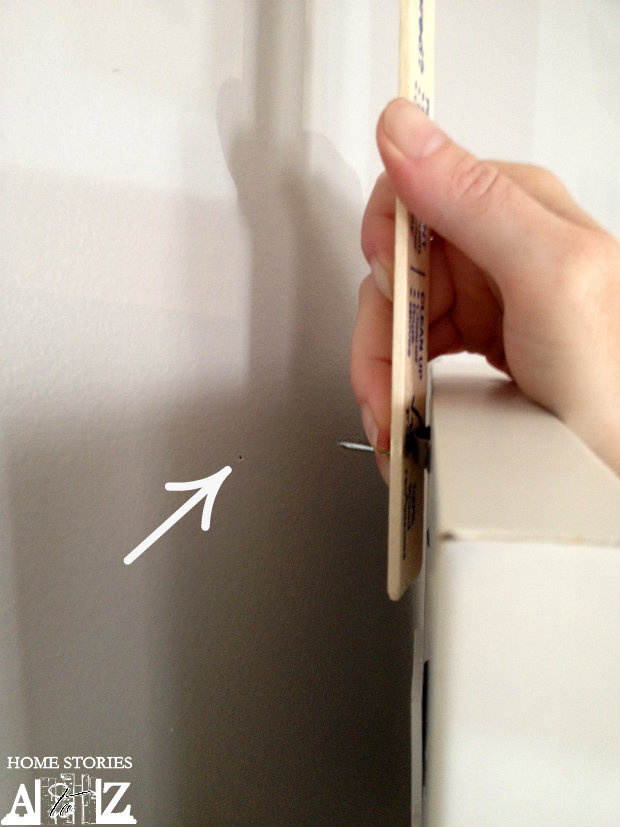
Step 5: Use a nail through a paint stick to act as a picture hanging guide.
There is nothing more annoying than guesstimating where to place your nail. This trick is virtually fool proof. Take a brad nail and hammer it gently through an end of a paint stick. Hook your picture onto the nailhead and place your picture where you want it on the wall. Tap or push the frame firmly to create a pinprick on the wall. In the picture below you can see where my tiny nail hole is located. Now I know exactly where to place my nail!
I hope some of these tips and tricks prove helpful to you when hanging your own artwork and family photo gallery walls. Now I need to get back to work and finish this room!

Those butterfly prints are so cool! Im loving the paint stick tip. If I ever willingly put a hole in my wall, ill be sure to try that method! For now I’m sticking with my command picture strips. I like that the velcro lets me make slight adjustments and keeps them from sliding out of place 🙂
Really cute! My hubby just brought 13 watercolors back from a deployment (currently being framed and matted) and we will be doing a gallery wall in our master bedroom in the next week. I love gallery walls. We already have a few!