 When I originally posted, I was feeling lazy and didn’t explain how I put together the graphics for the pillow. I will try to remedy that today! But first, let us admire my creations, shall we?

Back of pillow

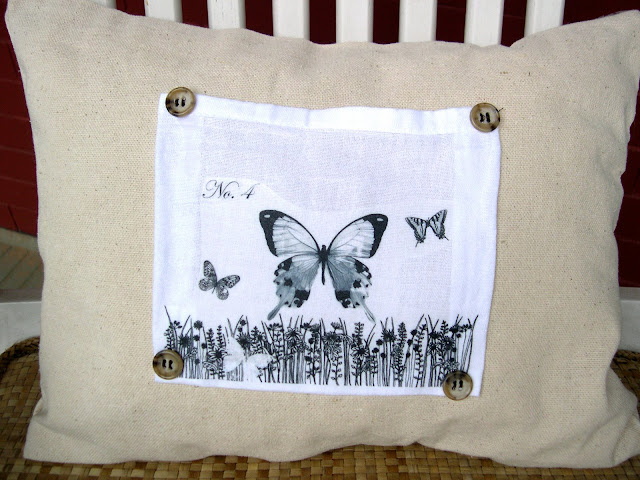
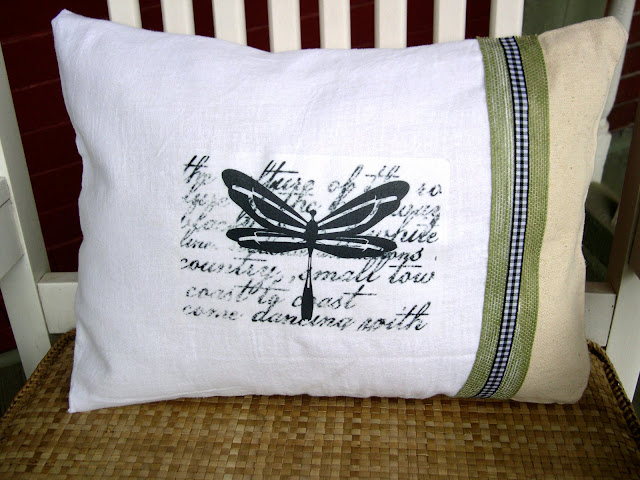
Front of pillow
Back of pillow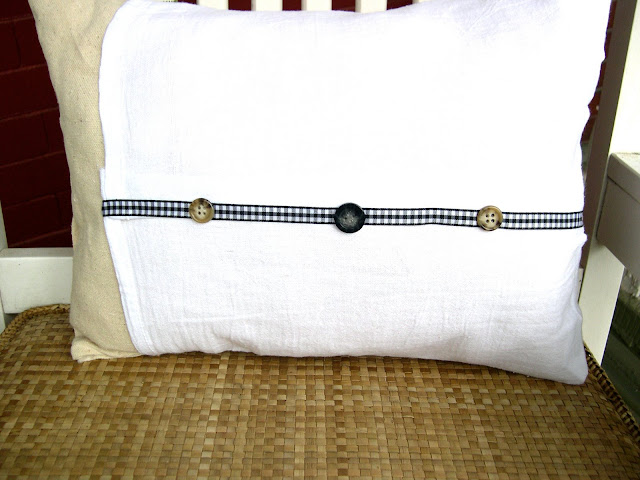


Pillow Construction Tutorial
- Drop cloth
- Tea towel (optional)
- Avery T-Shirt transfers ($7 at Walmart)
- Stitch Witchery (hem tape)
- Fabric glue
- Ribbon, buttons, fringe, bling (optional)
- Old pillow or pillow form
 Step 1: Iron the material to smooth out any wrinkles in the fabric. Canvas requires a lot of steam, so steam away and get a facial while you’re at it.
 Step 2: Measure the pillow that you want to cover and add about 2 inches in all directions. For example, if your pillow is 15×15 you will measure out an 19×19 inch square.
 Step 3: Once you have cut your two squares, place hem tape between the seams and iron away. Experience the facial once again!
 Step 4: While ironing on top of your counter, have your 2 yr old abscond your camera and take pictures of you.
 Step 5: Seal up three sides of your pillow with hem tape and turn it right side out. You are now ready to put on some bling! You can print out any image of your choice onto your transfer paper and iron it directly to your pillow. I like to use tea towels instead to add a little extra somethin’-somethin’.
  Step 6: Use fabric glue to glue on your iron-on, ribbon, and buttons. Of course you can sew this part by hand, but if you’re
 lazy short on time fabric glue works too! You’re almost done, so be sure to admire you’re work at this point…and your toes. Step 7: Tuck and fold the bottom edge of your pillow like a present and use fabric glue to secure. Look at how cute it is!
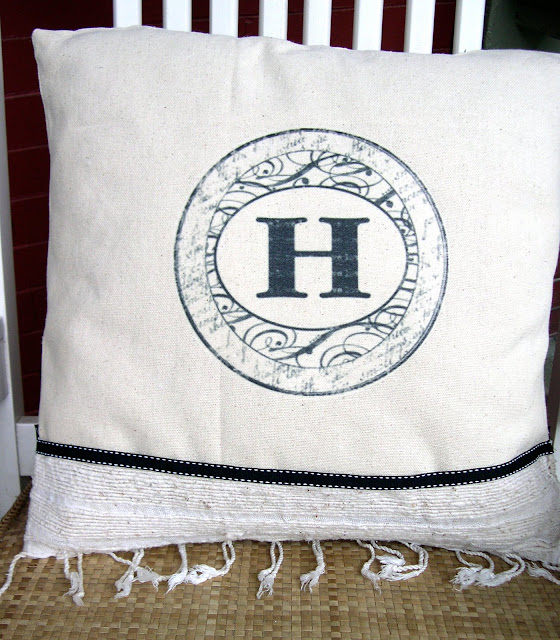
 Step 8: Worship the beauty of your handiwork with lots of praise, admiration, and paparazzi . This pillow is for my friend’s bedroom, but seeing how cute it looks on my own bed I’m now wishing that my last name began with W. Michaela requested that I leave the top open as a little pocket. Perhaps she and her husband can use it to exchange love notes.


Now go make some pillows!
Related Posts

Love your pillows! I know this is an older post but I just found it. I checked out scrapblog.com, and noticed that they just merged with mix book. Can you still print out images from mix book or do you use another site now?
Hi Lisa, yes, sadly Scrapblog went out of business years ago. I recommend using The Graphics Fairy for free graphics. If you search the term in google her site will come up. Thanks for visiting me and good luck on making some cute pillows!
Hi Beth! I got that seat cushion done and linked back here for more inspiration for my readers. Thanks again for the great tutorial : )
No Sew Custom Cushions by Simply Cottage Love
Ah! Thanks so much for this tutorial. I have been wanting to recover a seat cushion for my front porch rocker with drop cloth canvas, but wasn’t sure that the stitch witchery would be strong enough to work with the canvas. Now I can go forth with confidence ; )… or at least know that SOMEBODY out there can do it !
Yay! No sew pillows. Love the look. Pinned and stumbled.
Saved By Love Creations
I loved this tutorial so much it gave me the inspiration for our Christmas stockings this year. I never thought of using painters canvas until I saw your tutorial. I can't wait to make pillows! I included my link to the tutorial I did on the stockings. Thanks so much for the inspiration!
http://www.myvintagebliss.com/2010/12/stockings-were-hung-by-chimney-with.html#links
Very fun! Thanks for the great ideas. My kitchen island has become Pillow Central and anyone who wants to eat in the next day or two better stay clear. :o)
http://ldsmomtomany.blogspot.com/2010/10/pottery-barn-knock-off-pillows-and.html
I found the "H" on Scrapblog.com . Thanks for stopping by!
Cheryl, I think I just googled "french bee" for that one but it was so long ago at this point I don't remember.
Hi Beth! Your tutorial is AWESOME and I subscribed to Scrapblog!!! I can't wait to use it and thank you for opening up a whole other world to me. I wanted to know where you found the French bee, I can't find it on there. Keep up the great work!
AWESOME!!!
Lou Cinda 🙂
Best part of this post: "Step 4: While ironing on top of your counter, have your 2 yr old abscond your camera and take pictures of you"! too funny! (and the pillows are great too!)
Great Scrapblog tutorial! I now have zillions of ideas of how I can utilize this. Thank-you, thank-you, thank-you!
Sue in WA
What a great post! Those pillows are awesome!
THose are great pillows! I think I could tackle those!
Ohhh – I love! This is another project to add to the list!
Those pillows look just like the Ballard ones, even better!! Thanks for sharing.
Wonderful tutorial! You have a great speaking presense!
No sew pillow. I could do that. 🙂
Thanks Beth!
Donna
http://www.funkyjunkinteriors.blogspot.com/
So cute! Thanks for the great tutorial!!
Great tutorial. Thanks so much, coming from a person who cannot sew…yet. (I have determined that I am going to learn soon)
I so love your tutorials. You make it sound so easy-I believe that I can do it. You are so great like that! I also have to tell you thank you for introducing me to scrap blog. I have been using since October and I so love it! So-thank you!
As always-thanks for the inspiration!
You rock!
Your pillows are darling… LOVE EM'. And I so do not sew, so that's even better. 😉 I'm going to put this on the top of my fun projects to-do list.
I had no idea the iron-on transfer paper was so cheap! I've avoided any projects involving the need to iron anything on, thinking this stuff was expensive. Thanks for the tutorial. I see some really cute stuff in my future. 🙂
Love these pillows, Beth! I think the butterfly pillow is my favorite. Way too cute!!
I love Scrapblog! I used their site when I created my old banner. I hated my old "freebie" background, but using Scrapblog for my banner made me feel like I had something custom. 🙂 It's very easy to use. Great pillows!!!!
I haven't been to Big Lots in awhile {it's a planned trip destination}, but I should go and get that dropcloth. I would love to try doing these pillows because I love everything Ballards, but I love yours even more because, well, you can't beat the price! I love the W one you made for your friend. I have some P iron-ons that I may be able to adapt to this {actually, I'd just be skipping the Scrap Blog step}. This is one for my Blog Projects binder!
THANK you millions for the Scrap Blog tute. I have just tried ScrapBlog AND ♥♥ IT. Your pillows are so cute, might make one as well, lol.
Many hugs and thanks again from Marian from the Netherlands
You're the Queen Mother of Creativity. Henceforth to be known as QMC.
This is such a great 'how to' post…. When will you begin to take custom orders or perhaps have an etsy shop. Your talent cries out for it and your blog gives you a captive audience. Oh, and I buy because I can't make.
I know which pillow is my favorite – I am the proud owner of the 'W' pillow – and it happily hangs out on my bed! Thanks again Beth!
I am so loving the french bee pillow. You make it look so easy. I can't wait to try it out myself!
Ooooh, Beth, your pillows are much dreamier! I'm in love with pillows. Ahhhh, fluffery pillows.
That was an awesome tutorial Beth!! Love, love, love the French Bee!! That would look great on my black rockers on my front porch. Gotta love Big Lots! One question, what kind of tea towel and where did you get them? Thanks dear!
I love these!! I want to spruce up my balcony furniture, and pillows like these would be adorable!! Thanks for the tut!!
You did a great job! Thanks for the tutorial!
yeay! i love the tutorial. I've been curious about this scrapblog thing and I'm gonna play around with it a bit this weekend. p.s. I don't know why, but I love your voice 🙂
Beth, those are some cute, cute pillows! Great job with them.
Thanks for the scrapblog tutorial…now you have me curious how to make a new background for my blog & bloggy buttons….I'll play around with it a little this weekend but be warned I may be e-mailing you with questions 🙂
Have a good weekend & I'm thinking about you! Enjoy family.
Wow – I love these! Not sure which one is my favorite because they are all gorgeous! I am glad to be back to blog land – I have so much to catch up on…I hope you don't have too many amazing projects like these…hee, hee – I still have a few of your inspired creations on my to do already! Have a great weekend!
Cute! Adorable! We have yards and yards of painters canvas, but I never seem to think of using it. Gotta give it a try!
I'm drooling now…your pillows are sooooo stinkin cute…I must get to work and make me some! Come on over and check out my CASH GIVEAWAY…I think you will like it:)
Blessings,
Linda
THANK YOU for the scrapblog tutorial, I'm going to play around with it this weekend. Isn't fabric glue amazing !?