
For now, it’s back to my kitchen lighting. The burlap basket thingy I hung up there just wasn’t working for me. I thought it was a great idea, but it wasn’t. Thank you for being kind and not telling me! I went to my inspiration file and found all of these beckoning to me…
 |
| CreateGirl |
 |
| Coastal Living |
 |
| Small But Mighty Interiors |
 |
| Shine |
 |
| Isabella and Max |
Drum shades in the kitchen! I love it! You can find them for less than $10 (if you’re clever), and you can cover them in fabric to add a pop of color. Voila, instant cute lighting update!
So let’s review all the many befores!
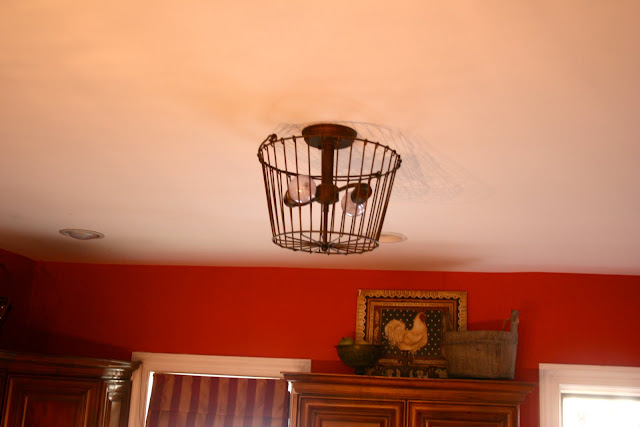
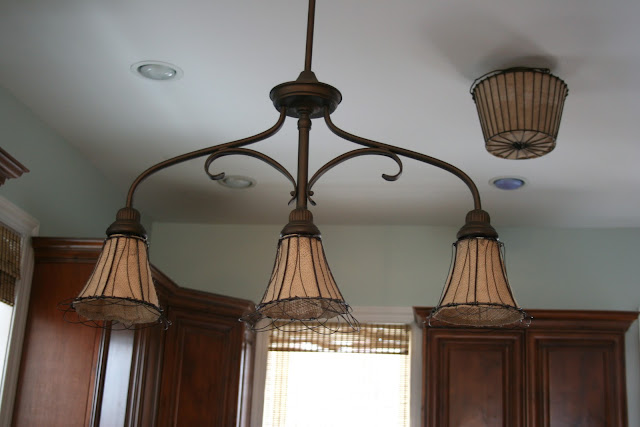
1. Here you can see the (awful red kitchen) Tiffany-style pendant and my first attempt at making skeleton/cage lights (which were originally Tiffany style globes).

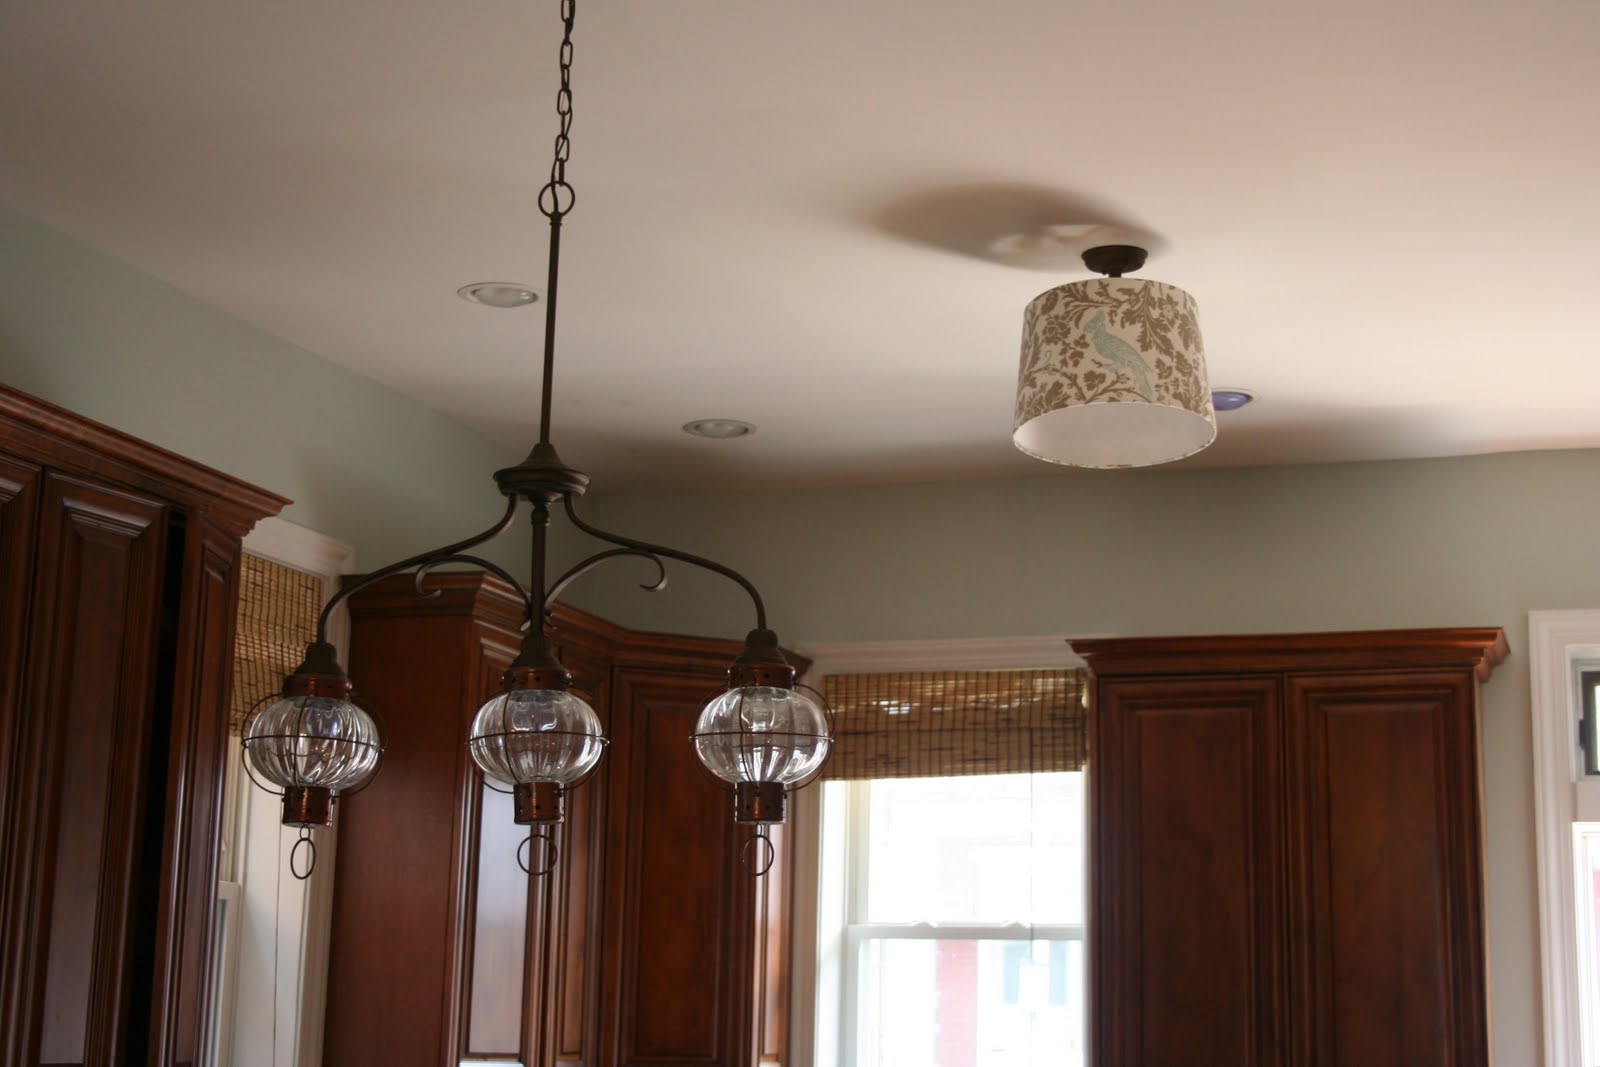
4. And here we are today! Did I finally get it right? I think as right as a girl can get jerry rigging her lights for the third time! If you missed the post about the lantern lights, click here to see how I did those.
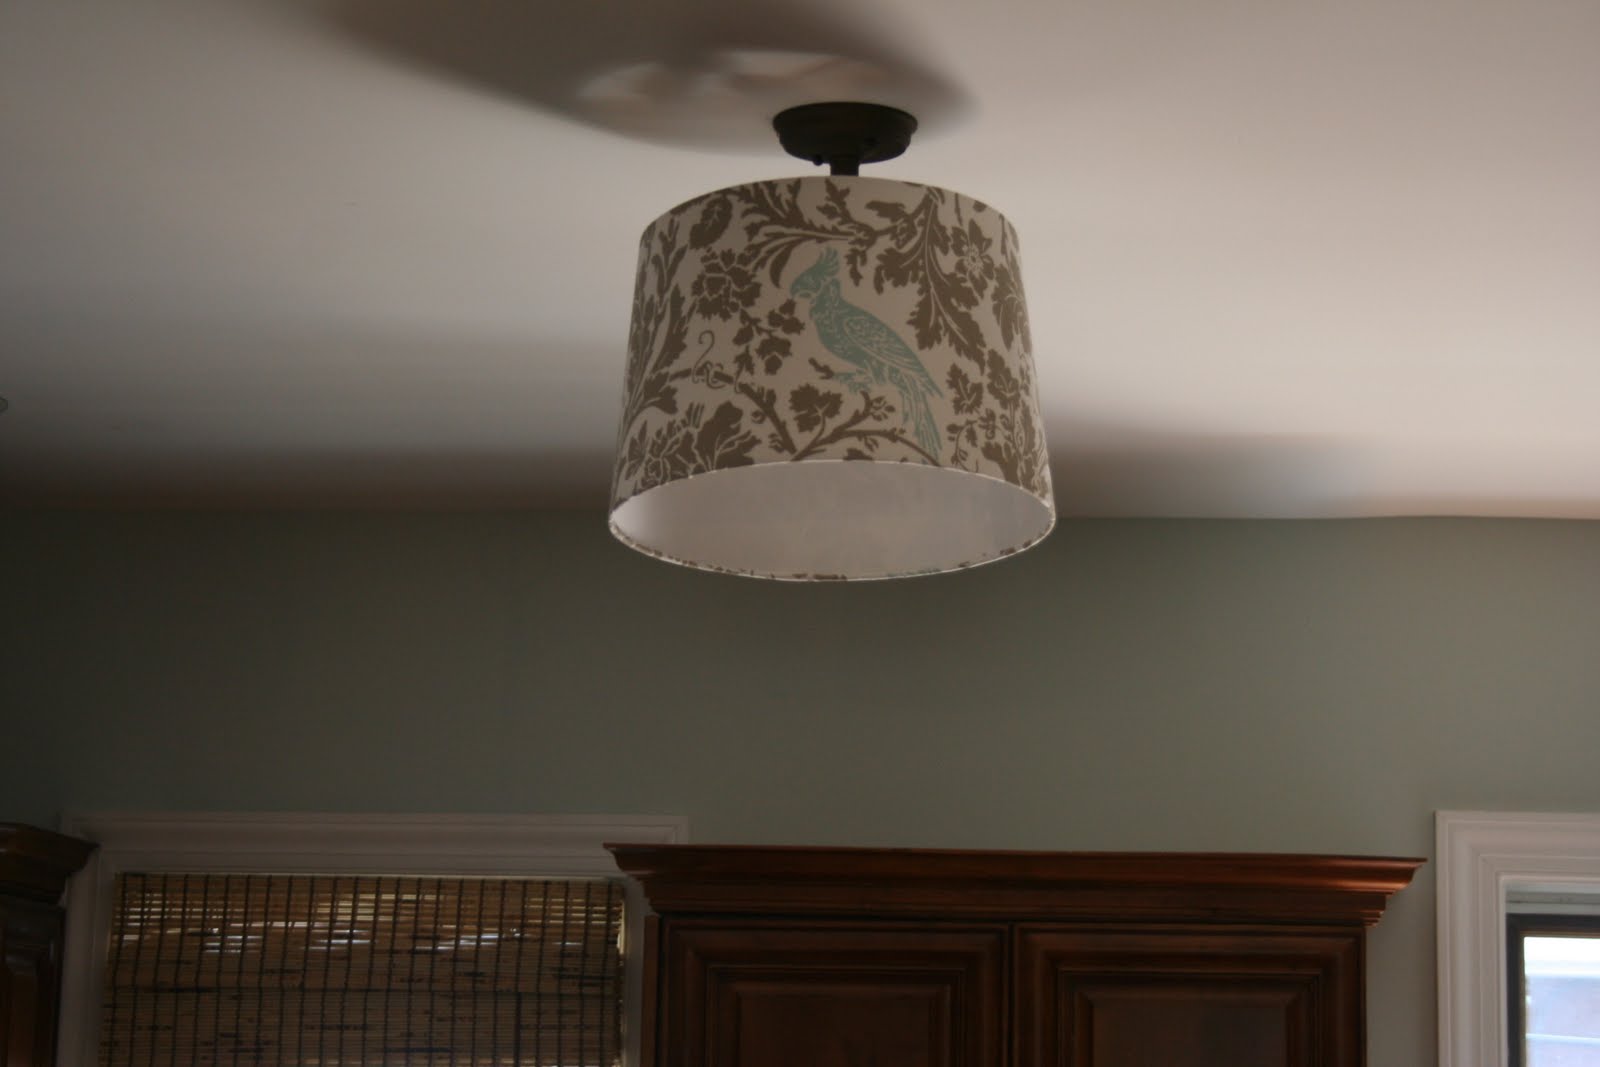
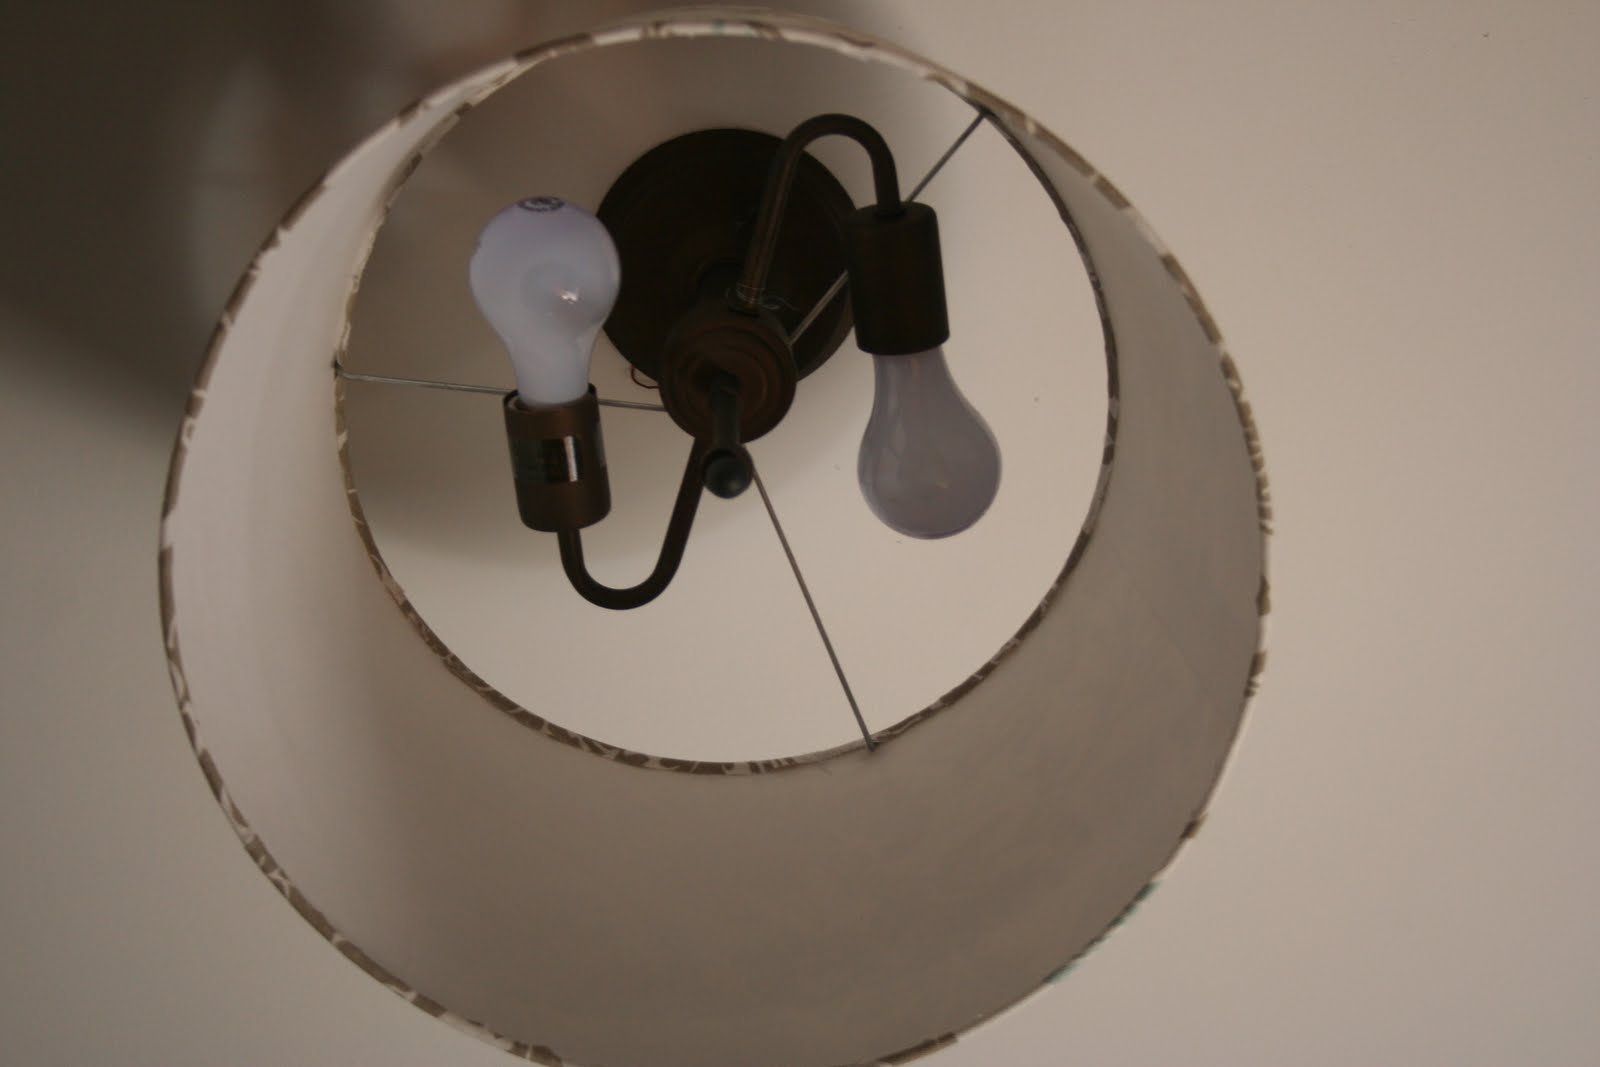
If you follow this method, you won’t have to use anything to cover the seam because it will look very clean from underneath too! To attach the shade to the light, all I did was use some beading wire to secure it in place. Sigh. I love beading wire. It’s like my own special girly version of duct tape.
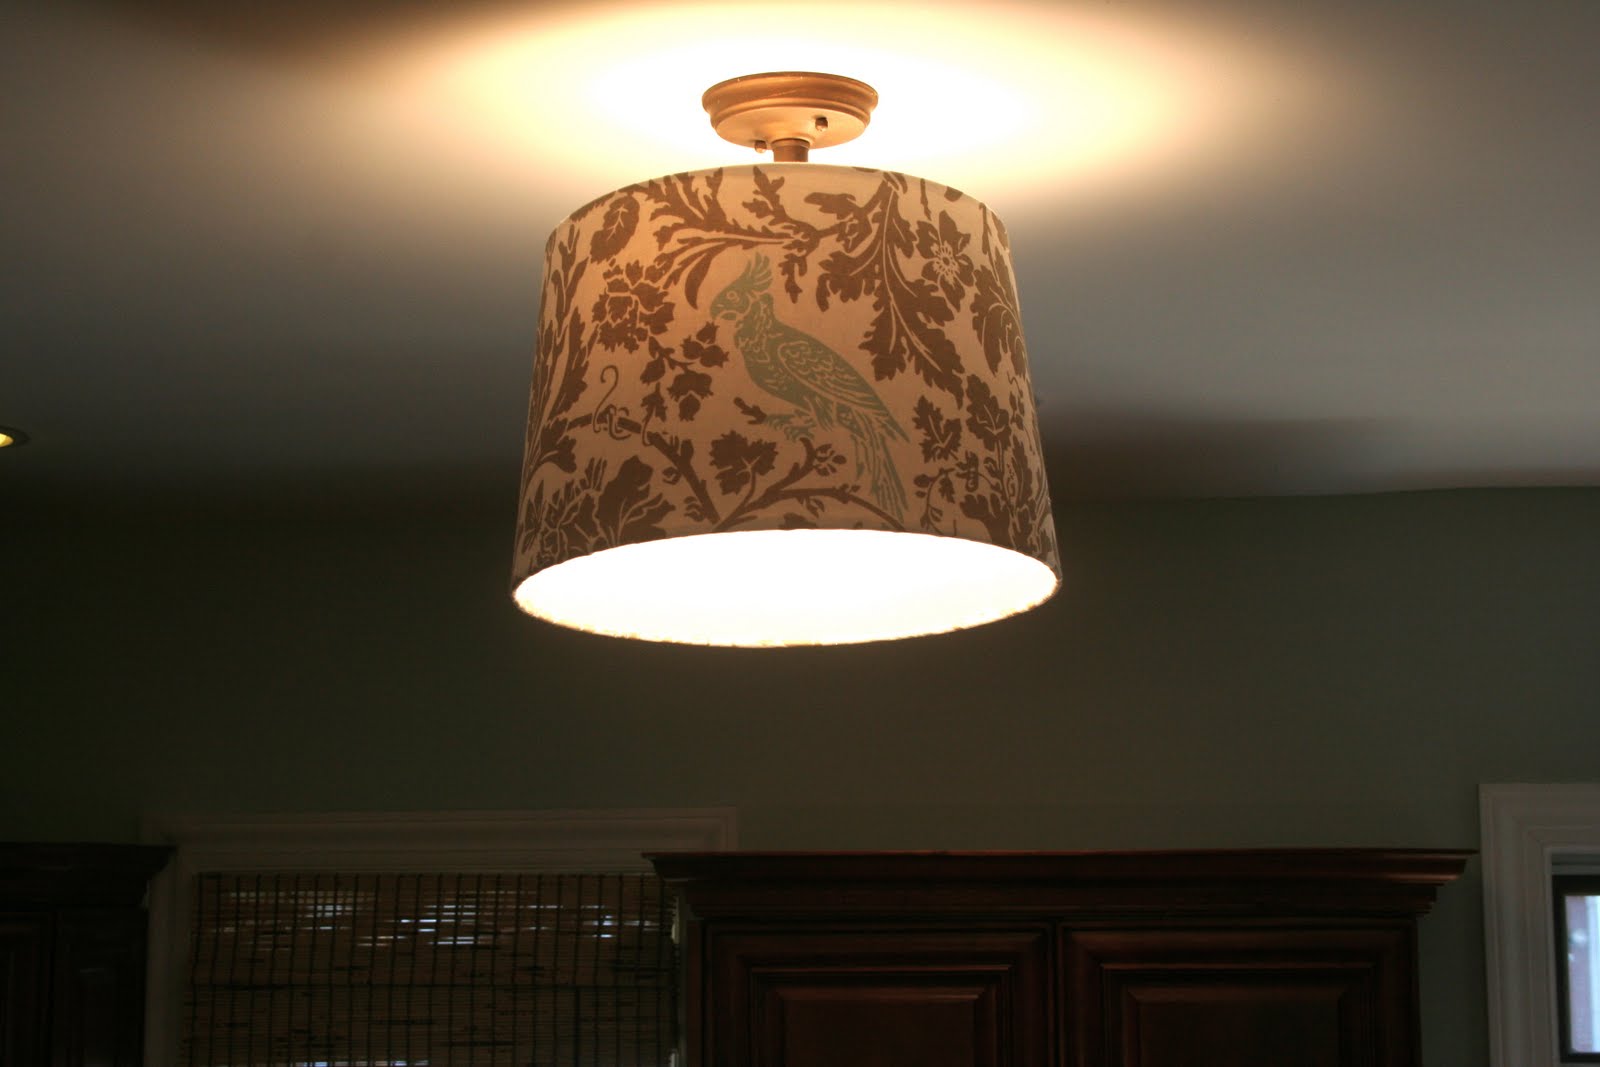
So there you have it. Third time is the charm?


These are great! Thanks so much for the inspiration I need right now for some ugly lights in my dining room and kitchen. I now have a weekend project! BTW I love the fabric you chose.
That looks amazing, and I love the fabric you chose! You've inspired me…I have some leftover fabric from a sewing project that I'm going to use to cover lamp shades for my bonus room using your tutorial! Thanks for the easy to follow instructions!
~Julianne
repurposedlifedesigns.blogspot.com
Beautiful makeover! I love the print you covered it in!
AWESOME! I have wanted a drum light for my living room and just realized…DUH! I can make one! Thanks for the inspiration. You did a great job.
I love this! I am so glad I am not the only one who changes my lights, like they are shoes 🙂 I was already talking about repainting my chandeliers and my husband said they had to be up a full year first!
It's gorgeous! How bit is the drum shade?
Love, love, love the material you used!! I was also going to comment that it would look better lower, but I see you just addressed that. 🙂 I have become a drum shade addict myself…
http://ryanandsharon.blogspot.com/2011/05/let-there-be-pretty-lights.html
@The Jongejans I agree that it would look better lower but I can't afford a new fixture right now, and I'm not able to lower the current light.
I think the lamp shade came out fantastic! I recently saw the fabric somewhere but not sure where. I like the latern lights also. Great job. Thanks for sharing.
Jessica
http://www.jessabellstamps.blogspot.com
Girl, you definitely got it right. Looks great. I love all the looks you have had. However, it's just right now, love the fabric you chose and the lantern lights are so cool.
Love it…I've been looking for a reasonably priced shade to do the same thing to it…glad to see how you rigged it up there with the beading wire (which I have loads of from making jewelry too!) Thanks for the tips…Fab-U-lous as always!
I LOVE that fabric!! I'd love to see what the light looks lower down though, its lost up there 😉
It's beautiful! I'm a sucker for drum shades.
Beth I love your drum pendant light fixture and the fabric you chose really looks lovely all lit up. Kathysue
Yup! I think you got it girl. Love!!
A fab fresh look, Beth!! Really love your fabric choice!
Love the drum shade! Especially love the fabric you chose to cover it in! Gorgeous! Thanks for sharing.
Third time is most definitely the charm!! Even though every light fixture you've done-up has looked great 🙂 But those lanterns & that drum shade are fantastic!! The fabric you chose is better than perfect 🙂 I love how that bird ties in with the wall, absolutely lovely. And thanks for sharing the how-to! I may have just found the type of light to go over my island!
Looks great!!
I think the third time is definitely a charm! Love that fabric!
love it!
Like they say – 3rd time is a charm! thanks for sharing.
The 3rd time certainly was the charm Beth. LOVE IT!! Martina
AWESOME!!! Love it…and love the fabric too! 😉
Blessings, Grace
Love it! I just love anything you do to your house really!
Have a de"light"ful day!
Jenn
Very attractive job!
I absolutely LOVE drum pendants! I enjoyed those that you featured. It gives a room such an instant update without being fussy. Love the fabric you chose as well. I'm a huge chocolate brown/blue fan. The bird is adorable. Congrats on a superb job – it couldn't have been easy! Way to go! Stop by Gracious Spaces & like me when you get a chance. Thanks for the fun post!
Looks great! I do believe you've got it right this time!