
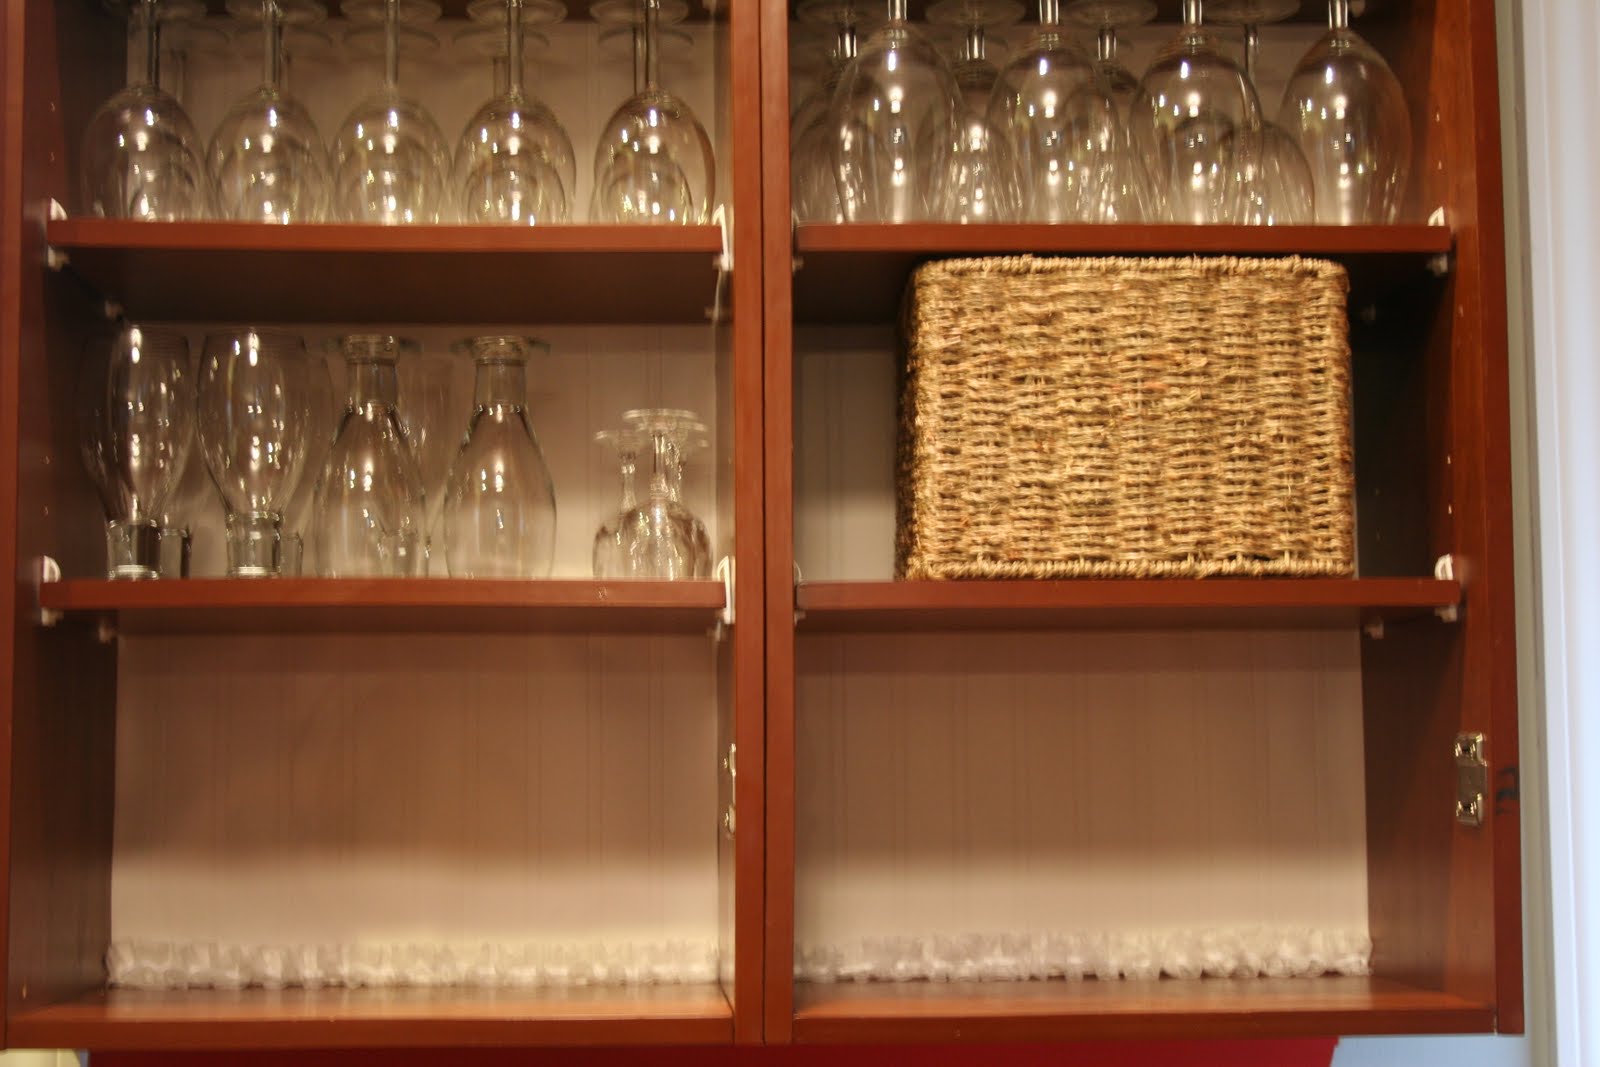
No worries. I’m used to this sort of thing. Every project I do has some sort of glitch which requires special creativity due to my own specialness. I rummaged through my craft closet and came up with this… What doesn’t look cuter with a little ruffle action?
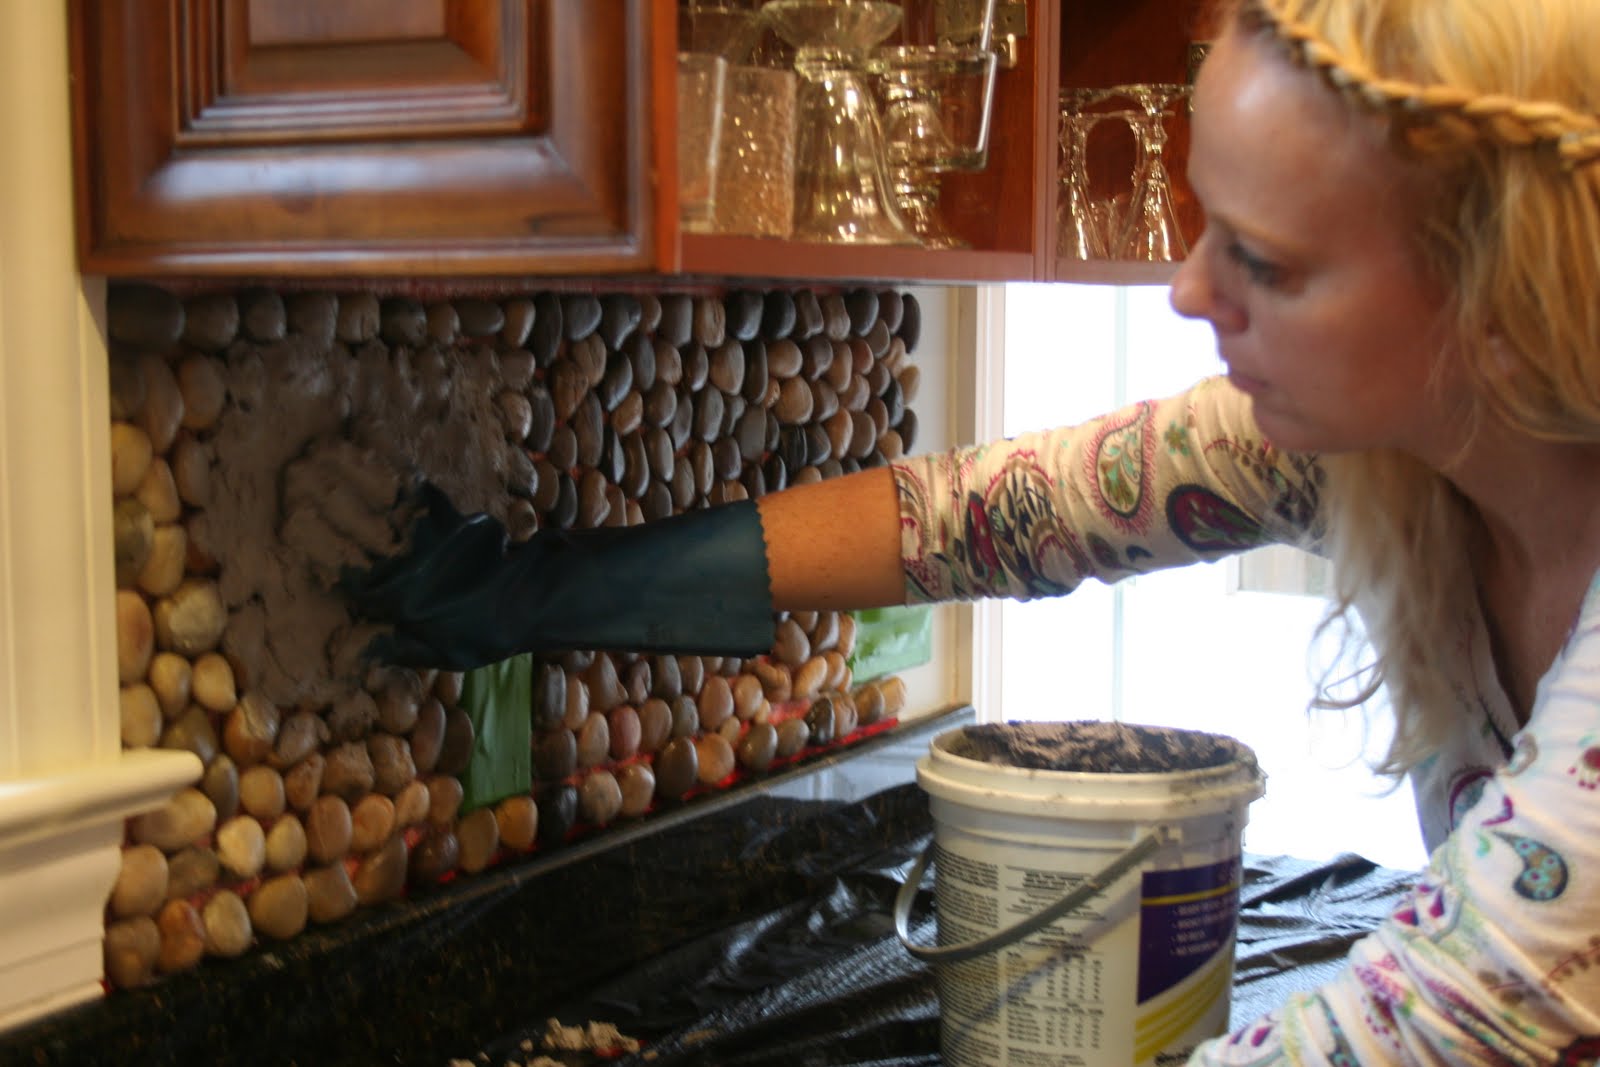
With the backs of my cabinets done, I moved on to finishing the backsplash. I used this product from Home Depot called Simple Mat to adhere the stones to the drywall. This stuff really is quite awesome. It’s like a giant double-sided sticker that you place on your wall. You can start and stop tiling at your leisure which is very cool, but what really sold me was the couple on the front happily working together.

Here’s my guy. He doesn’t look quite as happy as the guy in the picture, but we actually made it through this project without arguing which is more than I had hoped for! (My guy loathes all things diy. He puts up with me and all my demands quite well considering.)


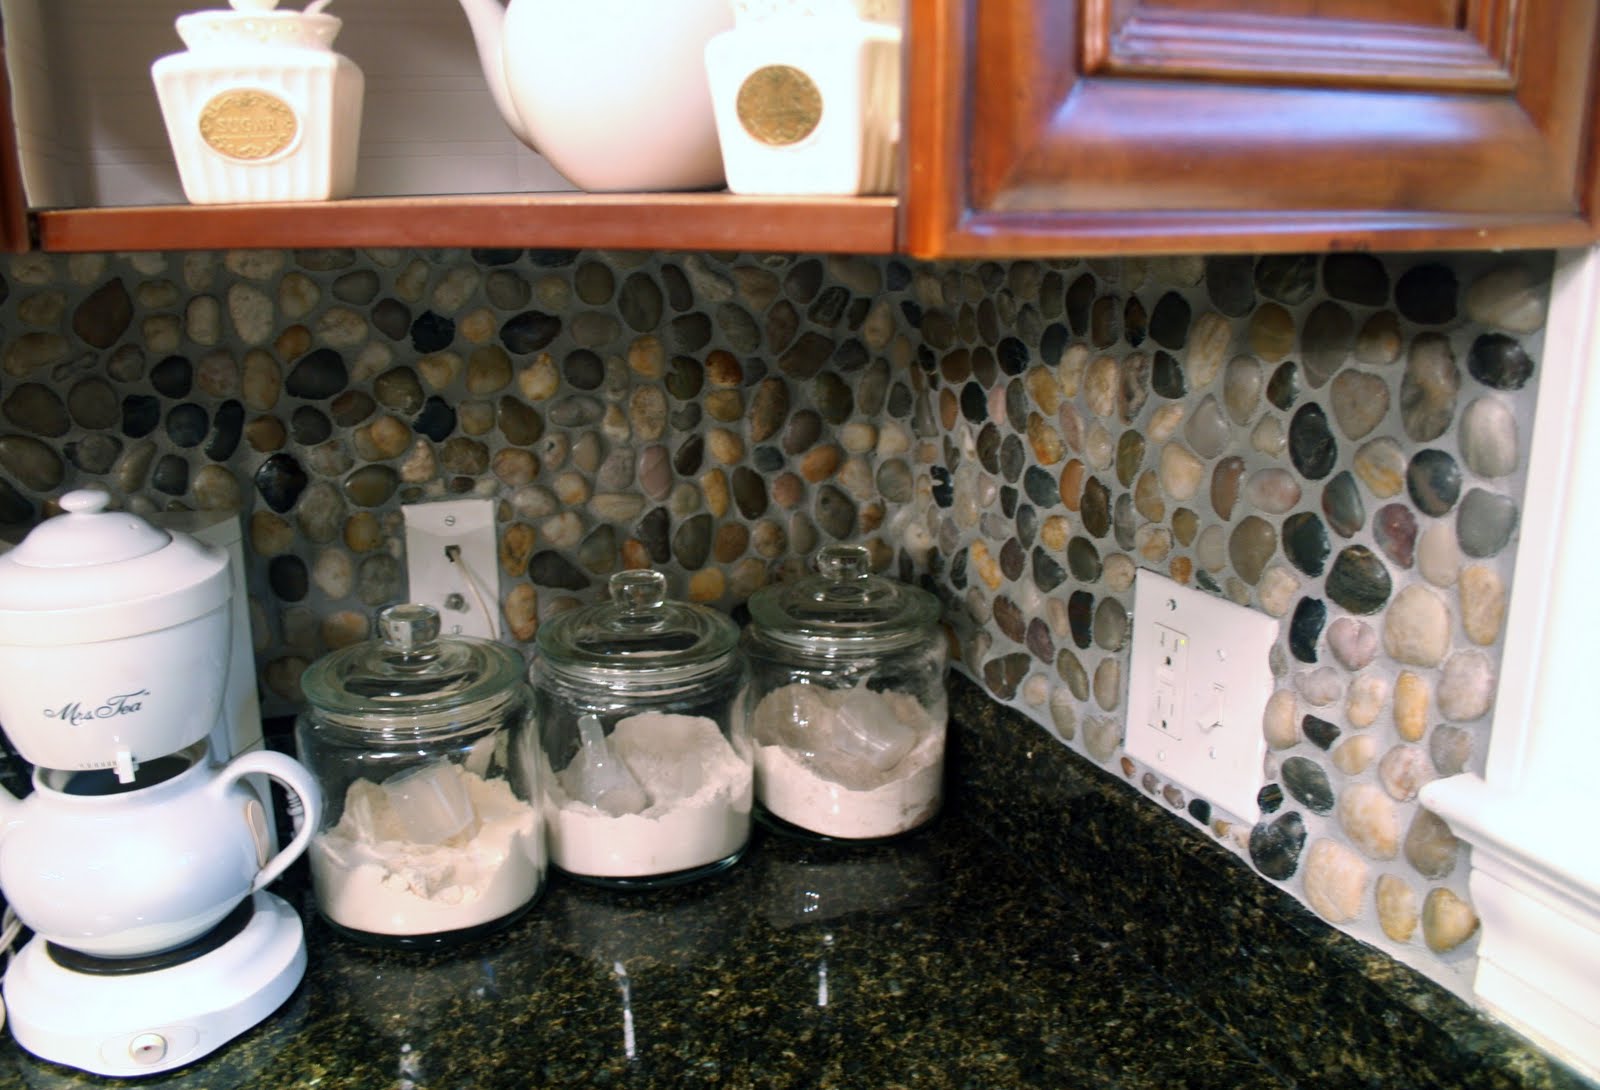
Once the stone was up, I took my premixed grout in Dorian Gray (did you ever read that book?) and just rubbed it all over the stone. I tried piping it in with a frosting bag. I tried carefully smoothing it with a tile smoother thingy. In the end, just globbing it on and smearing it around worked best for me.
Once you’ve covered the stones, they will look like this. Don’t panic!
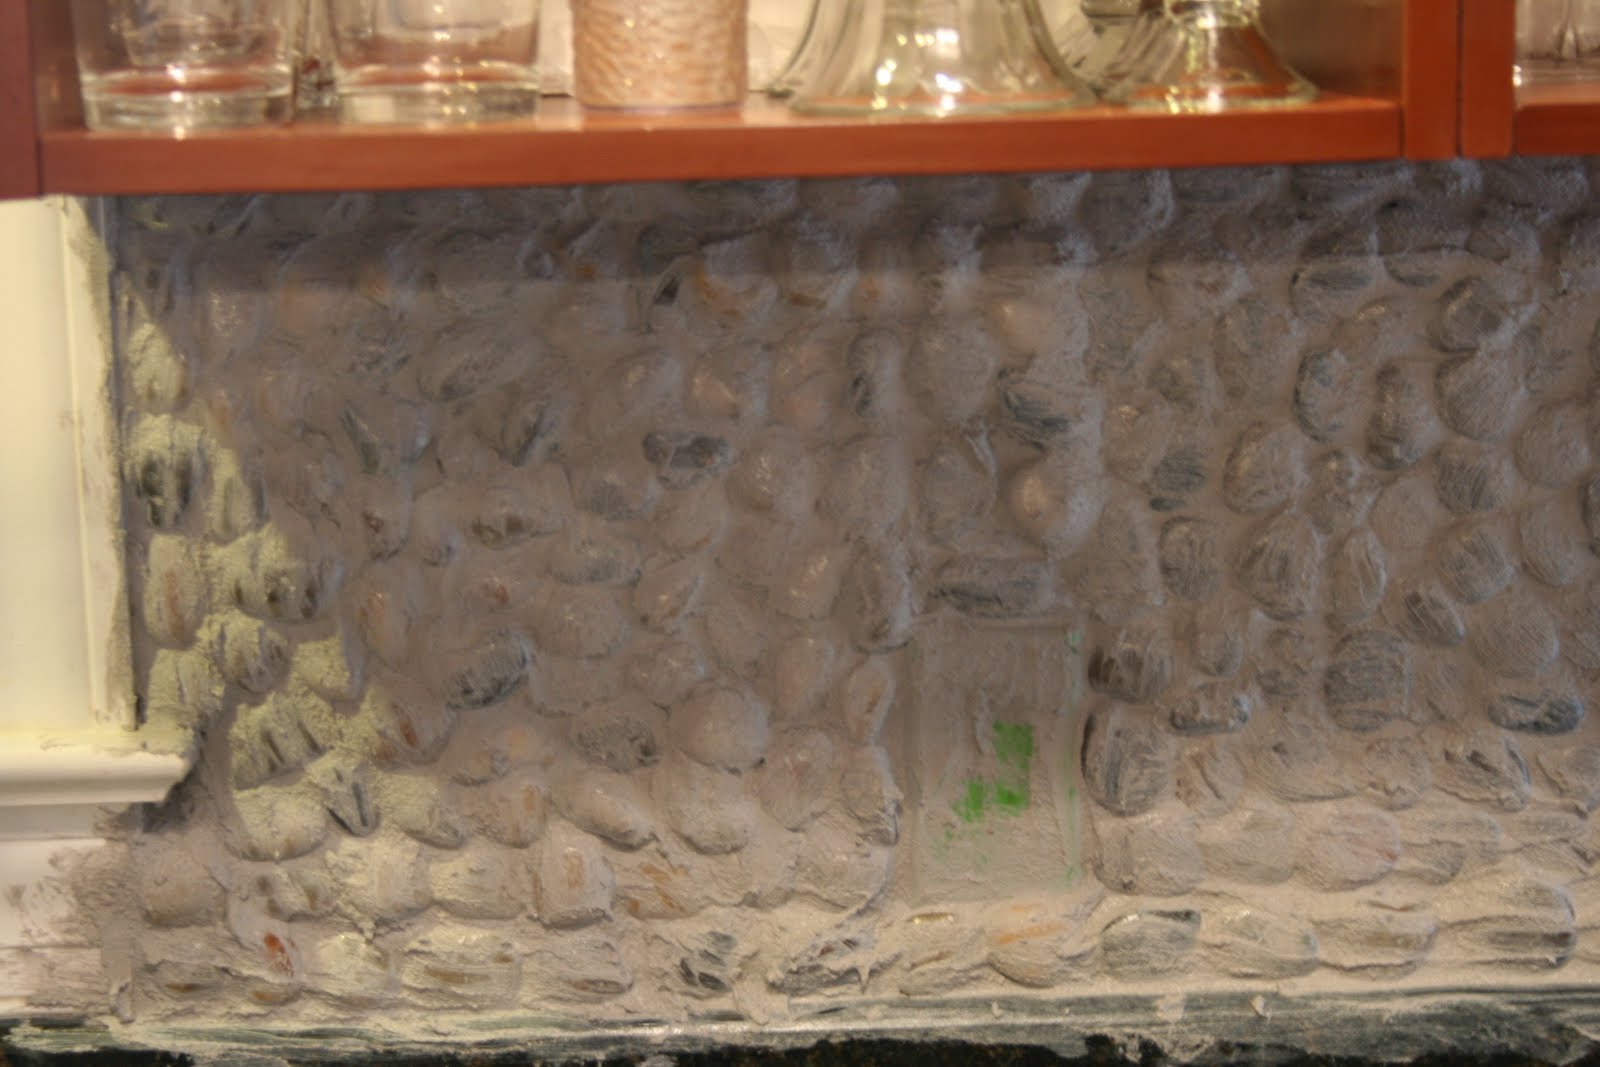

Oh yes, and I should mention that we totally didn’t do the outlets the right way. You’re supposed to use electrical box extenders and pull your outlet out so that it sits flush with your stone. This was going to mean another trip to Home Depot for me, and I didn’t feel like it. Therefore, we taped off the outlets and I grouted and then caulked around them. The covers still come off (I think).


I love it!!! Looks great.
Love this! Excited to see the rest of your creations!
Hi Beth! Wonderful backsplash, I love it! My question, posited by my mother-in-love, is: do you have any trouble keeping the grout clean? Obviously, you can just wipe the stones off. But when you splash spaghetti sauce on the grout (maybe you don’t, but I would be sure to), do they get stained pink? Or similar probs, if that is not yours. Thanx!
Hi Kristalyn! The stones and grout are sealed which makes them easy to clean, but honestly I don’t think I’ve ever had anything splash on them. My front burners on my stove are pretty far away from the backsplash and I use the center island or the peninsula to do other messy things.
Thanks for responding, Beth! The reason I started getting interested a backsplash in the first place is because the drywall in my kitchen has been nearly destroyed with my cooking efforts. I guess I am just a messy one. :/
Hi! Could you help me? I was so inspired by your back splash I decided to do an accent wall the same way. I’m Having a lot of trouble with the grout and your one minute video doesn’t seem to be working on here. Could you maybe email it to me?
Hi Brittney, unfortunately the video file is corrupt for some reason and I don’t have it backed up elsewhere. All you do is take your index finger on your sponge and sort of “carve” the grout out around the stones. If your grout is too thick the stones will have a buried look. You need to use your sponge to wipe (and carve if necessary) enough of the grout away that the stones stand out. This needs to be done while the grout is still wet and hasn’t set.
How have the stones held up? Wondering how long ago you bought the stone tiles at Christmas Tree shop? Thanks
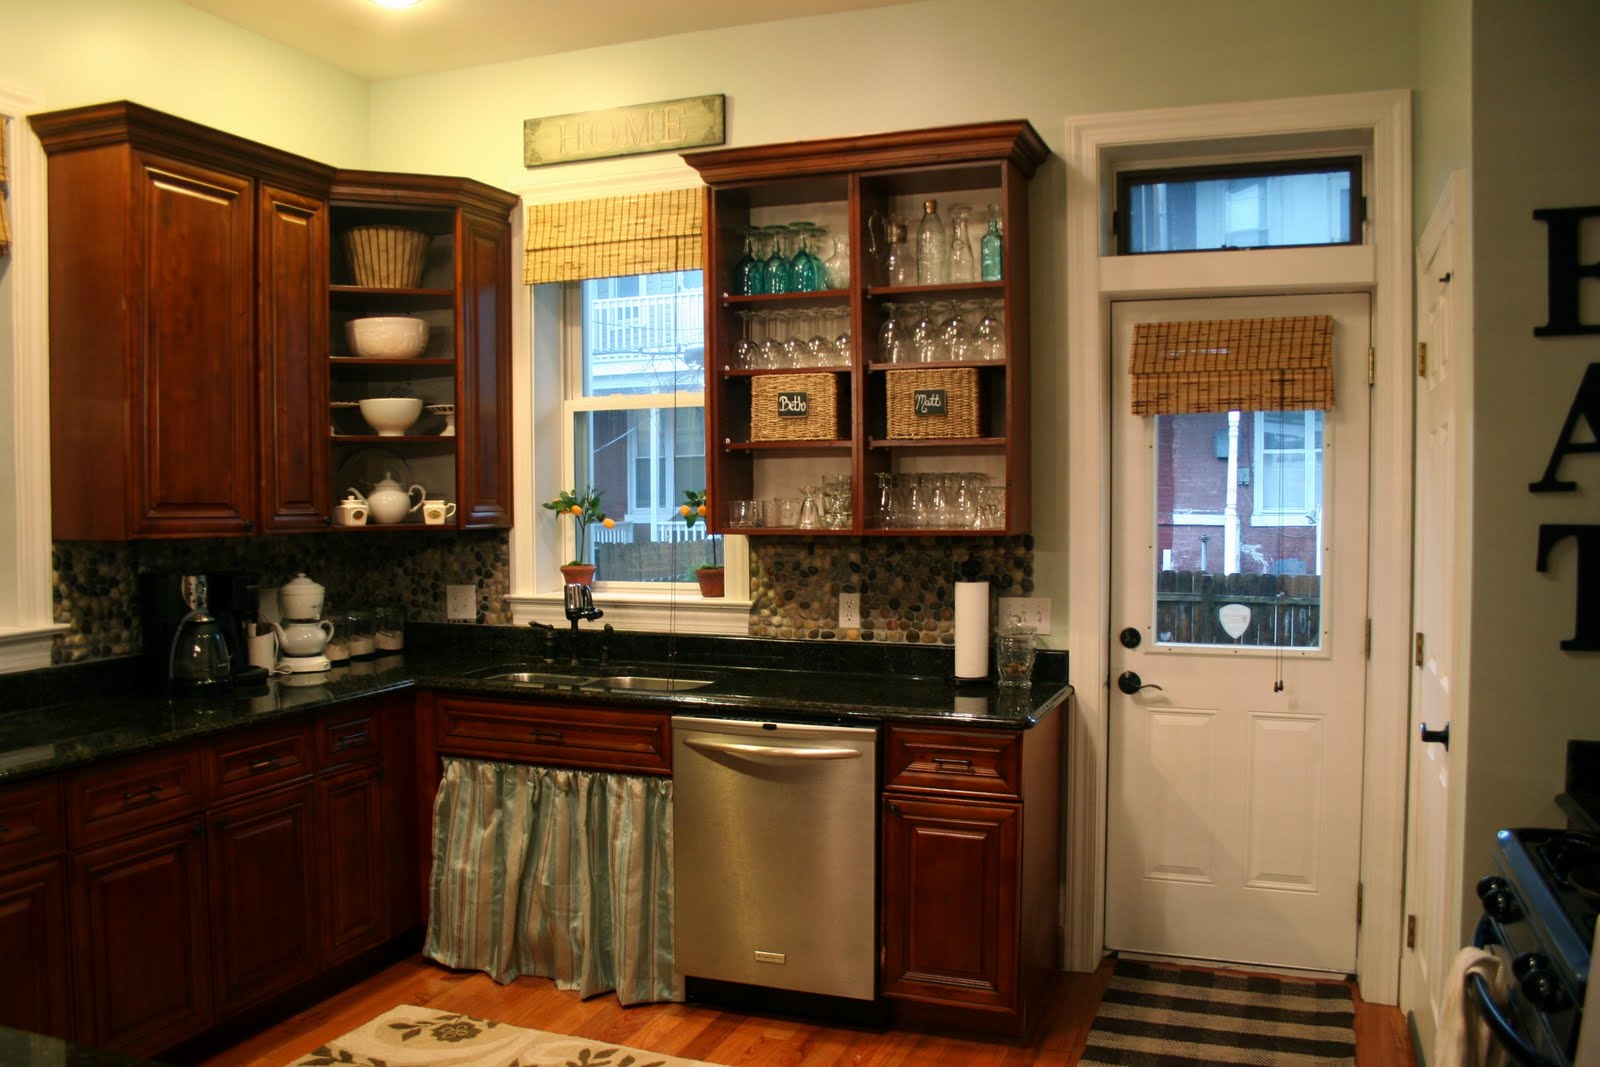
Hi Martha, you can see me updated kitchen here to see how fantastic the backsplash still looks. I haven’t had any trouble with it at all. I bought the garden tiles over two years ago but I see them pop up in the store every Spring/Summer so be on the lookout for them soon.
Just wandering if you could explain in a little more detail about how to wipe off the excess grout. Is it with a wet or dry cloth, and if wet just water? I would have loved to see the video of this you didn’t happen to put it on youtube by chance. Really like this idea.
Thanks
Also can you tell me, how has it stood up over time? Are the stones staying put, chipping, falling off? Would you recommend actually bringing out the electrical boxes or did your method work fine? And, as another reader asked, did you put any sealer on at the end?
ImaReck » They look beautiful and “new” over a year later. No chipping, or stones falling out whatsoever. I think if you can easily bring out your electrical boxes, then do so. It is certainly the more professional route to go, but I haven’t had any trouble with my method. And yes, I used a wipe on grout/tile sealer.
This is the only video that I’ve ever done on Vimeo instead of Youtube and I obviously will never host one over there again. So sorry the link is broken. I wet a sponge and using my index finger as pressure through the sponge I “traced” around the stones. It was tedious work. If you simply wipe the grout over the stone it doesn’t give the stone as much dimension and your stones look “stuck”. So lots and lots of rinsing the sponge and wiping off grout to get a good look.
You wouldn’t believe how much this helps me! I have already bought the rocks and was thinking is this right? It matches my granite perfect and we have a rock fireplace in our living room. You really helped me make up my mind to get with it!! I love it!! Thank you!!
Btw, my cabinets are exactly like yours 🙂
You wouldn’t believe how much this helps me! I have already bought the rocks and was thinking is this right? It matches my granite perfect and we have a rock fireplace in our living room. You really helped me make up my mind to get with it!! I love it!! Thank you!!
Btw, my cabinets are exactly like yours
It’d be great if that video worked~ any chance you could add a link to it?
Christi, so sorry that the link is broken. I have no idea why Vimeo isn’t allowing my link to work. Unfortunately, my hard drive crashed since creating the video so I no longer have the hard copy. Let me know if you have any questions and I’ll do my best to answer them.
I just Love this stone look. I have been collecting small stones on my travels, but I can see I will need a whole lot more to finish the job. Thank you so much for the info. Your kitchen is so warm and inviting.:)
The Christmas Tree Shop…..is it a chain, does it have a website? The Christmas Tree Shop we have here ONLY sells very expensive Christmas items. 🙁
Hi Beth – I remember seeing this post a long time ago and put it in my mental file for “to do” projects. Today I came across the same garden stone tiles at Dollarama (here in Canada) and picked one tile up to see what it would look like in my kitchen. We’ve lived here 13 years and never done anything with the backsplash and still don’t have a huge budget to work with. I love the look of stone or brick for a backsplash so I’m thinking this could be a good idea. My husband’s a little leary of it working well. Sooooo, tell me, how has it stood up over time? Are the stones staying put, chipping, falling off? Would you recommend actually bringing out the electrical boxes or did your method work fine? And, as another reader asked, did you put any sealer on at the end?
Your advice would be welcome!
We recently found the same stones in at The Christmas Store for the same price. I love the way it looks as a backsplash. We are planning on using them in a small guest bathroom (no shower) just on the floor. I just have one questions? Did you seal the tile after you grouted?
I like how your kitchen turned (or the part that’s finished anyway!). We used the stones part way up the walls in our powder room. Our daughter-in-law has her degree in interior design so the powder room was her’s to do as she pleased. The top of the walls are painted in grey sand paint and my husband built the cabinet for the sink, stained in black and distressed. The light over the sink is an outdoor light and the mirror has achisled edge. I’ve gone the beach route for decorations with pictures of the ocean and lighthouses and jars of shells sitting around.
Hi, I loved viewing the kitchen pics (although the one-minute video had an error occur, so I couldnt’ see it..), esp the stone backsplash – how creative is that?!
Since we remodeled our kitchen a couple of yrs ago, one comment I might add is a good idea is to place the outlets on the under side of the cabinets, so they don’t show on the wall. My SIL did this and it’s nice not to see them interrupt the backsplash or other decorating ideas. I don’t know a lot about electrical wiring, so could be this is more of a headache to implement than it’s worth, but the resulting outcome is much less of an eyesore. Ok, that’s my 2 cents worth for the day – take care, all!
Your kitchen is beautiful! And thanks for sharing your blooper moments–it makes me feel like I’m not the only one this happens to.
Oh, I just love this unique backsplash! Thanks for the idea, I'm inspired now! I wanted something different, other than tile, but just didn't come up with an idea yet. This is great!
Very pretty! Love the idea of using stones as a back splash. =)
Also, the new paint color looks great too.
Looks Phenomenal! l love the natural elements in the kitchen, the soft curves of the stone are a nice contrast to the clean lines of the cabinetry. Softens things up a bit.
@A Stone Gatherer, you can find an adhesive at Lowes made by Keraset that is premixed in a tub. I believe it is plainly called "Type 1" and if you use a grout tool, you can spread it on your wall and apply the stones individually. It is super sticky and works great! I used it to apply 1" slate tiles on my backsplash.
LOVE IT, LOVE IT, LOVE IT!!!!!!!!!! I so want that!!! Now question for you. You said you bought the stones in a square. What if you have all separate stones? You see I am a stoneaholoic and every time we go up to the Upper Peninsula of Michigan I come home with buckets of all shapes and sizes and would like to use those. Is that possible???
oh my gosh! LOVE the transformation! I've seen a lot of different back-splashes, but never anything like your rock! Totally amazing!!!
NICE WORK!
-Ashley
http://www.DesignBuildLove.co
It is seriously a brand new kitchen. I can't get over it. When you slapped that grout over it, it looked like it would never come off. Scary! Not for you, of course. You're a true DIY warrior!
Beth, it looks amazing! Your entire kitchen is really beautiful, and such a drastic change from the "before" picture!! It looks so warm and inviting and charming now.
Visiting from Addicted 2 Dec……
Great job! What an amazing transformation!
LOVe this, great job!
cara
I'm loving your kitchen, Beth! Very cool stones!
WOW great job on your backsplash! Many thanks for the info on the tile setting sheets. I think this is finally what I need to try and brave making my own. We have never had a backsplash and I have always wanted one, but couldn't afford to have one done. Great to know the bead board wall paper is cheaper at Lowes than Home Depot. Also, I was going to email you and ask how you do your grout, so thanks for already answering that. I think I have to be your biggest fan!
Love you and you blog!!!
Looks awesome Beth!! I've been debating on whether or not I want to take off a couple cabinet doors in my kitchen and I think you just talked me into it. 😉
Hey Beth…I think it looks fab….
So hope you had a nice Mother's Day…I have been out West visitng my kiddos and Grand Furbaby LOL
I am looking forward to seeing the WHOLE kitchen 🙂
All the best,
Kathy 🙂
ps I tried the blush you use from Target, OMG loveeeee it
And it is fabulous that backsplash love it!
Wow!! So pretty!! Thank you for sharing the video – I would never have figured out what to do! I'll keep this in mind for when we get our forever home.
Hi Beth-
I just love what you did – what a nice way to bring nature indoors, too. It looks great. Must have been fun swirling around all the grout.
My best- Diane
Beth, your kitchen is looking amazing! I love the stone backsplash.
Great job, girl!!
This backsplash is beautiful…and I love your kitchen…especially the color on the walls – well done!
Beth, it looks amazing! Not wanting to make ANOTHER trip to Home Depot for the proper electrical thingies and cutting such perfect lines are things that I may or may not have done….just sayin'.
Love the backsplash! It looks amazing! I can't believe you got the pebble mats at the Christmas Tree Shops! Who knew? Your kitchen is looking terrific! Thanks for sharing.
That is absolutely beautiful. Great ideas for my kitchen…thank you!
Oh. my. goodness. I absolutely love this. We need to do something with our kitchen to make it more "me". We don't have the funds to totally remodel, and the stones are wonderful, and this may just have to become our summer project! 🙂 Thanks!
Progress on the kitchen! Yay Beth!! It looks great! Me and hubby have been talking about doing glass subway tiles, but I actually like the look of this way better!!
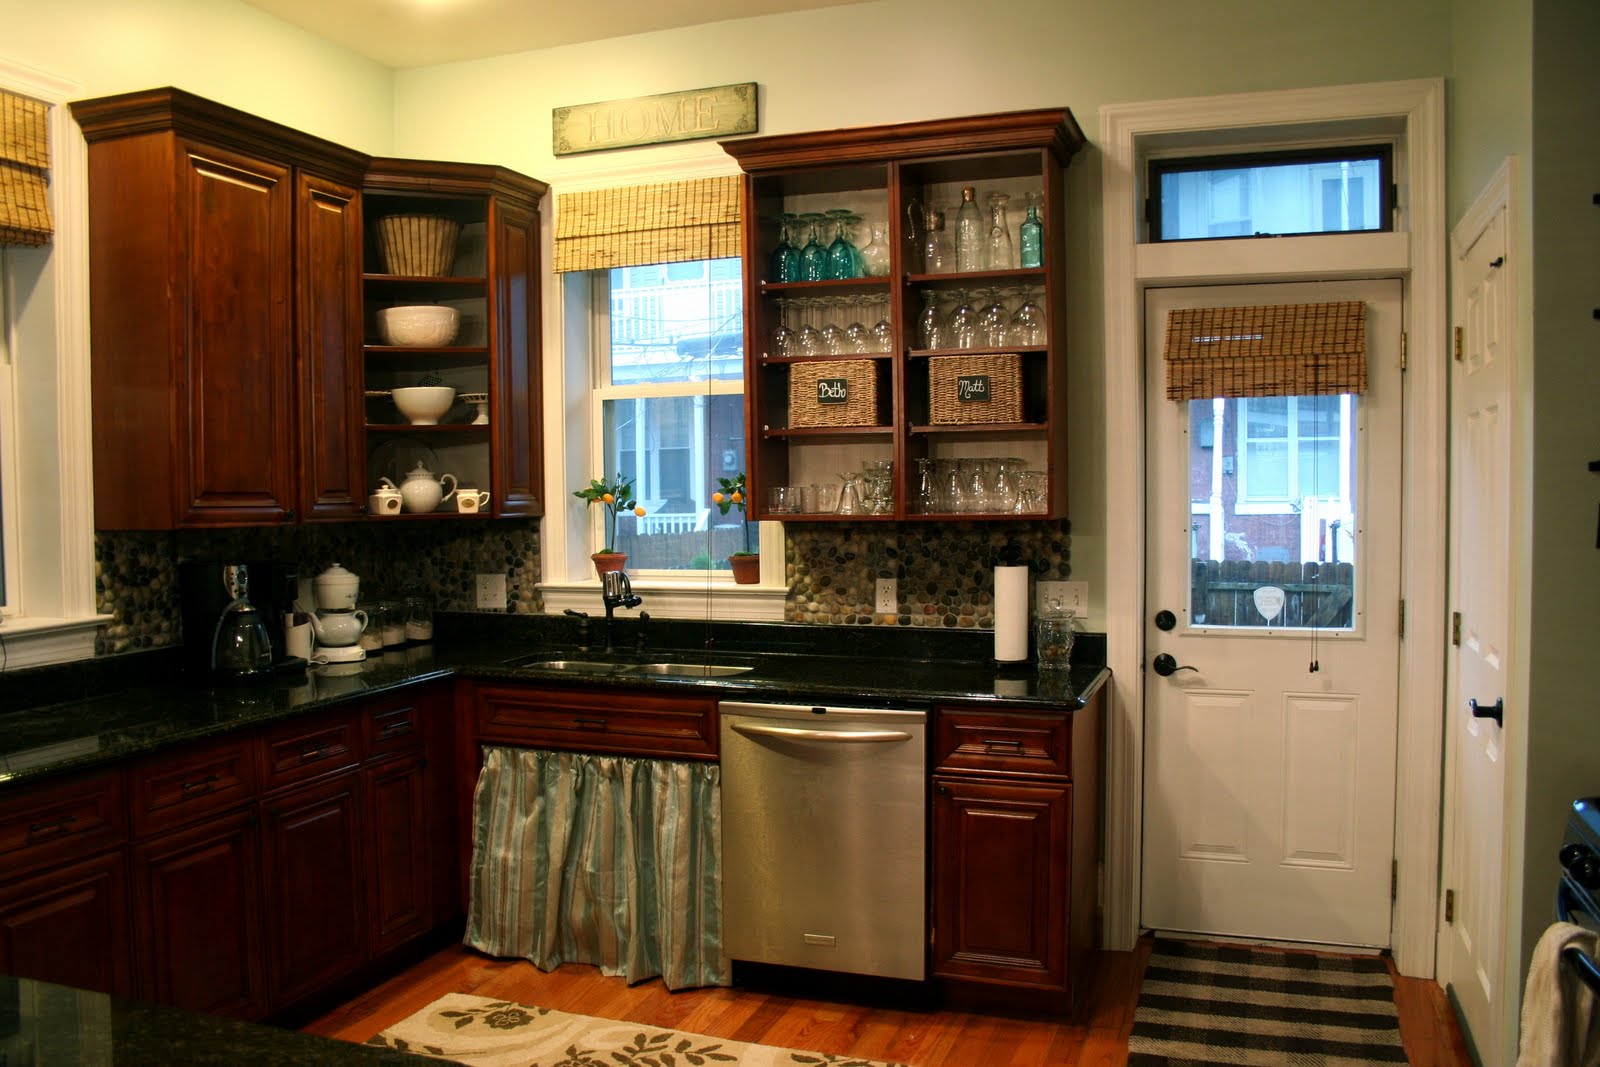
It's looking great! I love the backsplash and your HOME sign!
I just saw this product at Home Depot this weekend. It is great idea. I love your rock backsplash.
Traci
Totally read Dorian Grey in high school. We seriously have the SAME kitchen cabinets. I didn't want white because I am a messy cook, {although I sometimes regret it now}.
Dark wood feels like home to me.
Your backsplash brings so much texture to the space…
Great, GREAT job, girl! 🙂 The stones add so much character to your kitchen. I also love your baskets of "meds!" 🙂
xoxo
Yea! So happy to see your kitchen…and I love it! I am in the process of a small reno myself…bought some cool morroccan tiles for the backsplash but now I'm afraid to install it! You are helping me get the nerve up…..or maybe I should just hire someone…
Danielle
Girlfriend!!!!! That looks A-MAZ-ING!!!! I love it! I have to say I was a bit leery in the beginning, but I am sold. That is gorgeous!
woo-hoo! looks great. can't wait to see it in person. xo
That looks so great. It's so much lighter and more open now. The rock backsplash and open cabinets are my favorite. I'm painting over my red right now too. I still like it but it's too dark.
That looks amazing! I'm loving your kitchen.
That looks great!
Big difference, Beth! And that's only the portion you are showing us. I love the skirt you added under your sink and the stone backsplash finished up nicely. I think your guy looks pretty happy considering he doesn't like DIY! I would have done that to the beadboard wallpaper. I do that all the time ~ paper, fabric, hair. If you want anything cut crooked, I'm your girl! Well, you are, too, apparently! ; )
Beth you're so talented! This looks great!
I love it! I just looked at that tile setting mat at Home Depot … so glad to hear a report about it. Your rocks look great!
I love it!! and you've inspired me to leave some doors off on the kitchen cabinets of the house we've just purchased!! I know I'm too chicken to attempt the stone and grout haha but would consider those glass tiles that come in square thingies. Thanks so much for sharing all your ups, and downs, with us 🙂 ~ Nancy
Beth, that looks really pretty! I remember that messy grout. Great job on your kitchen reno, it is looking fab.
Hey now! I love those stones. Very nice. And the open cabinets looks nice too. Thank you so much for sharing your kitchen process. It is giving me some great ideas. Now if I can only convince PHGuy that butcher block counters would be gorgeous.
Beth, that looks amazing! It is really coming together!! GREAT JOB!!