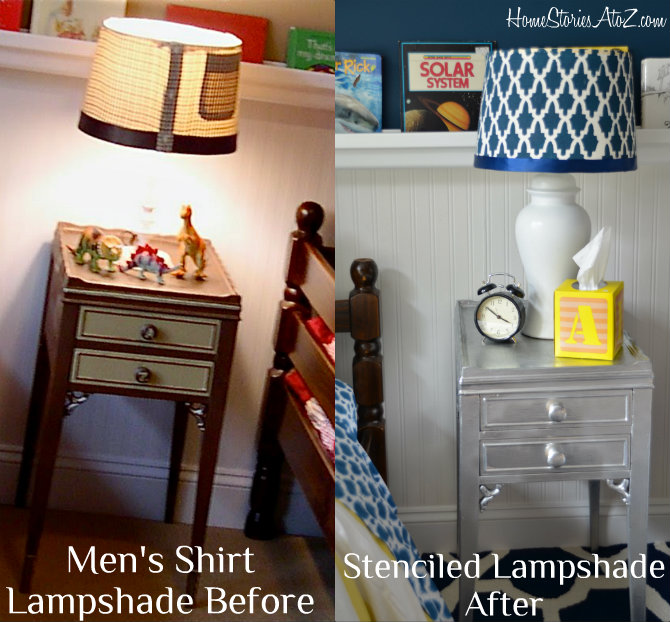
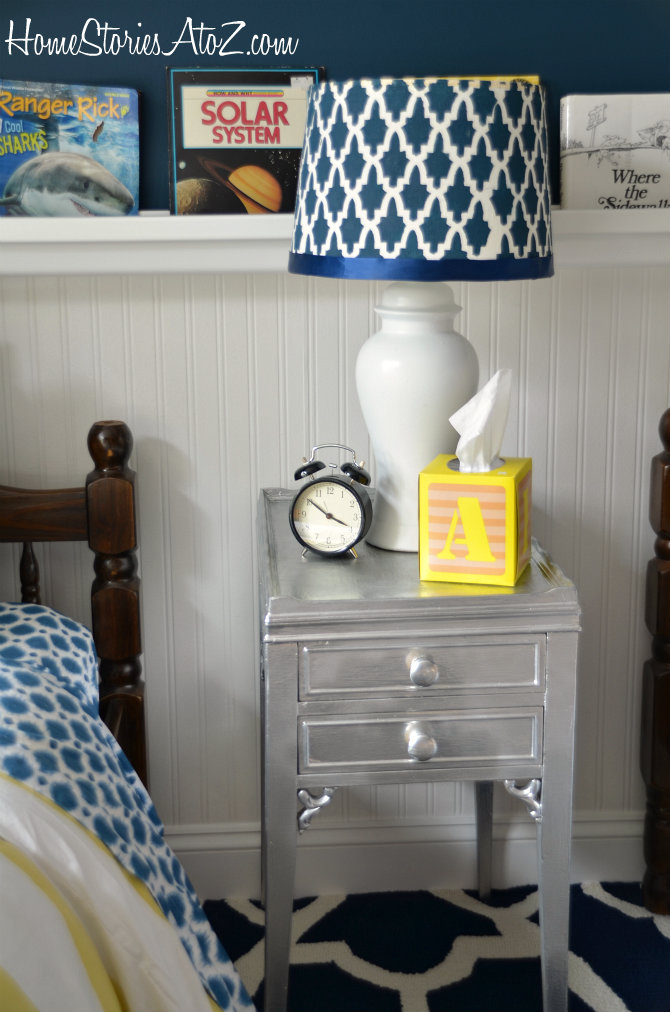
Lampshades are some of the easiest accessories in your home to customize on-the-cheap! Below you can see two very different looks using the same thrift store drum lampshade that I purchased several years ago for $2. When I first made-over my boys’ bedroom in 2009, I created a man’s flannel shirt lampshade. I still love this look and it was fun to be able to put love notes and toys in the shirt pocket to surprise the boys! But we were all ready for a fresh look and I was ready to DIY a lampshade! I took that same lampshade, pulled off the flannel, and stenciled it!
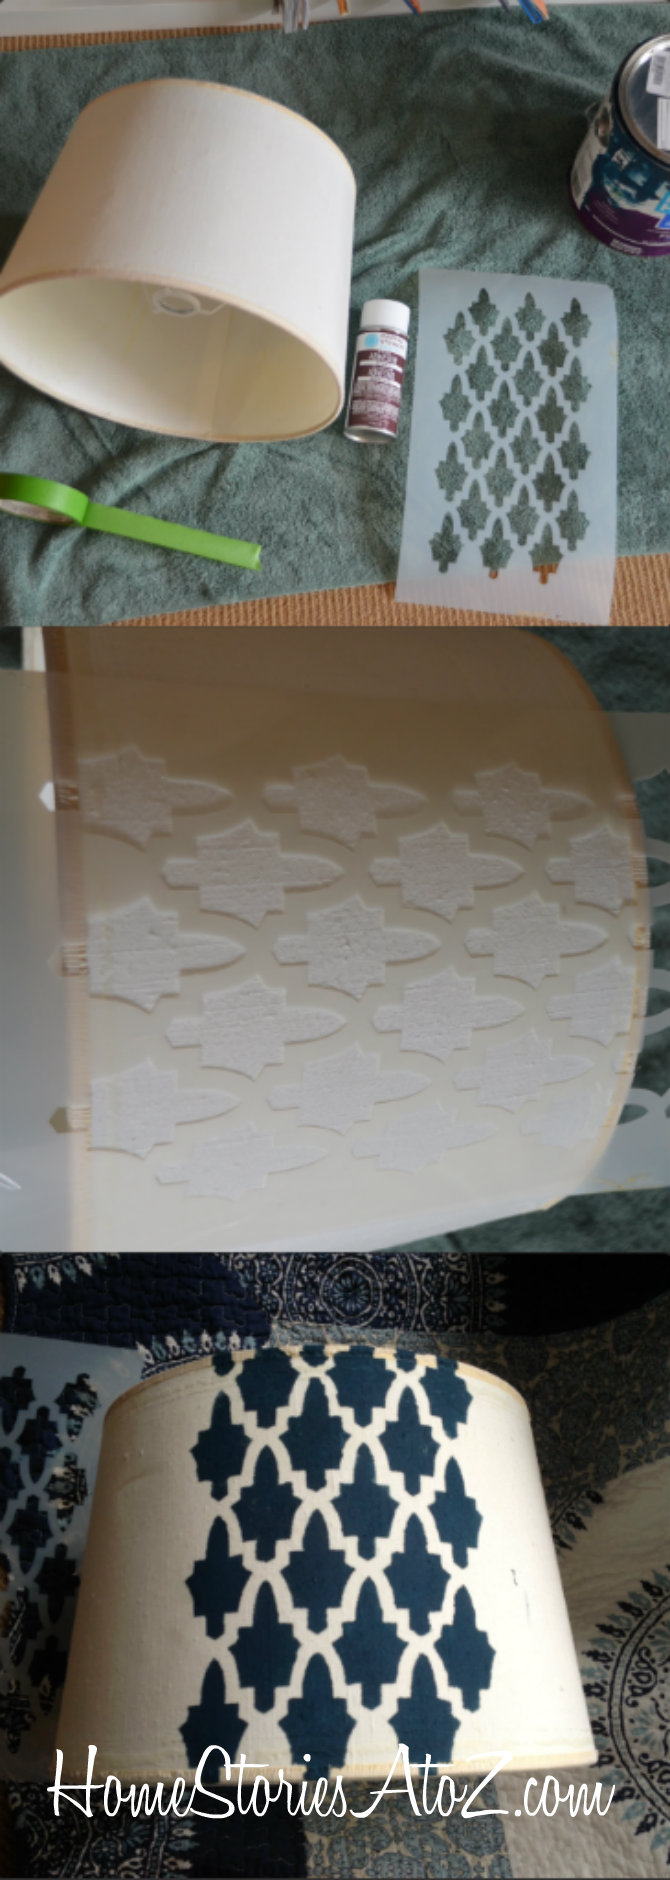
Since a lampshade is not a flat surface, you will want to purchase stencil adhesive spray. I used Martha Stewart brand for this project. My stencil is from Royal Design Studios (and I won it for free at the Snap Conference—woohoo). I would normally use acrylic paints for stenciling, but I didn’t feel like buying any so simply used the exact same latex paint that I used on the walls. It worked beautifully. I don’t have a picture of my foam brush below, but I just used a disposable craft foam brush.
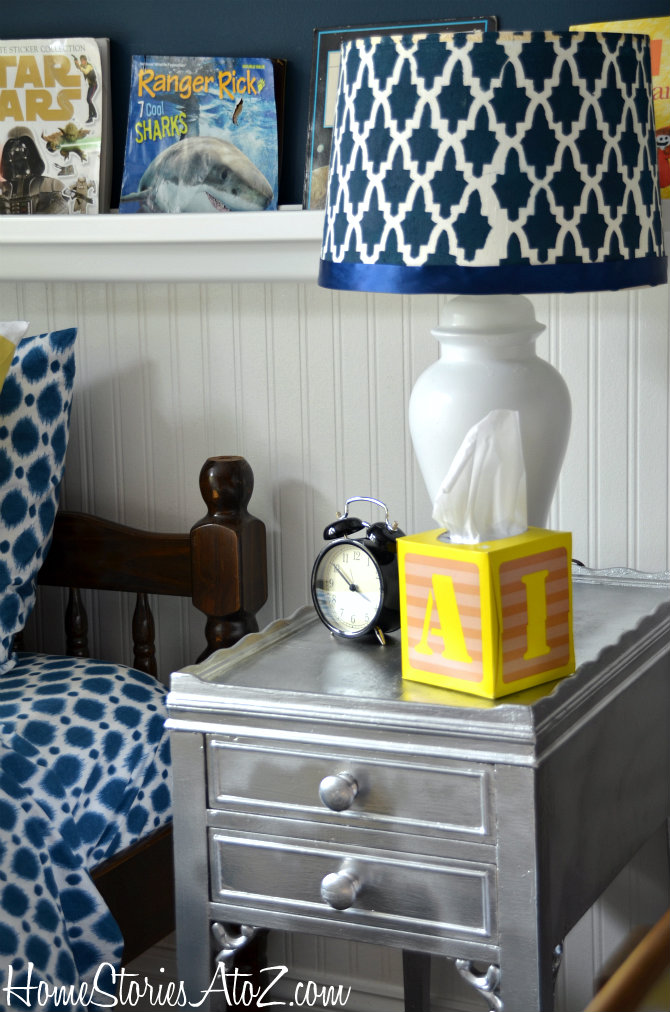
I thought the bottom edge of the lampshade looked a bit unfinished, so I added some pretty blue ribbon with fabric glue.
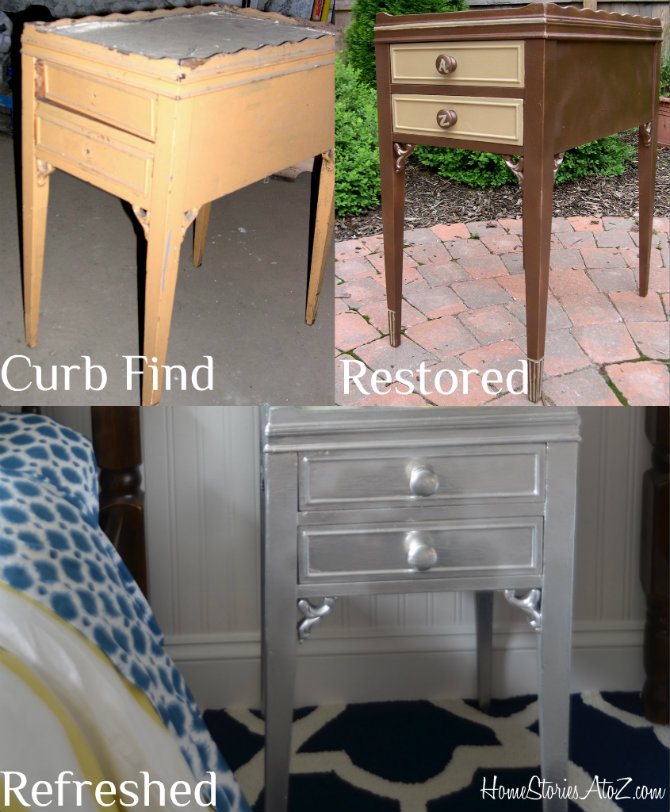
Oh yes, and you might have noticed that the nightstand received a little makeover as well! Below you can see how it has transformed over the years :). This time around, I used Krylon spray paint in Chrome to give the room some bling….er…I mean some boyish space-age charm!
My boys are thrilled with their new lampshade, and I’m thrilled that it cost me $0 to make!

I have the same SW paint & would lovento stencil a lampshade like that but have never done it & feel intimidated. You said you used fabric adhesive spray but did you spray it on then paint that section & take it off and repeat until you made it all the way around? I feel confused on how you’d paint using a stencil w/o making a huge sloppy mess. Can you give me a quick tutorial or link? Thanks!
Hi Monica. I used spray adhesive on the back of my plastic stencil. The adhesive gives the back of the stencil a removable stickiness so that it will adhere to your fabric lampshade but not leave a mark and can easily be removed. I smoothed the stencil onto the lampshade and then painted using a sponge brush. A dabbing motion works best with your sponge brush. I then removed the stencil right after painting and with baby wipes cleaned off all of the wet paint off of the plastic stencil. I wiped the stencil down with a dry cloth and repeated the process. To speed up dry time on the shade I used a hair dryer on the cool setting. I’ve never stenciled a shade before either and it turned out great. Because the shade isn’t perfectly cylindrical you’ll have to move the stencil to best fit the pattern on the shade. My stenciling isn’t “perfect” but no one would ever notice that unless they closely examined it. I hope that helps!
LOVE it!
I love the updated lampshade! The stenciling is great and the deep blue is still boyish. Can’t wait to see the full room!
Don’t you love free projects? And the table looks great too. I’m thinking of stenciling some lamps in the living room. I love the little pattern it adds!
I love that you are using existing things in the room to change the look. I love the stenciled lampshade, it looks expensive! I love the evolution of the nightstand, the current look is very cool. We had this same color on several pieces of furniture for my daughter from age 12-14. Now we are all Pottery Barn and 60’s chic knock off. The current look better last until college!
Thank Karen! And yes, I too am hoping this room lasts us at least 5 years :).
Beth–great job on your lampshade! So funny–I’m about to work on stenciling my lampshade tomorrow in a navy blue but with a different pattern! Love the blue ribbon on the bottom.
Oooo, I look forward to seeing your lampshade Katie!
Ooh, I love the stenciled shade- I recently did a stencil on the inside of a shade so it’s only visible when the light is on. I’m lazy and paranoid that I’ll mess up, so I figured I had an out that way- just don’t actually use the lamp if I goof! 🙂
I love the look of the inside stenciled shades! Was it hard to do? I would think painting in that tight space would be a challenge.
Your boys room has really grown with the boys! Love all the changes you’ve made! Great job with the lamp and the nightstand!
Love the colors with the sheets and rug. Looking good! 🙂
Beth, I love coming over to your blog to get inspired! I have this same stencil but have done nothing with it. Hmmm.. the wheels are turning…
Love it. I have several lamps with plain cream shades that I am tired of. I see a DIY in my future. The little table is as cute as can be.
Love it, Beth! I would never think to stencil a lampshade. Is the lampshade made of paper or fabric?
Thanks Suzy :). It’s a white linen shade.
LOVE it! That is one of my fav patterns & I personally have been wanting to do that to a lampshade as I am re-doing a couple rooms. Now I feel more confident. Although wonder how it will work with MS paints – I don’t have the spray just the acrylics, should be fine you think? Thanks for posting & giving me the confidence to see just how easy it will be. =)
Thanks Laura! I used the MS stencil adhesive spray to stick the stencil onto the shade and keep it from moving. I think this is a must when stenciling on a surface that isn’t flat. It will keep your paint from bleeding through. Typically when stenciling you’ll use acrylic paints. MS acrylics are great! I used latex wall paint for this simply because I had it on hand and wanted it to match my walls perfectly. The dry time is longer but it still worked great :). Good luck on your shade!
thanks so much for the quick reply – you rock! Yes – the adhesive spray, thanks for mentioning that again – better make sure to have that on hand – would have totally forgot! lol
How adorable! I love the changes! I can’t wait to see the room reveal!
Thanks sis!
Love the stenciled lampshade and the chrome nightstand came out great!
Thank you Mary!
Love the makeovers! The chrome nightstand is so cute!
Thank you Leslie!
Nothing like crossing something off the design to do list with a cheap and easy project!! Although sometimes those take the longest! And I love the chrome nightstand! How fun and adventurous, and unexpected!!!
Thanks Jennifer! Fortunately this project went smoothly without a glitch. But yes, MOST DIY’s have some unforeseen glitch pop up that takes you longer than you’d ever imagined to complete :).