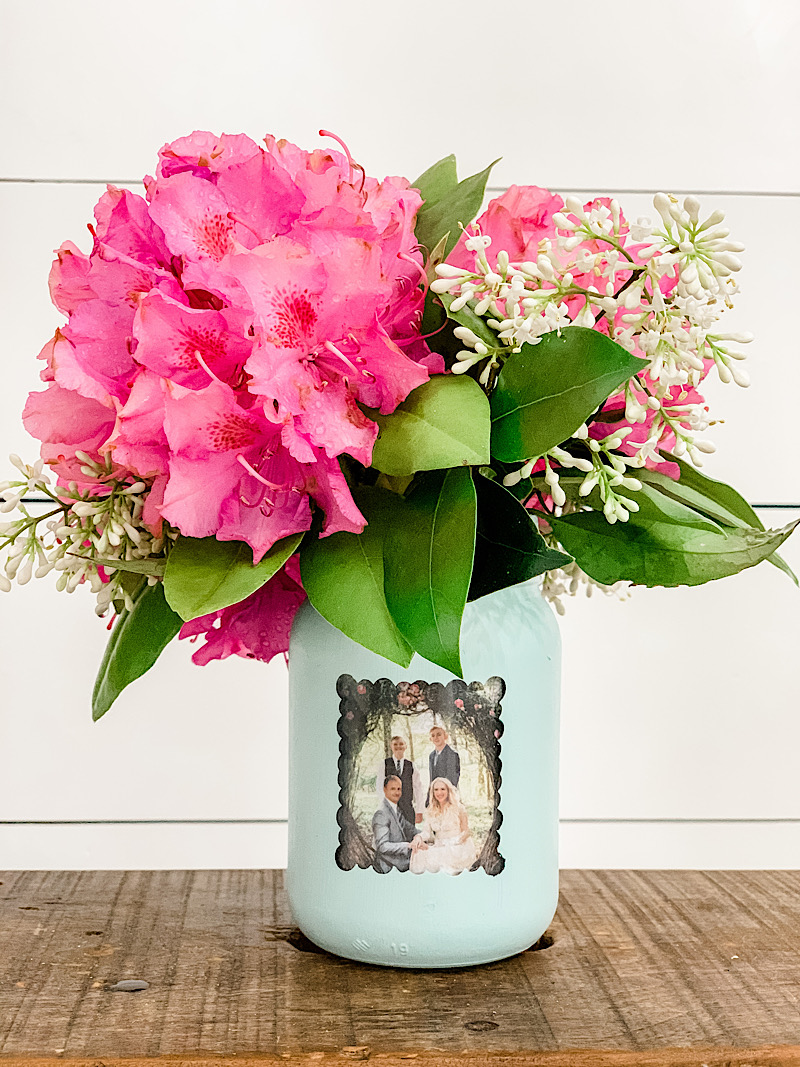
Upcycle a mason jar into an affordable and thoughtful gift using supplies you most likely have on hand! This makes a great DIY gift!
This post originally appeared on the blog several years ago and I recreated the project just for fun today!
…………………………………………………………………………………..
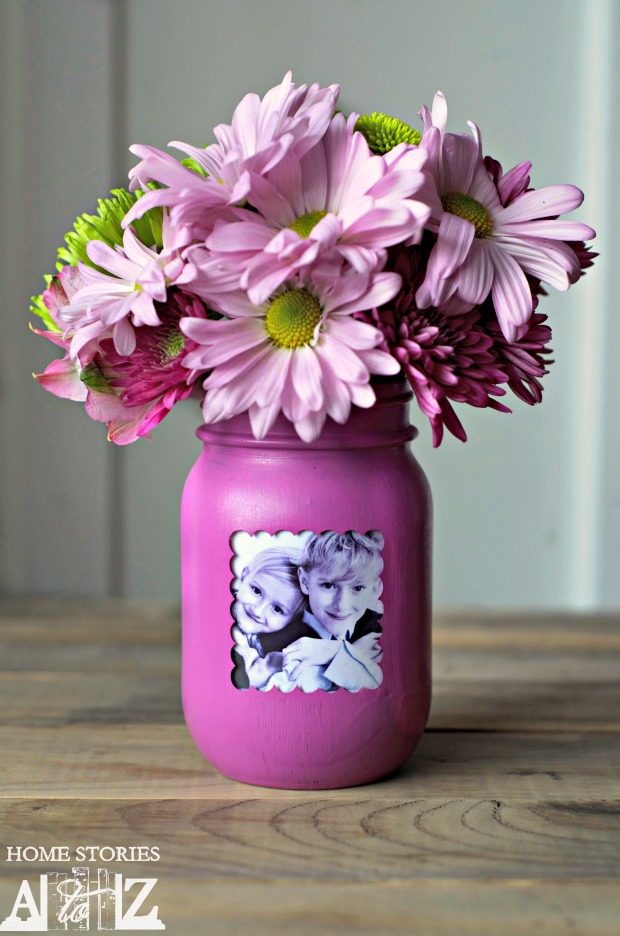
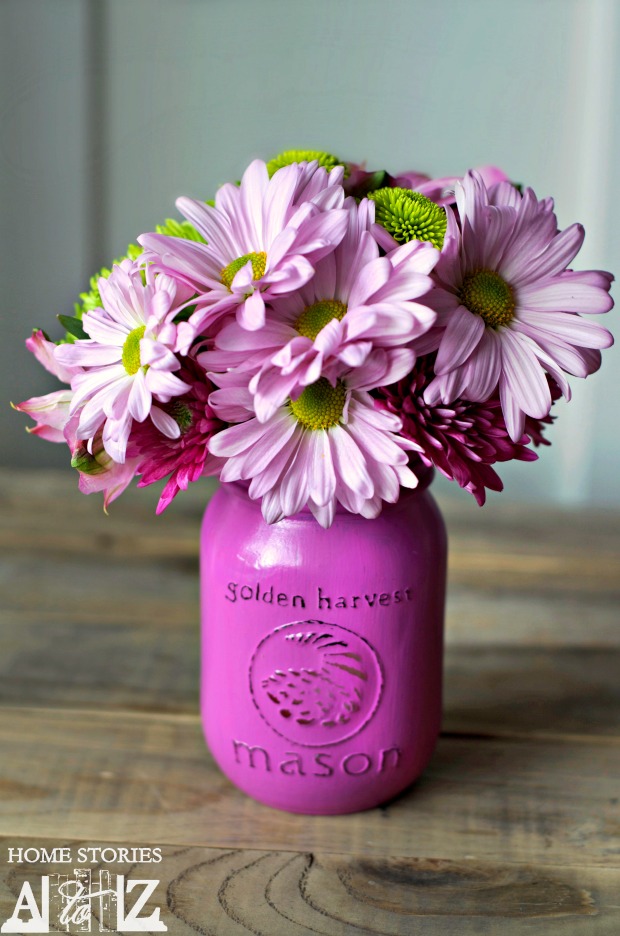
I am a Lowes Creative Ideas Blogger and each month we are issued a project challenge…should we choose to accept it! For March, we were tasked with showing off Pantone’s Radiant Orchid paint by Valspar. I recently shared with you 3 Tips on Decorating with Radiant Orchid. It’s a BOLD color and it’s definitely not for everyone. For this project, I wanted to create something in Radiant Orchid that would be easy to replicate, appeal to many, and scream YAY SPRING! I came up with a simple Mason Jar Picture Frame Vase. I think this would make a fantastic Mother’s Day gift, don’t you? It’s simple enough that kids can do most of the steps themselves with just a little adult supervision.
Supplies Needed for Mason Jar Picture Vase
For this project you will need the following:
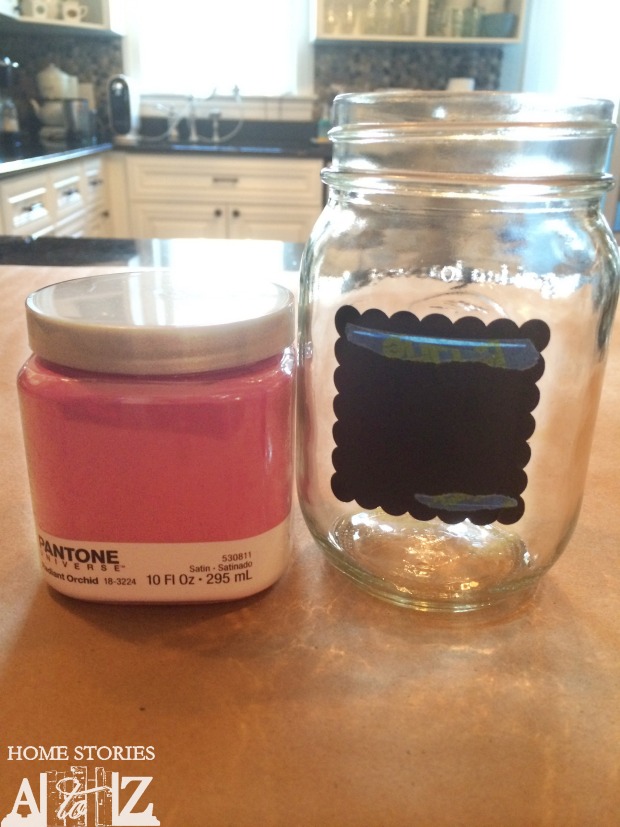
- Clean mason jar (To find the ones I used shop here.)
- Pantone’s Radiant Orchid paint by Valspar
- Paint brush
- Vinyl shape or sticker and picture
- Painter’s tape
- Clear spray paint


Press Play for Video Tutorial
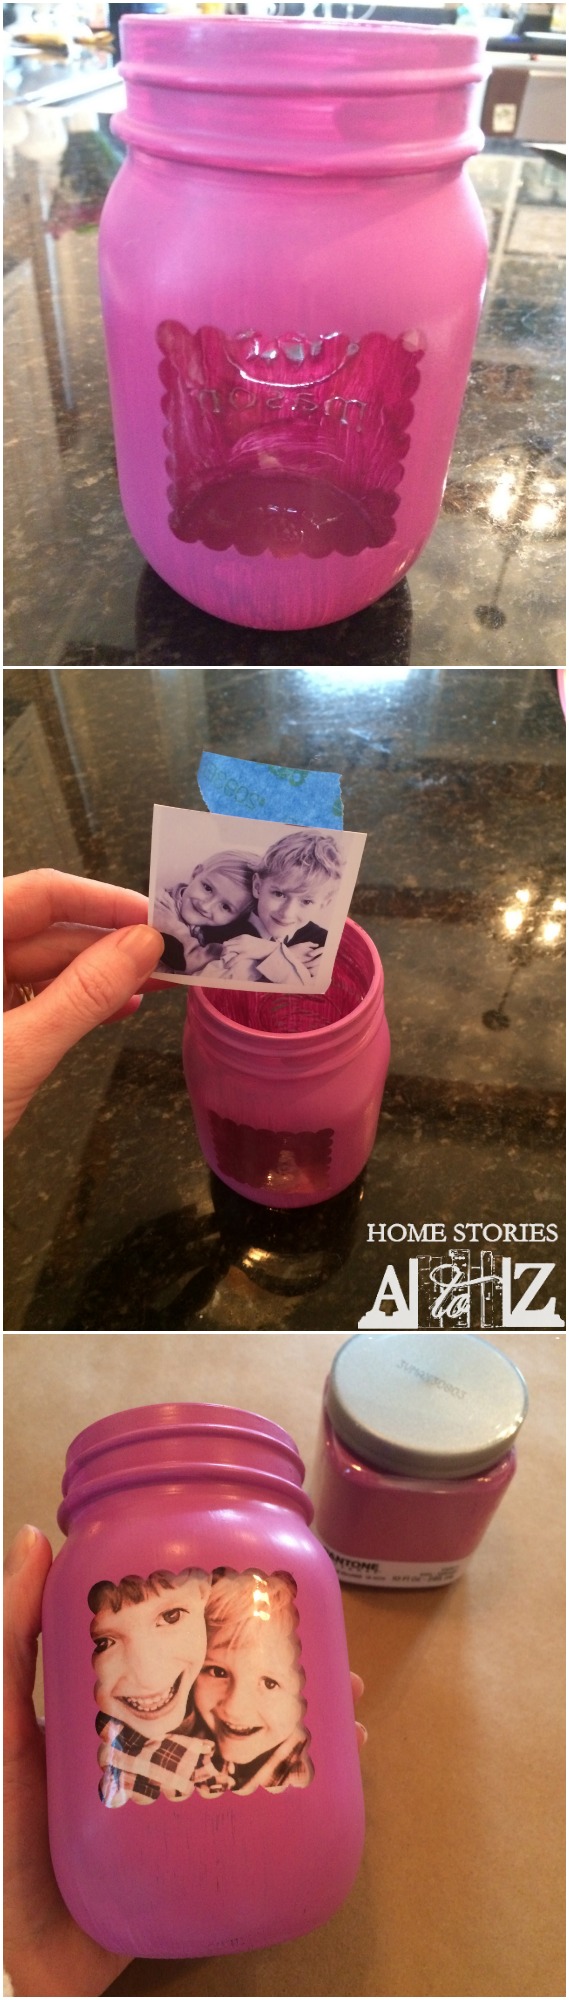
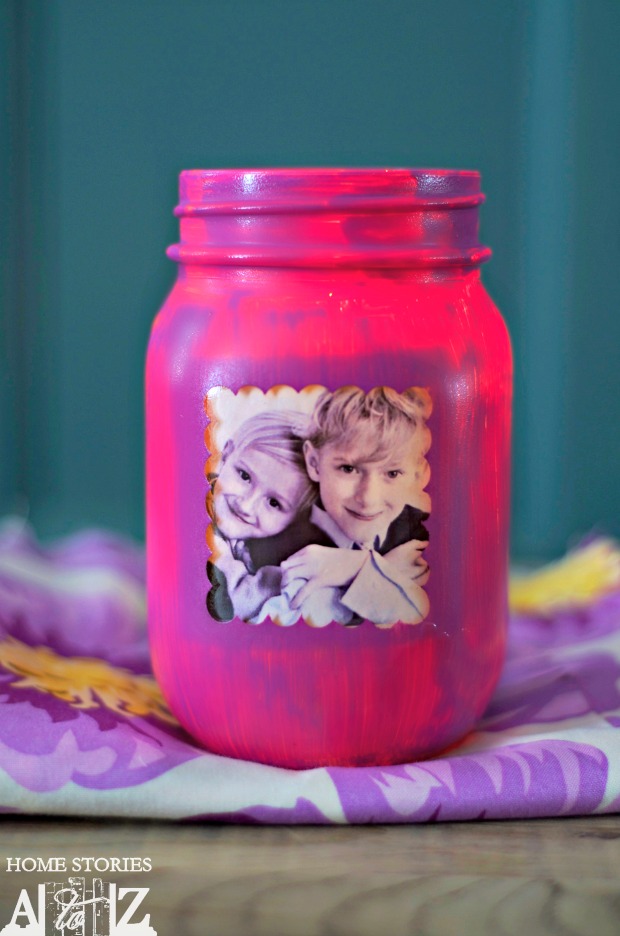
Step 1: Place vinyl or painter’s tape over jar and paint.
To create your picture frame window on your jar, place vinyl or painter’s tape on the area that you don’t want painted. I used my Silhouette machine to cut out a decorative square in black vinyl. There were some gaps in my vinyl, so I filled them with painter’s tape. If you don’t own a Silhouette, you could create a square using painter’s tape and decorative edge scissors. Paint the outside of the jar and immediately remove your sticker. You do not want to wait until the paint is dry or else it will be difficult to remove your sticker.
Step 2: Cut a picture to size and attach to jar with painter’s tape.
I tried out a few different pictures before deciding on the one I liked best. I sized my pictures in a Word document and then just printed them off on my laser printer. The painter’s tape allows you to easily change out the picture.
Step 3: “Distress” the lettering on the jar.
This is an optional step. I like the look of the lettering and pictures on mason jars and wanted it to show more clearly. I took a metal file and scraped off the paint where I wanted the lettering to show.
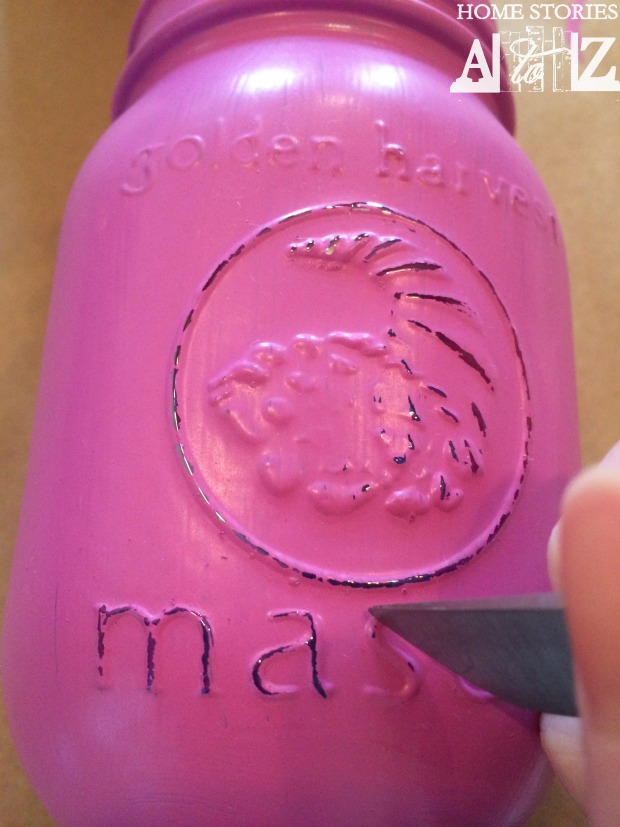
Here you can see what the back of the jar looks like with the paint scraped off of the lettering.
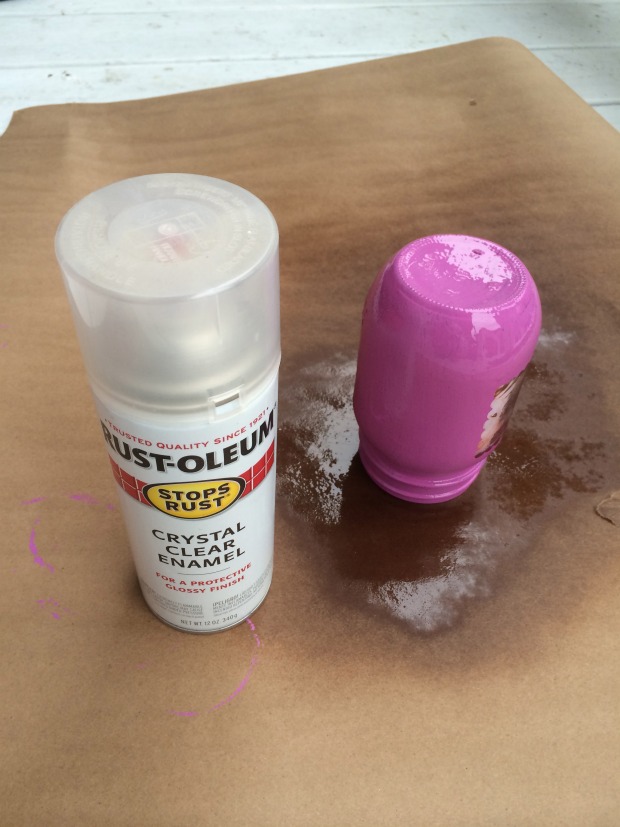
Step 4: Seal the outside of the painted jar with clear spray paint.
The paint will easily scrape off of the jar if it is not sealed. To add durability to the paint, spray it with a clear spray paint.
Step 5: Place paper cup inside jar to hold flowers.
Your picture will be ruined if you fill the inside of the jar with water. Place a paper cup inside the jar, fill the cup with water, and place your flowers in the cup. I used a foam cup and had to cut off the lip of the cup in order for it to fit but it worked great.
Alternatively, you can place an LED candle inside the jar for a different effect! Enjoy!
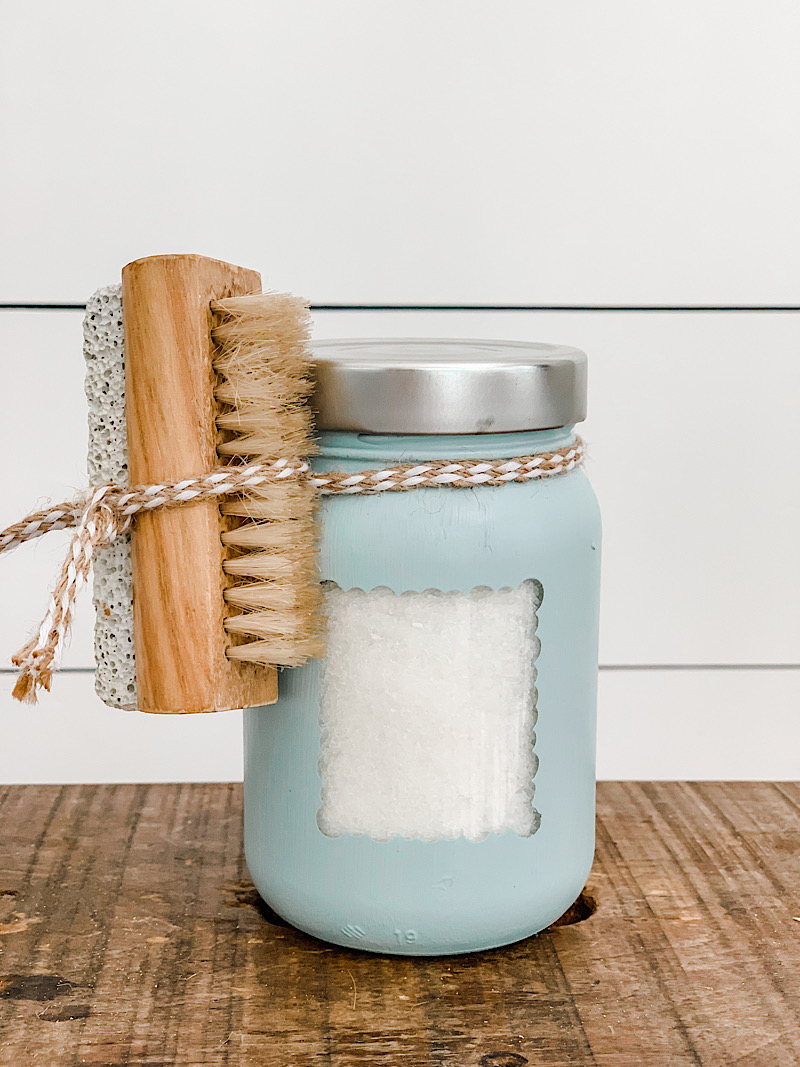
You can also fill the jar with epsom salts or a sugar scrub!
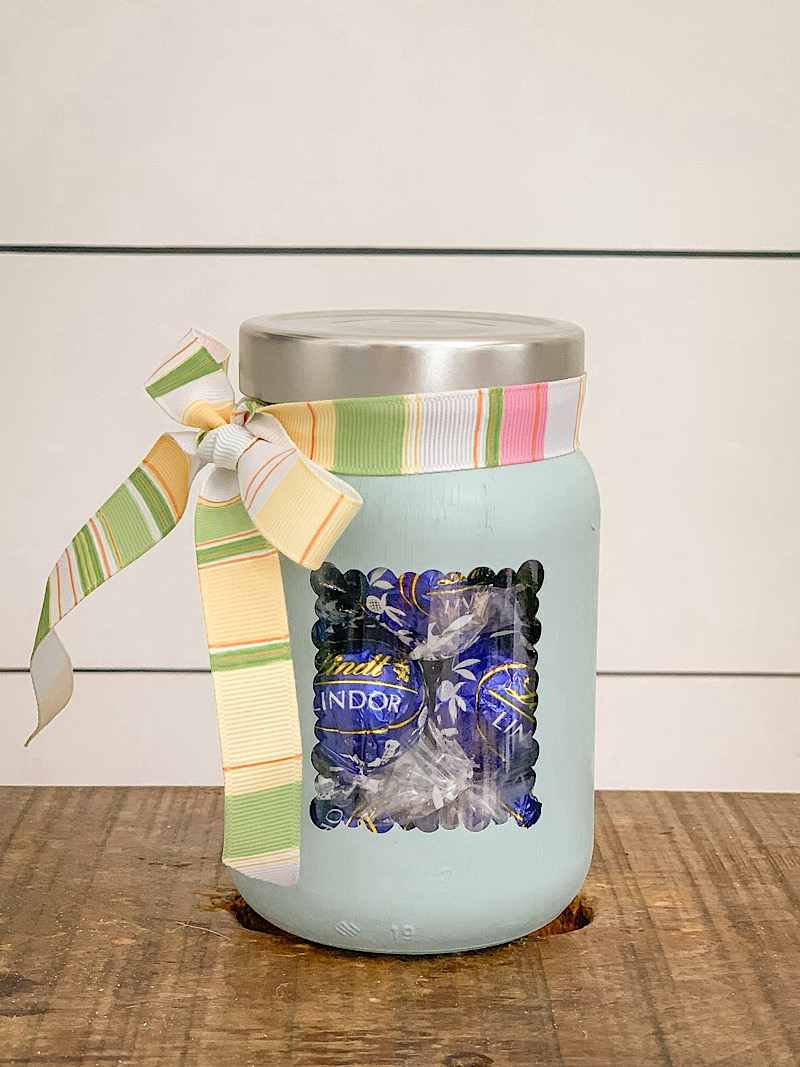
Or just fill the jar with your loved one’s favorite candy for a thoughtful and inexpensive gift!
*Note: Some of you are having difficulty finding the right mason jars. Use Golden Harvest mason jars

Love this and the colors are beautiful!
This is such a great idea, my wheels are turning!!
I’m so glad! It’s such a simple and versatile project.
I love mason jar crafts! Great project idea. I included this in a ten best photo ideas for Father’s Day gifts blog post that links back to your tutorial and blog.
Could you use spray paint that has acrilic?
I’ve found it works best with brush on acrylic paints or latex paint. People tend to get impatient with spray paint and it doesn’t cure properly to the glass. If you are patient and can do very light coats with plenty of dry time between the coats and then allow it to cure overnight it should work.
Hi! This is such a cute idea. I’m wondering if you think I could use acrylic paint and a workable fixatif to seal it? Let me know. Thanks!
Yes, you can use acrylic paints and seal it with a clear polyurethane.
So cute!!! I have added this project to my “Grandparents’Day Crafts” post I have just published on my blog!
Lovely idea for Mom! I liked it so much I added a link to this page on my blog. I love the recessed look of the photograph – very unique.
What size jars did you use?
Hi Heather, you can choose whatever size you’d like for this project. I used a 16 oz (pint-sized) jar.
The pint size mason jars have lettering on one side and fruit on the other. Will I still be able to do this project? We’re doing this in my daycare as a Mother’s Day gift.
No. You need jars that only have something embossed on one side otherwise your frame area will have fruit or writing over the kids’ faces. I recommend going to Walmart to see what’s available. You can buy online on Amazon (http://amzn.to/23xpch4) but they don’t always show you the back of the jar. Ball jars sometimes have embossed fruit on the back and sometimes are plain.
What about putting mod podge on inside of jar, covering photo? Would it protect the photo so the jar could be filled with water, skipping the cup?
I haven’t tried it but Mod Podge does make a dishwasher safe and an outdoor version that might work. Let me know if you try it and if it works!
how do you prevent the picture from getting “wet” if you put water in the mason jar? Love this mason jar idea!
Thanks so much Valerie! In the tutorial and in the pictures I address this. You use a foam cup inside the jar.
Can you tell me what the secret is to getting paint on that thick in one coat? A certain kind of brush? Technique? What?! I’ve been trying to replicate this but it’s taking several coats of paint to get coverage like you have and by the time that is accomplished the vinyl won’t come off nicely. HELP!
I’m so sorry it’s not working well. I think I used a Purdy paint brush and I don’t remember doing more than one coat, but maybe I did two. You could also just use spray paint.
Will Fabric spray paint work on a glass jar?! Just wondering…?! Thanks!
Fabric spray paint typically contains softeners in the paint so that the coating is more flexible and won’t crack when bent. It wouldn’t be my first choice to spray on glass, but I’ve never tried it before so can’t speak to whether or not it works/holds up.
Thanks much for the reply. Will give it a dry run tomorrow and will advise.
Appreciate the quick reply and have a great day!
:>>
Diane
I love this idea! I was trying to email it to myself and am having issues. I want to use this for my daughter’s quincenera, as table decorations and families can take them home if they want!! Please email me this article!
Thanks!
Carla Enriquez
I am making 5 of these as mothers day gifts. Cant wait to see how they come out!
Hi,
I am just wondering. Is the picture on the inside of the jar or outside? How is the picture adhering to the jar?
Thanks
Hi Christie, If you look at the pictures in step 2 you will see that I have cut out a picture of my boys and placed painter’s tape (sticky side up) on the top of the picture. Place the picture inside the jar. The rest of the directions should be clear. Thanks!
I am still not clear about step two. How does the picture not get wet?
Please read step 5.
Love this and the colors are beautiful!
i am interested in how you became a “Lowe’s Creative Blogger” and what the job is like…
Hi Stephani, Several years ago (3 or 4) Lowes’ PR company that managed the Lowes Creative Ideas Magazine chose me and 30 (or so) other bloggers to participate in the program. Just a few months ago, they changed how the program works so I no longer have monthly challenges. It was wonderful working with them, and I loved having a monthly project that “forced” me to think outside the box!
This is such a cute idea! Thanks for posting! Do you spray the photo area with clear paint as well?
Hi Fawn, yes, I just sprayed the entire jar including the picture area with the clear paint.
how big is the picture area?
I think I made mine just under 3 inches but it will depend on the size of your jar. Measure the area you want your picture to be placed and size your tape/vinyl and picture accordingly.
What a cute idea! …Pinning!
Thanks girl!
Hi! I was wondering what the price point for this craft would be.
Thank you!
Hi Steph, I’m not really sure. I guess it would all depend on what you have on hand already and whether or not you were buying supplies for a group. I would guess you could do it for about $2.50 per jar? But I’m totally guessing here.
Love it! Will def put the word out for others to look at your site!
What a cute idea Beth!! Love the photo of your boys – perfect for gift giving!!
Such a great idea. I love using mason jars.
This is absolutely precious! We are having a party for my grandmother’s 90th birthday next week and just tonight my mom and I were talking about how to incorporate mason jars and pictures! Well, there ya go! Super cute idea!!!!!!!!!!!!!!!!
I cannot wait to try it!
~Amber
Such a sweet idea! I have those same Mason jars!
Jeanine