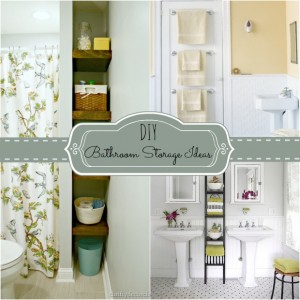
I promised you a tutorial on how we created our floating bathroom shelves! It is so incredibly easy that I swear ANYONE (yes, even you non-DIY’er) can do this! If you missed the entire bathroom reveal post, please click here to see more pictures of the entire space.

The first thing we did was buy unfinished pine boards at Lowes and we had Lowes cut them to size. I primed the boards with some oil-based primer and then painted them with a gloss white paint. (I had enough boards for five shelves, but we only needed three.)

I wanted the shelves to be sturdy, but I also wanted the hardware to disappear. Matt suggested using three braces instead of four on each shelf and it worked out beautifully!

Here is your secret weapon….toggle bolts! You can find them in the hardware section of any home improvement store. They allow you to securely hang things in your drywall when a stud isn’t available. I don’t know about you, but our studs are NEVER where I need them to be….like ever. Toggle bolts work great for your permanent wall fixtures.

And here is a little explanation as to how they work:

I was too cheap to actually destroy a toggle bolt in order to show you exactly how they work so you’ll have to use your imagination. But the directions are right on the box and if you can drill a hole you can use a toggle bolt!

These are the braces we used to hang each shelf.

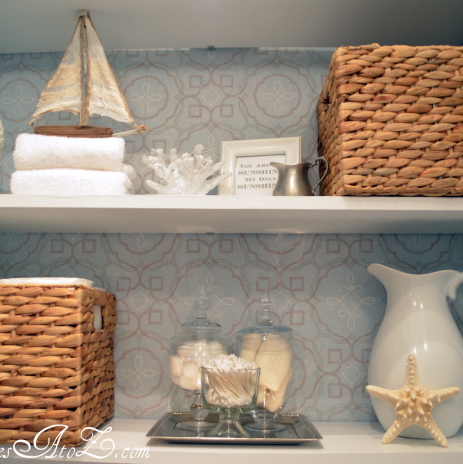
And here is a close-up of the hardware. You can barely see it!


If you need to know how to use a drill, you can check out my video at the very end of this post here. Happy shelf hanging!

Awesome explanation. I’m using this approach for my kitchen, putting a floating shelf above my sink. Painting a regular board gray, then sanding it a bit. I also liked the tip for painting the hardware and have them really disappear. Was reading this during my visit to Home Depot today.
Thanks James! Good luck on your shelves.
that’s awesome! I could do that without my husband’s help!
Absolutely! No husband required for these at all.
I realize this was posted a while ago, but THANK YOU! My husband and I are trying to declutter and redecorate our office space and these floating shelves are EXACTLY what I need! Now to convince him to install them for me. 😉
You’re welcome :). Glad it was helpful!
I really hate to bother you, but the convincing isn’t going so well. 😛 Do you think the way you installed the shelves would be sturdy enough to hold books? I want the bottom support to disappear, but I think I also want to install some upside-down brackets to the top of the shelves for both decoration and added support. Is that enough support? Some of my books are kind of heavy. Any advice you have would be immensely appreciated. Google won’t tell me anything. 😛
do you know if the togglers will work on a wood type of wall. I want to mount shelves in my living room but my walls are not drywall they’re like wood
Hi May, if your walls are wood paneling with studs behind them you won’t need to use toggler bolts because you’ll have something sturdy enough to drive the hardware into. My sister wrote a great post on installing true floating shelves that I recommend. My shelves have very minimal hardware and work great in this space since they are flush to the wall. But for stand alone shelving, I would implement her technique. http://www.sandandsisal.com/2012/06/how-to-build-floating-shelves.html
Hi! This looks great! I will be doing this in my living room ASAP. I was just wondering about how much all of the materials cost?
Hi Jessica, I really don’t remember but I’m guessing less than $50? I already had the paint on hand. Good luck!
How high above the toilet did you start the first shelf and how far apart are the shelves spaced? Thank you!
How deep are the shelves? I’m trying to get an idea so there is enough space to place things on it.
Thanks!
Awesome idea. Hubby and I bought stuff this morning to build our own too. We went one step easier and found laminate boards already stained that were the perfect length! Can’t wait for them to go up tomorrow.
I love this look and the directions are perfect. I also love the wallpaper!! Where can I find it and does it have a name? Thanks for sharing – it’s lovely!!!
Thanks Dana! I bought the wallpaper at Lowes. It’s called Brewster National Geographic Spanish Tile: http://low.es/PQk83X
Just a suggestion: Paint the corner braces the same color as the shelves so they disappear.
The whole bathroom looks great! well done! I love the pattern you have on the wall,m is it wallpaper/ or a stencil? Where can I get it? do tell.. ( sorry if you already answered that question, I looked through past posts but could not find it)
I will be starting a kitchen makeover soon and I will be using this for my open kitchen shelves! Thanks for sharing another great tutorial!!!
I love those little togglesd. They are worth their weight in gold 🙂
Lovely, Beth! Thanks for sharing the details – you make it seem very much more doable by sharing them. Now I need to find a cubby for shelves!
I have been trying to talk my hubby into assisting me with floating shelves… but the tutorial I found on floating shelves was MUCH more complicated. I’m so thankful that you posted this! LOVE them!
Nice! I was wondering how you had done it. Do you suppose it would work in a window opening? I have a tall narrow window in our half bath, was trying to think of a cool way to have shelves there, without major visible hardware!
Thank you, thank you, thank you for this tutorial, Beth! We just painted our master bath last weekend and I have been slowly doing things to it all week long. One thing I definitely wanted to do was hang some shelves above our toilet as well! I think I might make this my weekend project this weekend! Thanks again! xoxo