
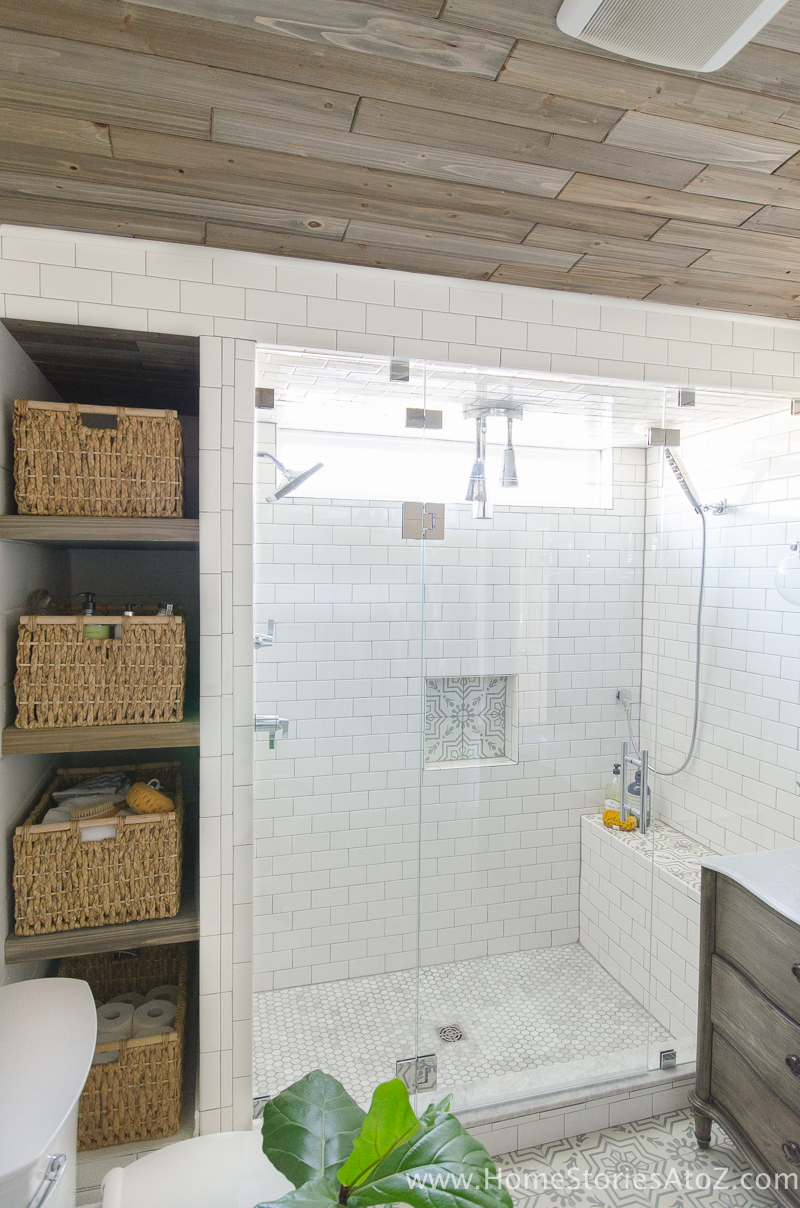
Learn how to build these easy and inexpensive bathroom shelves! These are perfect for that awkward space between your shower and wall.

I recently shared our urban farmhouse master bathroom remodel and if you haven’t seen it yet, please stop reading and click the link! I promise it’s worth the extra page opening in your browser. 😉 Several of you inquired how I made the shelves next to our shower, so I thought I’d do a quick tutorial for you.
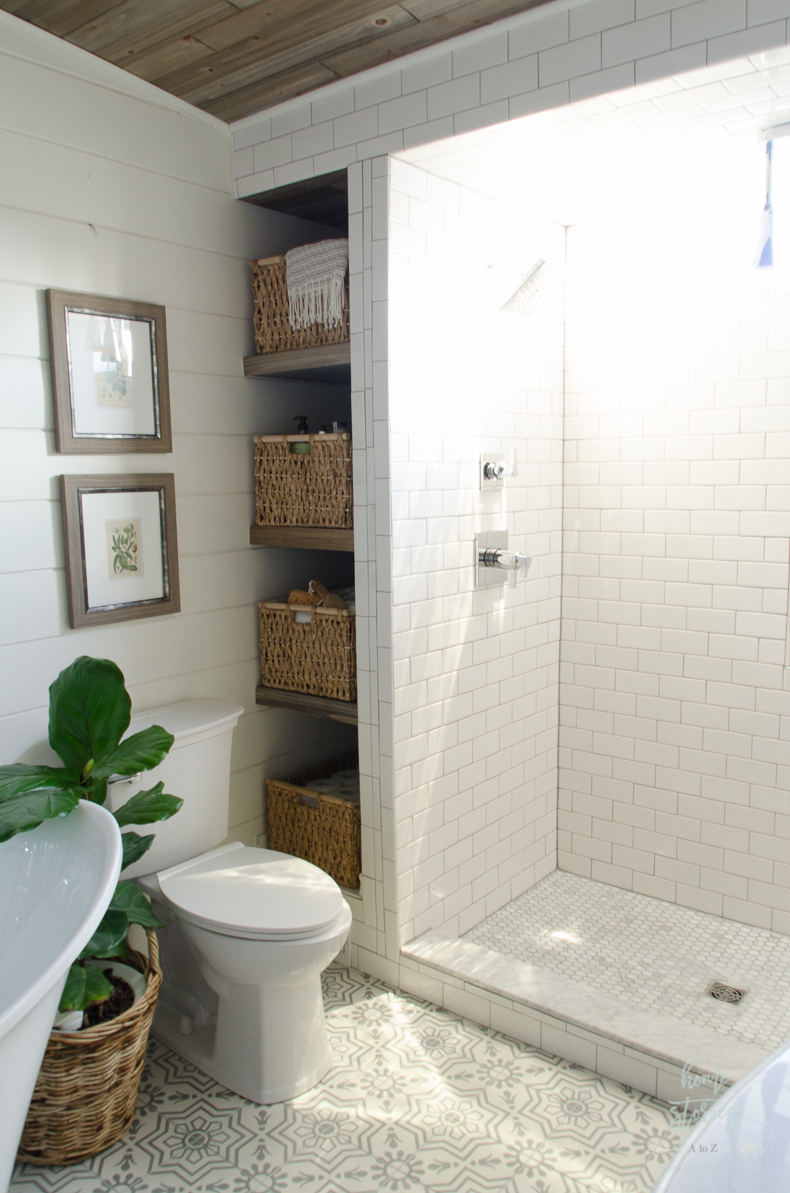
When I designed the shower, my original plan was to run it the entire length of the bathroom. After mapping it out on paper, I realized an almost eight foot long shower would be a bit overkill! I also wanted access to the plumbing and wanted the plumbing away from the exterior wall. A closet or shelf space seemed like the perfect solution to all of our problems. When I saw this inspiration picture in my Pinterest bathroom file board I knew it was meant to be! I had already designed my shower with a similar window and shower head layout so this design was the perfect inspiration for our shelves.
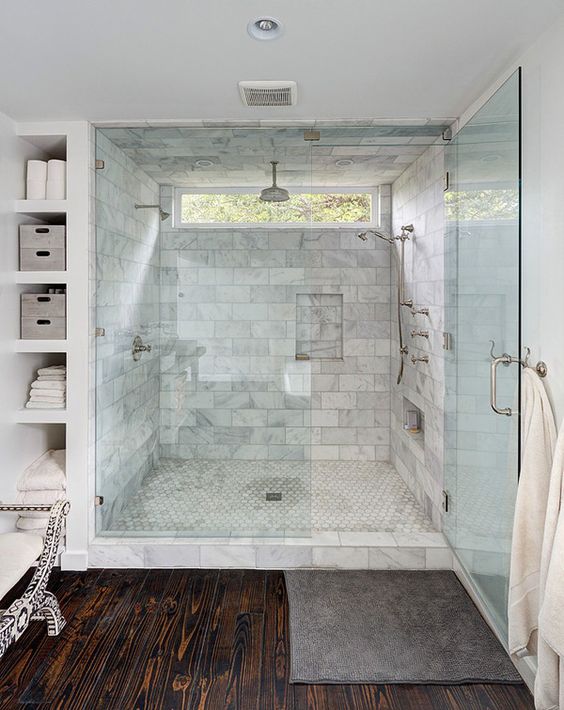
Source: Restructure Studio via Houzz
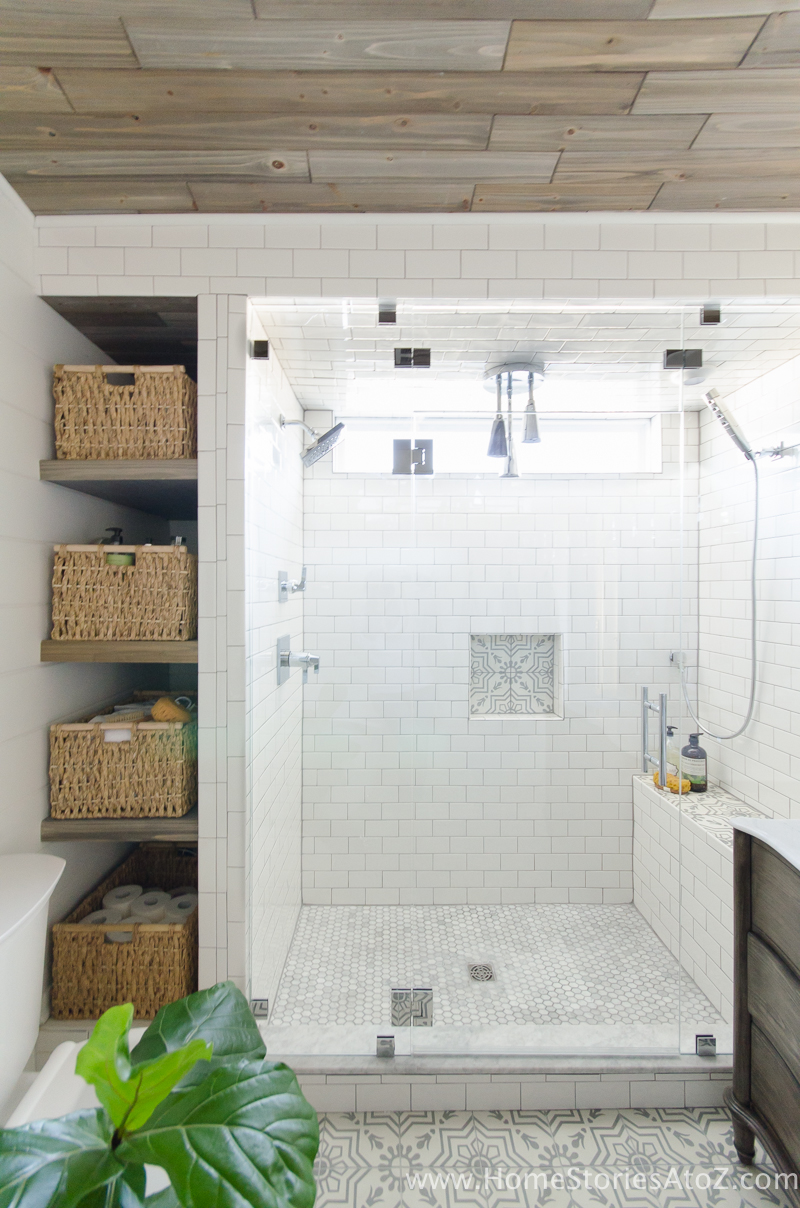
How to Build Bathroom Shelves Next to Shower
As a reader, you might not know that some of your favorite home bloggers are good friends in real-life and text and chat daily. Sarah from Thrifty Decor Chick is one of my good friends, and I told her about my bathroom shelving plan. She reminded me that she created similar floating bathroom shelves a few years ago in her basement bathroom remodel. They were exactly what I was planning on doing in our space and they turned out great! Check out her tutorial for more inspiration.
Bathroom Shelves Step 1: Measure your space and determine how many shelves to make.
Our “closet” space is 80 inches tall from floor to ceiling and about 17.5 inches wide. I knew I wanted baskets on all of the shelves, and I also wanted to leave breathing space around the baskets so I could reach in for items without having to completely remove each basket. I’m lazy. 😏 While I think five shelves would have looked better visually, four just worked better. Measure exactly how deep and wide you would like your shelves and head to a home improvement store with your measurements.
Bathroom Shelves Step 2: Buy 1×2’s and a sheet of plywood and have the store cut the wood to size.
I took some pictures of this process on my Instagram Stories and forgot to save it to my phone! We bought our wood at Home Depot and their was a big sign on the side of the ginormous saw in the cutting area that said, “We will not cut exact measurements!” I ignored the sign and asked nicely if they’d mind cutting our sheet of plywood and 1×2’s to size. I gave them the exact measurements and they cut everything for us. This saved us so much time and made the project completely painless! The trick here is to buy your wood during the week at a non-busy time. Both Lowe’s and Home Depot are typically happy to cut things for you at little to no cost if they aren’t busy. If you’re asking at prime-time on a Saturday, then you might be told no and will have to cut the wood yourself.
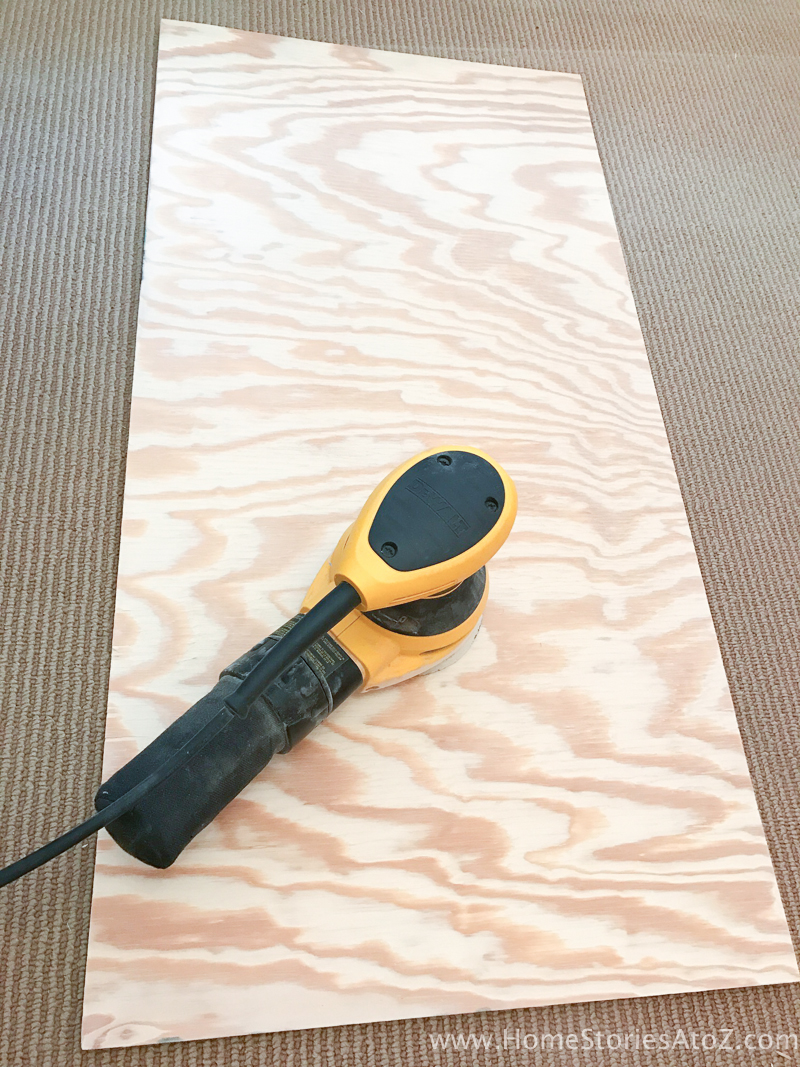
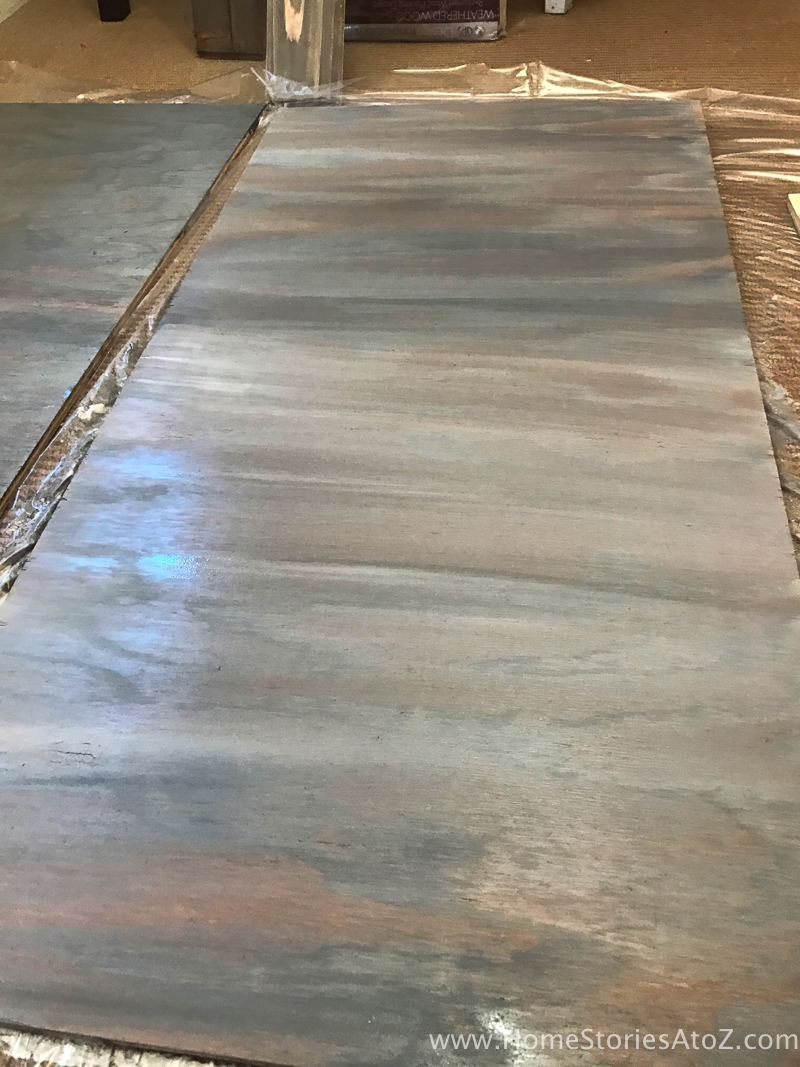
Bathroom Shelves Step 3: Sand and stain your wood.
If you purchase inexpensive plywood like I did, you will spend a lot of time sanding! Cheap plywood is rough and splintery, but with a little elbow grease you can create a smooth surface. I own four different sanders and this oscillating sander by Dewalt is my favorite. Don’t waste your money on the sanders that just vibrate back and forth. Invest in this one and be done with it! I used a coarse sandpaper followed by two other less coarse papers to create a smooth surface and then stained my shelves.
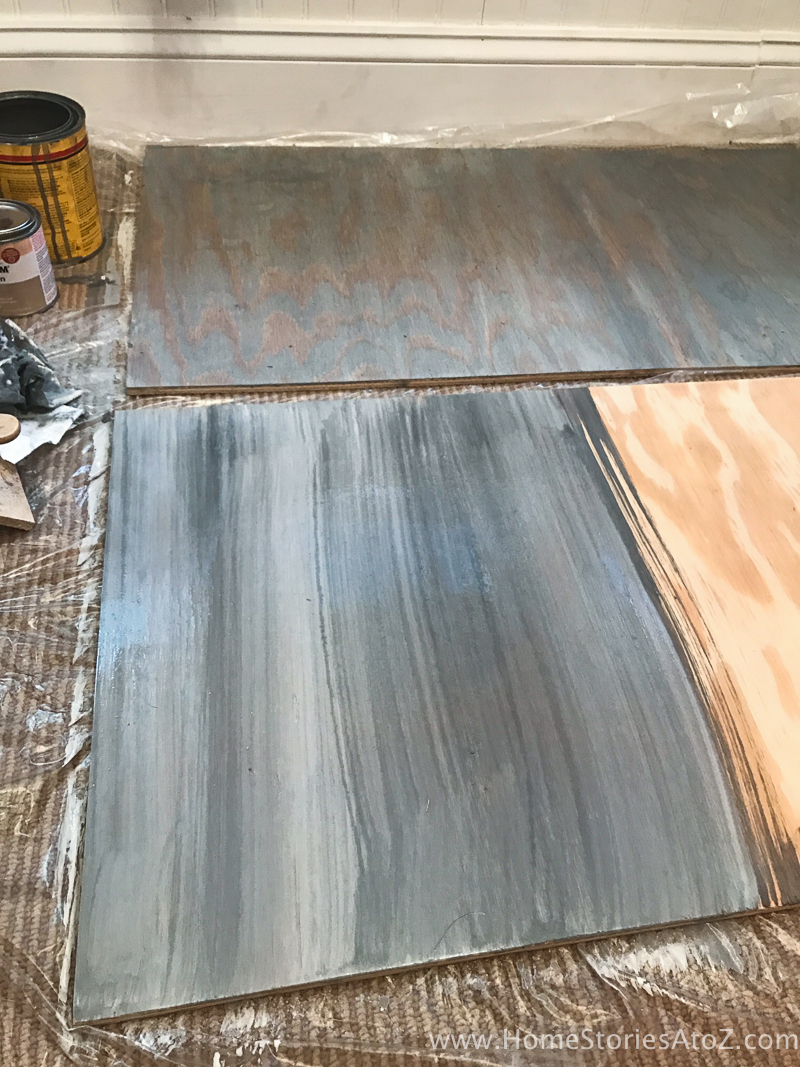
I used Minwax Classic Gray

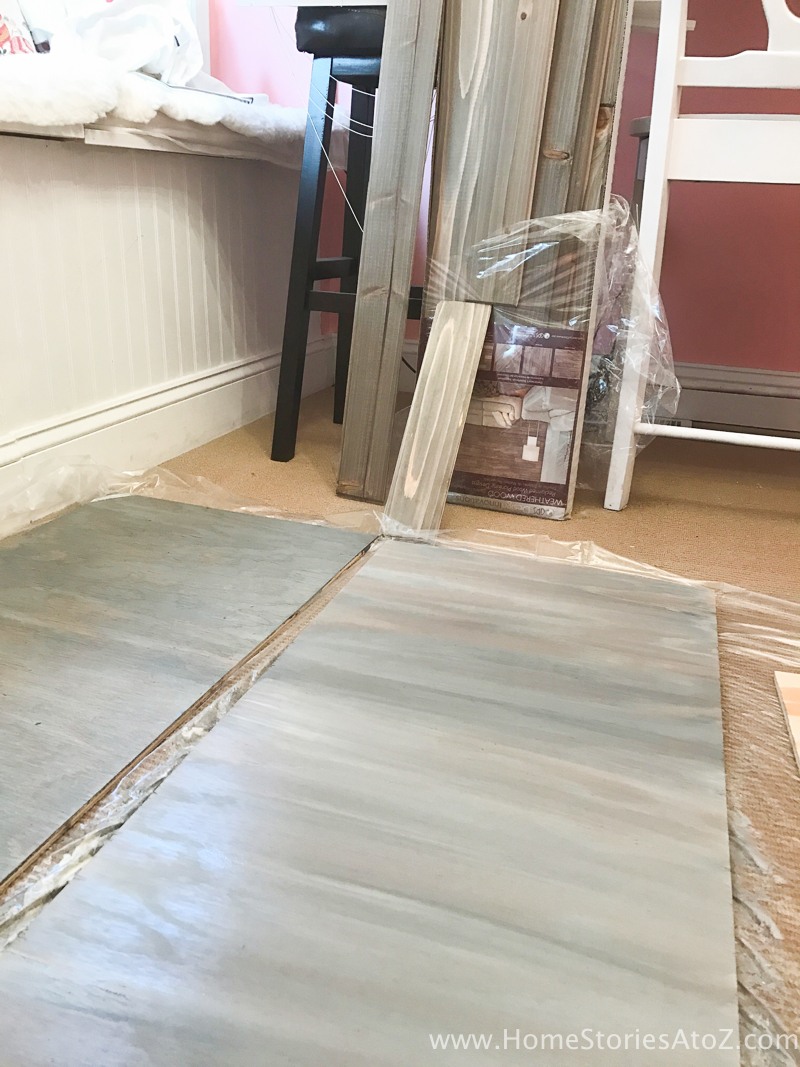
While they weren’t a perfect match, I was very pleased with how they turned out!
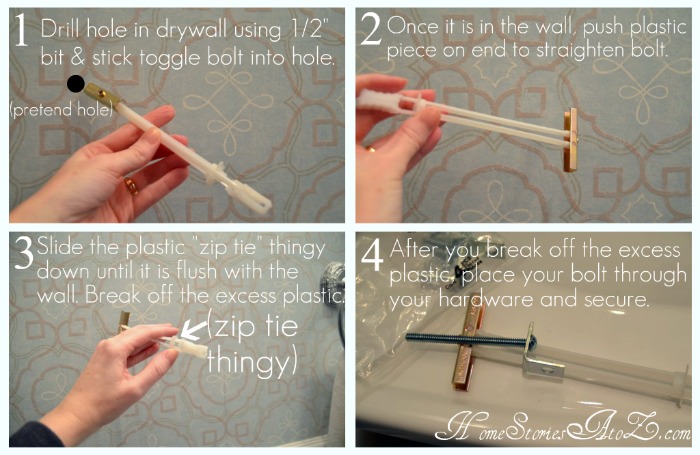
Bathroom Shelves Step 4: Measure and nail your 1×2’s in place.


Matt had never used my Ryobi AirStrike

To determine where to place the 1×2’s, measure the height of your space and divide by the number of shelf openings. My space was 80″ and we wanted four shelf openings and three shelves. I placed the bottom of the 1×2’s every 20 inches, creating three shelves and four openings 20 inches apart. You’ll need to do the math for your own space but this will give you an idea. Use a level before nailing to ensure they are straight.


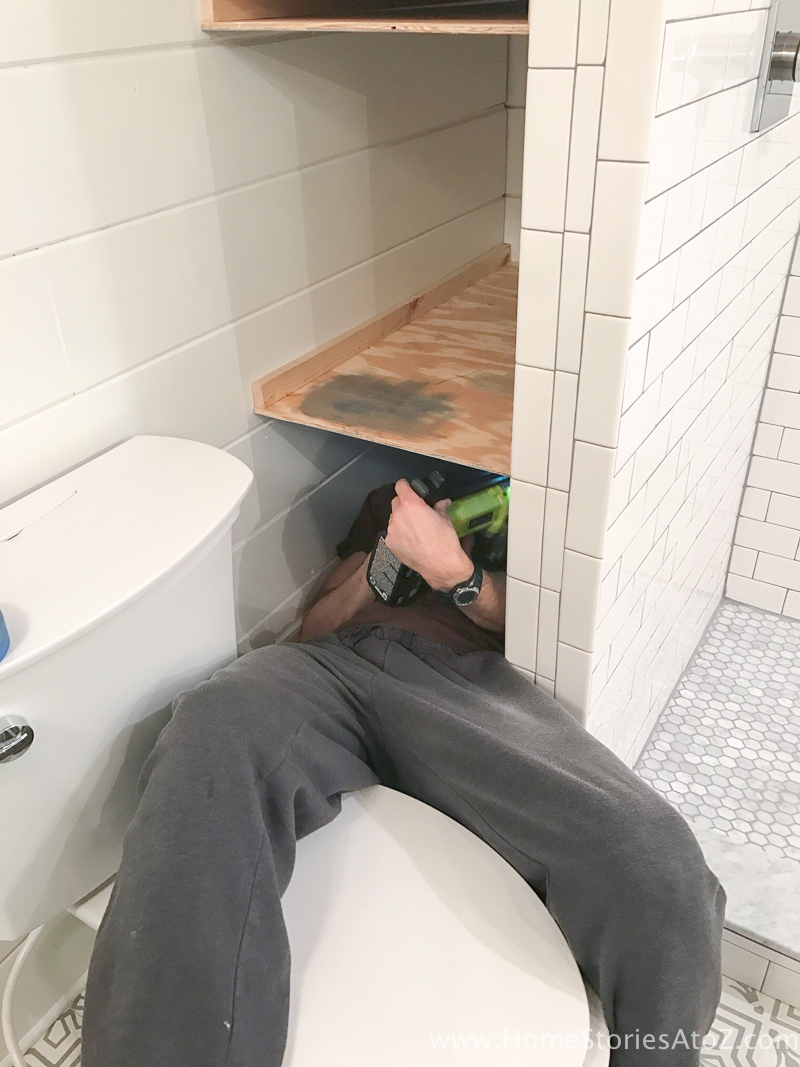
Bathroom Shelves Step 5: Nail your plywood to the 1×2’s.
My husband is over 6’2″ with wide shoulders and this picture totally cracks me up! Our commode buts up to (no pun intended) the bathroom shelves. I told him that I’d take it from here, but Matt wanted to finish what he started! I was so worried he was going to nail himself into this space and not be able to get out. I did video him trying to get out and it was amusing. 😂 For this step, simply nail the top and bottom pieces of your stained plywood into your 1×2’s and you are almost done!
Bathroom Shelves Step 6: Cut and attach your front piece of wood.
I used leftover cedar ceiling planks cut to size on the fronts of my shelves. To attach, I used liquid nails instead of nailing. I didn’t want visible nail holes and knew that the liquid nails would easily hold the lightweight cedar in place.

Bathroom Shelves Step 7: Add baskets and enjoy!
I found my baskets at Christmas Tree Shop. You can find similar ones here on Amazon.
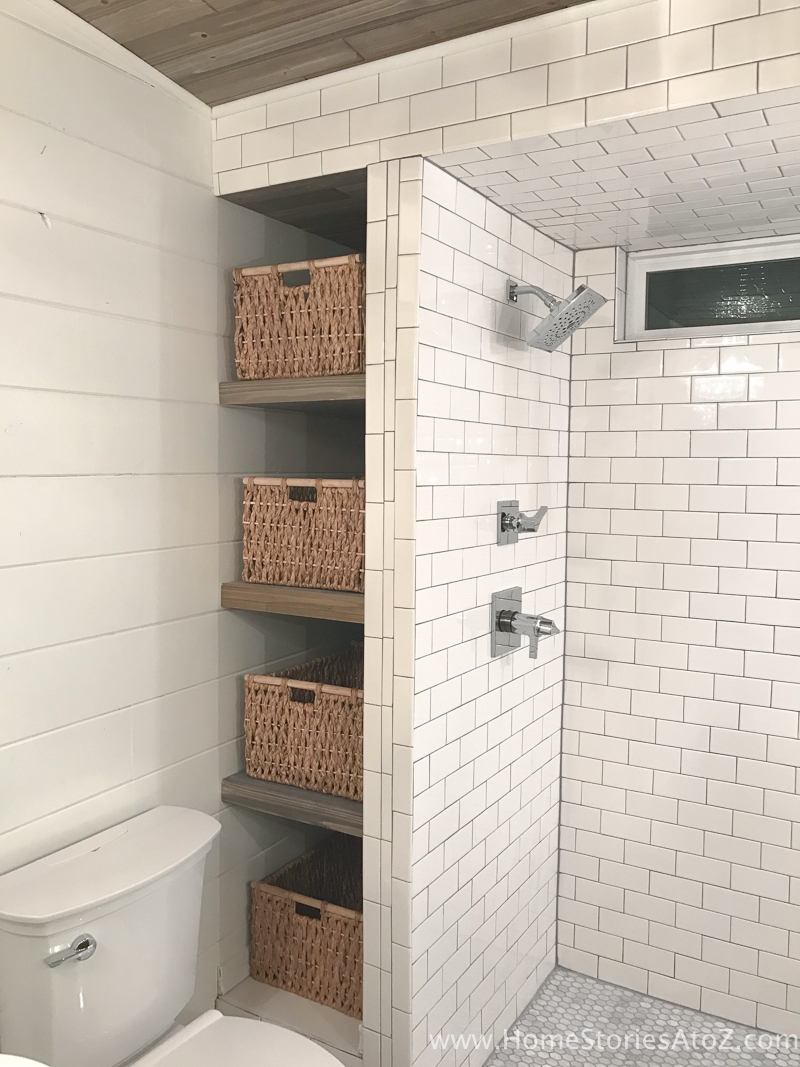
I love the extra storage they add to our space, not to mention they look great! And some of you have also asked about the beautiful barn door. I’ll have a tutorial for that soon as well!

Thanks for stopping by and check out my related posts while you’re here!
Related Posts
 How to Install Floating Shelves {diy shelf}
 How to Decorate Shelves
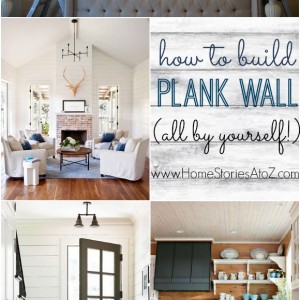 DIY Plank Wall Tongue and Groove Tutorial
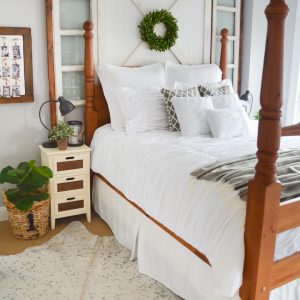 5 Affordable Tips to Creating a Modern Farmhouse Look in the Bedroom
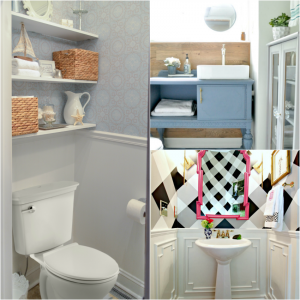 10 Helpful Tips for Making the Most of Your Small Bathroom
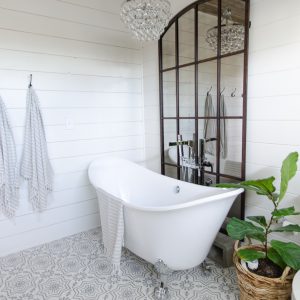 7 Things to Consider Before Beginning a Bathroom Remodel
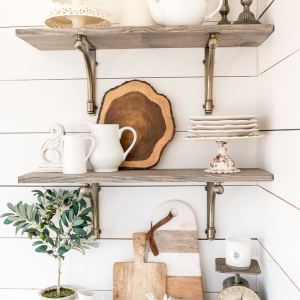 How to Build Open Shelves the Easy Way
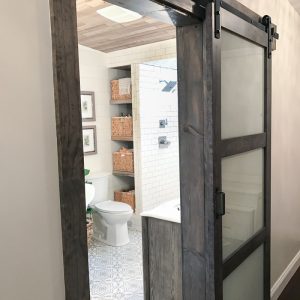 Affordable Premade Barn Doors
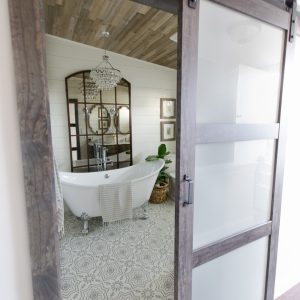 Urban Farmhouse Master Bathroom Remodel


Thank you for this tutorial it’s really great 🙂
Can you tell me about the vanity/sink?
Here is the link for it: http://rstyle.me/n/cc9eb5n7aw Looks like it will be back in stock June 7th.
You are a life saver! This is EXACTLY what I need in our master bath. The space that has been my biggest frustration can now be something wonderful. I actually saved that exact inspiration photo sometime last year and had forgotten about it…but probably wouldn’t have known how to make it a reality anyway. Thank you for this tutorial! (PS Your entire bathroom is gorgeous! I’ve loved reading all about it and looking at the beautiful photos again and again!)
You’re so welcome Lindsey! I’m glad you found the tutorial helpful and felt inspired. 🙂 Send me a pic of your completed shelves when they are done! I’d love to see them.
Hi – Could you please tell me which tile (manufacturer, name, mateial) you used on the floor? This one looks perfect!
Hi Amanda,
The flooring is the Leon I pattern from Cement Tile Shop. Here is the link: http://www.cementtileshop.com/in-stock-encaustic-cement-tile/LeonI.html
Simple but great diy. Thanks for share tutorial & inspiration!
Thanks so much Nicole!
where are the extra long baskets from!? they’re awesome!
Thanks! They are from Christmas Tree Shop but I link in the post to a similar one on Amazon.
thanks so much!
What a great idea Beth. Great tutorial.
Thanks so much Mary!