
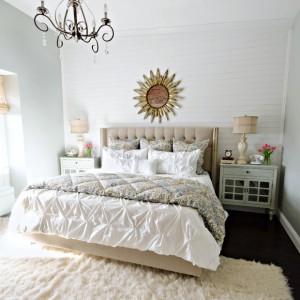
Out of all the rooms in my house, my master bedroom has given me the most trouble. I have redecorated this baby about 10 times in the last six years! Well, I’m determined to get it “right” this time (for at least a year or so) and that required the addition of a plank wall. I have wanted one for a few years so it was just time to do it already! This tutorial is great if you are going to be building a wall 100% by yourself with no help from anyone. And if you have limited upper-arm strength! Seriously, if I can build this wall, then your seven year old can probably build it too. Wimpy upper-arms unite and let’s do this thing!
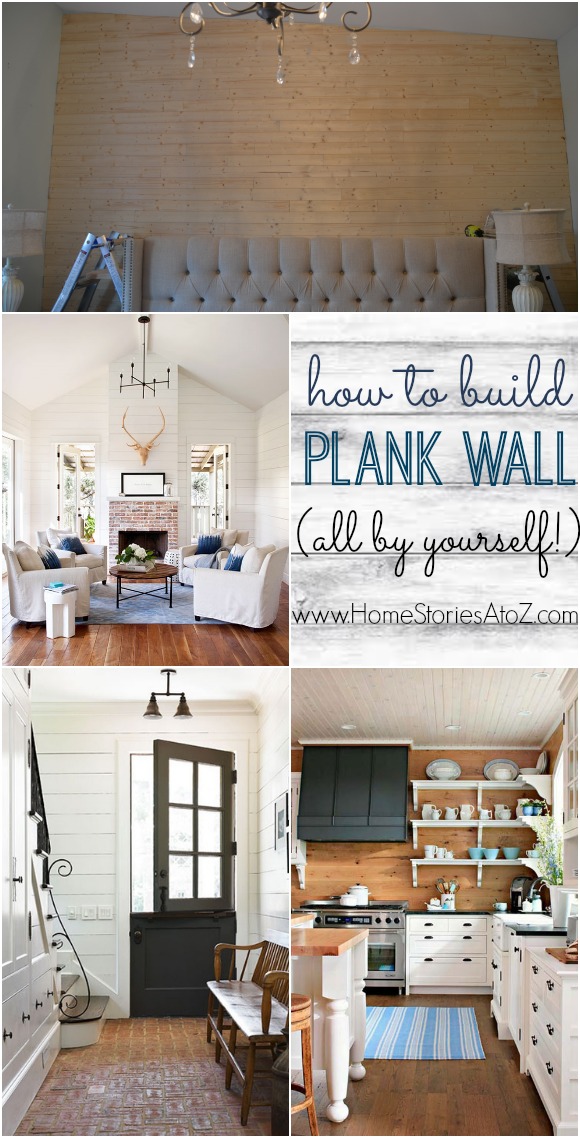
Photos via BHG.com
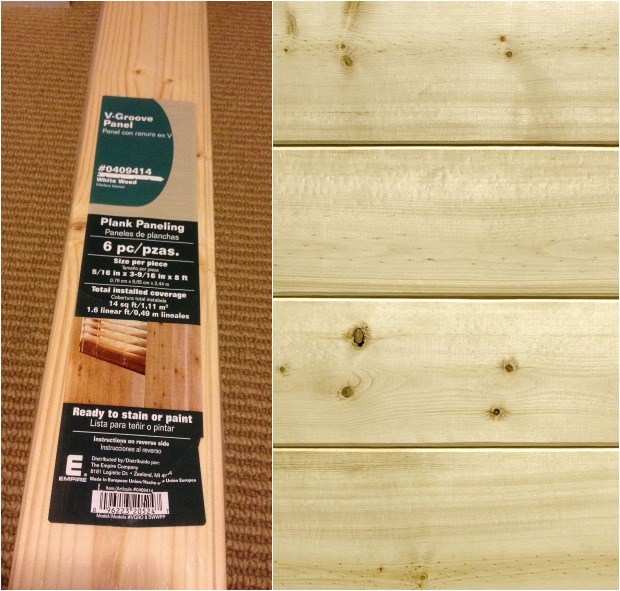
Step 1: Choose your wood.
Deciding what type of wood to install was half the battle for me! I wanted this project to be as affordable as possible, so I initially considered using ripped plywood to create my planks. However, I also knew that I would be doing this project 100% by myself and the idea of balancing long boards of plywood on top of nickels sounded like a four-letter-word-inducing experience! I also originally wanted one-piece horizontal boards. However, that was going to cost a lot more in special-ordered planks and would likely be much more difficult to execute by myself. In the end, I settled on the Empire Company 5/16-in x 3-9/16-in x 8-ft Unfinished Wood Wall Panel from Lowes. You receive 6 tongue and groove planks per pack. The great thing about these planks is that they are light as a feather and they secure to one another like pieces of a puzzle. I knew I’d be able to pop up a board and leave it there while I reached for my phone to take pictures for this tutorial reached for my nail gun. 🙂 The wood is described as “whitewood” which technically could be several different kinds of wood. However, I’m confident that these planks are some type of pine. They are knotty and some boards even contained dried sap. I used 11 packs of wood which cost a total of $175. Out of the 11 packs, 3 boards were unusable due to cracks, knots, or warping. This wood is soft and dents easily, so I wouldn’t recommend it for walls that get a lot of abuse. But for low traffic areas of the house it is perfect!
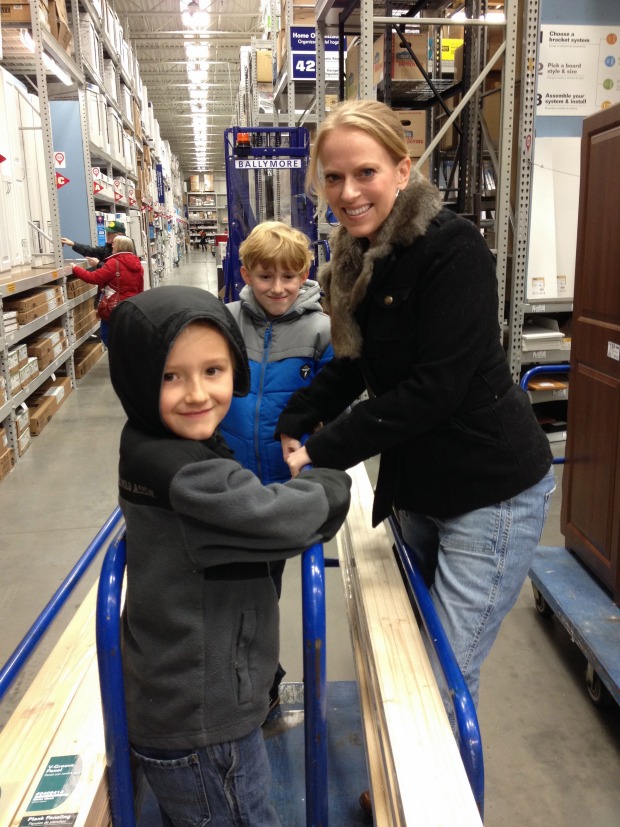
Oh yes, and when picking up your planks, be sure to jump on the cart and have your hubs push it as fast as he can through the store! Okay, don’t do that because clearly that wouldn’t be safe. The carts are not a toy for goodness sakes! But if you did take a ride on said cart I wouldn’t judge you one bit!
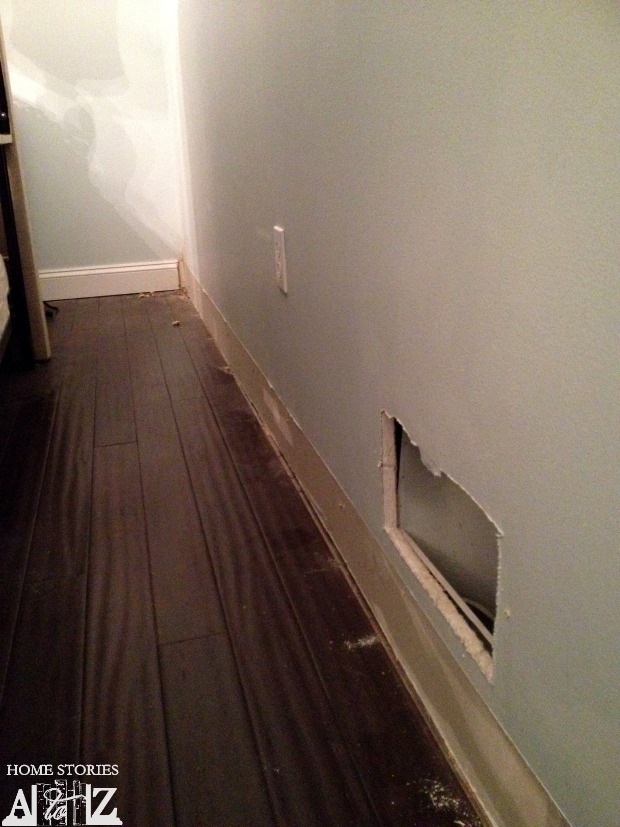
Step 2: Remove your baseboard and cut away any needed wood on the existing baseboards.
Before removing your baseboard, be sure to score your molding using a utility knife. You want to cut the paint and caulk seam before pulling it away from the wall. I used two different prybars to gently remove the baseboard. First I used a flat prybar with a mallet to get behind the baseboard and then I used a “rocker head” prybar to rock it away from the wall. Once you remove your molding, you need to remove all of the nails by pulling them through the back using nippers (which are pliers with a rounded head that allow you to rock the nail gently out of the wood). My wood is 5/16 of an inch thick which means that my baseboard needs a 5/16in larger gap on each side to fit properly. I cut away some of the existing baseboard in each corner to accommodate for the extra width. I didn’t have the right Dremel for the job, so I used a wood cutting blade on my standard Dremel. I’ll need to caulk quite a bit to make it all look great again!
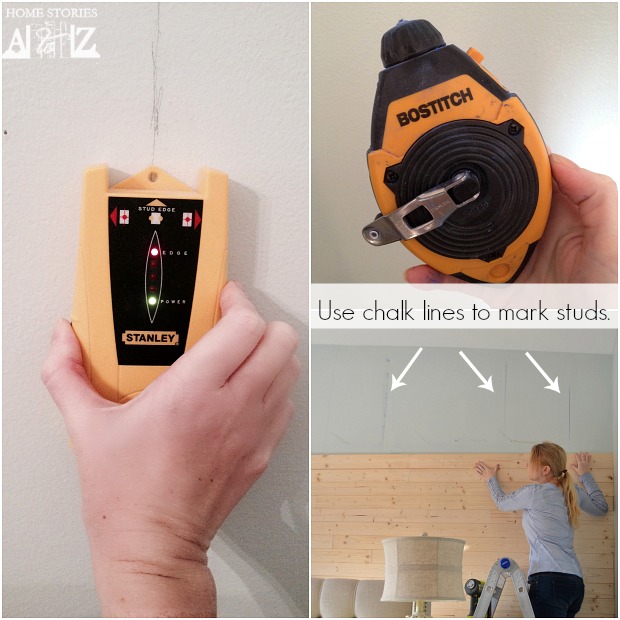
Step 3: Find studs and mark with chalk lines.
Use your stud finder to find the studs in your wall and mark with a pencil. Once you have your marks, create a chalk line to mark all of your studs. This is where you will nail your boards into the wall. You can also use ScotchBlue™ Painter’s Tape to mark your studs. Just move a piece of the tape up the wall as you go to keep track of your stud placement.

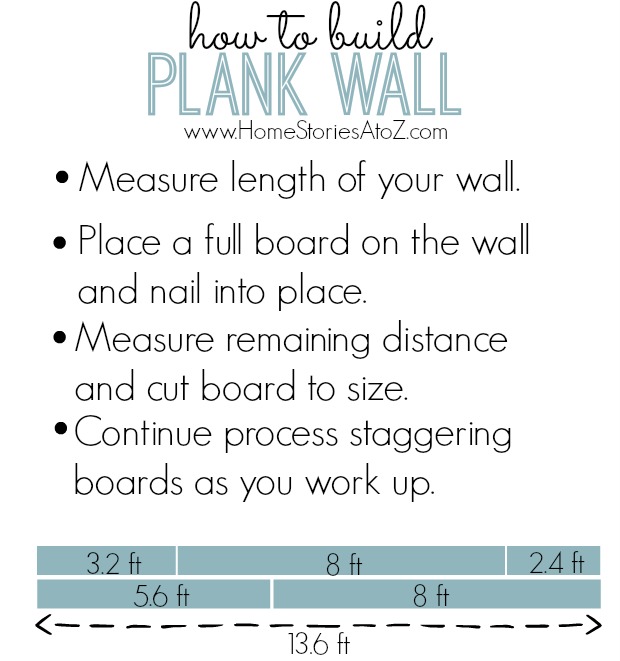
Step 4: Determine how to cut and place your boards on the wall.
I was nervous about the seams of my planks and how I would determine where to make each cut. I didn’t want to use any liquid nails for this project in case the wall needs to come down at some point. I also wasn’t sure if I should end each board so it would be aligned with a stud. Because this wood is sooooo thin and because it is tongue and groove and sticks together I didn’t worry about the ends of the planks aligning with a stud. I nailed each plank’s end into the drywall. If you’re a perfectionist you’ll want to forgo my method :). However, I’m confident that even if the wall warps a bit in humidity I will still be happy with it. Below is a picture of how I cut my planks. It’s a process of measure twice, cut once, measure twice, cut once…
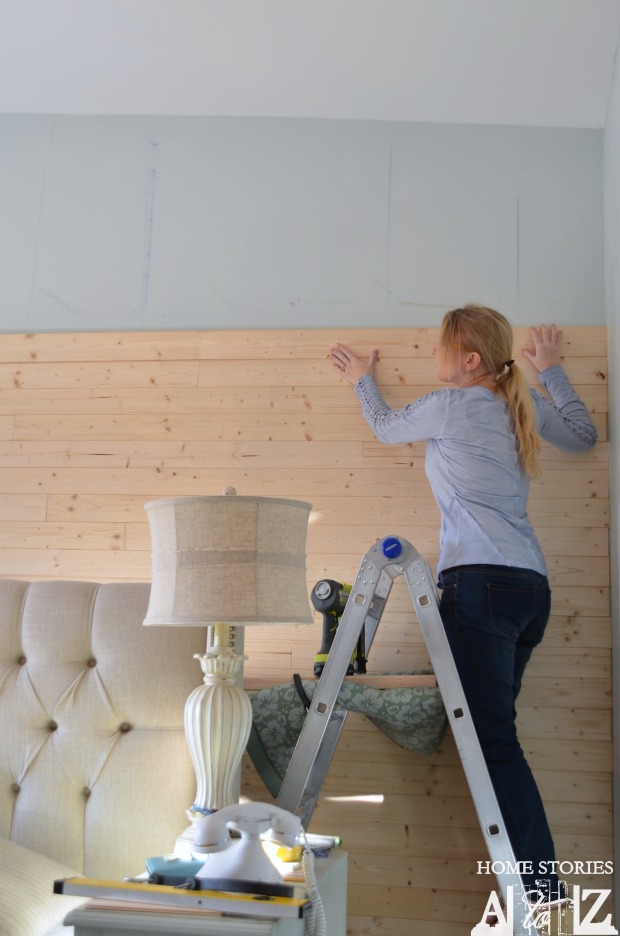
I didn’t need to use a mallet to secure my planks and a level wasn’t necessary either. If you get your first planks even, then stacking them is a breeze. A few of the boards were warped and I needed to fiddle with them in order to get the boards to connect appropriately but for the most part they stacked very nicely!
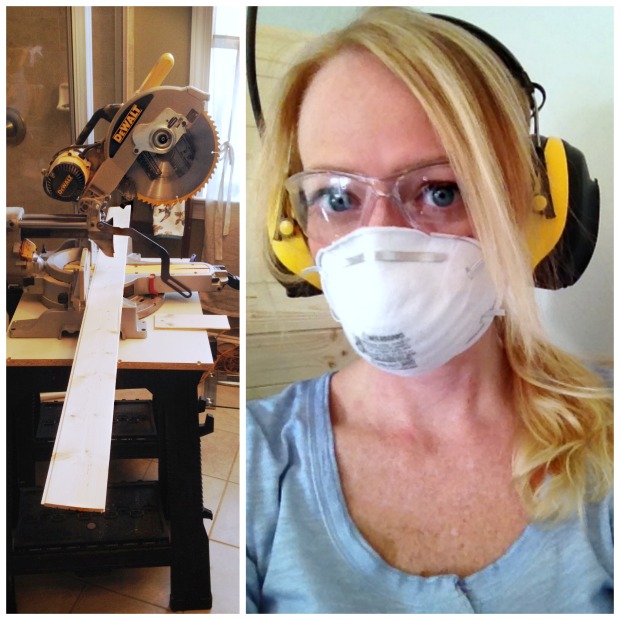
Step 5: Be safe when you cut your planks.
It is imperative to follow all safety precautions when you DIY and protect your 5 senses using 3M™ Safety Products. My respiratory system seriously freaks out around sawdust, chemicals, paint, solvents, cleaners, you-name-it! I wear a 3M chemical respirator or a sanding respirator every time I DIY. It protects me from having a full-blown allergy attack and keeps me healthy. I also like to protect my ears with earplugs or my fun 3M Tekk Protection Worktunes Earmuffs. You can listen to the radio through the earmuffs and tune out your saw and nailgun! To protect your eyes, be sure to wear 3M Clear Plastic Safety Glasses.
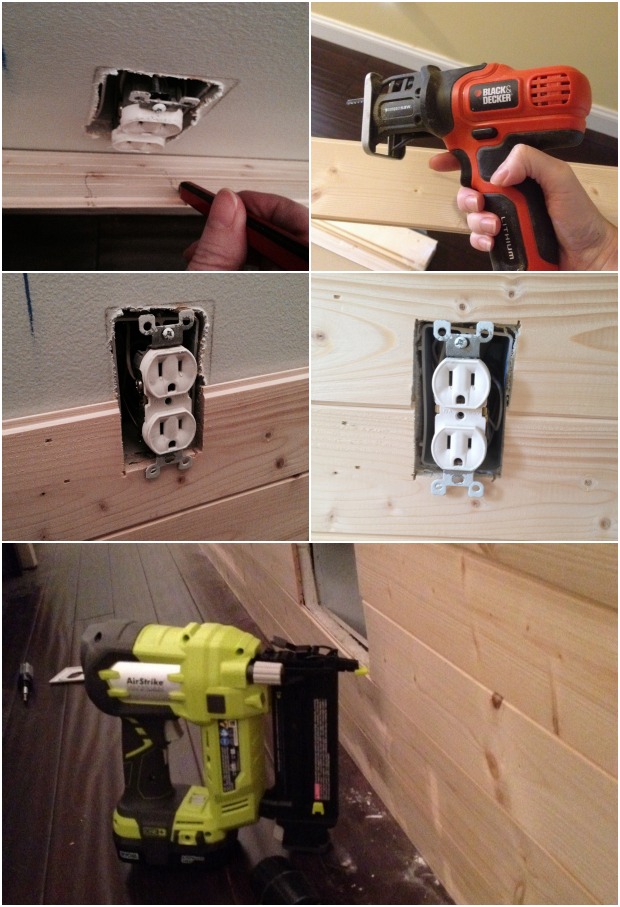
Step 6: Use a jigsaw to cut around obstacles.
Fortunately, I only had one outlet and a vent to cut around. I lined up my board and traced the area that needed cutting and used my jigsaw to cut out the area.
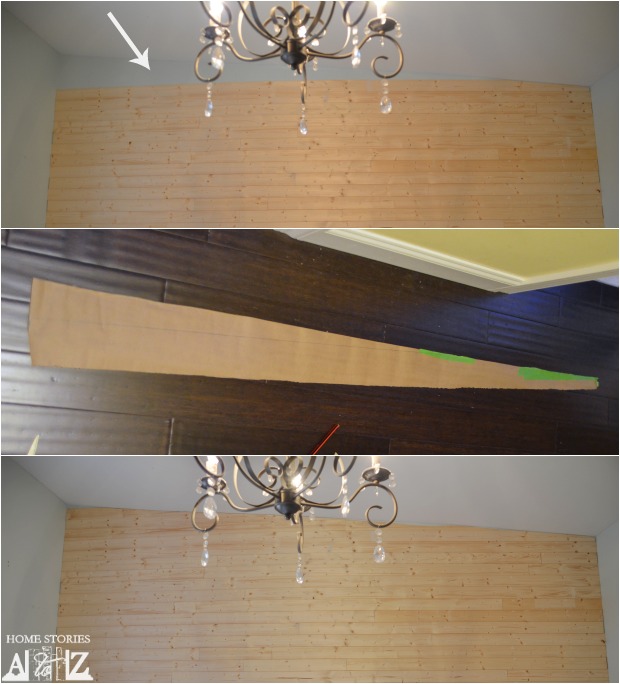
Step 7: Create a pattern with butcher paper for tricky areas.
Our bedroom ceilings are vaulted at a bizarre angle. I used butcher paper taped to the wall to trace a pattern for the wonky shaped boards I needed to cut. I will be using molding around the perimeter of my wall so I didn’t worry about getting it perfect.
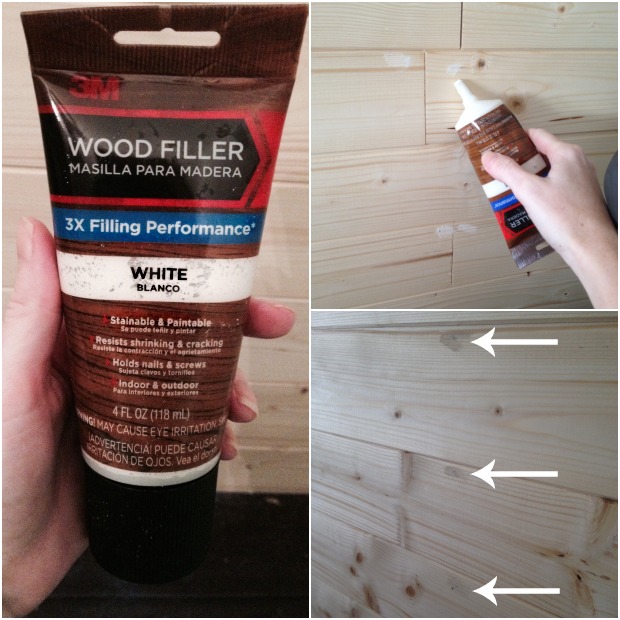
Step 8: Fill nail holes with 3M Wood Filler.
I filled all of my nail holes with 3m Wood Filler in White. You can apply the wood filler with a putty knife or a gloved finger. Allow it to dry and then sand each hole smooth. This is tedious work so if you have kiddos old enough to help this is a great task to assign them!
Phew. Admire your hard work! You did it!
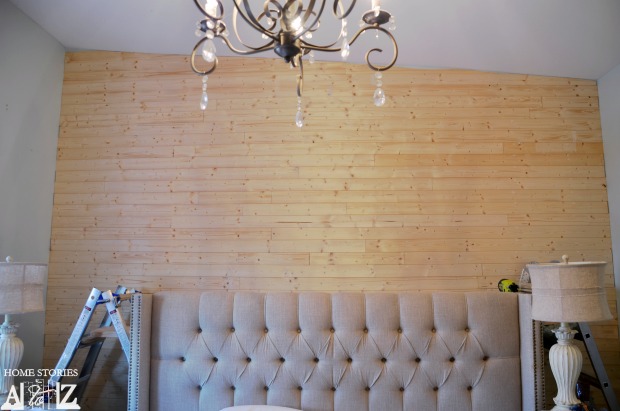
I know you want to see the glamour shot of the wall completely done and the bedroom looking smashing. So do I! Next on my agenda is to nail up the molding, prime the planks, and paint! Stay tuned for the full reveal coming up after the holidays :).
UPDATE: Come on over and see the finished wall and bedroom reveal!
If you’re looking for even more plank wall tutorial goodness, my friends have got you covered. There are different techniques that everyone brings to the table, so it’s fun to see how each one is different!
How to Plank a Wall by Pretty Handy Girl
How to Plank a Ceiling by Tatertots & Jello
Inexpensive Plank Wall How to by Remodelholic
Planking (A Wall Not Me) by Thrifty Decor Chick (She cracks me up!)
DIY Diagonal Wall Plank Tutorial by Vintage Revivals
Planked and 2×4 Shelved Feature Wall by Infarrantly Creative

This post is a collaboration with 3MDIY.com. To keep up-to-date on projects, products and sampling visit 3MDIY.com.


Excellent details and result Beth! I wonder if you have done any project related to drywall.
Thanks! I have repaired our drywall several times due to some water damage but I typically hire out for large jobs.
I’m redoing a log cabin built in 1850 and I’m doing some of the interior wall just like this!!!!
You done a really great job!!!!! A++++++
Thank you! It’s been a few years and my wall has held up great. I still love it.
Are you able to stain this???
Yes, you can easily stain the wood rather than paint it.
Hi! Now that you’ve had the wall for a while now. How did the final product do with shrinking or warping over time?
It’s held up great! There is one section at the very top where the board was not secured in any way to a stud and it has “bubbled” out a bit. You only notice this when lying in bed and staring straight up at it. If I had glued the boards I don’t think I’d have this issue.
I am moving into a beach rental that has cinder block concrete walls (hate them but love the apt!). I am soooo much wanting planked walls but I know I can’t nail or glue onto the walls because it’s a rental. I’m thinking about using industrial strength Velcro pieces to attach the boards to the wall. I’ve no doubts about the strength of the Velcro as I’ve used it to attach a series of the cheap wall mirrors you get at Kmart or Walmart to a rental wall once. When I removed the mirrors, it took off the paper from the actual drywall underneath, co I had to spackel and repainted that wall. The worst I could see happening with these walls is it peeling the paint off the concrete when I would go to remove it.
I’m honestly not sure if this will work over cinder block. I would think you might run into trouble adhering the planks to the uneven surface of the cinder blocks. The tongue and groove is a bit finicky if the board or wall is uneven. Let me know if you try it and how it goes!
Thank you so very much for this wonderful step by step tutorial on installing plank walls. Because of you, I am going to do this! I can see it now! Beautiful! Thank you! Thank you!
Yay! You’ll have to show me how it turns out!
I am just now seeing your blog for the first time, and let me start off by saying WoW! I ould browse forever! I will certainly be back to look at many more of your projects!
What a fantastic tutorial!! I love plank walls, and I appreciate the time and effort it takes to walk us through the step by step instructions. Sometimes it is so time consuming to make sure you are taking the right pictures along the way…so Thank You! Very informative 🙂 I will have to tackle this one!
Thanks Brooke!
Do you think these panels can be used in a ceiling? seem to light weight to me…
I think they would be great on the ceiling. And they are very light weight which would make them easy to work with overhead.
Beth, this is a project I’ve been waiting to do for almost a year. I get to start in 2 weeks, picking up my wood today. Thanks!
Looks amazing! I’m about to do a similar project in our basement. What kind of nail gun do you have?
I have the Ryobi Airstrike. Highly recommend it! Good luck on your basement!!
You did a great job! Do you think this type of boards would work on a ceiling?
Thanks Jen! And yes, I think it would work on a ceiling. Working over head is very laborious though so panels are sometimes easier.
Yep, couldn’t agree more! It seems super easy (of course I haven’t actually done it 🙂 ) But your versions looks AMAZING!! Looking forward to seeing it once the crown molding is up.
I’m so impressed! I love it all! Very smart of you to use tongue in groove paneling. Can’t wait for the final pics!
Gorgeous! I have done this and it is pretty easy. Your wall looks amazing and I can’t wait to see it all finished 🙂
Super impressed! Can’t wait to see the final room renovation.
Love it Beth! Go you!!! Hum… might have to try that in the foot area of our bars tools… LOVE! Have a Merry Christmas!
So awesome girl!! Such a fantastic tutorial and I cannot wait to see the final reveal. I’m sure whatever you do will be off the charts amazing! Cheers and Merry Christmas!
Thank you Cyndy! You are such an encourager :). I always end up smiling from one of your comments! Merry Christmas girl!
I love it! I want to try it but I’m worried about nailing so many nails into a wall that’s an exterior wall. Do you know if this is something I should be worried about?
I think as long as you are nailing into the studs you have nothing to worry about. If it’s something you think you’re going to get sick of quickly then I probably wouldn’t do it. I wanted the option to be able to take it down, if need be, without ruining the drywall with glue, but removing the wall will be a PAIN in the bum. I used 1 1/2 inch nails and you could probably go down to 1 1/4 if you were concerned about hitting something other than a stud.
Thanks! It was mostly the bf worried about nailing into an outside wall but he seems satisfied with your answer. I think he was mostly looking for a way to prevent me from putting another project on the “want to do” list :).
Ha! My husband HATES to DIY and there are a ton of projects I have roped him into over the years. He made it very clear that he would not be helping me on this one at all. You got this girl! You can 100% do this project on your own without an BF help whatsoever.