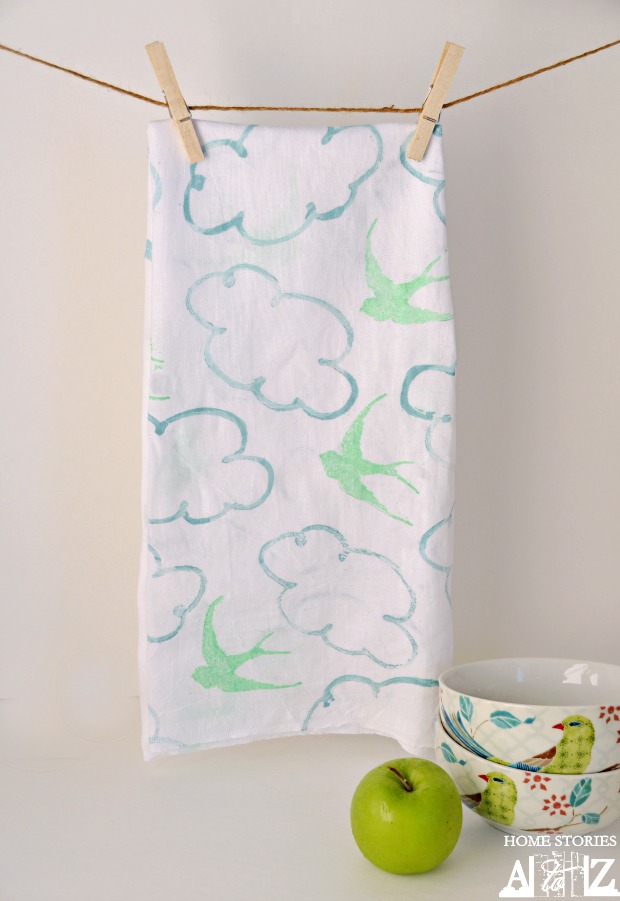
Handmade gifts should be useful, cute, and easy to make! Christmas will be here before you know it and stamped tea towels make thoughtful and relatively inexpensive presents. Today I will show you step-by-step how to create a stamped tea towel and even how you can create your own stamps! If you don’t have the materials to create stamps, don’t worry because this tutorial works just as well with stamps you might already have on hand.
For this project you will need a white tea towel, paint, fabric medium, a sponge brush, and some stamps. I wanted to create my own custom stamps for my tea towel, so I used Silhouette’s new stamping kit which comes with everything you need to create your own stamps. The kit even has its own adorable cutting mat.
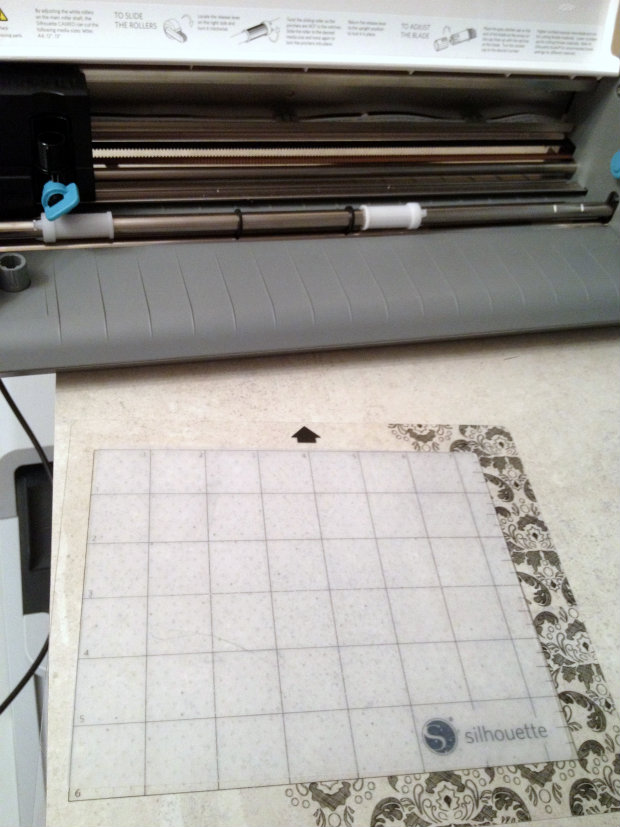
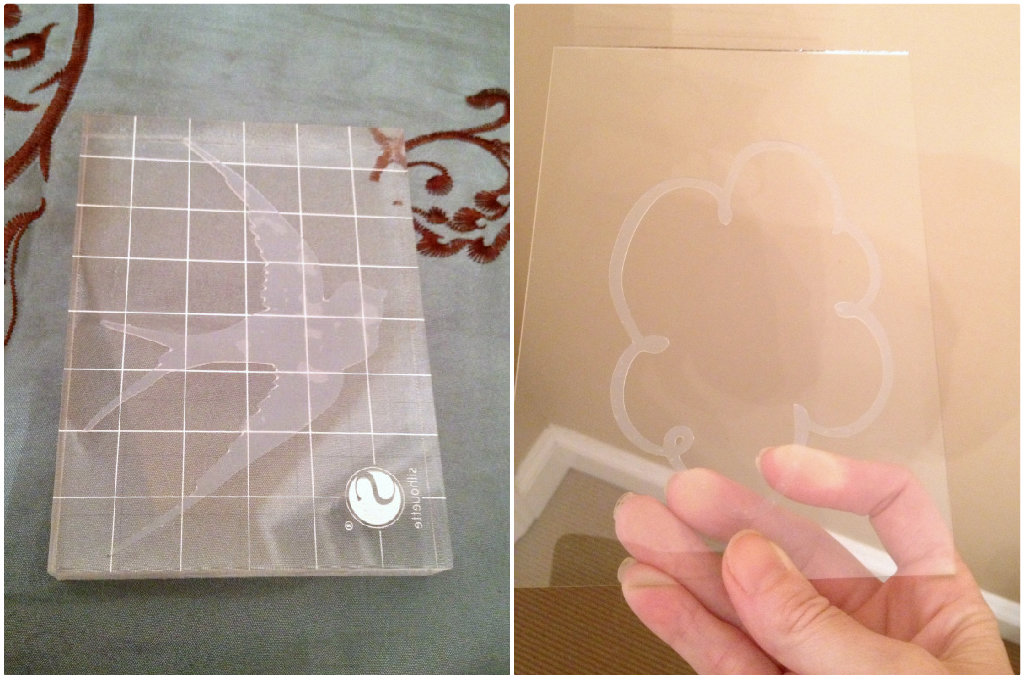
I purchased the bird and cloud images from Silhouette’s online library, chose the “Stamp” setting on my machine, placed the stamp material on the cutting mat and ran it through my Silhouette Cameo.
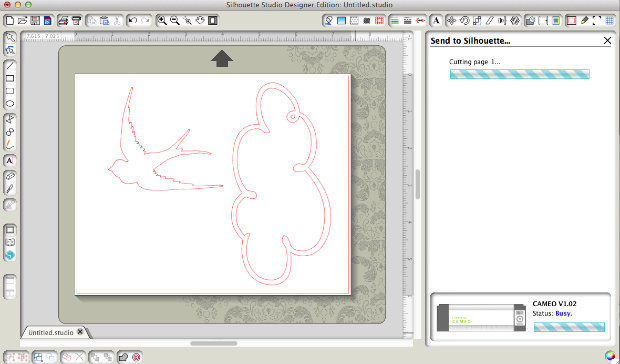
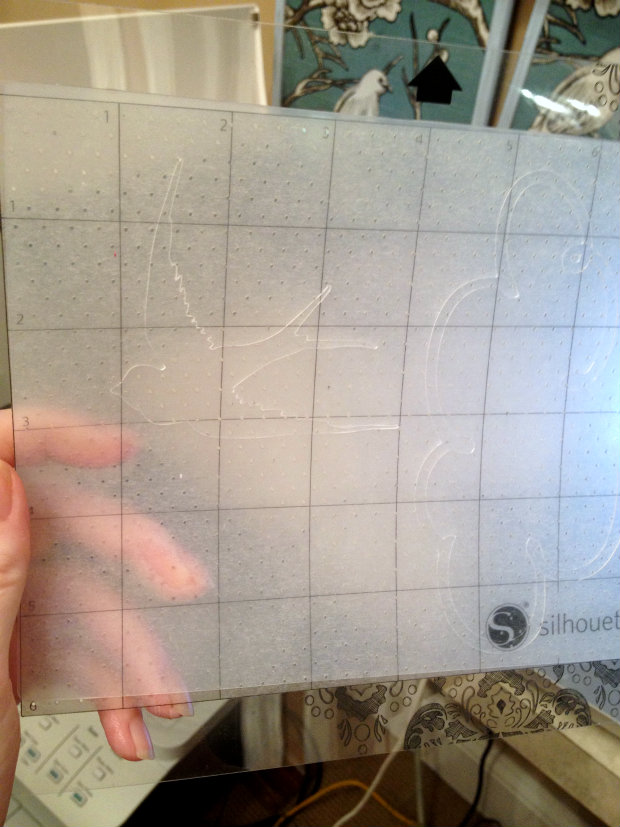
So easy! Below you can see what my stamps look like before I pulled them off the cutting mat.
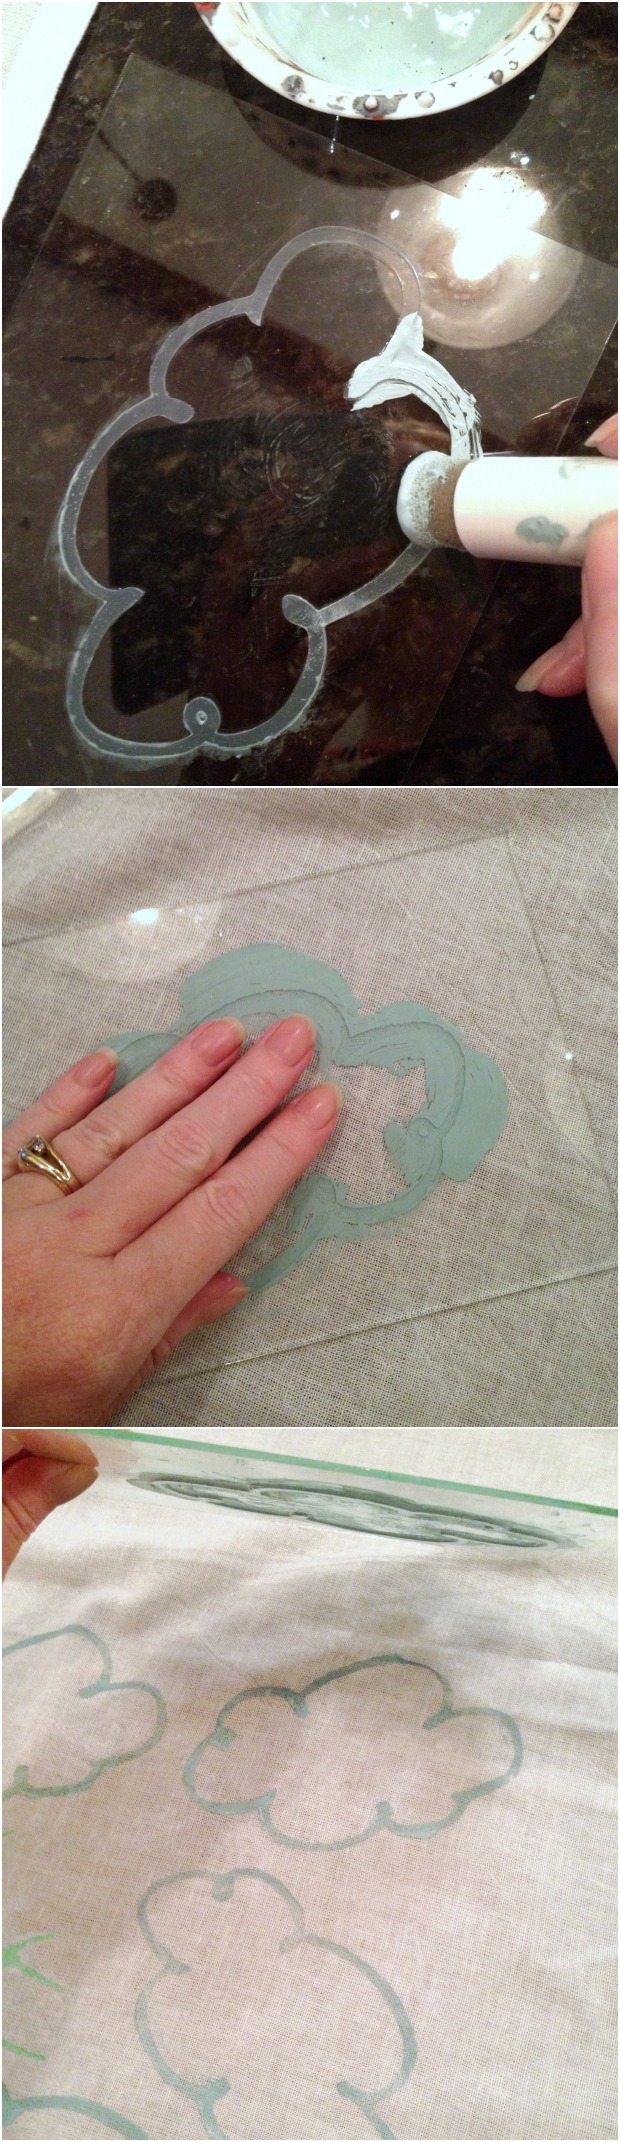
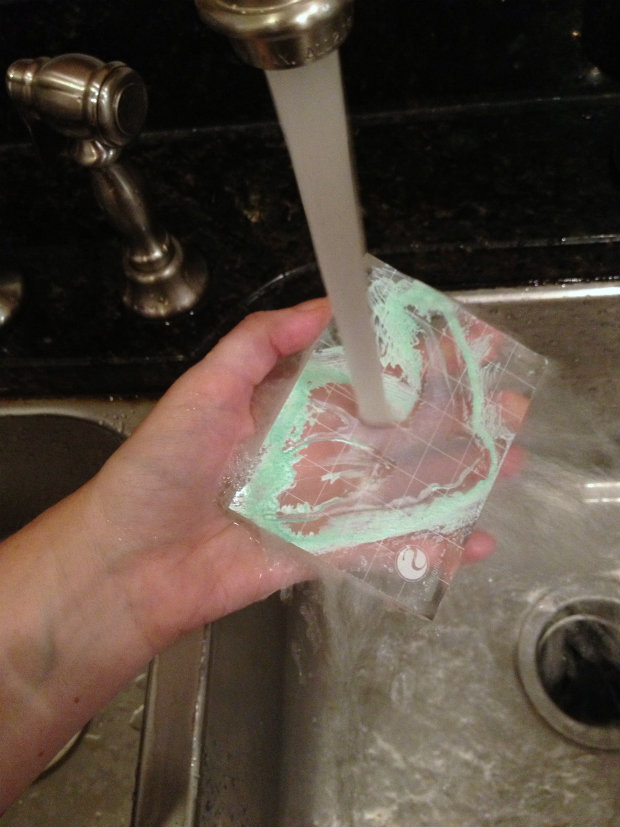
The stamping kit comes with three acrylic blocks to place your stamps on. My cloud shape was a bit larger than the acrylic blocks, so I used a piece of glass from a picture frame as my “block”. It worked great!
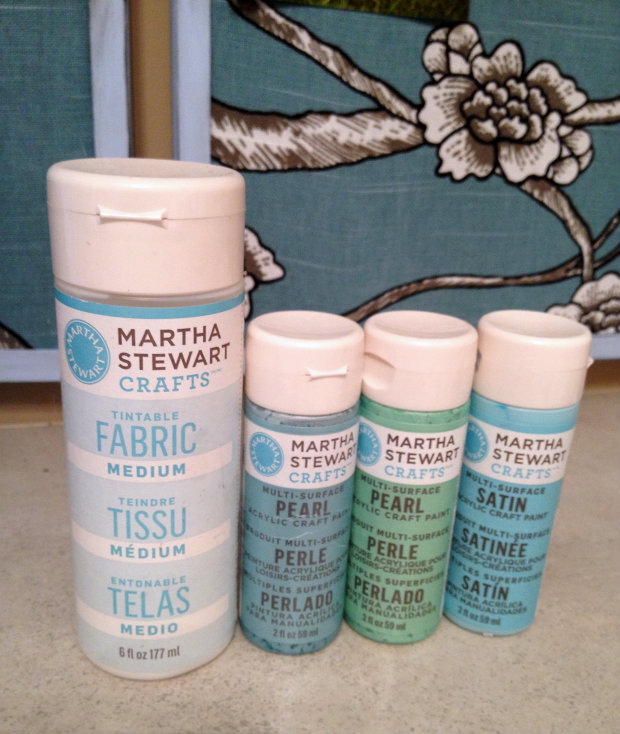
For my paint, I chose some Martha Stewart acrylic paints that I had on hand and some fabric medium.
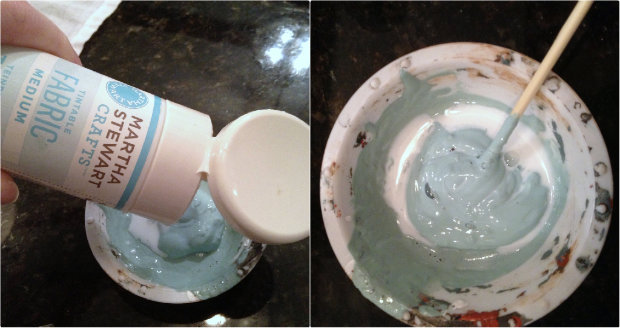
I used about two parts paint to one part fabric medium and just combined them together until completely mixed.
I found it easiest to use a sponge pouncer to apply my paint to the stamp. The rubber on the stamp will naturally resist the paint so don’t be scared to apply a thick coat. It’s okay if you get paint on your stamp block as long as there are no globs that extend past the edge of your stamp. Just use a paper towel or baby wipe to remove any raised globs that are on your stamping block before you stamp to ensure a clean image transfer.
Have fun using a free form pattern!
When you are done, you can clean your stamps with some dish soap and water. The paint will wash right off and you can store your stamps for other projects in the future.
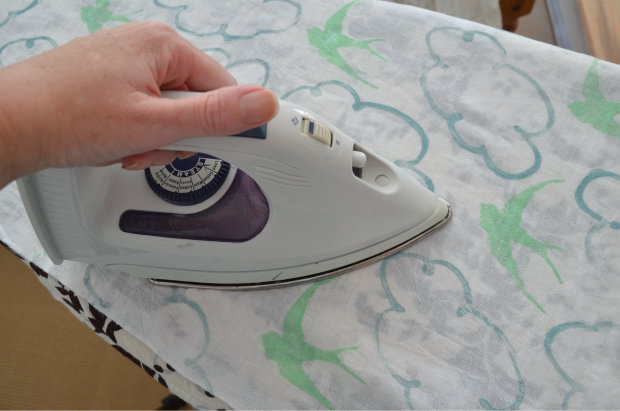
I allowed my paint to dry overnight and then heat set the paint with an iron. Follow the directions on your fabric medium bottle for best results.
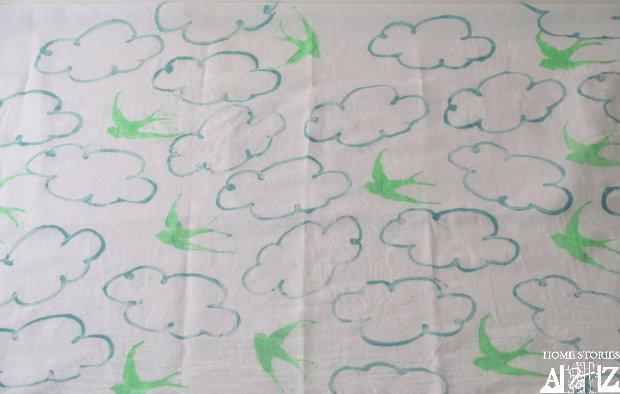
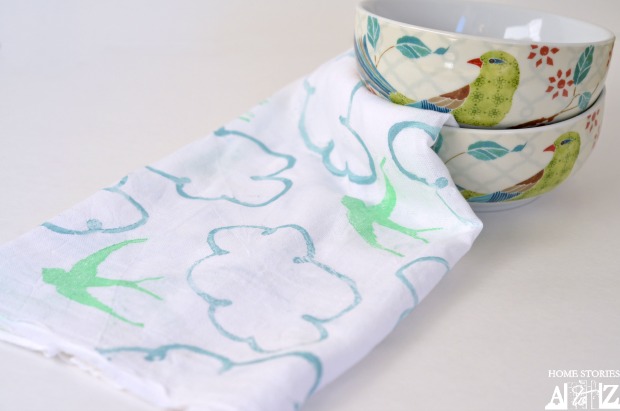
And now I have an adorable and unique tea towel to give away as a gift or to enjoy for myself!

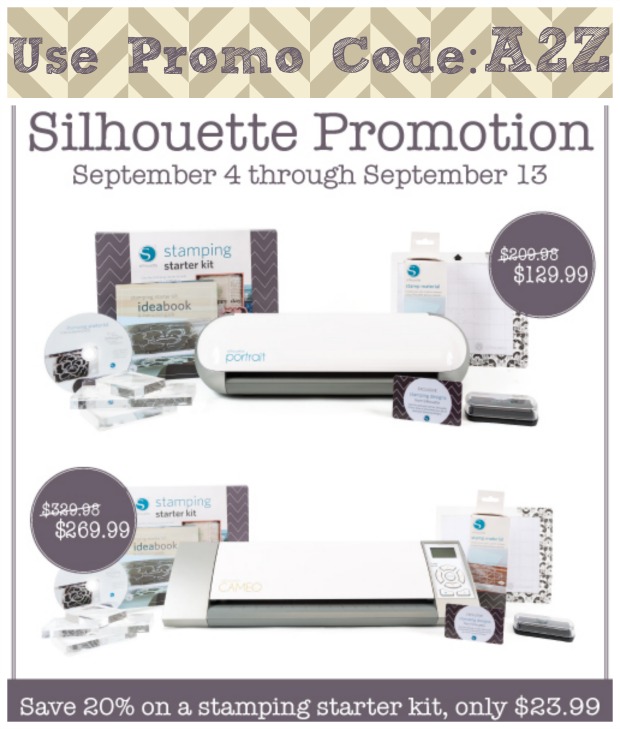
You can craft your stamps to make numerous handmade gifts and cards with Silhouette’s Stamping Starter Kit. Simply click on this link—->www.silhouetteamerica.com/stamping and enter promo code: A2Z at checkout. If you don’t currently own a Silhouette but would like to purchase one, the current Silhouette promotion comes with a free stamping starter kit with your purchase of a Silhouette Portrait (smaller machine) or the Silhouette Cameo (the big daddy). To qualify for the promotion use the promo code: A2Z at checkout.
Disclosure: I was given the Silhouette Starter Kit to try out, and I am a Silhouette affiliate.. All thoughts and opinions are my own.

So smart and so beautiful, love the homey look and vintage feel. Thank you for your inspiration!
Ananasa.com- Home For Handmade
Love, Love, Love. It looks just like the wallpaper that I saw Layla use from the “Lettered Cottage”. I fell in love with that, but can’t use it. Now, I can have this. What were the paint colors that you used? I see two different shades of blue. Did you combine them? Love it!!!!
That wallpaper was actually my inspiration for the towel :)! For the paint, I ended up using FolkArt’s Sky Blue for the clouds and Martha Stewart’s Hummingbird (green) in Pearl for the birds.
I wondered if that was the case. I bought the stamping kit, but to be honest, I have yet to even try my silhouette.
I am so intimidated by the thing. But, I do want to try this.
Hi Erin, don’t be scared of it :). Google Silhouette tutorials and you can even watch this one on the stamping starter kit before you start: http://www.youtube.com/watch?v=hkvDkvDZ-hY.
I loved the colors and the images so much. Very well done. I will try doing this with rubber stamps as I do not have a Silhouette machine. Thanks for sharing.
Absolutely fabulous! Put some tape around the edges of that glass next time, so I don’t have to hold my breath while scrolling down the post, LOL! Seriously, this is a wonderfully creative project that all ages can do. Well done!
Ha! Thanks Jo :). I’ll tape off my glass next time.
Those are really cute! I have a stamp that looks just like that bird. I’m planning on making home made soaps for gifts this year, stamped towels would be the perfect pairing. Thanks for sharing Beth!
These are adorable Beth!
Thanks Taryn :)!