Create a beautiful focal point in your entryway or hallway today with this DIY Christmas art tutorial!
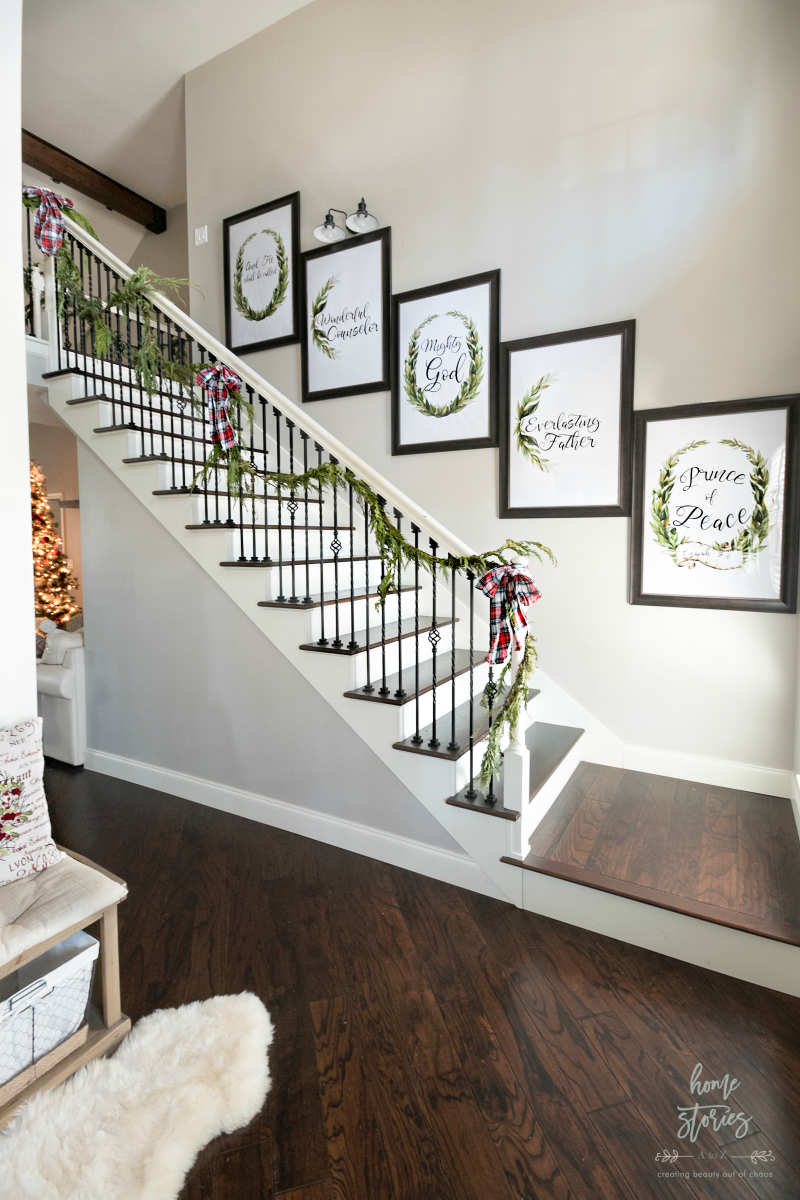
One of the first areas I decorated when we moved into our new home was this entryway. I really wanted to shake up the typical gallery wall that’s been done for years and years and do something fresh and different. Instead of the typical myriad of black and white framed pictures, filled in with wooden arrows and monogrammed letters from Hobby Lobby, I wanted something new! I craved something bold yet simple. I decided to use five large poster frames with beautiful in-color family photos…and I loved it! You can see the post here if you’d like.
Better Homes & Gardens loved it too, and they featured my gallery wall on their Instagram page. And guess what? People HATED it! We’re talking vehement backlash on how tacky and domestic and just plain wrong it all was. The level of outrage amused me, and I had really hoped to outrage that crowd again by displaying some updated family Christmas photos! 😂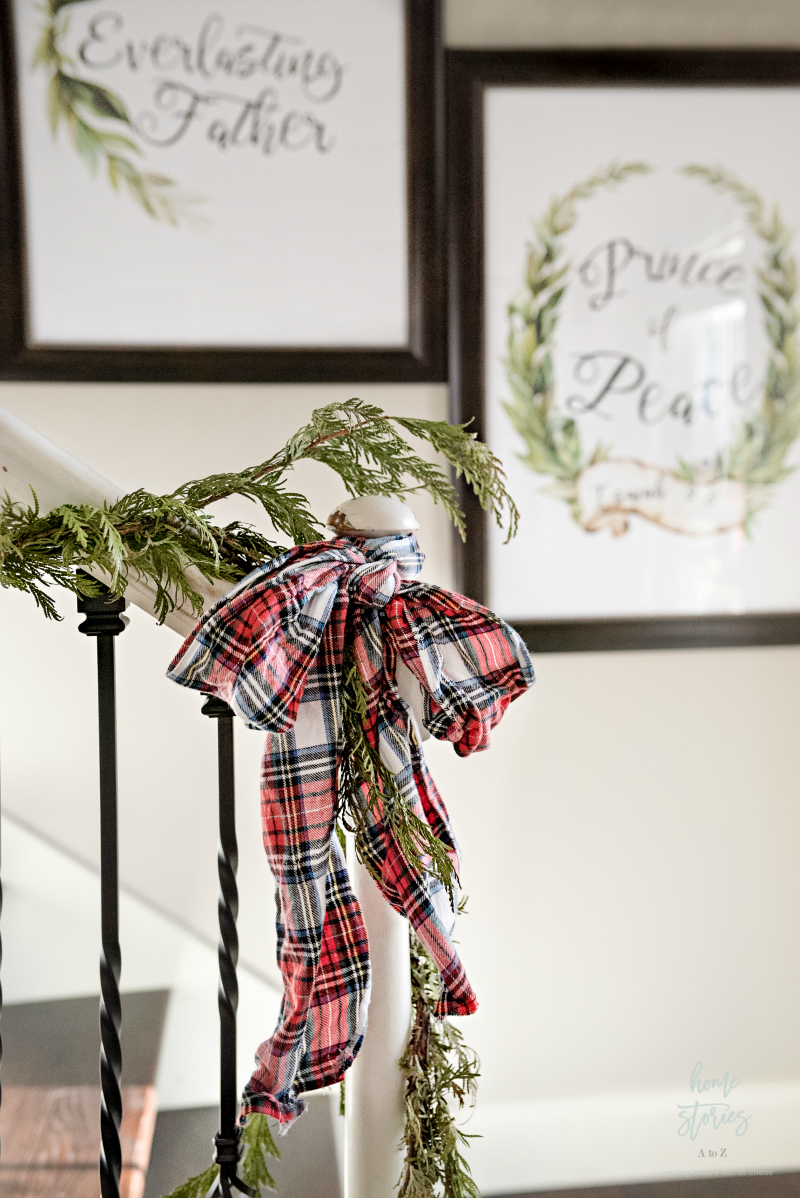
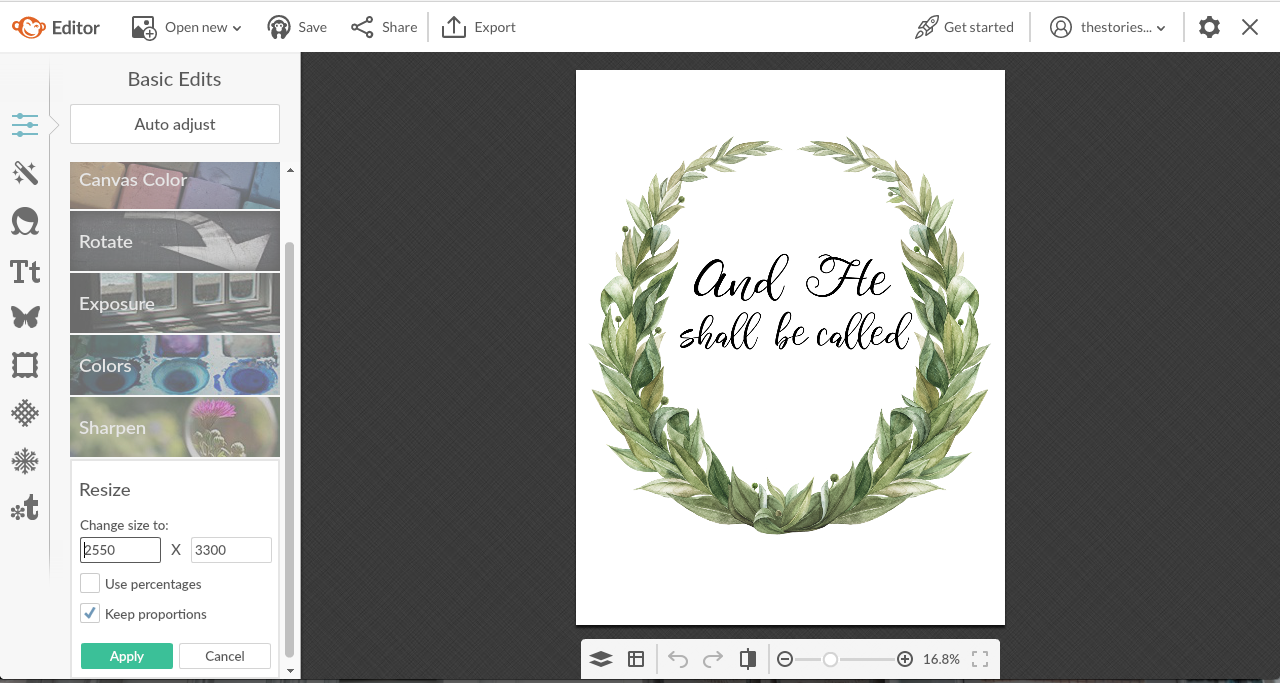
Unfortunately my SD card failed and my family Christmas photos were lost. I scrambled to come up with a Plan B for this wall, and decided to use one of my favorite Christmas verses. Handel’s Messiah is near and dear to my heart and For Unto Us A Child is Born is my favorite piece.
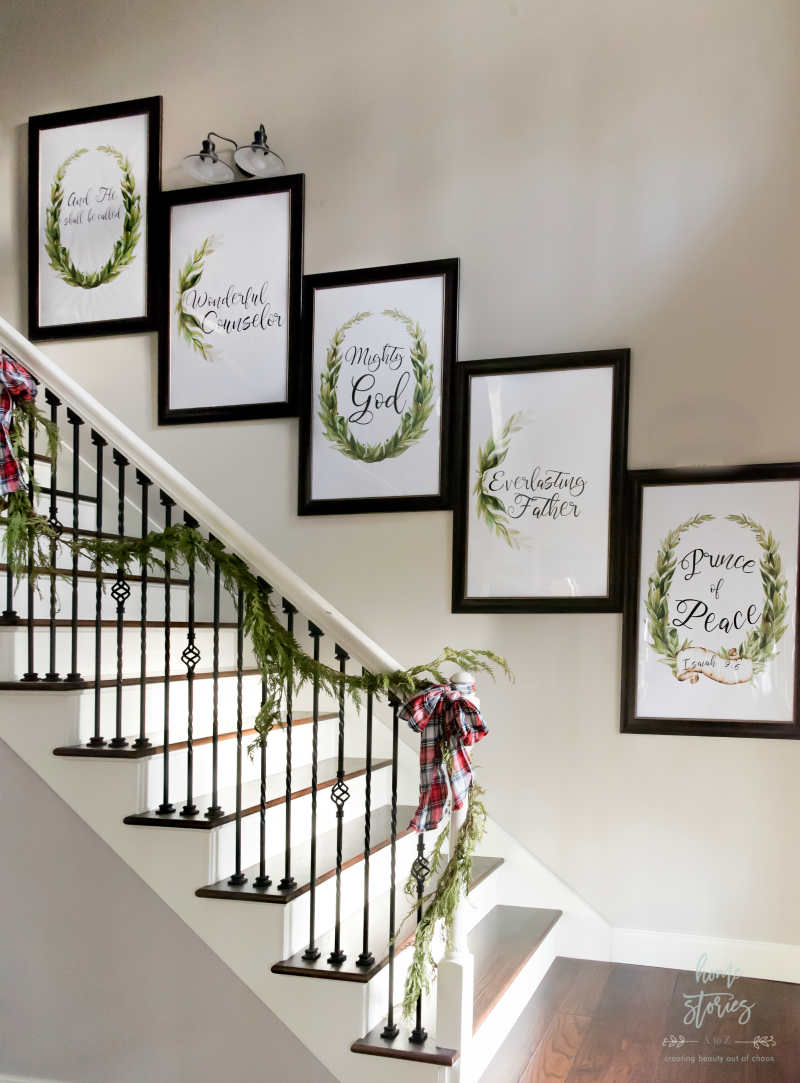
The watercolor artwork is not my own so I’m not able to sell these to you but I will show you how to create them for yourselves!
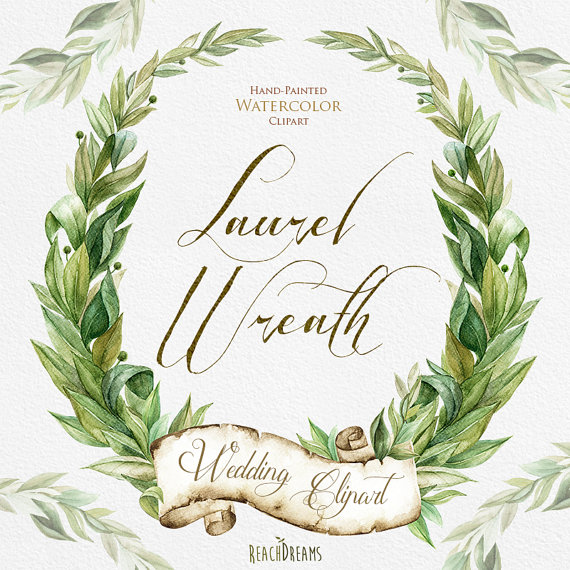
Step 1: Purchase the Laurel Wreath Clipart
I purchased the gorgeous laurel wreath clipart here on Etsy. It is even currently on sale!
Step 2: Download the verse text images.
Click here to open the page with all of the text images and follow the instructions on how to download. Once you’ve downloaded all five text images simply click the back button in your browser to continue.
Step 3: Open each text image in a picture editing software.
I used PicMonkey to create these images, but you can use any picture editing software that allows you to layer images. In PicMonkey, open the first text image and then choose the butterfly icon. At the very top it will say Overlays and Add your own. Click on Add your own and choose the laurel wreath you’d like to add. Drag and drop the laurel wreath to the size you prefer and then click Export to save the new image to your computer. Repeat this step for each picture.
Step 4: Print Your Posters as Engineering Prints
I always submit my engineering print order online through Staples. You can click on this link to be taken to the engineering print page. I select “Engineering Prints in Color” even though it says it’s not suitable for photographs. The quality has always been excellent. Next, under “Media” choose the size you want the poster to be. My frames are 24×36 so that is what I chose. Also, be sure to click the little box at the bottom that says “Fit content to paper…”. If you don’t click this box, then your images may run off the edges of the paper.
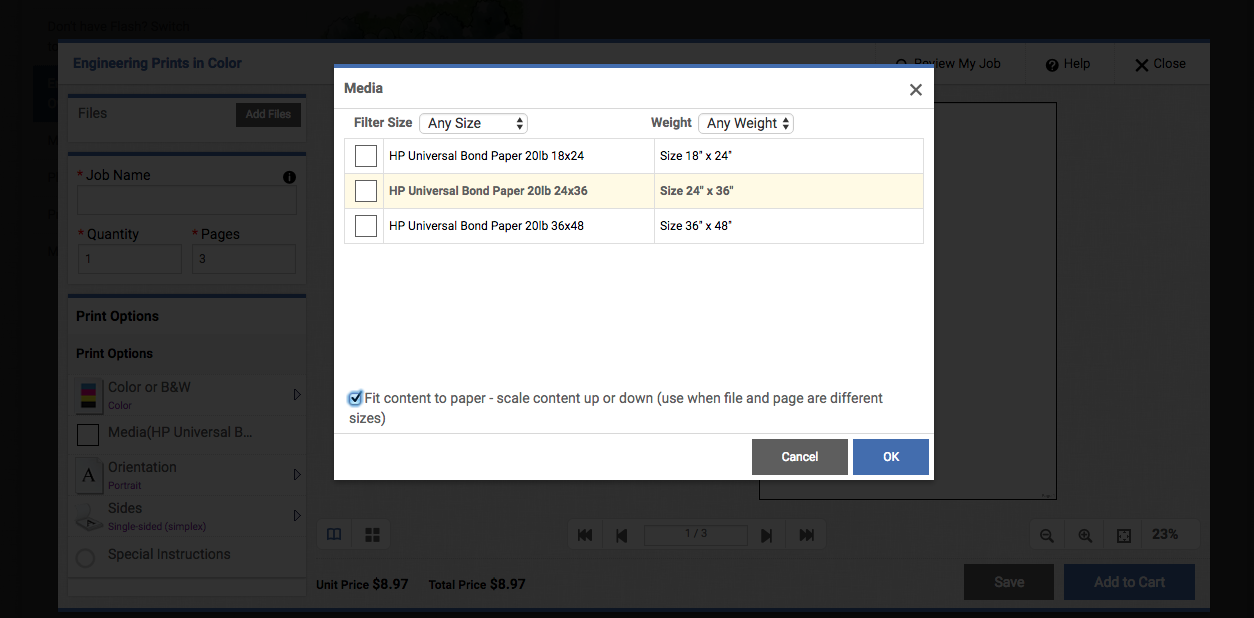
Make sure your paper orientation is set to Portrait, upload your photos, and submit your print job! The cost for me to print 5 posters was $29.95. It may cost you more or less at your local store.
Step 6: Purchase Poster Frames and Hang
You can purchase the poster frames I’m using on my wall here. They are from Better Homes & Gardens and I love them! You could also hang this art less expensively by creating a simple “DIY scroll art” frame. Just be warned that the engineering print paper is very thin, so if going this route I’d recommend first mounting the print with double-sided tape to a sheet of butcher paper.
Thanks for stopping by friends! Please feel free to pin this project for later inspiration. If you liked this printable you might also like the following related posts below:
Hot Cocoa Mix Recipe Jar Gift with Free Christmas Printable


Lovely home! I was listening to christmas music while i was browsing your blog. The song that was playing when I came across your Christmas art was by Matt Redman…”His name shall be”. A God moment! Blessings for Christmas!
How wonderful! Thanks for stopping by!