
Learn how to create a clean and simple stairway picture wall using affordable engineering prints and poster frames.
This post is created in partnership with Better Homes & Gardens products found at Walmart; post contains affiliate links. If you’re unfamiliar with Better Homes & Gardens products I highly recommend checking them out! They have some super cute items at a price-point that will make you smile!
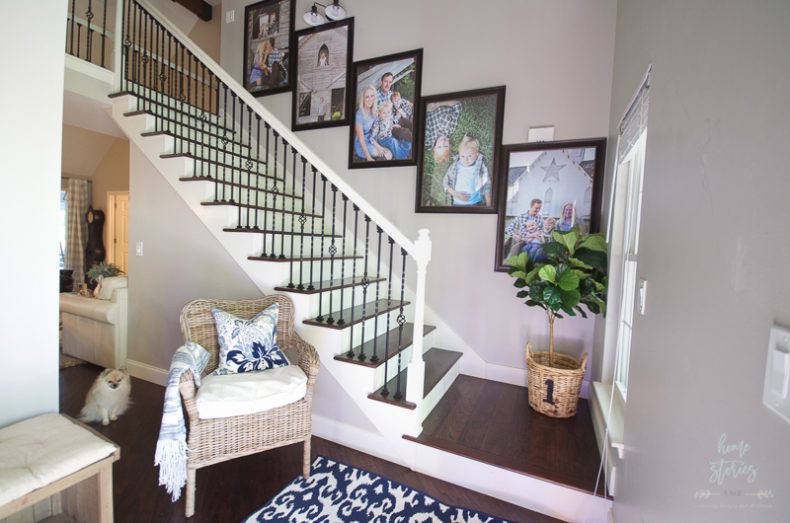
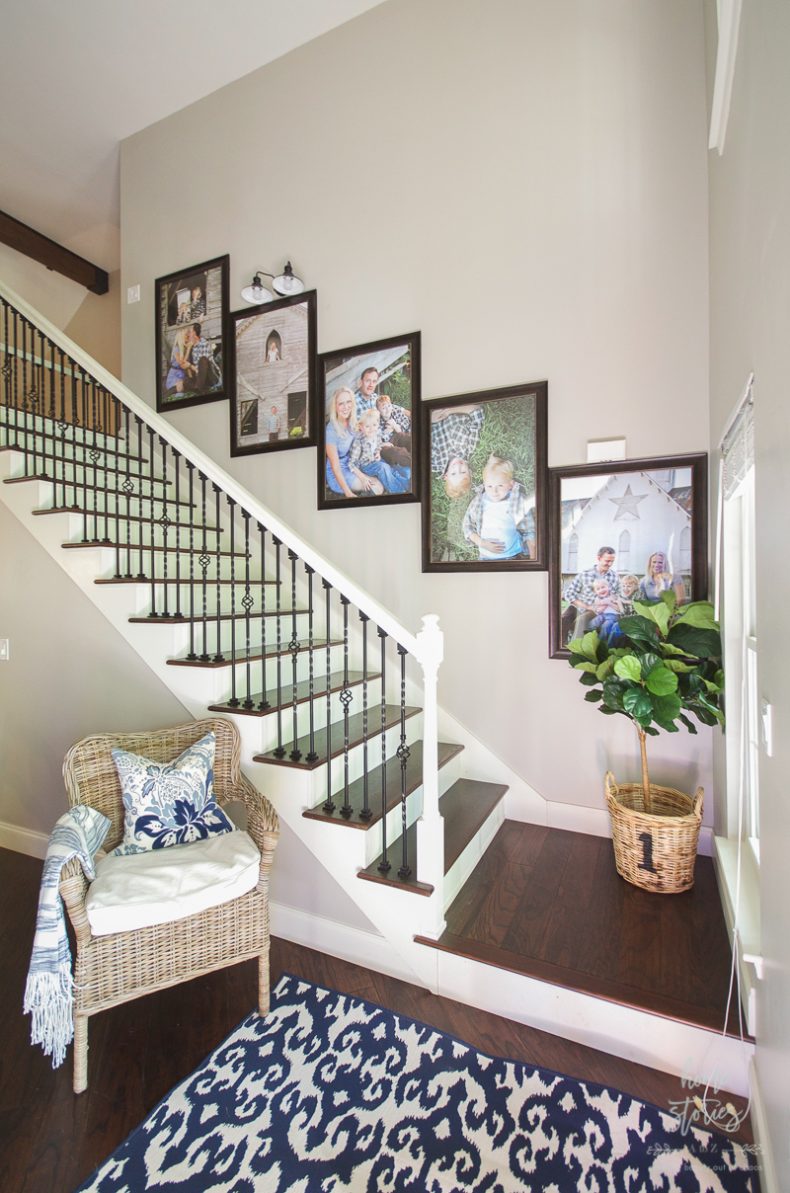
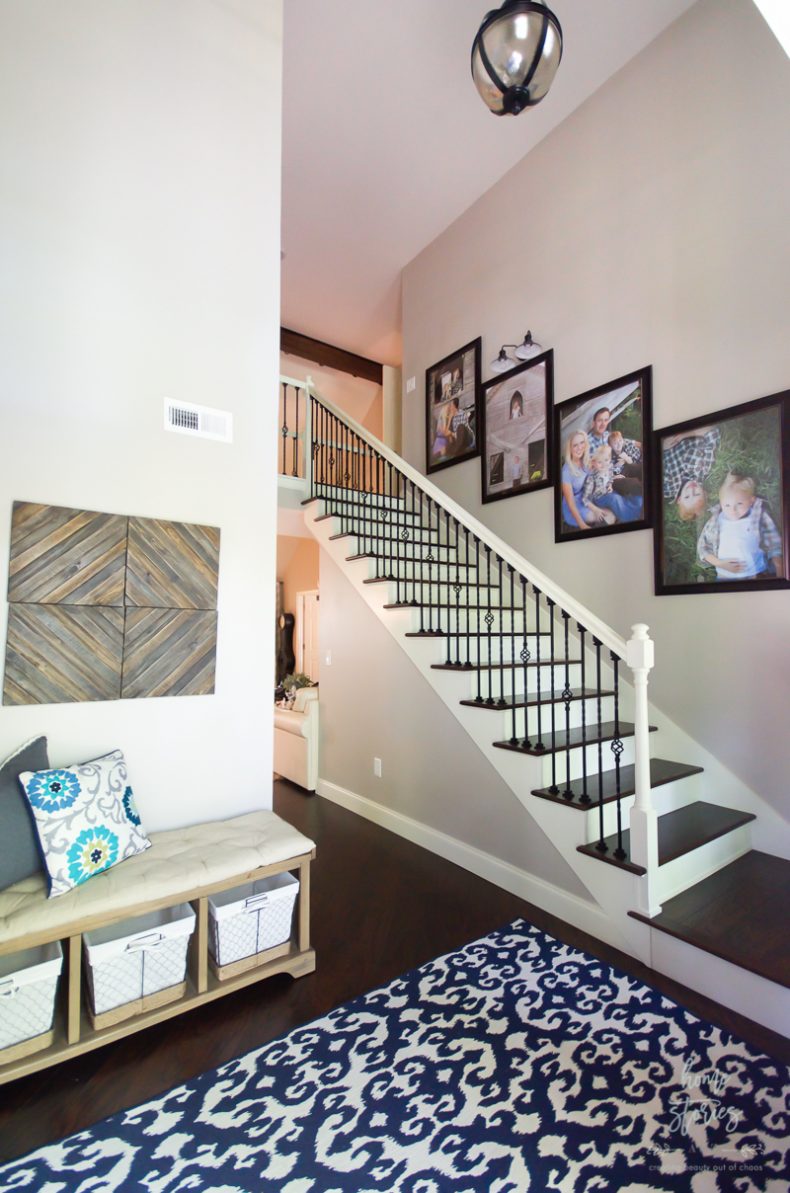
How to Create a Stairway Picture Wall
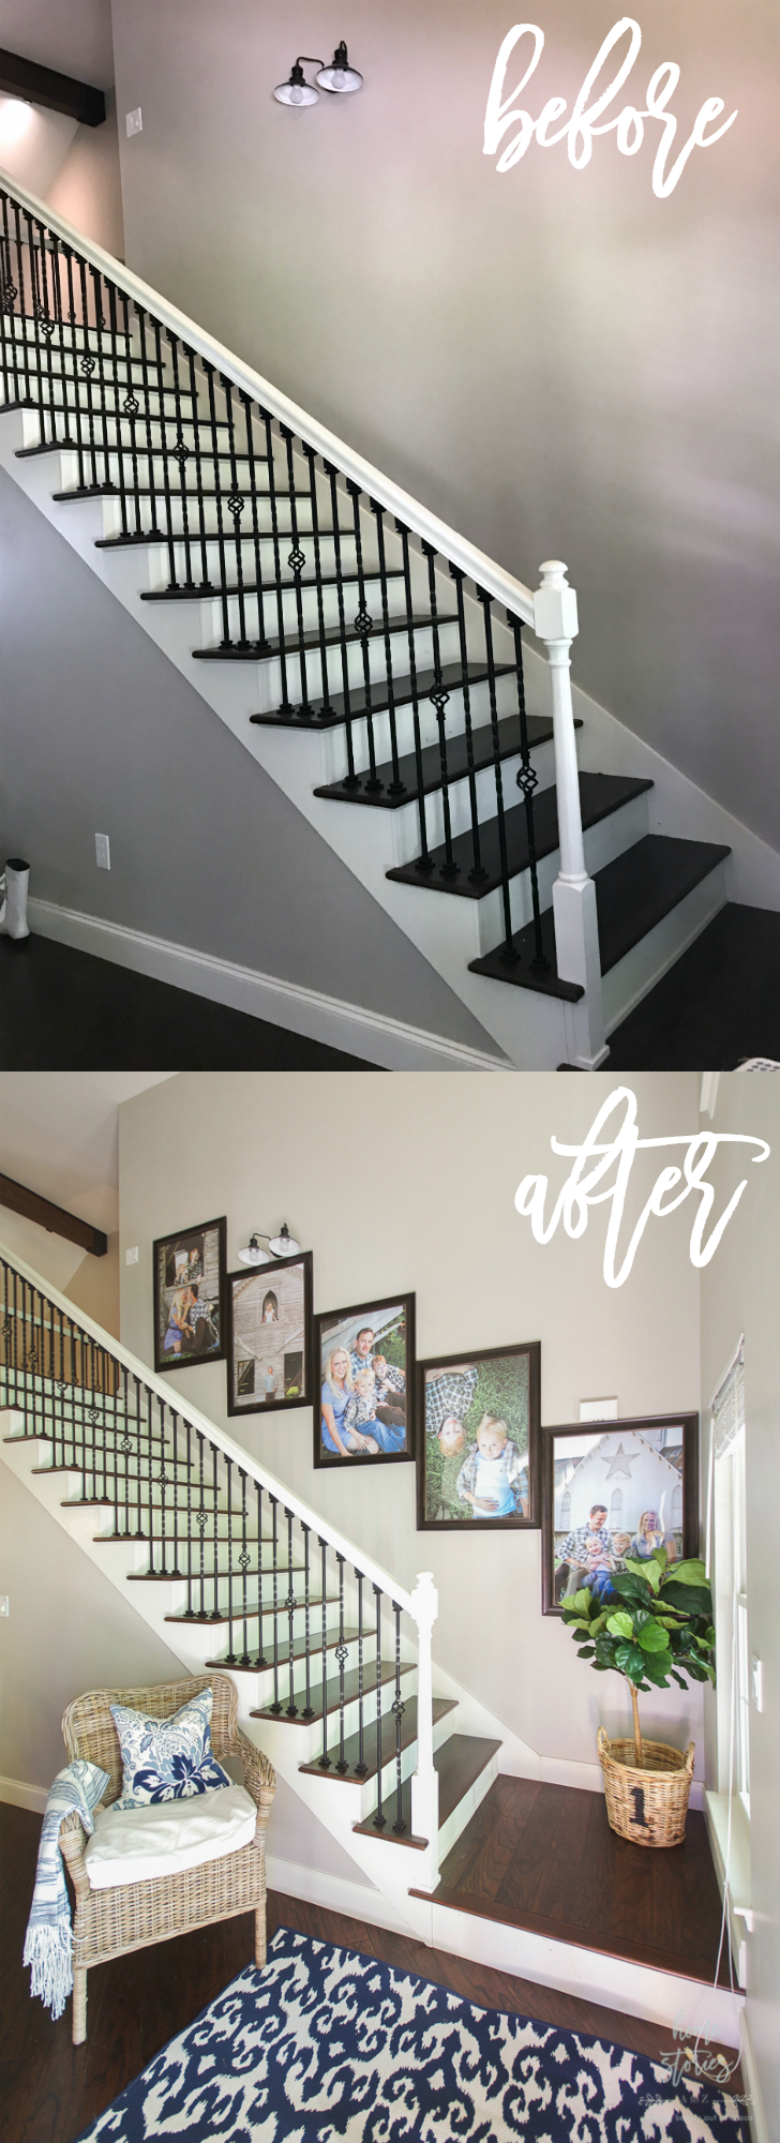
It has been a few weeks since we moved into our new home in South Carolina, and I’m just beginning to tackle a few decorating projects and make this house our own! What better place to begin than in the entryway? If you’ve ever moved before, then you know it has the tendency to make you feel nostalgic. I wanted to honor our past as a family in our new home with a picture wall that didn’t break the bank! Here are my steps for creating a clean, simple, and affordable stairway picture wall.
Step 1: Take your pictures and gather your photo files.
Hiring a professional photographer to capture your family memories is a wonderful option! However, if you want to take a DIY or semi-DIY approach to taking family photos, I’ve written a few posts on the topic. Read How to Prepare for Fabulous Family Pictures {family pictures} and Family Photo Tips to learn how to take your own family pictures.
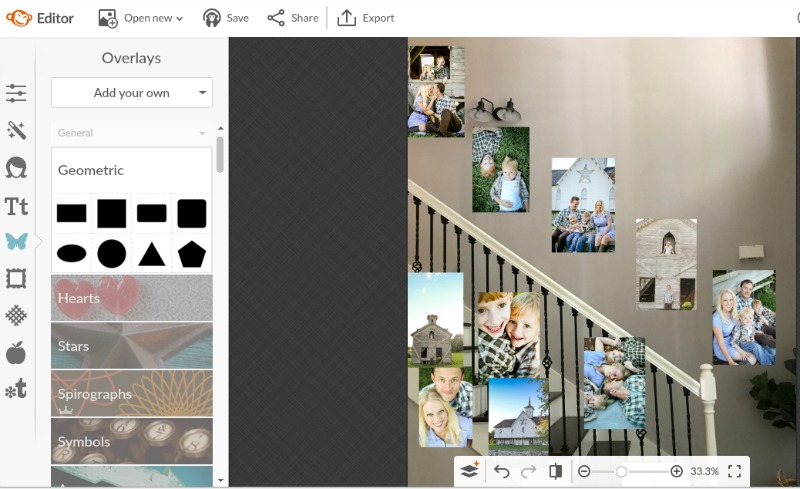
Step 2: Create a mock-up of your picture wall using photo-editing software.
To get an idea of what prints I wanted to choose for our wall, I took a picture of our staircase and then used PicMonkey, an online photo-editing software, to upload some family photo options using the Overlays “Add your own” tool. This is such a great way to see what your prints might look like and which photos work best together for your space. Be sure to measure your wall to get an idea of scale before ordering your prints and frames. Some find it helpful to create paper templates of chosen frame sizes and tacking them to the wall with painter’s tape in order to be certain of a good fit.
Step 3: Order your prints and your Better Homes & Gardens poster frames.
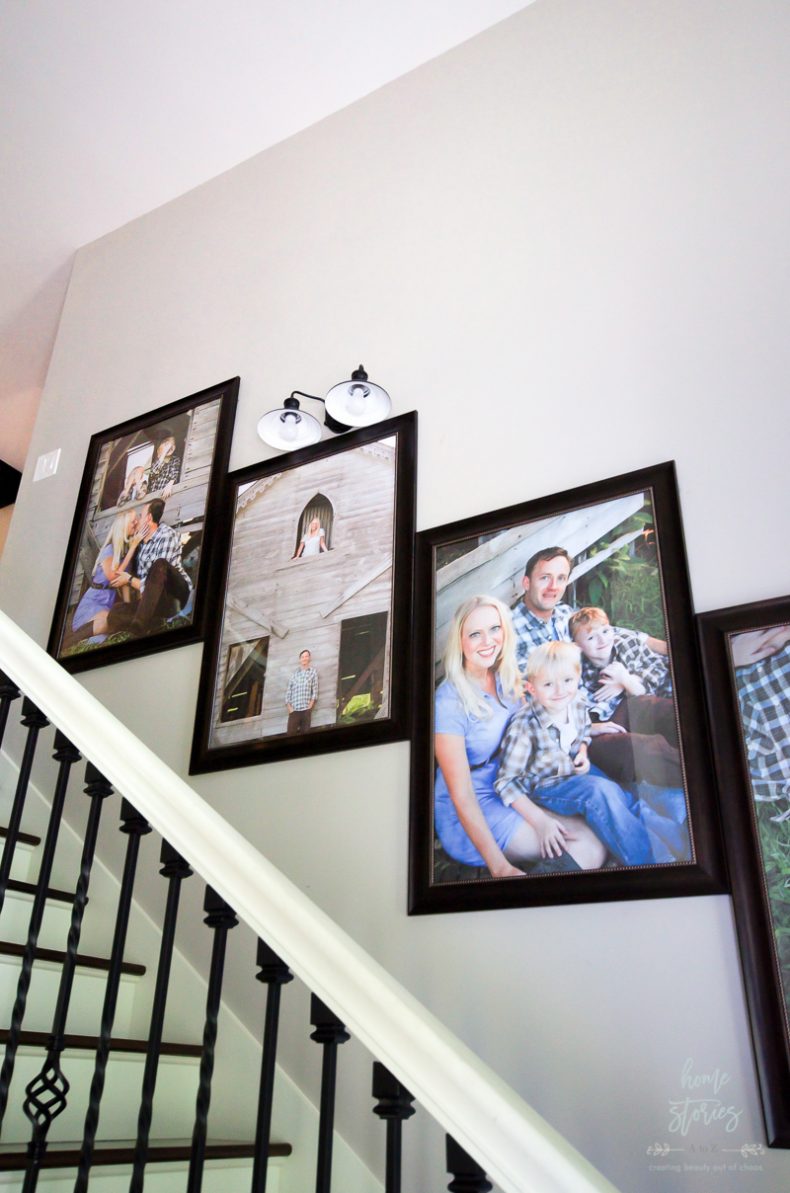
To save money on this project, I printed all of my photos as 24×36 engineering prints. If you’re unfamiliar with engineering prints, they are a wonderful and affordable option for printing poster-sized pictures in color, or in black and white. The photo quality is not archival quality of course, but it’s perfect for someone like me who likes to change decor frequently! I have a post on Tips for Creating Engineer Prints in case you are interested.
I measured my wall space and ordered five Better Homes & Gardens Bronze Monteclair Poster Frames. I love the thick frame and beaded detail around the interior of the wood. The frames complement our iron staircase railings beautifully and are exactly what I had in mind for this project! The interior of the frame is not glass but rather plastic which makes it lightweight and easy to hang.

Step 4: Hang your frames.
One trick I frequently use to hang D-ring picture frames is to create a template from painter’s tape marking where the nails should be placed. Simply run a piece of painter’s tip from each D-ring picture hook and then poke a hole with a nail at the top of each ring. Next, place the tape on the wall where you’d like your picture to be hung and nail through the holes. Remove your tape and place your picture on the wall! Voila! No complicated measuring needed!
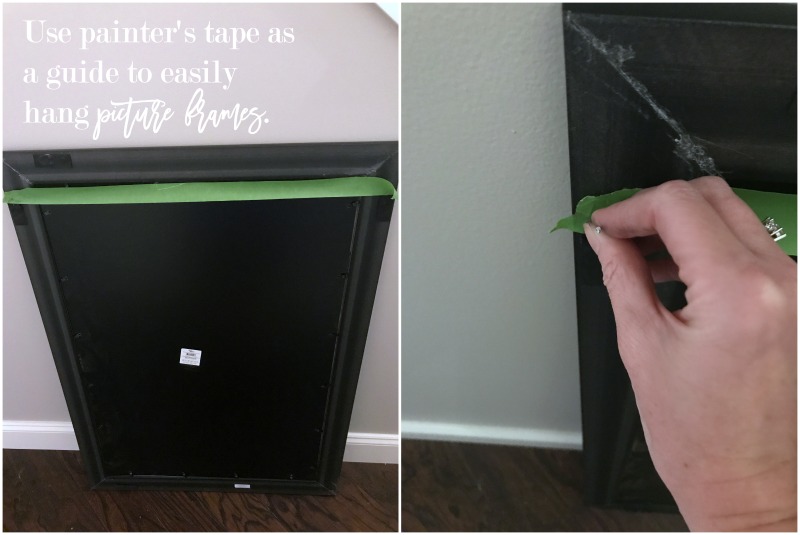
And here is another trick for you! Place painter’s tape on the wall in a straight line and line up the bottom right corner of each frame with the tape. I’ve created a mock-up demonstrating the technique in the picture below. This tip ensures that your pictures are perfectly spaced without ever needing a measuring tape! Remove the tape from behind the frames as you go up the staircase.
I am still playing around with how to style our entryway, but for right now I’m using some cute Better Homes & Gardens accessories from Walmart. This indoor/outdoor rug is a great versatile piece and cleans up beautifully! You can shop for all of the Better Homes & Gardens at Walmart products I used in the post by clicking on the product pictures below.
![]()
Follow Better Homes & Gardens Live Better Network on Facebook : Instagram : Twitter: Pinterest


This is so dreamy! It’s amazing what a difference pictures can make to a space.
Thanks Annie! I smile now when I walk up our stairs. 🙂
It’s so fun seeing a few pictures of your new house, Beth! I’m so happy for you & your family. May God bless you in your new Southern home!
Thanks Crystal!
Where did you get your color engineering prints printed?
At Staples. However some stores will not do them for you. I always use the online software to create my photos and pay for the prints online ahead of time before pickup. You can read my post on Tips for Creating Engineering Prints for other tips: https://www.homestoriesatoz.com/diy/tips-for-creating-engineer-prints.html