
Come see how I inexpensively changed the look of my kitchen hood to a shiplap hood with wood trim using some wood, a chop saw, liquid nails, a nail gun, paint, and stain!
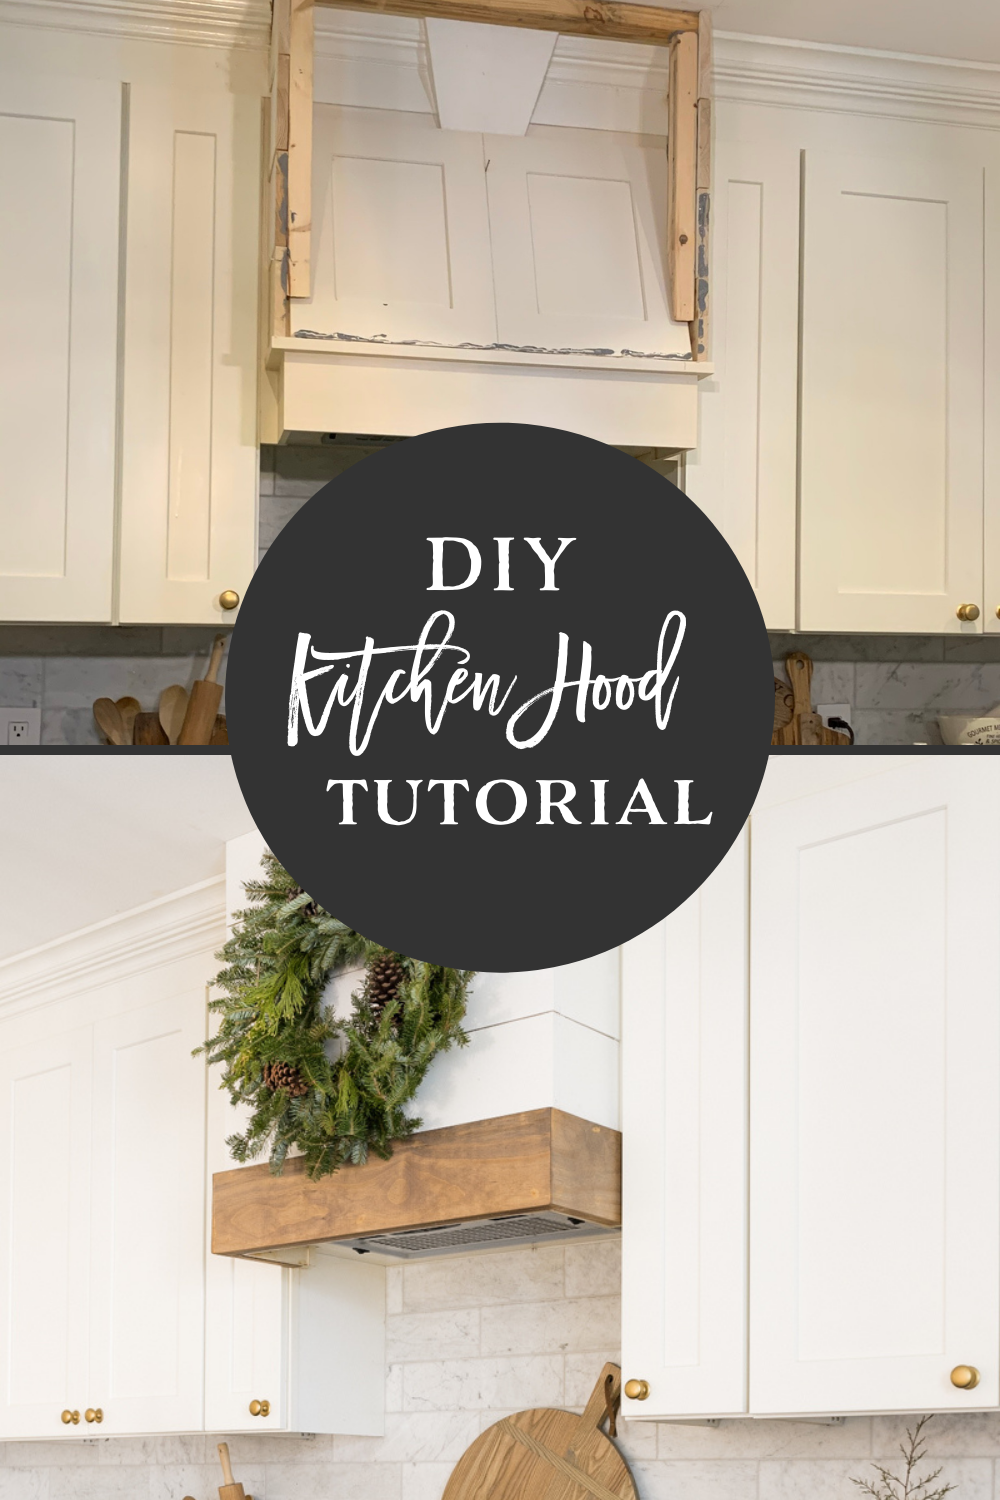
Due to the custom nature of this project, this blog post isn’t my typical step-by-step tutorial and is meant more to be used inspiration for your own project. If you’re looking to update your kitchen hood, I hope seeing what we did inspires you to tackle your DIY Kitchen Hood project!
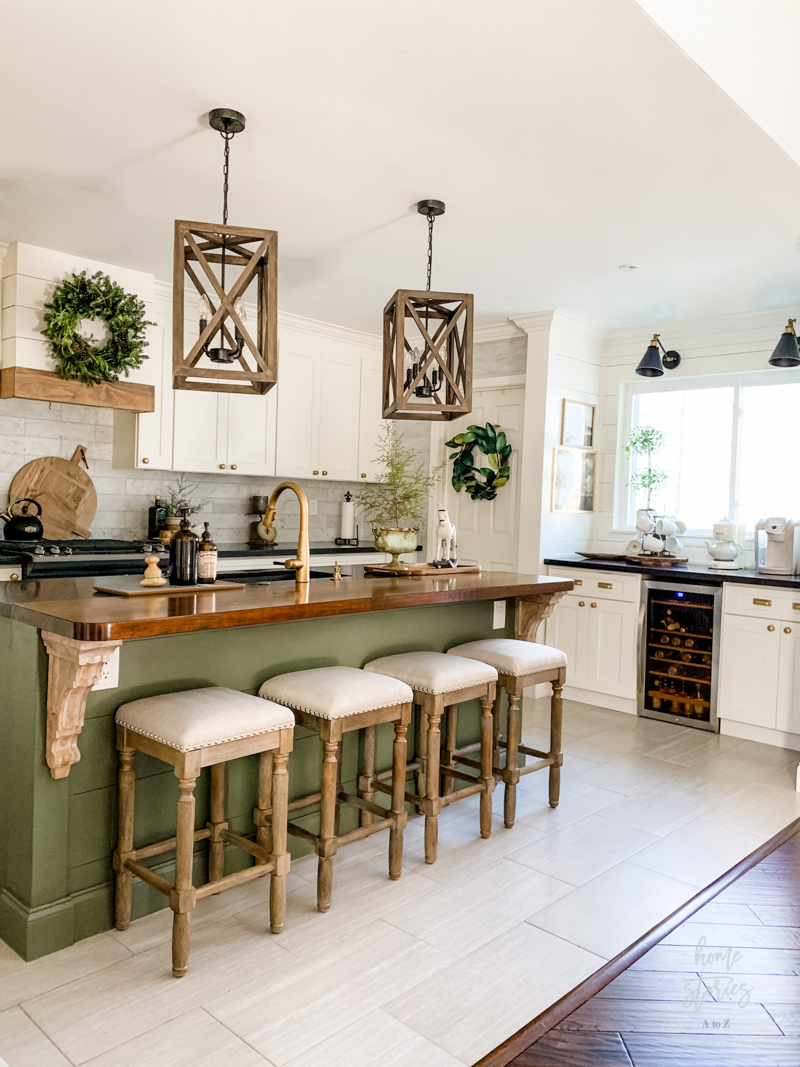
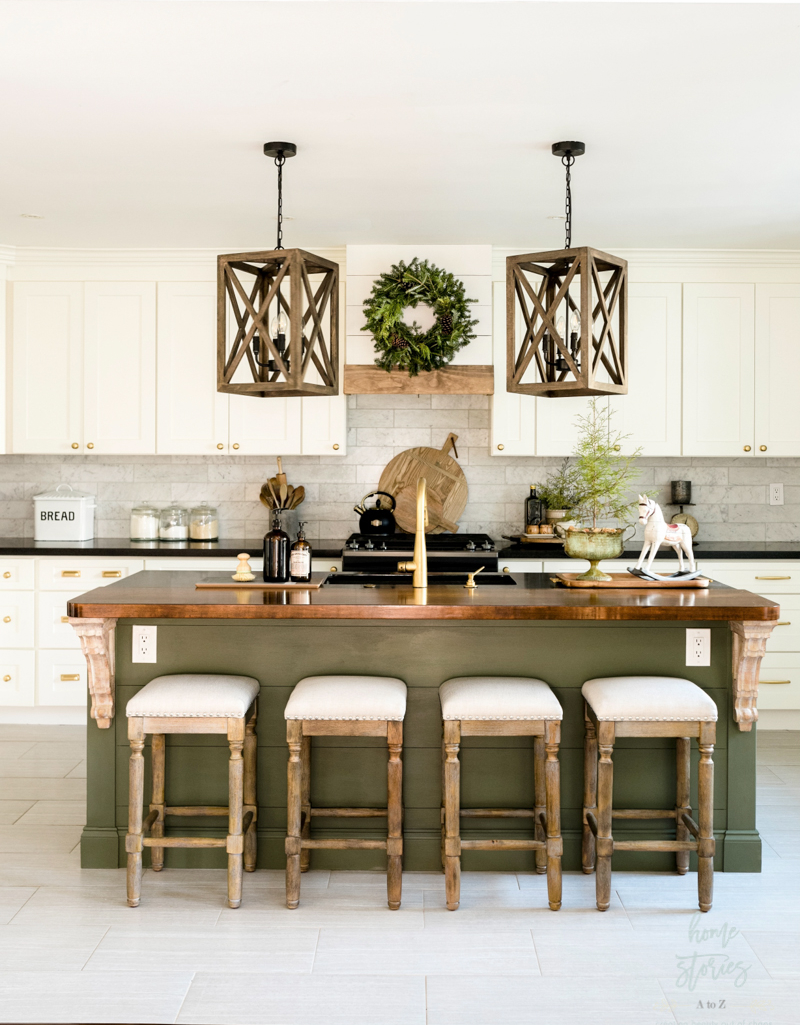
Our kitchen was beautifully renovated by the previous homeowners and was one of the selling points for our home! Over the course of living here these past 3 1/2 years, I’ve had fun playing around with several different looks in our kitchen. While I’ve enjoyed all of the different looks I’ve created in here, I was ready to update it to something a bit sleeker. Matt and I decided to conquer the hood update in an afternoon using mostly scrap wood we had on hand and a few new boards from the hardware store.
Step 1: Develop a base frame.
Work smarter and not harder! I originally planned to completely remove the existing hood but upon further thought and discussion, we decided it would be so much easier to build over the existing hood. First, we used 1″x 2″ boards nailed into the ceiling and directly into the previous hood to create a base frame for the new hood. We then used a reciprocating saw to remove some of the crown molding. We did this in order to tuck the side shiplap pieces flush to the wall. Removing the molding and tucking the boards behind the crown was much easier than trying to copy the molding cuts onto our shiplap boards.
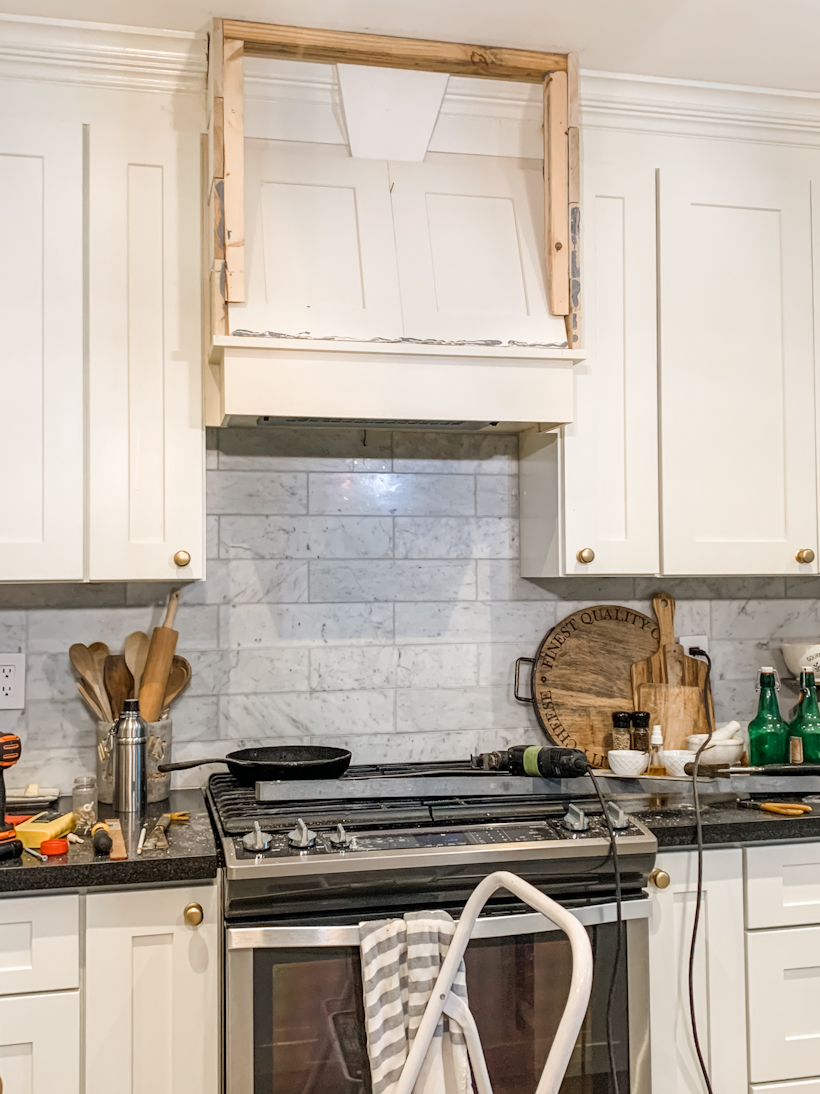
Step 2: Add side pieces of wood to the frame.
We used 1 x 5 x 8 pre-primed wood pieces and a few scraps leftover from previous projects to create our “shiplap”. Ideally, all of your side wood pieces should be mitered. We wanted to complete this project as quickly as possible and opted for the lazy method of a butt joint. I don’t recommend doing this. Your finished product will not look as professional, so don’t be lazy like us! Take the extra time to miter your edges. 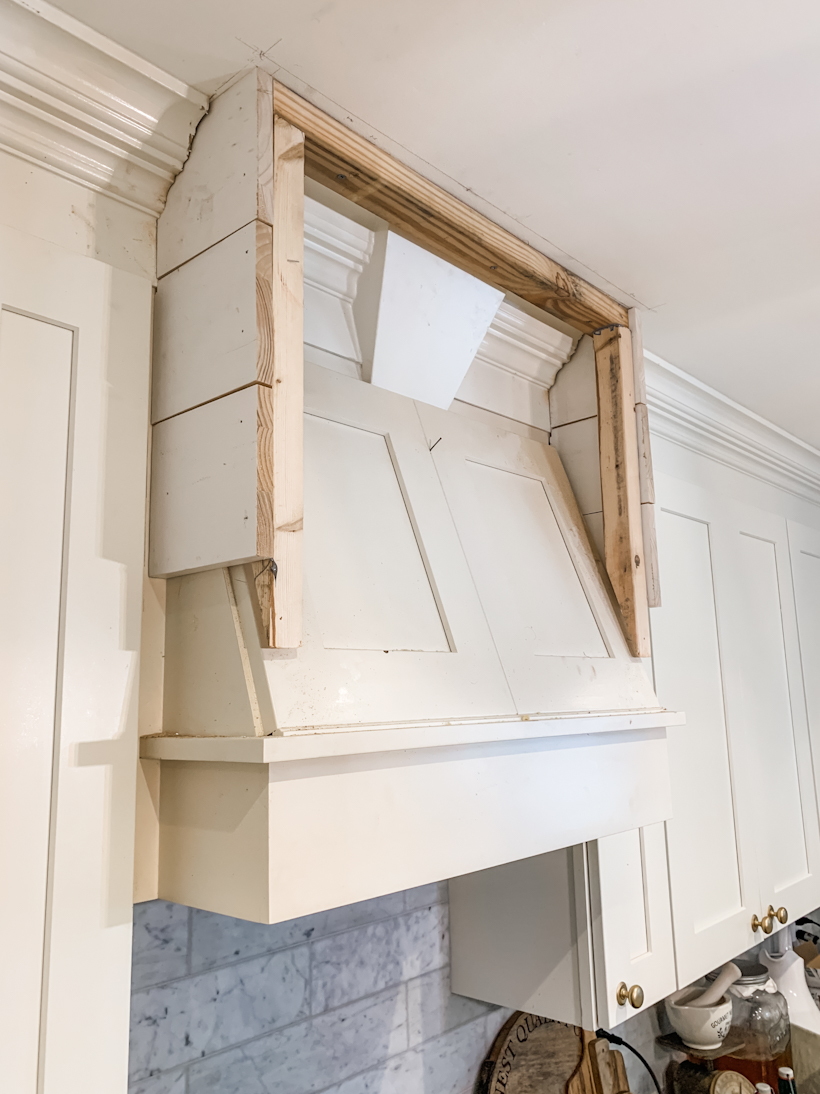
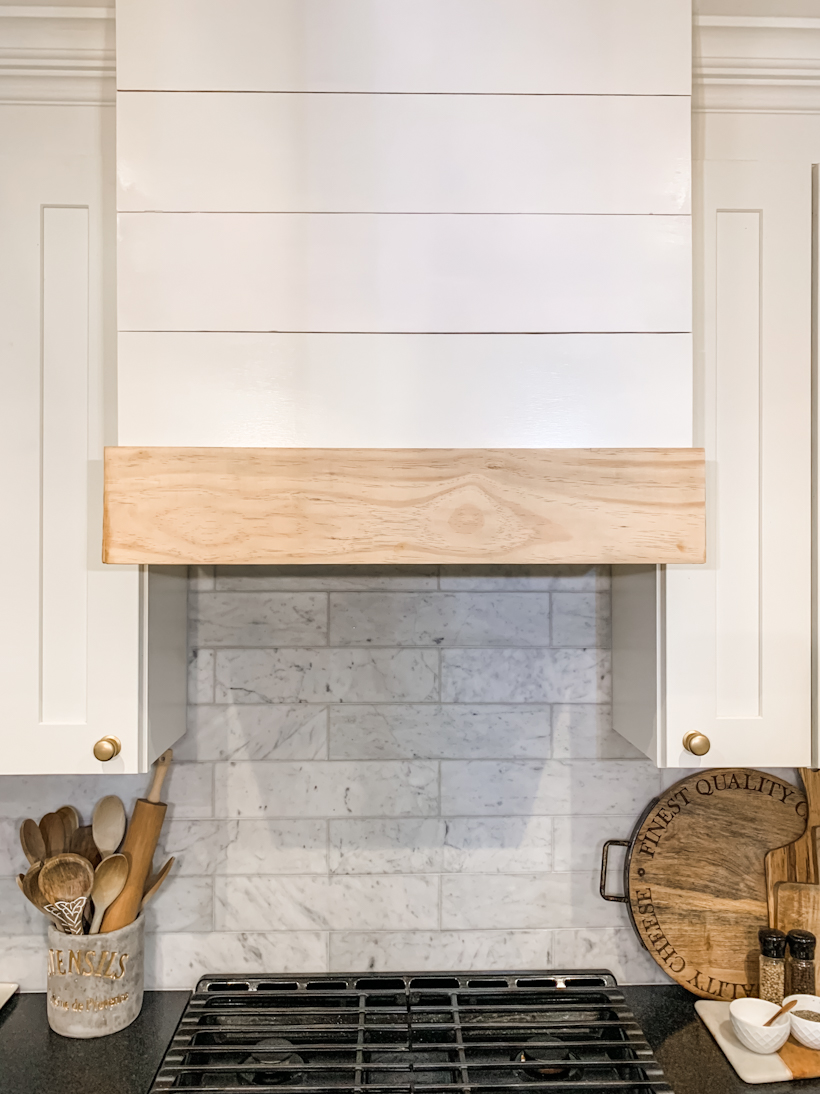
Step 3: Add front boards to the frame to create a shiplap look.
This was the easiest part! Measure, cut, and secure your wood to the front of your hood frame using a nail gun. 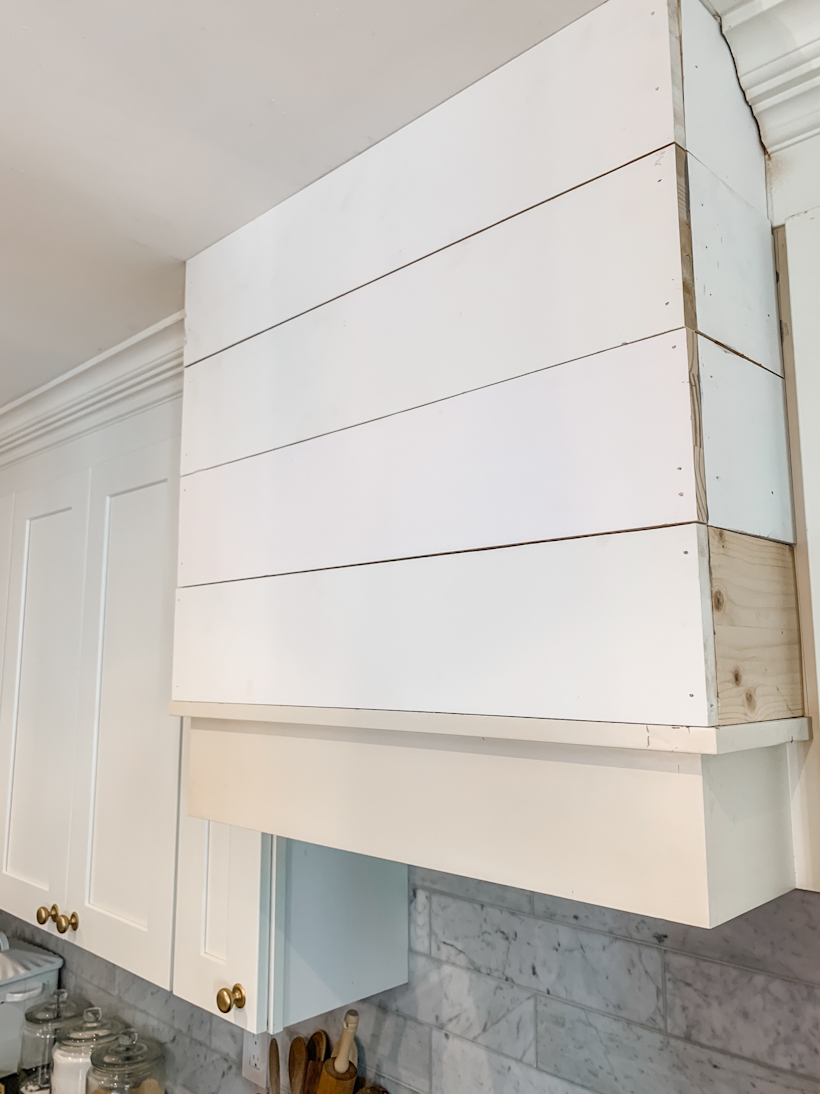
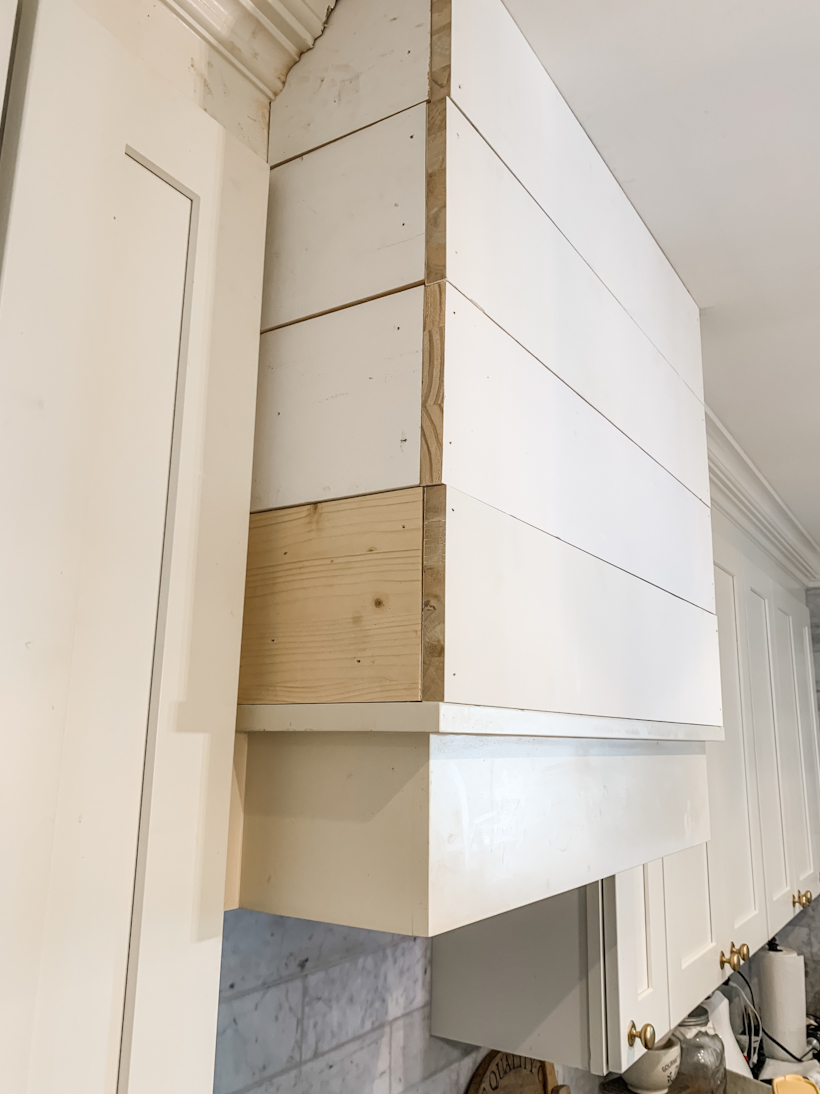
Step 4: Add the wood trim pieces to the front of the hood.
The wood trim pieces for the front of our hood needed to be highly customized because of the existing hood design. We created three different “puzzle pieces” with mitered edges to fit together and cover the existing frame.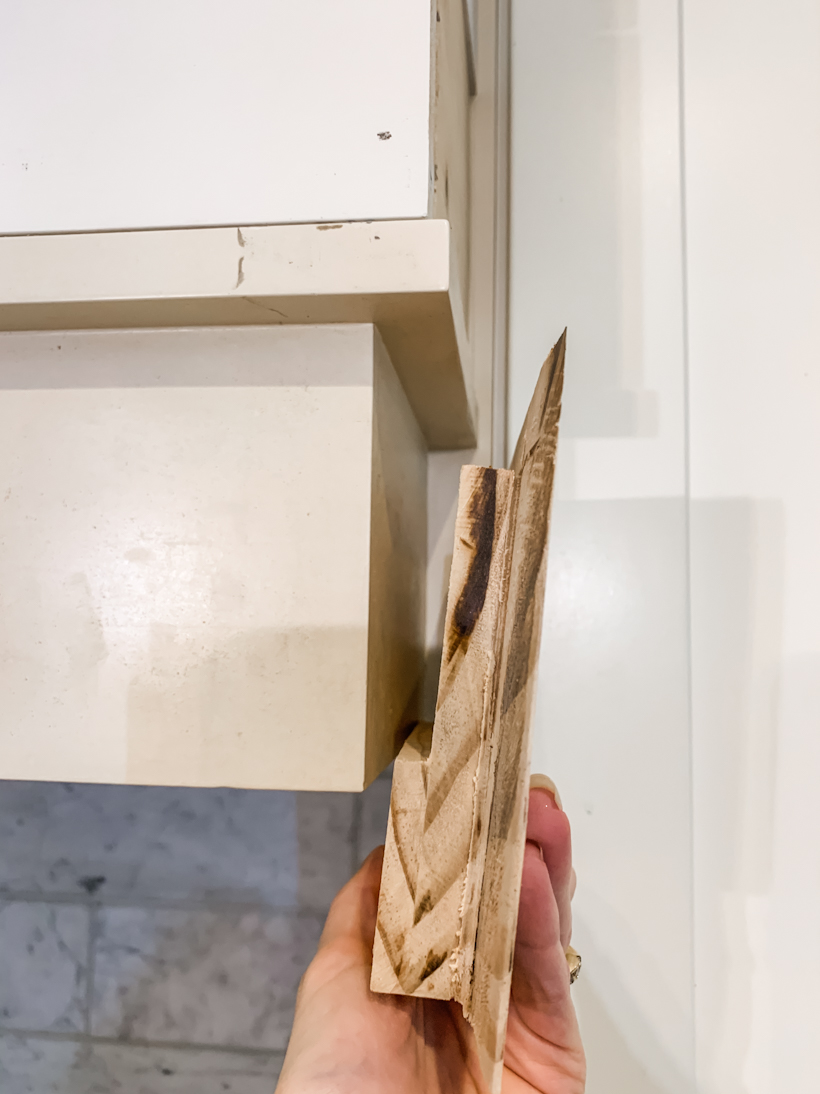
This was a creative solution to our problem that worked beautifully! The pieces are lightweight and easily attached into the MDF of the existing frame.
 I used wood putty to fill any imperfections and gaps in the seams and then sanded them smooth.
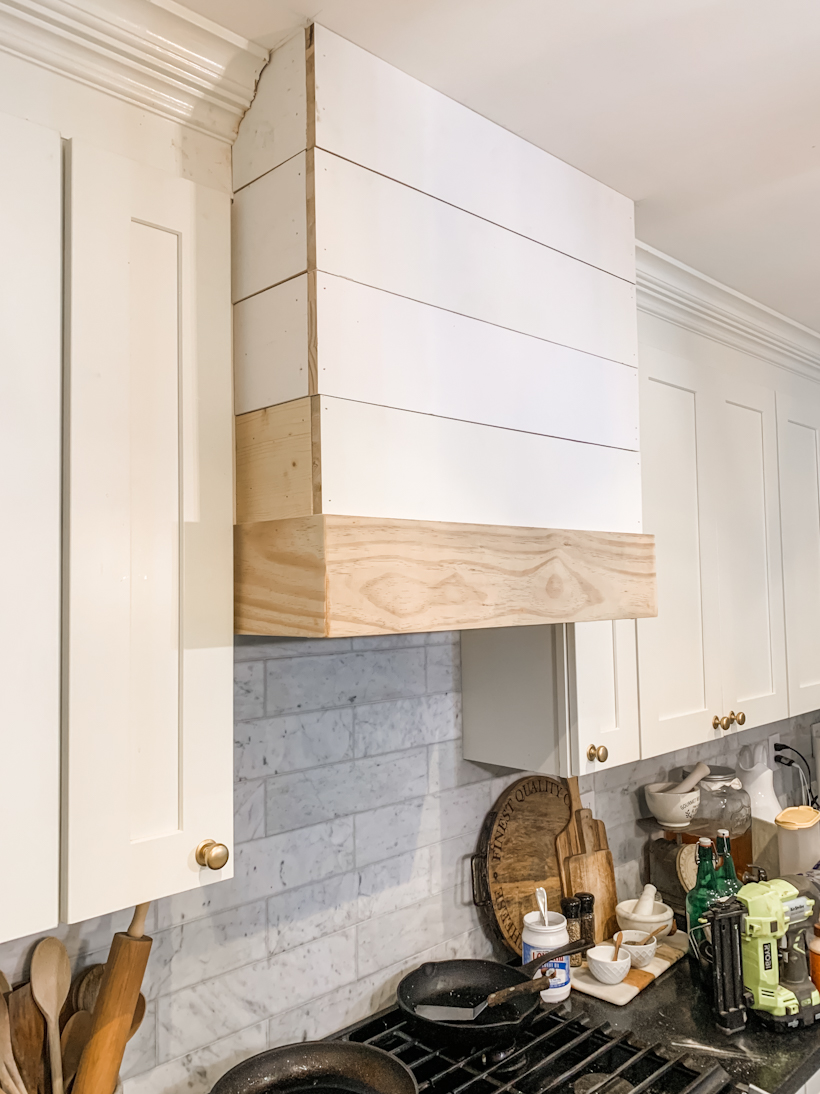
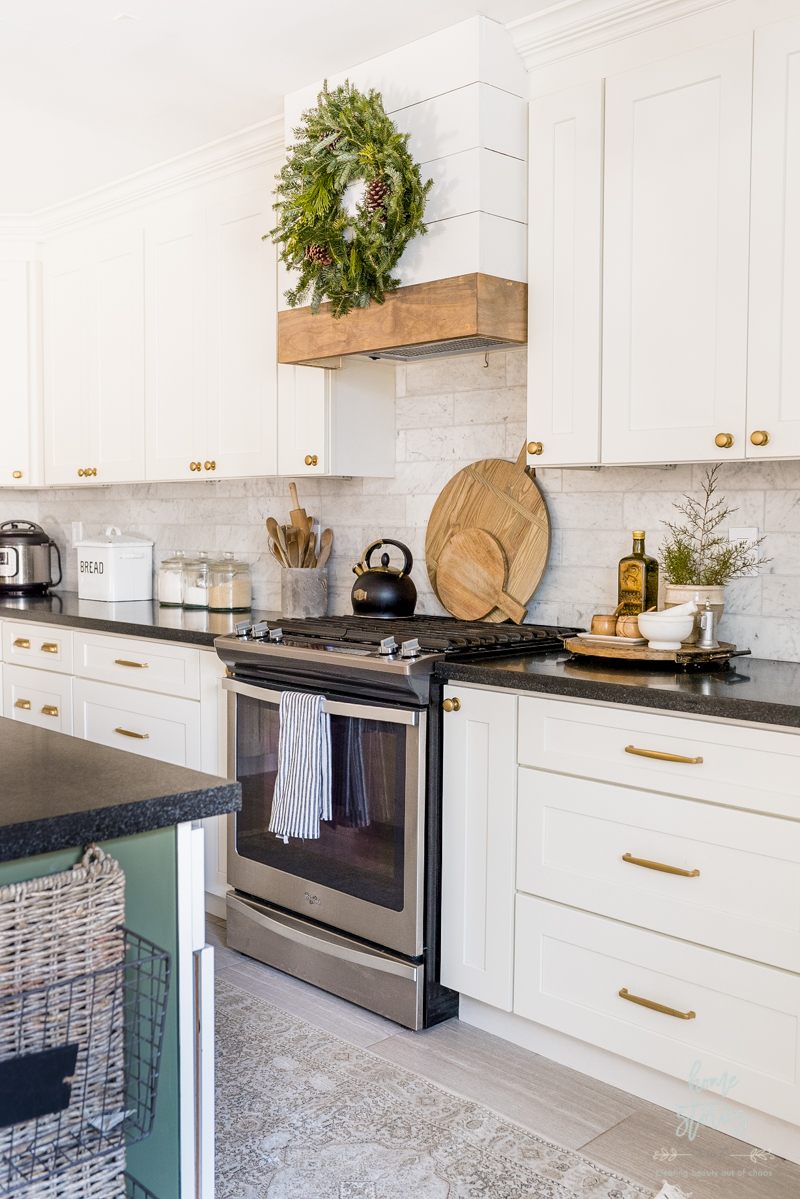
Step 5: Paint and caulk the hood.
I removed a cabinet door and brought it in-store to Benjamin Moore to be color matched. I’ve done this in the past with great success, but unfortunately this time the scanner wasn’t working properly and they had trouble capturing my exact cabinet color.

The hood is a bit whiter and less cream than the cabinets, but it’s close enough that it doesn’t bother me.
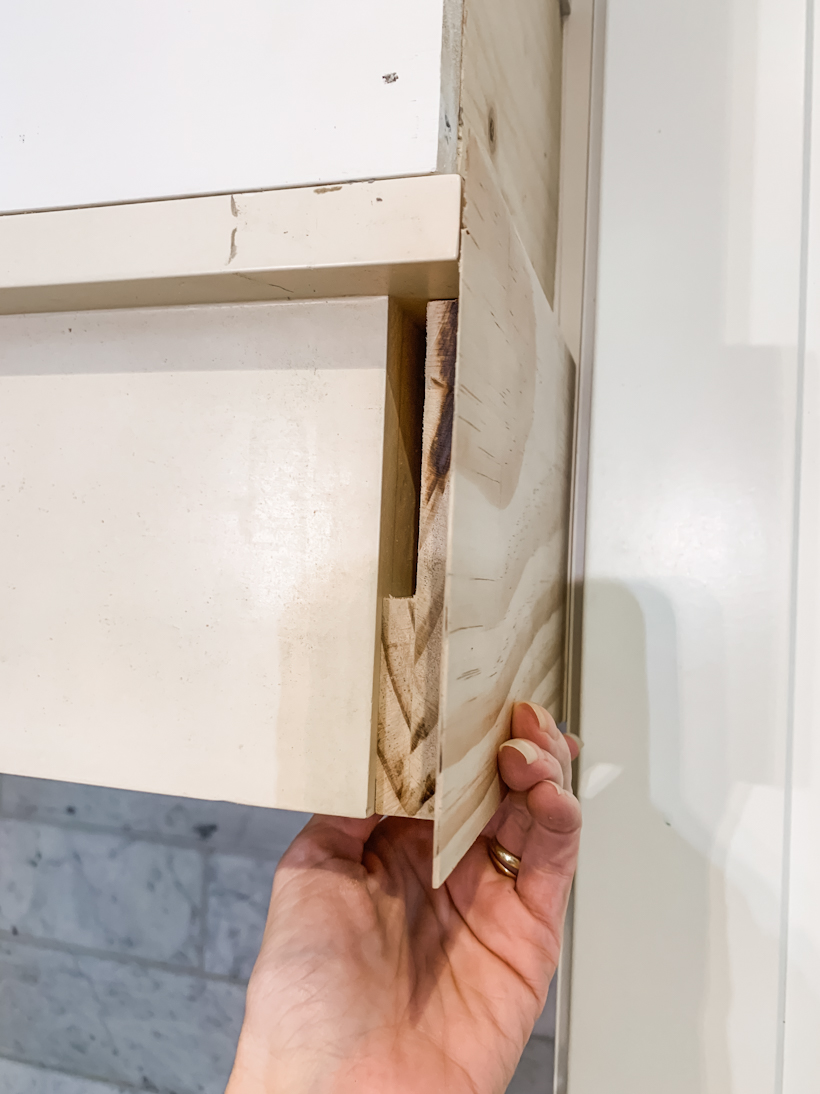
Step 6: Stain the hood trim.
I sanded, cleaned, and conditioned the wood with wood conditioner before staining. I always like to test my stain first on scrap pieces of wood to make sure my desired color is achieved.
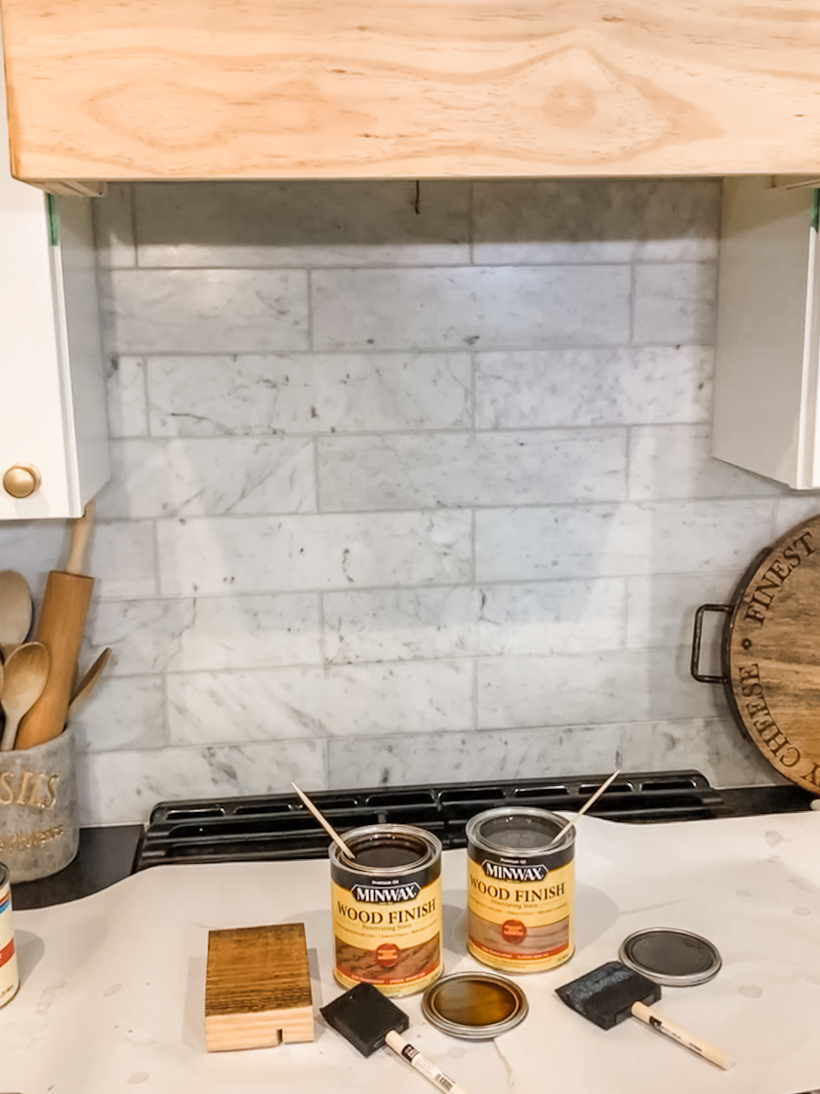
I used a combination of Minwax Special Walnut

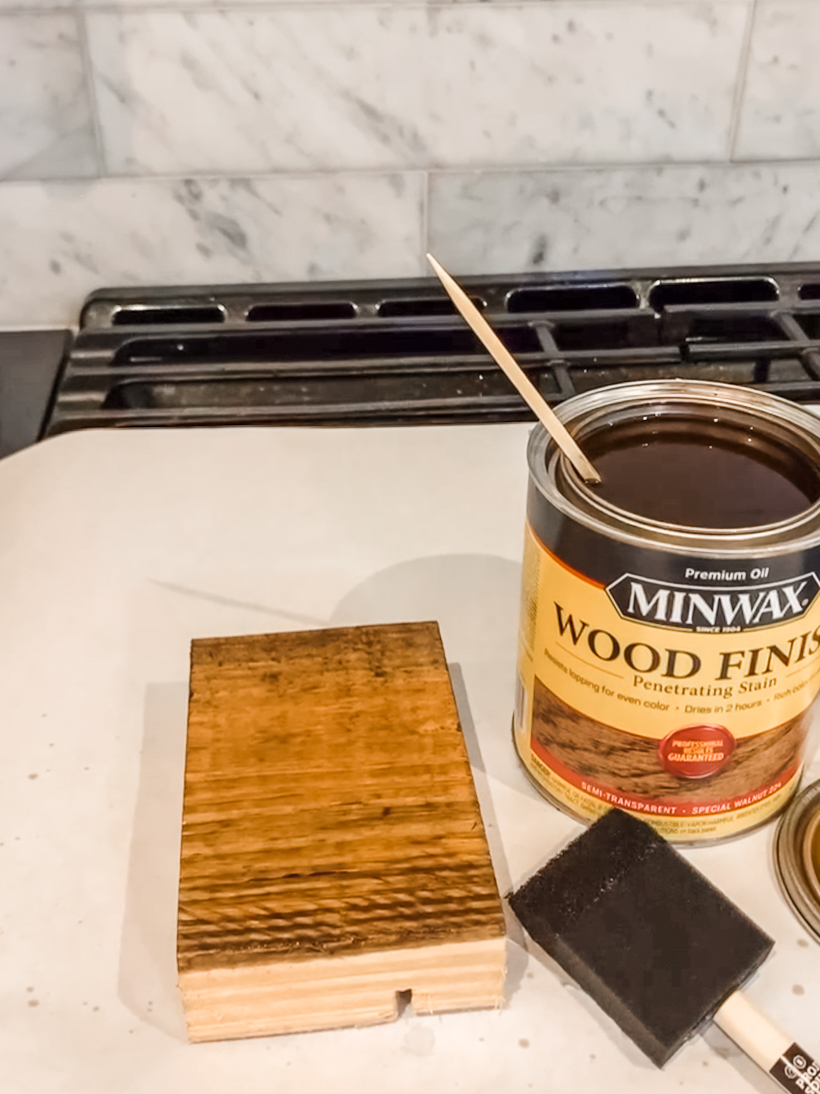
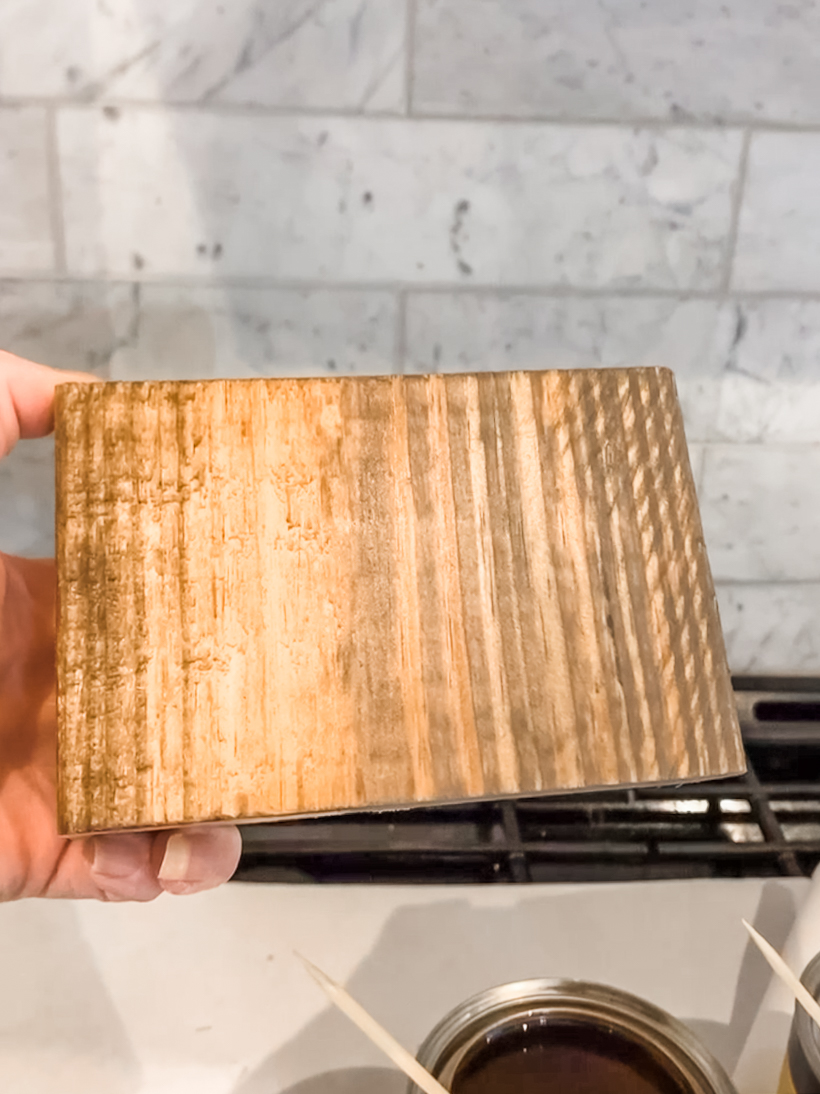 My goal was to have the stain color coordinate with my decorative cutting boards, and I think I accomplished that goal rather nicely!
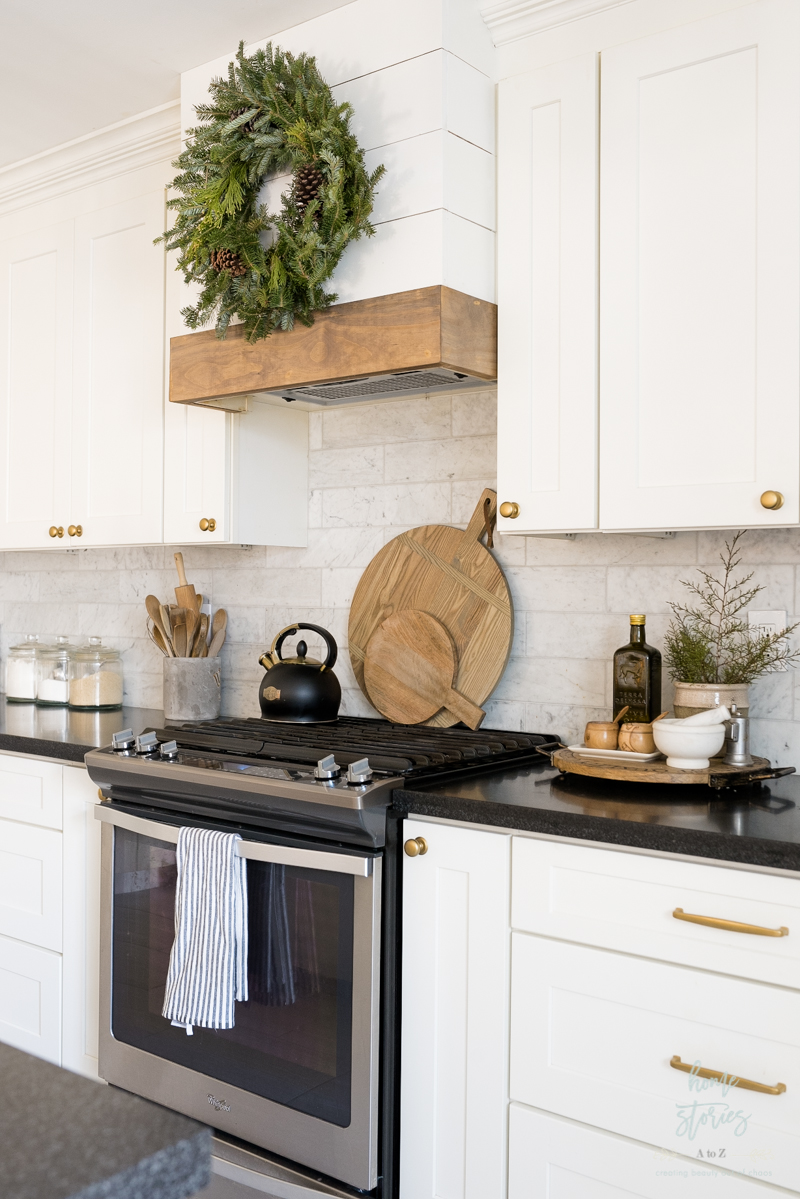
Kitchen Sources: Shop my Space.
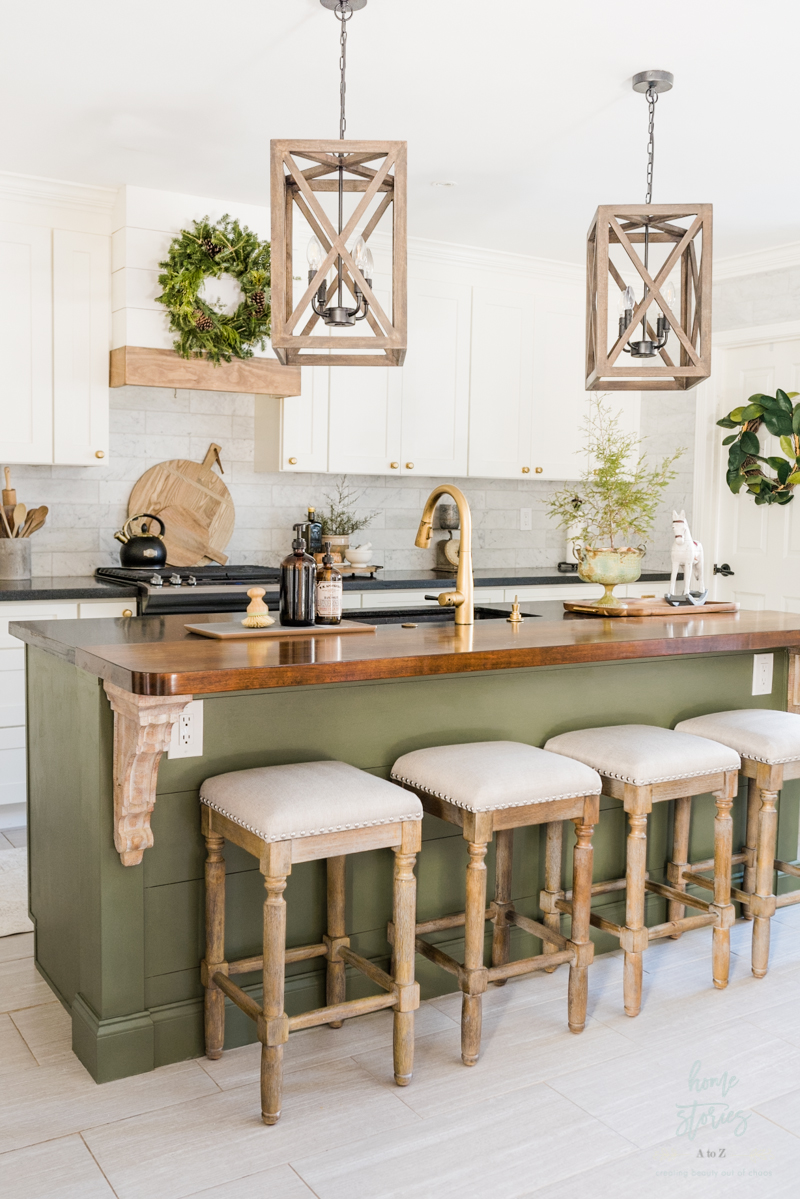
I’m thrilled with the updates we made to our kitchen and am loving all of the little updates including the new hood, new bar stools, painted kitchen island, new gold hardware, and new sconces above the beverage station. If you’re looking for my kitchen sources, you’ll find them all listed and linked below for you. Simply click on the links to shop.
Wood Pendants
Bar Stools
Wooden Tray
Amber Dish Soap Dispenser
Wreath
Frames
Circular Large Cutting Board
Black Tea Kettle
Black Sconces
Glass Lidded Jars
BREAD Box
Runner


Looks so adoring all the kitchen arrangements. Love it surely.
That looks amazing – what a great idea! We recently renovated our entire kitchen, so kudos to you!
Your kitchen hood looks amazing. You did such a great job making it. Your whole kitchen is beautiful. 🙂