
How to Create a Vignette
Learn how to create a vignette by learning the tips and tricks of how to group decorative objects together.
What is a Vignette in Decorating?
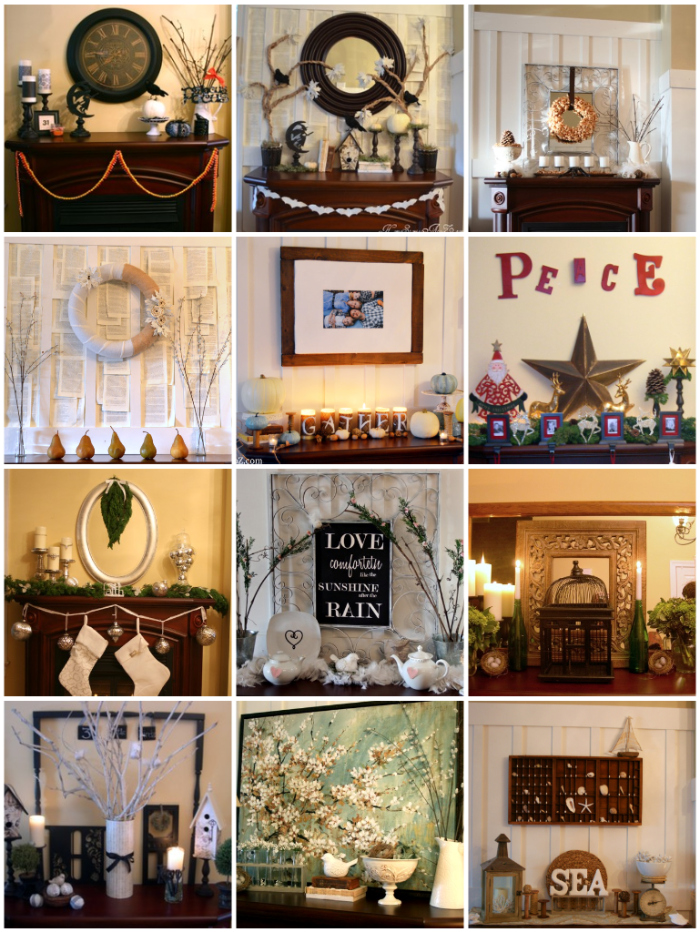
In decorating, a vignette is a small grouping of objects that creates a pleasing focal point and together tells a story. I love decorative vignettes because they are an affordable way to bring charm, character, and life to any tabletop, bookshelf, mantel, coffee table, or nightstand. Today I’m going to teach you some simple tips and tricks that you can apply to help create gorgeous vignettes throughout your home’s interior. Let’s get started!

Choose Your Space
You first need to decide where you want to create a vignette. End tables, nightstands, entry tables, and mantels are good places for beginners. Edit the items that are already occupying this space and decide which elements you want to stay. For example, if you are decorating your nightstand perhaps you have decided that your lamp and alarm clock must stay but the rest is negotiable. Tip: If it isn’t permanently fixed to the wall then it can be moved to a different location of the house. I am constantly changing around the lamps, mirrors, pictures, and accessories in my own home. Don’t be afraid to experiment with what you have!
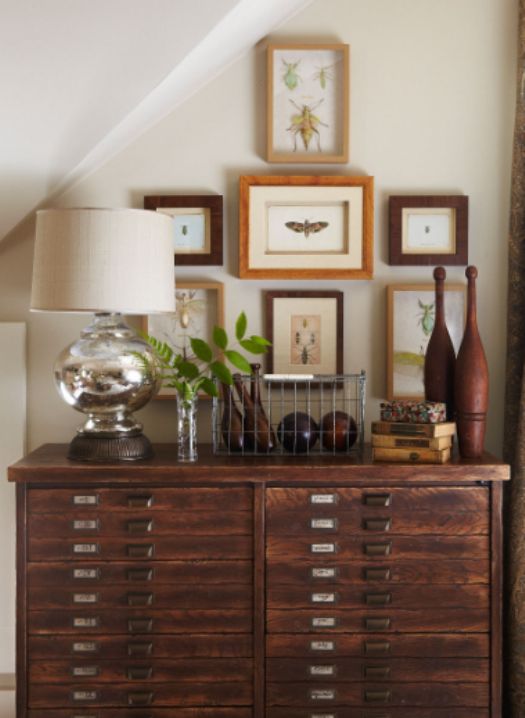
Gather Accessories & Pick an Anchor Object
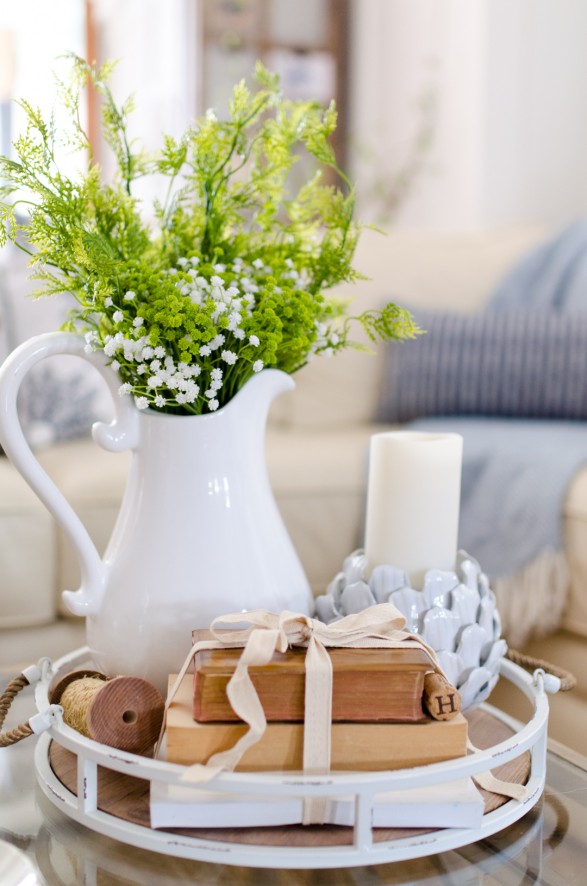
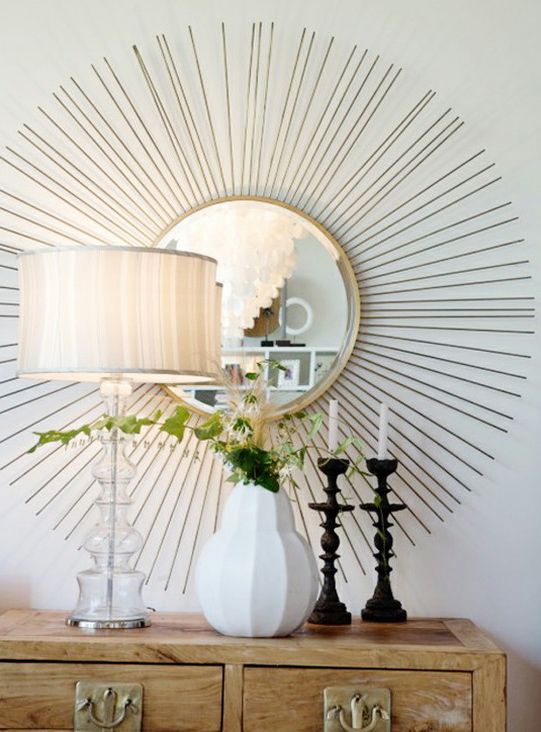
Now it is time to shop your home for objects which might work in your space. You want to keep the color palette simple, using only two or three varying colors. A simple color palette will help you achieve a more cohesive end result. Use color cues from the room to decide which colors to incorporate, or for an element of whimsy add a pop of unexpected color in your vignette. Good items to gather include: books, candlesticks, vases, mirrors, picture frames, and fresh flowers or greenery. Once your accessories are gathered, it is time to choose an anchor piece. This might be a lamp, art work, mirror, etc. which will “ground” the entire vignette and set the tone for your focal point. In the picture below, the sunburst mirror is the anchor object.
Work from Back to Front & Group in Odds
Once your anchor object is in place, position your second tallest accessory on your tabletop, often this will be a lamp or pair of lamps. Now begin layering your other accessories from back to front keeping your smallest objects until last. For maximum impact, try grouping your objects in odd numbers. Objects grouped in three or five tend to be more visually pleasing than pairs of objects, but experiment and see what looks right to you. In the picture below, the pair of vintage bowling pins visually balance the lamp and look beautiful as a pair. However, notice how the stack of books are placed in front of the pins to create a grouping of three.
Admire and Edit
Whenever I am creating a vignette, I frequently take moments to stop, stand back, and edit my work. I might shift a candlestick over, change out a picture frame, or omit a vase. Be sure to stand back often to see which elements you like and which need tweaking. Most importantly enjoy the process! Vignettes aren’t meant to be permanent fixtures in your home so free yourself from feeling like you need to “get it right”. When you tire of a vignette, simply switch up your accessories and create a new focal point. I change my mantel and other vignettes in my home at least six times a year. Don’t allow your vignettes to get stale. Keep them fresh and have fun exploring your inner-designer!

If you liked this post, you might also like How to Decorate Shelves:


When I worked at Pier 1 Imports many years ago I had to make vignettes all the time. At first it was so difficult and eventually it was second nature. Now that I have a home to decorate I second guess myself all the time and it’s much harder! I need to put together a great area in my entryway and a vignette is definitely what I need to start with. Thanks for posting this! I also needed the decorating a shelf link too 🙂
Now with that rundown I have no excuses but to get cracking on a nice fall vignette.
Thanks for a great post, Beth! It was helpful to break down the process into steps. I love to change up things in my home, but sometimes it’s hard to know where to start. I appreciate the tips.
I have been following your blog for 4 years, this is one of my favorite posts. We just moved to a new area and have a whole house to decorate. Keep up the great tips and posts….
Wow Jenene thanks for the faithful follow and the compliment :). It’s always good to receive feedback on what it helpful to others!
Great inspiration photos and tips! I need to get moving and start re-arranging my things. Good excuse to do some cleaning too 🙂
Yes, changing things up means that everything gets dusted occasionally around here :).
This is great inspiration…I’m always changing things around. The back to front part is brilliant. Oh how I wish I had one of those big starburst mirrors!
I know! That starburst mirror is particularly gorgeous.
Great ideas Beth! I love me a beautiful vignette ;)). xo Jenna
Thanks Jenna!
Great tips! I always look at everyone else decor and love it but get so frustrated when I do my own. Good tip on the “groups”. I knew about the odd # thing but never really looked at the grouping thing until you pointed it out in the picture above. Thanks!
Yay! Glad it was helpful :).
I really need this … thanks!
You’re welcome Randi!
Great tips, Beth. It feels like creating vignettes should be so easy, but it’s hard! It’s probably the hardest part of decorating for me. I think I need to do more editing. You seem to have it down to a science. 🙂
Thanks Kristin :). I think it can definitely be learned which is fun!
Great tips. I love changing up my vignettes from time to time too.