
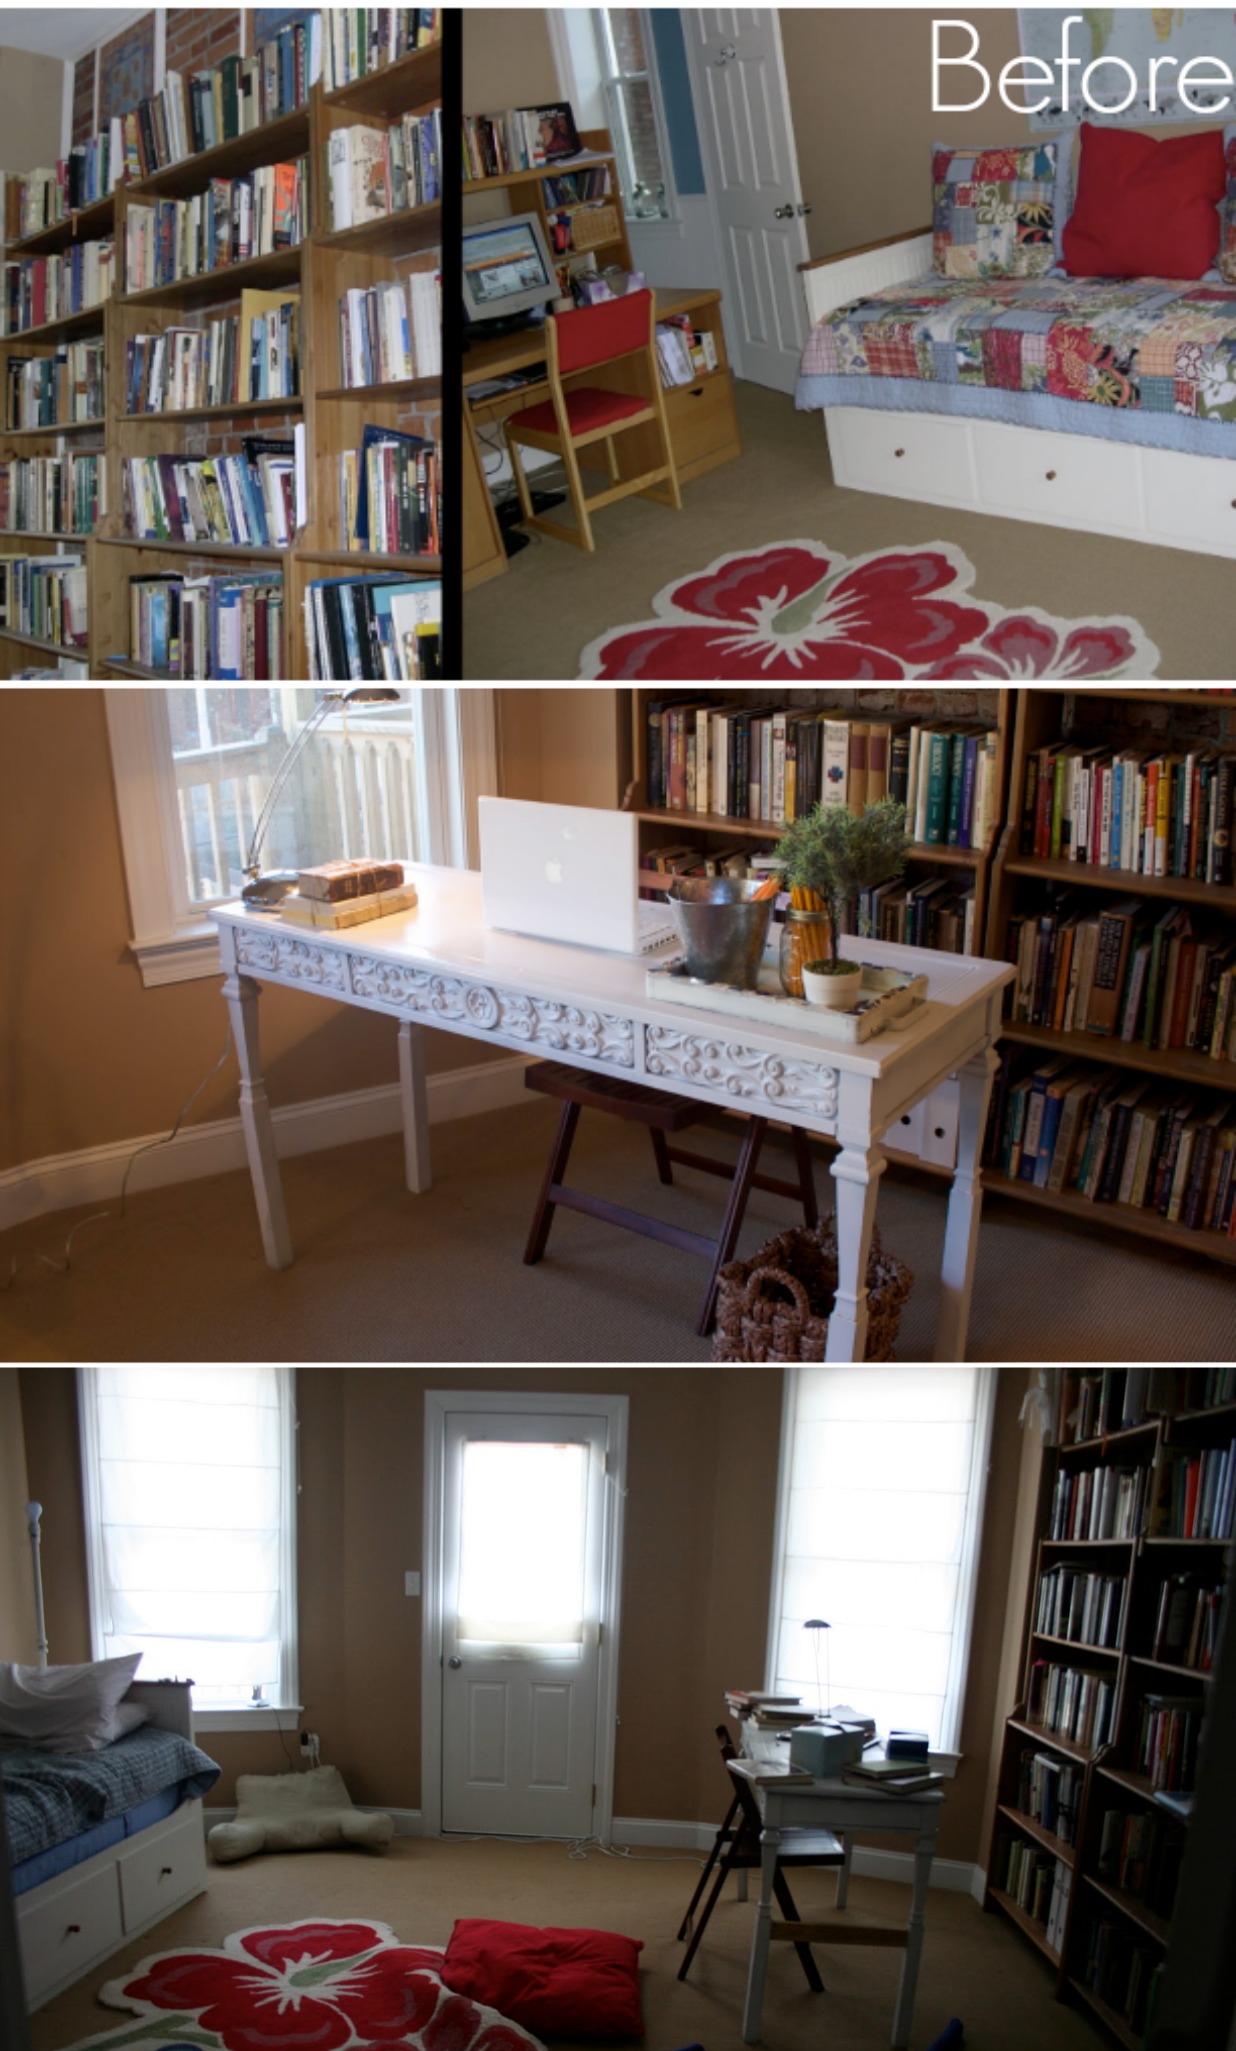
I have a room in our home that I haven’t shared much on the blog. It serves as our guest room, library, and Matt’s office all in one. I’ve never been happy with this room, so I’ve just chosen to close the door and ignore it. This summer, I have been on a mission to tackle the things in my home that I dislike and this room was at the top of the list! We sold the trundle bed, added our former master bedroom queen bed, and sold all of the bookshelves. I really wanted a cleaner look for all of the thousands of books we have spilling all over the place. Matt is an intellectual, has his PhD in Religious Studies, is a teacher, and is completely addicted to books. We desperately needed a better system. Creating an Ikea built-in Billy bookshelf is something I have wanted to do in this room for years. As much as I would love to have cute shelves showing off fun coordinating tchotchkes, these bookshelves will contain 100% books! So let the fun begin!
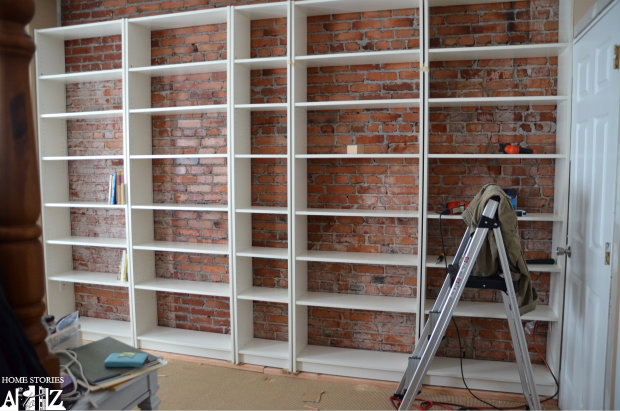
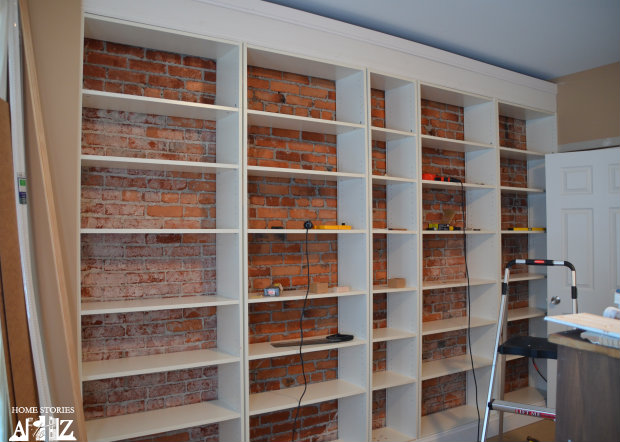
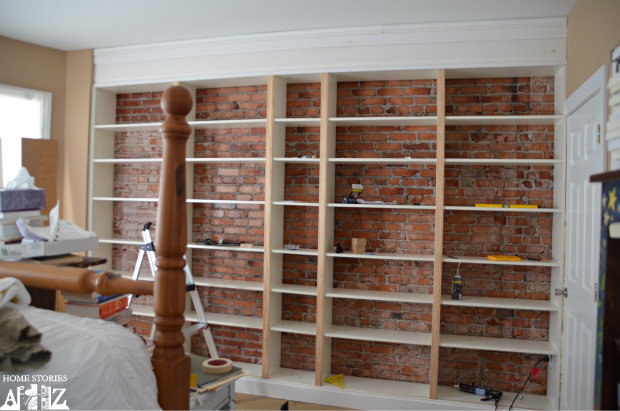
The first thing we did was measure the wall to determine how many Billy bookcases we needed to fill the wall. I knew I wanted the bookshelves to run all the way up to the ceiling, so we purchased the extender kits for each shelf. I also knew that I didn’t want to cover up my brick wall, so we chose to put the bookshelves together without the flimsy cardboard backs. Those things seem like way more trouble than they are worth! They are so thin and basically made of paper. Not using them was a blessing.
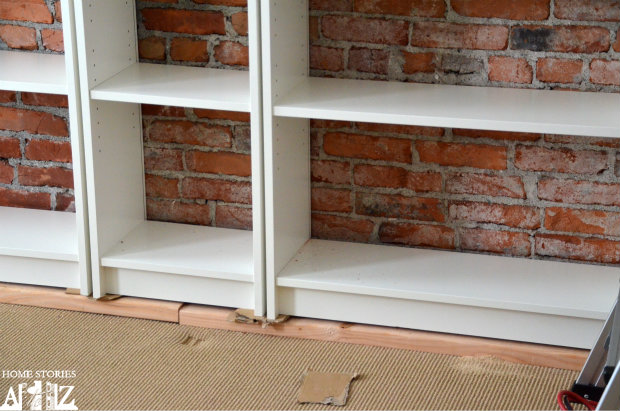
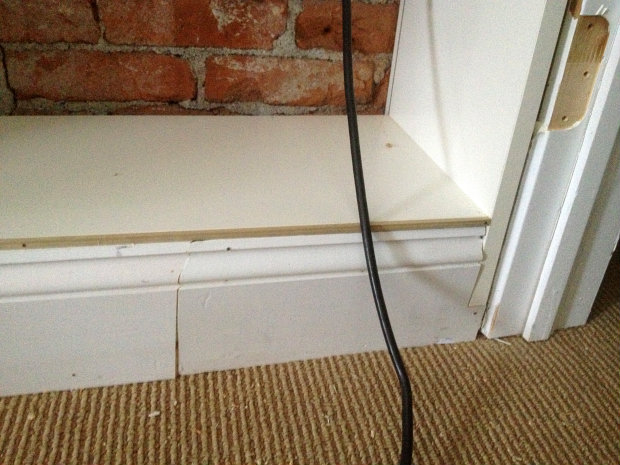
Next, we removed our baseboard and determined what kind of board we needed to place underneath all of the bookshelves to prop them up so that the baseboard would fit in front of the shelves. We used a 2x10x12. Our floors are uneven so we used cardboard as a temporary prop, but those were replaced later on with wood shims.
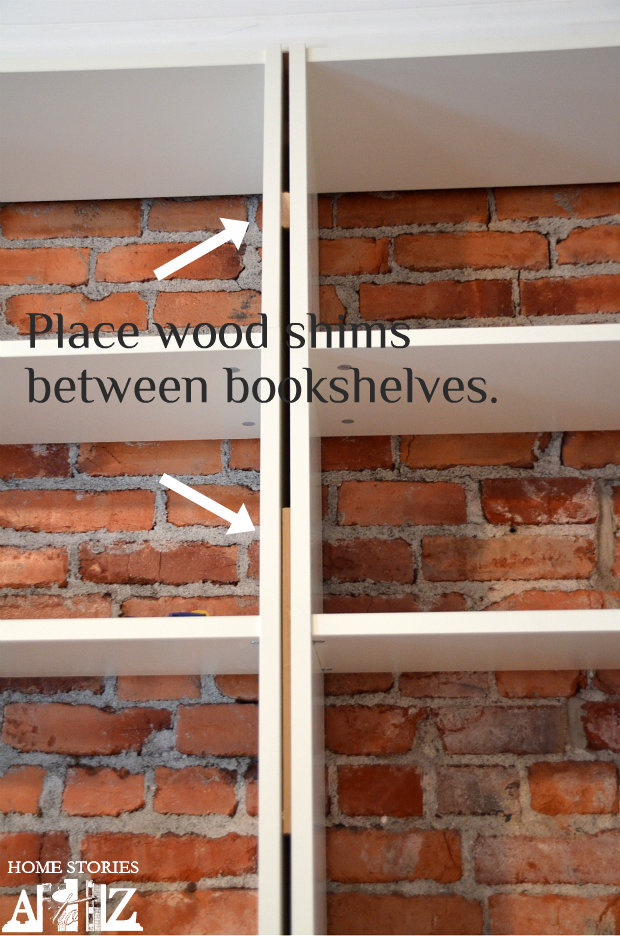
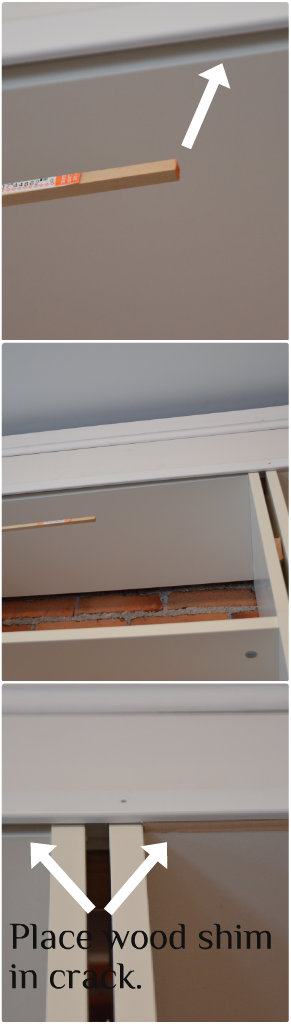
Next, we separated the shelves evenly and secured them together using wood shims and wood screws.
Anytime you DIY—and I literally mean nearly EVERY time—you run into some type of glitch. It is simply to be expected and embraced. Glitches come with the territory of taking on a new project, typically for the first time ever. In building these shelves, we ran into a myriad of glitches!
Glitch #1: I wanted a built-in look of course, and I wanted them safely and securely attached to the wall. Drilling into our brick is a nightmare, and something I definitely wanted to avoid. The brick is over 100 years old so it is brittle and we haven’t had good luck with fastening anything to it securely. We chose to attach two blocks of wood to the studs in the wall on the right and left-hand side. Then we ran two 2x4x12 boards across the entire span of the bookshelves and secured them with wood screws through the top of the bookshelves. We attached the 2x4x12 boards to the blocks of wood on the wall using L-brackets. Things were moving fast, so unfortunately I didn’t get a picture of any of this :(. Matt’s not really used to working with me on projects and forgets that we need to take pictures!
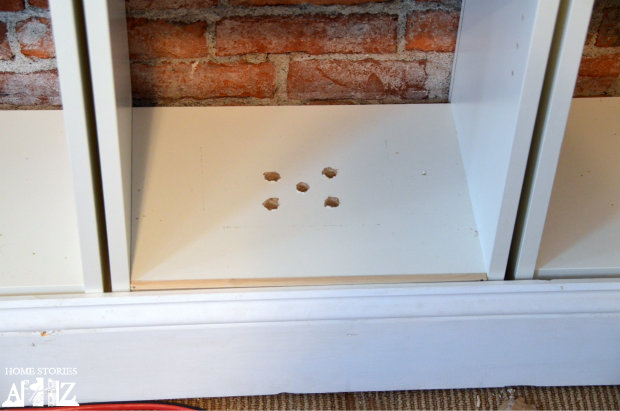
Glitch #2: We have a heat vent underneath the bookshelves. We had to cut a portion of the wood underneath the bookshelves to expose as much of the vent as possible. Next, we drilled holes in the floor of the center bookshelf and we will eventually cut this piece out and place a decorative grill here. I’m not sure what I’ll place in this nook since books will block our heating and cooling. I’ll worry about it later.
Glitch #3: We had a full foot of space above the bookshelves and needed a ton of moulding to cover up the space. I wanted it to be decorative and pretty and Matt just wanted it to be done. LOL! We had a few “please can you just jump into my brain and understand what I’m saying here” moments in the middle of Lowes. After a lot of discussion, we were finally on the same page as to how to fill that 12″ gap. Crown molding wouldn’t work for us because we didn’t have enough wall space for the crown to sit. Pushing back all of the molding on the top of the bookshelf would have looked weird. So we wound up using four separate pieces of molding and layering them to create a built-in look.

To cover the seams between the bookshelves we used 2″ moulding cut to size and glued on with Loctite.

Glitch #4: We had weird gaps at the top of our bookshelves between the moulding and the shelves because the bookshelves are not completely flush across the fronts. We glued in square dowel rods into the gaps.
Glitch #5: Our door was a hinged in the other direction. We had to remove the moulding and the door to fit the bookshelves and also needed to flip the hinges so that the door would close properly.
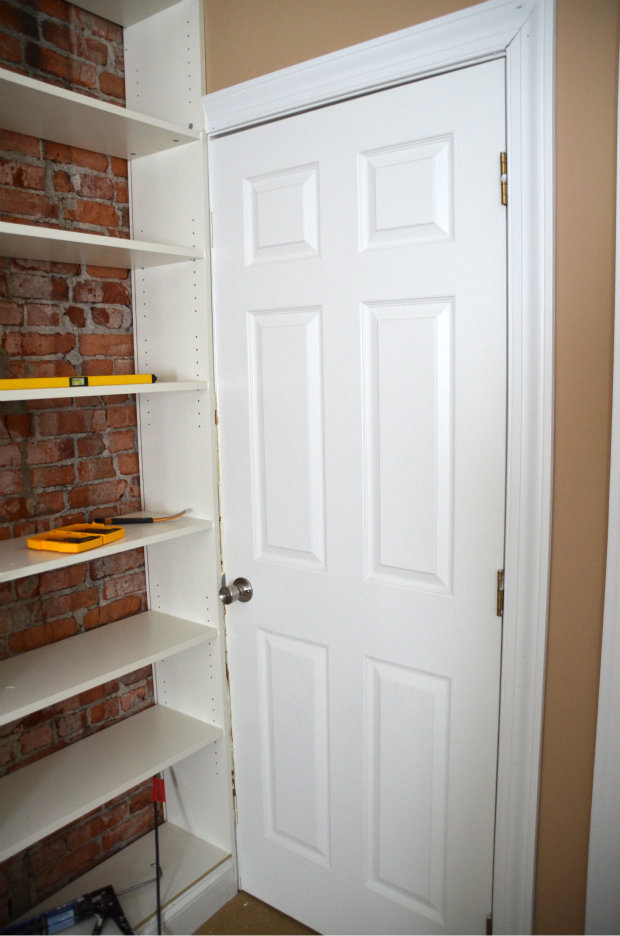
Some magic needed to take place here so that the door would close. Matt shaved off some of the moulding with a rip-cut so that is wouldn’t get in the way of the door. This glitch was probably the most challenging for us to solve!
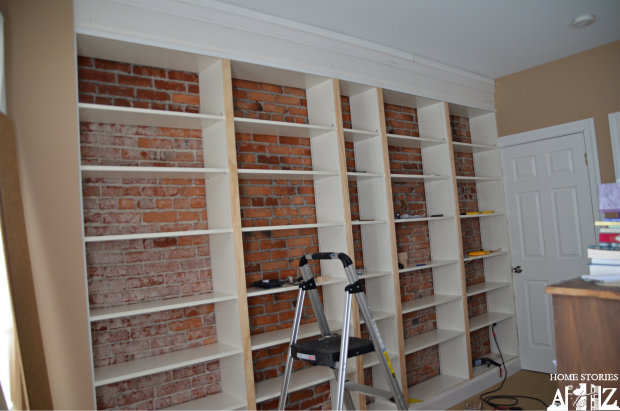
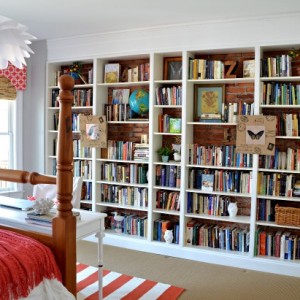
Phew! That was a lot of problem-solving for amateur DIY’ers like us to solve. But we did it. Here is where we are at today.
All of the hard part is over and now I just need to caulk, prime, and paint the moulding.


Did you caulk the lines in the back where the cardboard backing goes or just leave it or?
Sorry I’m just seeing your comment! We left off the cardboard backing to show off our 100 yr old brick walls. We didn’t caulk the back at all.
Hi, I’m worried that the ‘flimsy’ back was the thing that supports the shelves so they don’t sag under the weight of the books. Sometimes when people shove a bunch of stuff hard into the back of an Ikea cabinet or shelf, they push the backing right off, so then the shelves start sagging.
If you wind up needing some support for the shelves, you can add a vertical between each shelf. If it is not attached to the brick it will need super good support at the bottom, because of gravity.
Drilling brick is pretty easy with a masonry bit. Just get the right anchors and screws.
Hehe !! the proof this is a good idea, I just did the exact same thing ! ;O) Email me if you want me to send you a picture so you can add it ! ;O)
Doing this for a customer now. Similar Idea. I raised bookcase(s) up 9 inches off floor, so I could bring air vent out to vent mounted in the base. 3 inch spacers, to accommodate 3 1/4 wide fluted trim, nail into spacer no gluing.
Like the tip here about the aluminum shelf reinforcement. If you paint them with white spray paint. Wipe first with vinegar, and let dry. Cleans and stops oxidation.
Love the brick, love the can-do attitude.
I got on the site here, googling how to fill the void between front top – bottom and trim. I noticed other folks letting trim overlap to hide the gap. That seems ok at top, but would look to obvious at the base.
Thanks for visiting and adding some helpful tips!
What did you use to paint the molding/shelves ?
We used Sherwin Williams trim paint: ProClassic® Interior Acrylic Latex Enamel.
“I have read a bunch of reviews stating that the Billy’s sag under the weight of books.”
Coming in really LATE with this comment, but if you slide aluminum “channel” onto the back of the shelves, it increases their support limits by a huge amount.
Take a shelf to a home improvement store and find the channel size that snugly slides onto the shelf. I cut 8-foot channel into 3 pieces, filed down the rough edges and slipped it onto the back edge.
https://www.pinterest.com/pin/210754457541179426/ shows it installed.
I’m so glad you jumped into the conversation! I’m preparing a follow-up post to show how this project has held up over the years and we HAVE had some sag in shelving. I’m glad to know the easy fix. Thanks for taking the time to contribute!
Wow! You two did a wonderful job and I’m feeling quite inspired! I’m about to embark on a major renovation of my master closet and I need all the tips and inspiration I can get! Now if I can just get my own husband to go shirtless while he works I’ll be extra successful! ☺️
I don’t I ow if they are sagging but if they do you can get some mdf from Lowe’s cut it to the height between each shelf and put it in the center of each starting from the bottom.
I did mine so I sectioned the bottom in half then the next in two half for the third and just kept repeating up.
Thanks for the tip Niccole! Happy New Year!
Doing this to my house right now. Wife is sending me links to different styles.
Just wanted to post to anyone worried about sagging shelves. I have half inch thick square aluminum tubes that I’m going to screw into the bottom of the shelves that will have the heavier books on them. Left overs from another project (from Home Depot). Could also use ‘angle iron’ to strengthen.
Great tip!
Great article, thinking of trying this myself. I’m interested in knowing if the shelves did sag under weight after a while. If they did how will you reinforce the shelves? Any advice welcome!
Thanks!
Hi Stu, it has been almost two years and the shelves have held up great with no noticeable sagging. Because of the way we chose to space out our shelves we actually have several spares stored in out basement. If/when they do decide to sag, I will switch them out with our spares until a more permanent solution is needed. Because I’ve chosen to have the open wall as my shelving backdrop, reinforcing the middle of the shelves is not an option. I would need to create a dado in two vertically placed 2×4’s and insert the shelves into these. It would be a pain to construct, so I’m hoping I won’t ever have to do this. Good luck on you shelves! We love ours. 🙂
great work! What color did you use to paint and match the trim with the billy bookcase white?
Thank you! Any pointers on how I would go around the top corner of either bookcase with trim. Mine don’t go across one wall. There’s a fireplace in the middle. So, I have the top front of each bookcase exposed, one side is up against a wall and the other is shown. Would trim work?
Yes, trim would work. You will probably need to attach wood blocks to the ceiling in order to have something to attach the trim to.
Love this. Did you fill the holes on the sides of the bookcase?
Thanks! I didn’t bother but I’ve seen other posts where people have to give the bookshelves a more custom look. I want the flexibility to move the shelves in the future if I want (and the holes don’t bother me at all).
EIther I missed it or was a bit confused. How many of the BIlly shelves did you use? How did you do the narrower shelf in the middle section? This is really a great project!
Hi Lisa, if you look at the second picture in this post you can get a better idea of what the shelves looked like in their “raw” state. We used 4 Billy bookcases with the height extenders (and left off the backs) and 1 narrower Billy bookcase with height extender in the middle. Ikea sells a ton of options when it comes to the Billy system and it’s easier to navigate those options in the store than online.
Wow! Looks awesome!
Looking forward to seeing them all pretty and finished 🙂
If the adjustable shelves start to sag, remove the books, etc. and flip the shelf over. You will have to make sure all sides are painted but it will keep the shelves level. You will most likely style and restyle so just flip them each time.
Thanks for the tip!
The shelves look amazing already! I really can’t wait to see how it all turns out!
Hi Beth,
I did. I actually want to find a small piece of furniture and try my hand at the milk paint process. I have a bench I got from the thrift store, picked up fabric at Hobby Lobby and can’t wait to trick it out.
Nervous but I have to start somewhere.
Here’s a link to a post I wrote on my blog. You can see the little bench at the end of my post.
I bought some broadcloth in a parisian black/creme color. I would be curious to see what you would do.
http://alongawidowedroad.blogspot.com/2013/07/i-do.html
Glad to find your blog.
I love the look of the built in shelves. I had similar shelves from Home Depot several years ago. I found that if I put my heaviest books on the bottom shelves and the one stable shelf in the middle (the one you can’t adjust – most shelves have the middle one that is permanent) and just spaced them out, that I didn’t have to worry too much about sag.
Can’t wait to see the finished room!
Thanks Sadie!
I couldn’t believe the coincidence when I read your post today. We are literally in the middle of this exact project in our office/library! Even down to the details of using Billy bookshelves with two larger on each side and one small in the middle. I’ll will look forward to seeing your finished product, maybe you can give me some good inspiration on how to fill all of those shelves!
How fun Ann-Marie! Did you hit some glitches? These shelves unfortunately will receive zero styling. They will be filled to the gills with books, books, and more books with no accessories in sight. It’s not what I’d want for them but hubs needs a library for all of his gazillion books.
Can’t wait to see the final reveal. I’m new to DIY and have recently done some shabby chic furniture and I’m looking for some Milk Paint ideas.
I’m Viola over at Along a Widowed Road.
Welcome! Did you see the armoire that I recently painted with milk paint? It turned out nicely.
It’s looking great! We’ve had our wall full o’ billy shelves for almost a year now, packed full of books, and I haven’t noticed any sagging yet 🙂
Oh so good to hear!
Can’t wait to see the finished space. LOVE the brick walls, that was brilliant not to cover them up!!
Thanks Sandy! The books will cover them up quite a bit but hopefully their beauty will still peek out :).
I’m in the exact same place as you were. Brainiac hubby and his bazillion books in an office/library/guest room that is UGLY and I hate it. 🙁 I’d love to do a big wall of some industrial looking pipe and flange shelves and as well as other projects, but it’s pretty far down on the to-do list. Someday though!! 😉 I love your built-ins! That gorgeous brick wall was worth having to work around it!
Thanks Ann Marie! Hang in there. It’s been nearly 6 years of neglect for this room so you’ll find the time at some point. Industrial bookshelves sound perfect!
This is amazing! What a lot of hard work you’ve put in- but it was definitely worth it 🙂 I love the look of the bricks behind the bookcase- although I guess they’ll mostly be covered with books. xx
Thanks Kate! Yes, I’m hoping the books don’t cover all the brick but those books have to go somewhere unfortunately :).