Learn how to create this spring DIY wreath nest wreath using a few grapevine wreaths and simple craft supplies! It takes less than 30 minutes to create and is easy enough for any beginner to achieve!
Spring DIY Wreath Nest Wreath
This nest wreath is something I have wanted to create for years; however, the spring months are typically so busy for us that spring sneaks past me before I’ve had the chance to create all the things! Well not this year spring. Oh no you don’t! This year we are all going to create giant nest wreaths for our spring decor before summer steals the show!
To create this wreath you will need just a few craft supplies. I bought most of mine from Walmart because they seem to have the best prices. I’ve affiliate linked some similar ones online but purchasing in-store may be cheapest. I also created my wreath in a way that I’ll be able to easily dismantle it at a later date if I want to. Feel free to reinforce yours more if you are committed to owning a nest wreath for years to come!
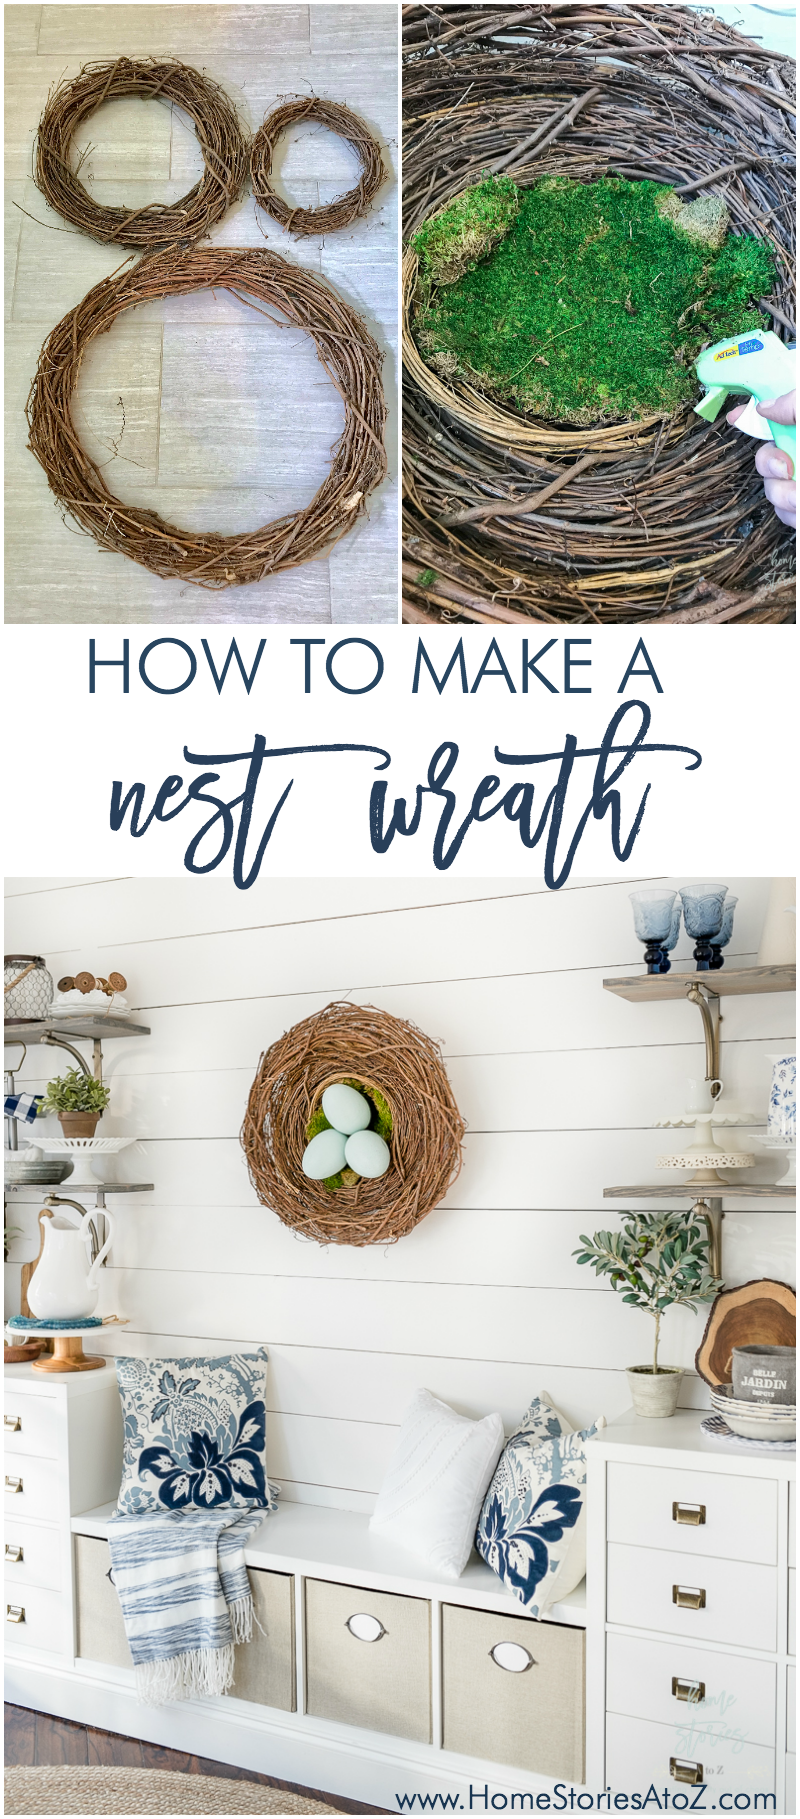
Materials Needed for DIY Nest Wreath:
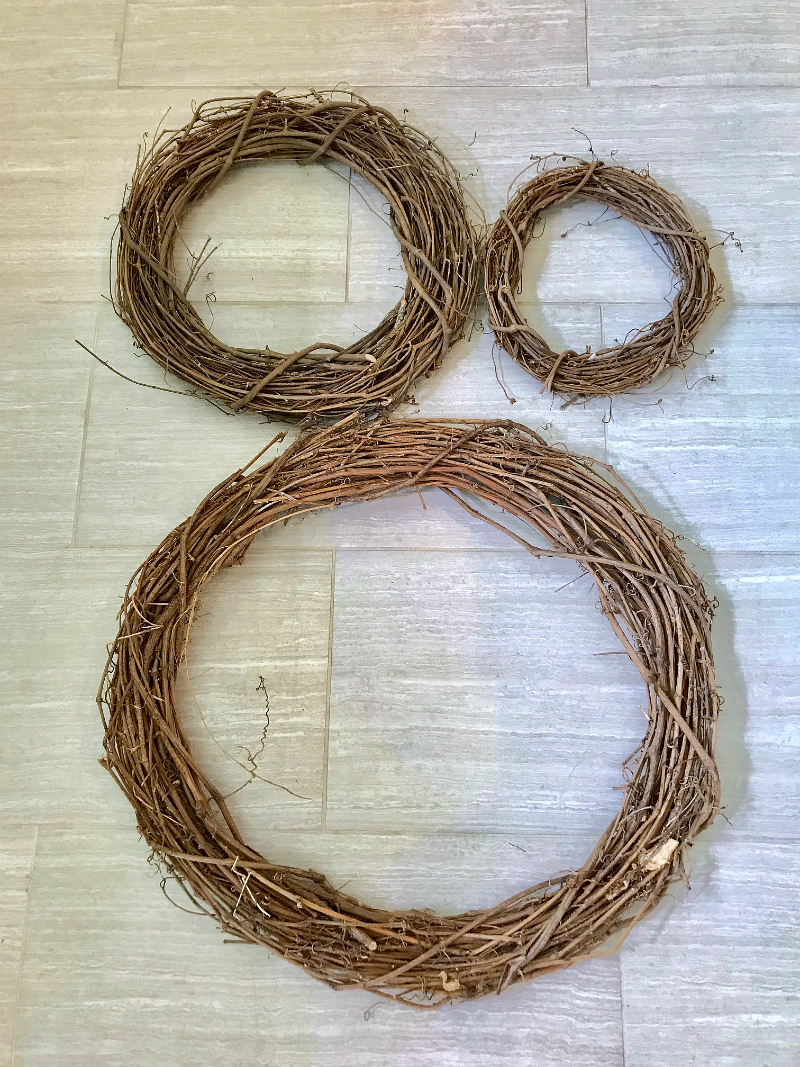
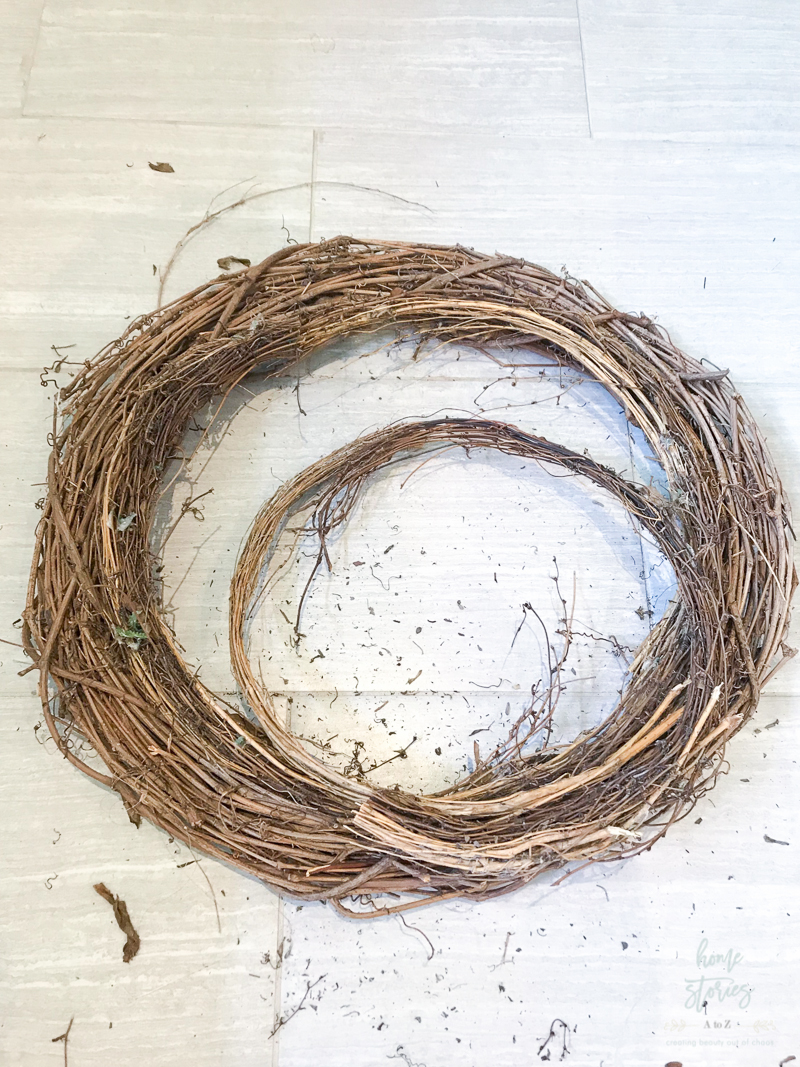
- 24″ grapevine wreath
- 18″ grapevine wreath
- 12″ grapevine wreath
- Extra 18″ grapevine wreath to dismantle
- Brown floral wire
(I just used the wire from the dismantled wreath.)
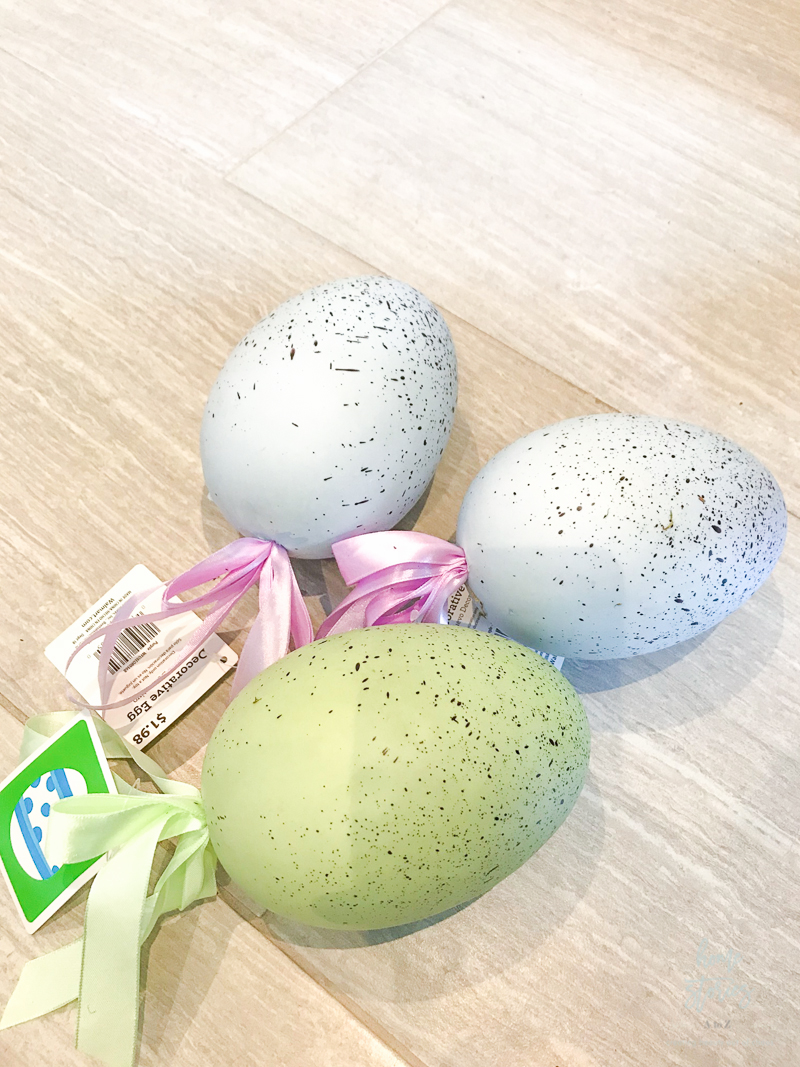
- Large craft eggs (Mine are from the seasonal section in-store at Walmart. These can be pricey so look for ones you can repaint!)
- Paint in desired color
- Sheet moss
- Hot glue and glue gun


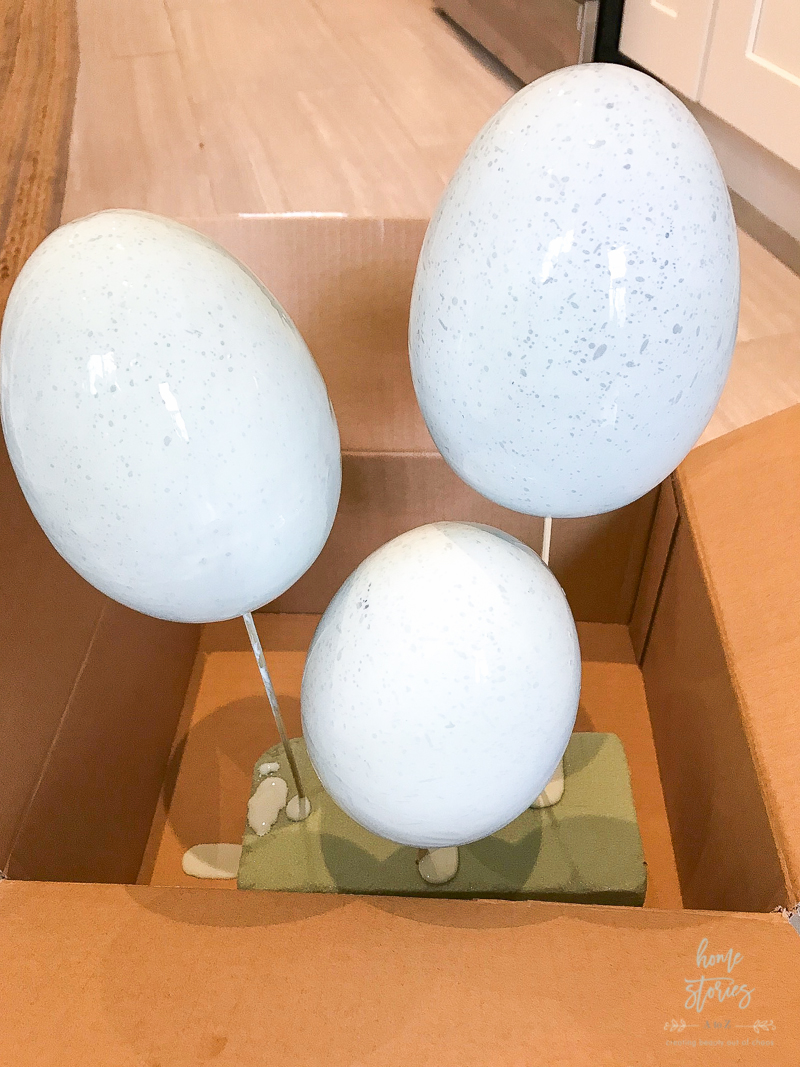
Step 1: Paint the styrofoam eggs.
Using craft or latex paint in the color of your choice, paint your eggs. I purchased my eggs from the seasonal section of Walmart. Styrofoam eggs can be pricey so get creative in looking for eggs you can repaint.
I removed the ribbons that came on the eggs and placed the eggs on skewers to make them easier to paint. I had a gallon of Benjamin Moore’s Wythe Blue in the garage, so I dipped each egg in the paint can and then simply allowed them to drip dry. I did two coats of paint.
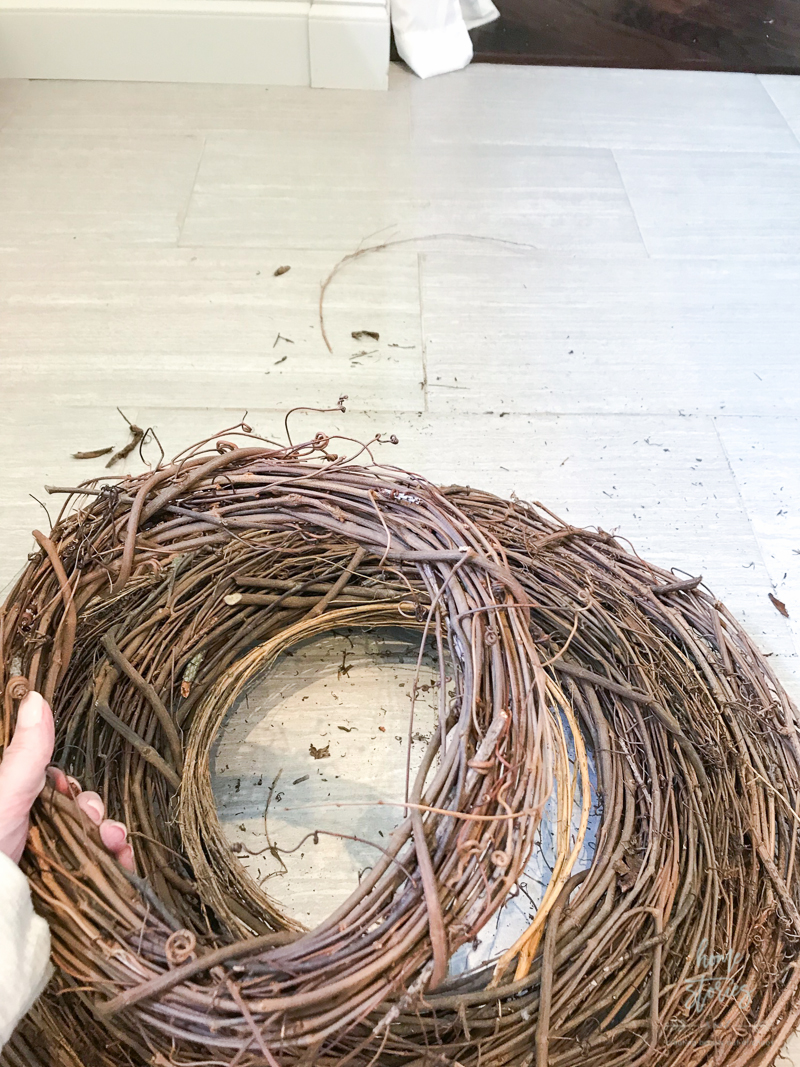
Step 2: Dismantle an 18″ wreath and stack it on top of the 24″ wreath.
While your eggs are drying, begin building your nest. You will be building the nest backwards with the back of the nest facing towards you. Stack the largest and medium wreaths and dismantle one of the 18″ wreaths to fill in any gaps between the two.
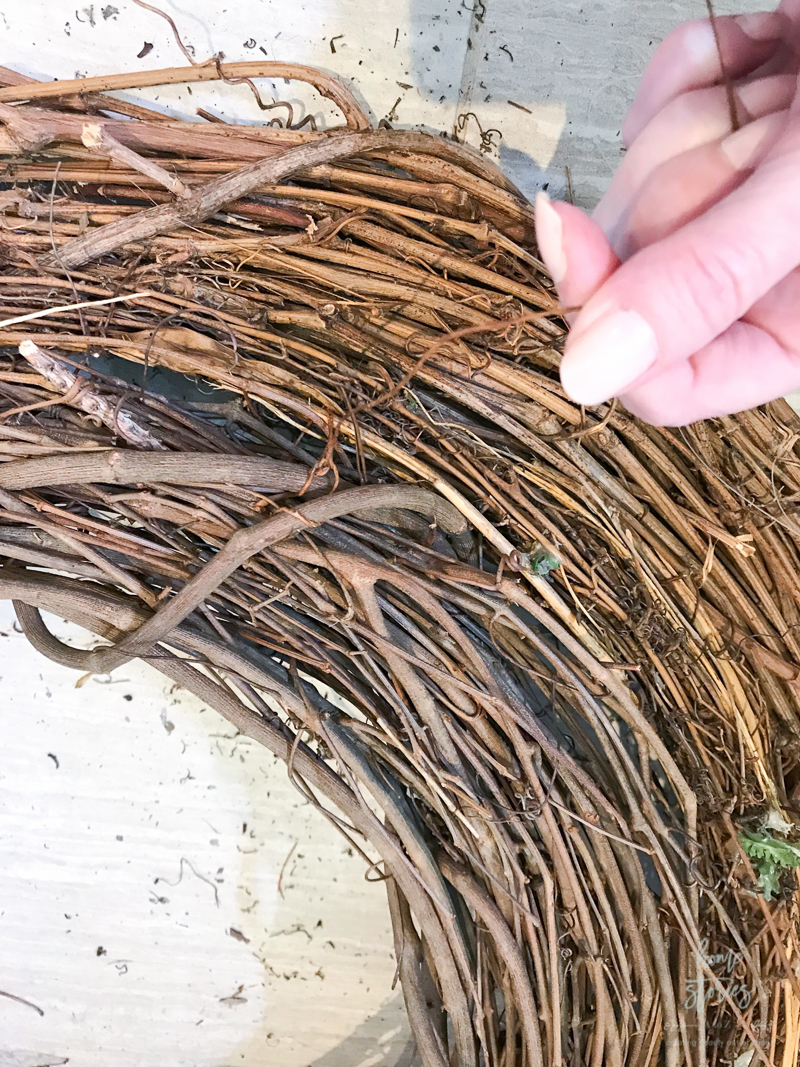
It will be messy! Just pull apart one of the 18″ wreaths and wind it around the inner-circle of your largest wreath, securing with floral wire as you go. Next, place the medium wreath on top and secure. The reason you are dismantling a wreath is because there will be a gap when stacking your wreaths. You are using the grapevine from the dismantled wreath to fill in this gap so the wreaths stack beautifully to create a nest!
Step 3: Layer on the 12″ wreath and secure with floral wire.
Fill in any gaps between the wreaths with your extra grapevine material and then secure your smallest wreath to the nest using floral wire.
Secure the wreaths together with floral wire as shown below.
When you are finished your wreath may look like this. There will be a hole in the middle and this is okay! We will fill up that hole in the next step.

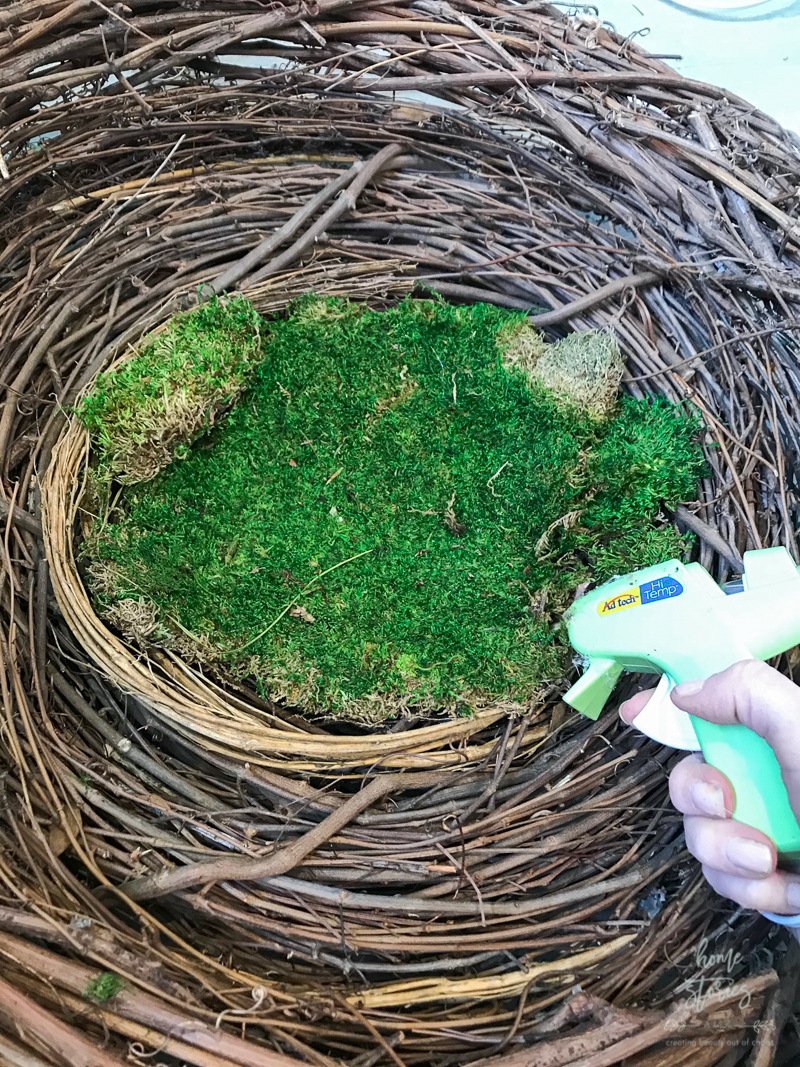
Step 4: Flip your wreath over and place sheet moss over the hole. Secure with hot glue.
Before proceeding with this step, be sure to flip your wreath over so that the bottom of the nest is like the inside of a bowl. I just used one sheet of moss over the hole, but you may need more or less depending on the look you are going for. Glue the sheet moss in place.
Step 5: Hot glue eggs to moss.
Once your eggs are fully dry, glue the painted eggs to the moss with a generous amount of hot glue.

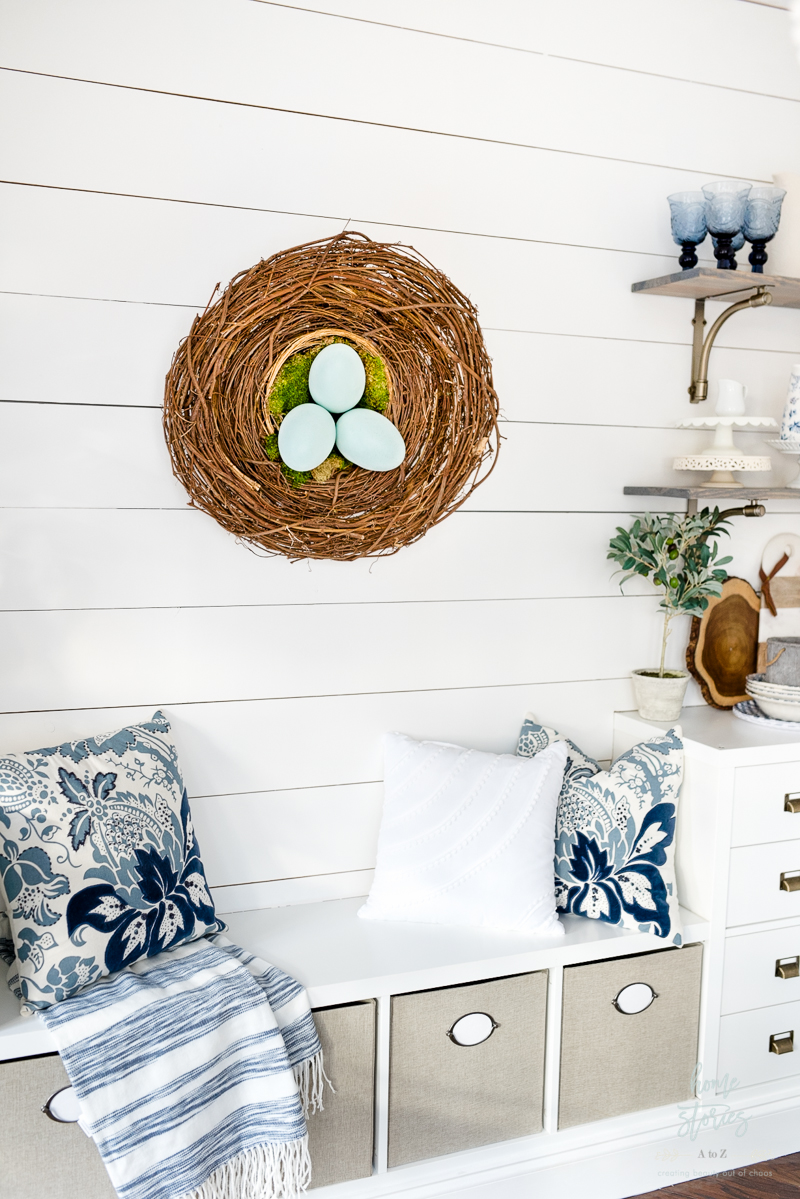
Step 6: Create a loop with floral wire and hang on wall.
Yay! You did it! You created an adorable oversized nest wreath that will be the envy of all the birds in town. 😉 I used a piece of floral wire to create a loop in the back of the wreath and hung it to a nail in the wall. It’s lightweight enough that a nail should be sufficient.
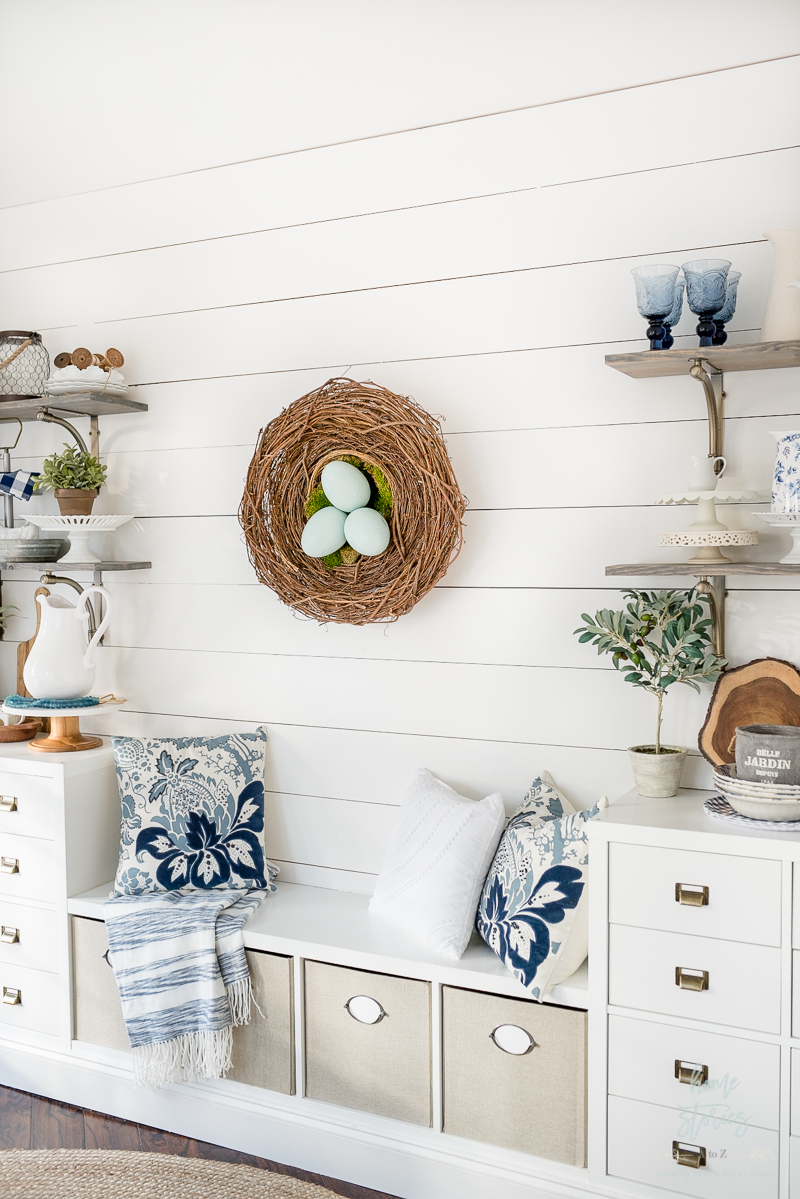
I just love how easy this wreath is to create and what a cute impact it makes for spring!

Please pin this project to save for later and to share with friends! It’s a great craft to keep in mind for a girls’ craft night!
If you liked this project, then take a look at:
25+ Easy Easter Crafts and Easter Home Decor Crafts
Beautiful and Simple Painted Easter Eggs
36 Creative Front Door Decor Ideas {not a wreath}

Hi, I love your wreath it’s a really sweet Easter decoration.
Thank you!
Hi Beth, I love your wreath nest. Very creative! Thanks for the inspiration. 🙂 Julie
Thanks so much Julie!