
Get the “decorator’s look” you want this fall by painting real or faux pumpkins in the exact paint colors you desire! This step-by-step tutorial with pictures demonstrates how to paint pumpkins to achieve beautiful results.
Materials Needed
- Faux or real pumpkins. (Walmart currently has inexpensive faux pumpkins in store.)
- Acrylic paint or chalk paint in desired colors–both will work.
NOTE on Spray Paint: You might be able to spray paint your pumpkins if the coating on the foam is durable; however, foam dissolves in oil-based paint so you could have a mess on your hands! Real pumpkins can be spray painted, but do so at your own risk. The oil-based paint prevents the pumpkin from “breathing” and as the pumpkin decomposes gases build up inside the pumpkin potentially causing it to explode. Yikes!
- Paint brushes
- Paper towel
- Cup of water
Instructions
Step 1: Decide upon the desired color for each pumpkin before you begin painting. This will ensure a polished-looking end result!


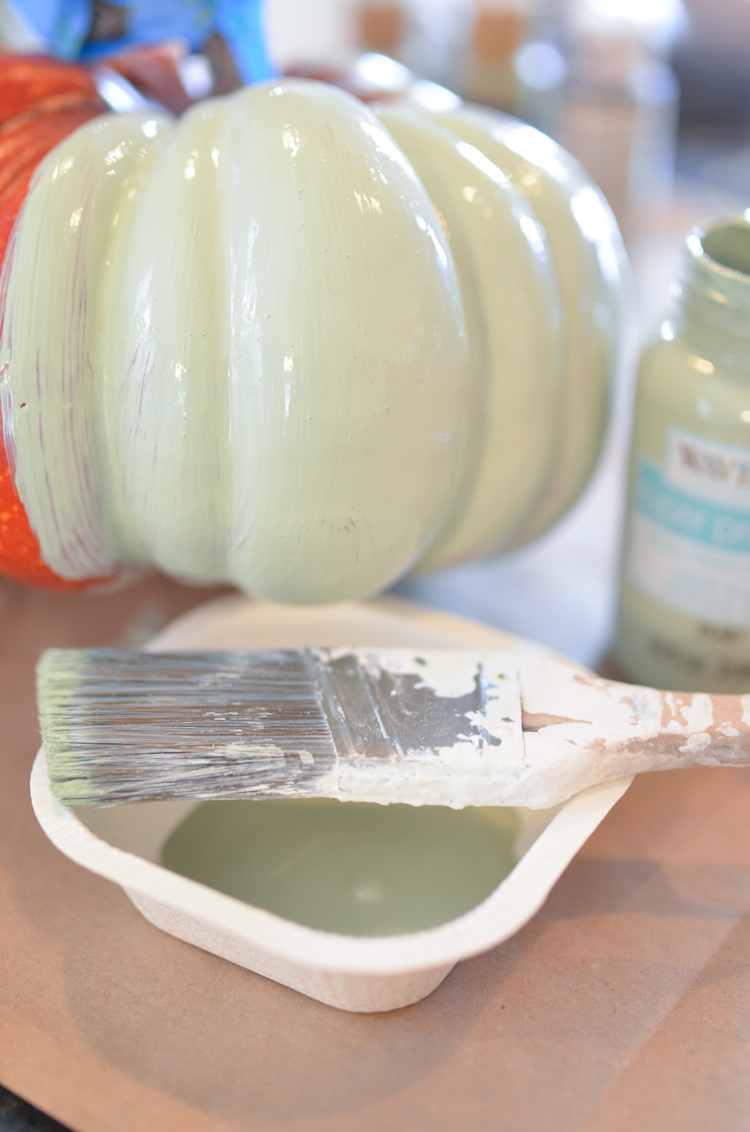
Step 2: Paint on your base coat.
Colorful pumpkins look the most realistic when you use more than one paint color. Choose a few paint colors in similar shades that are within the same color family, and use one of the shades as the base coat. You can decide if you want the crevices of the pumpkin to be highlighted or shadowed. I tried both techniques, and I liked both effects. For this pumpkin, I wanted the crevices of the pumpkin to appear highlighted so chose the lighter color to paint on first. I used Waverly paint in Celery (found at Walmart) as my base coat.
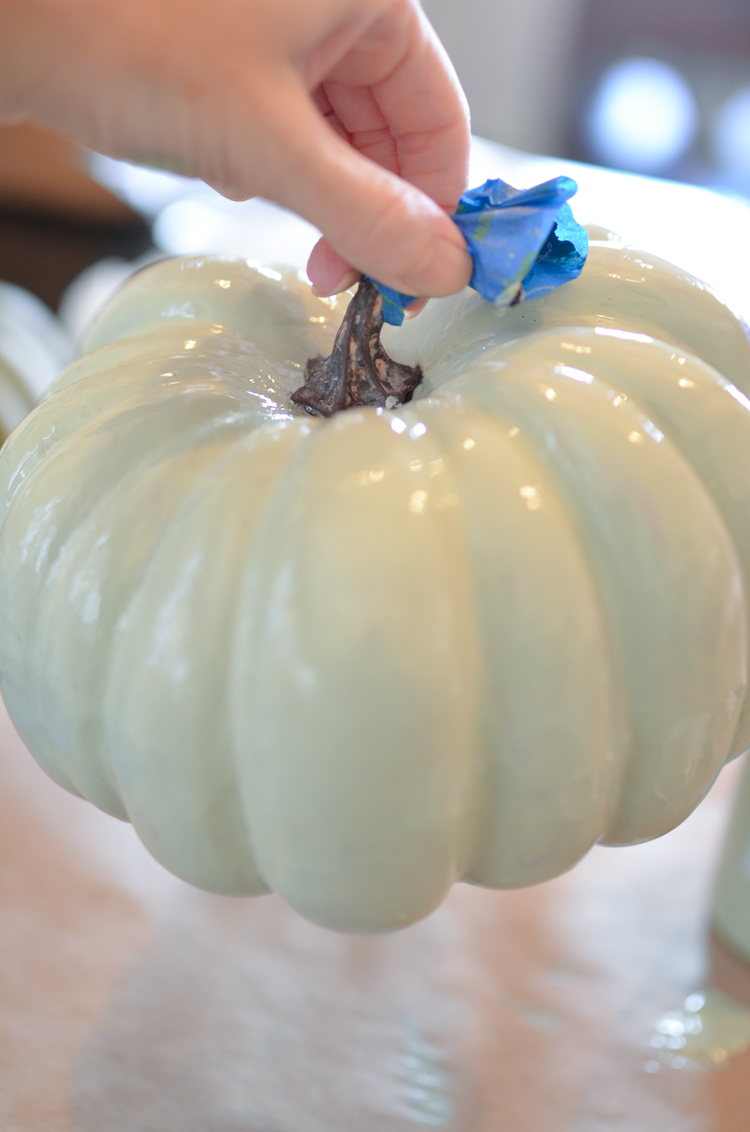
If you get a little paint on the stem, don’t worry. You will be able to scrape it off later on. I failed to take a picture of my “pumpkin drying contraption”, but it was handy for this project! Place a large office clip on a skewer suspended between two tall glasses. Clip the office clip onto the pumpkin stem and hang the pumpkins until dry. 🙂
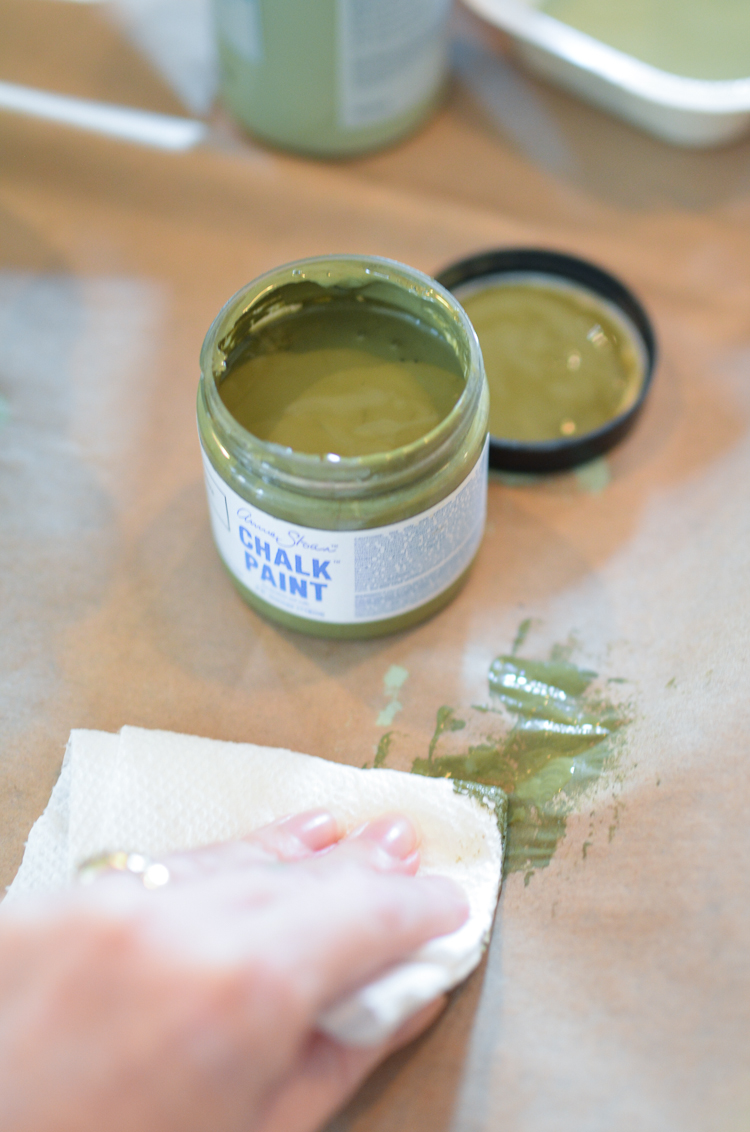
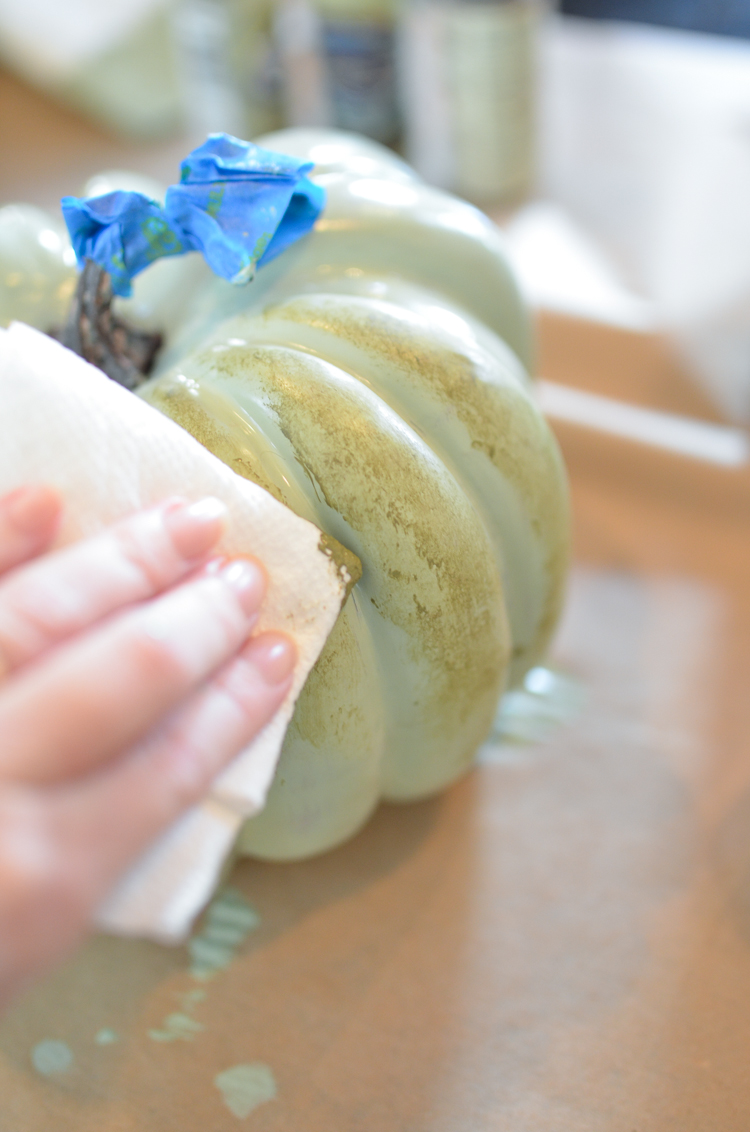
Step 3: Use a paper towel to dab on your second paint color.
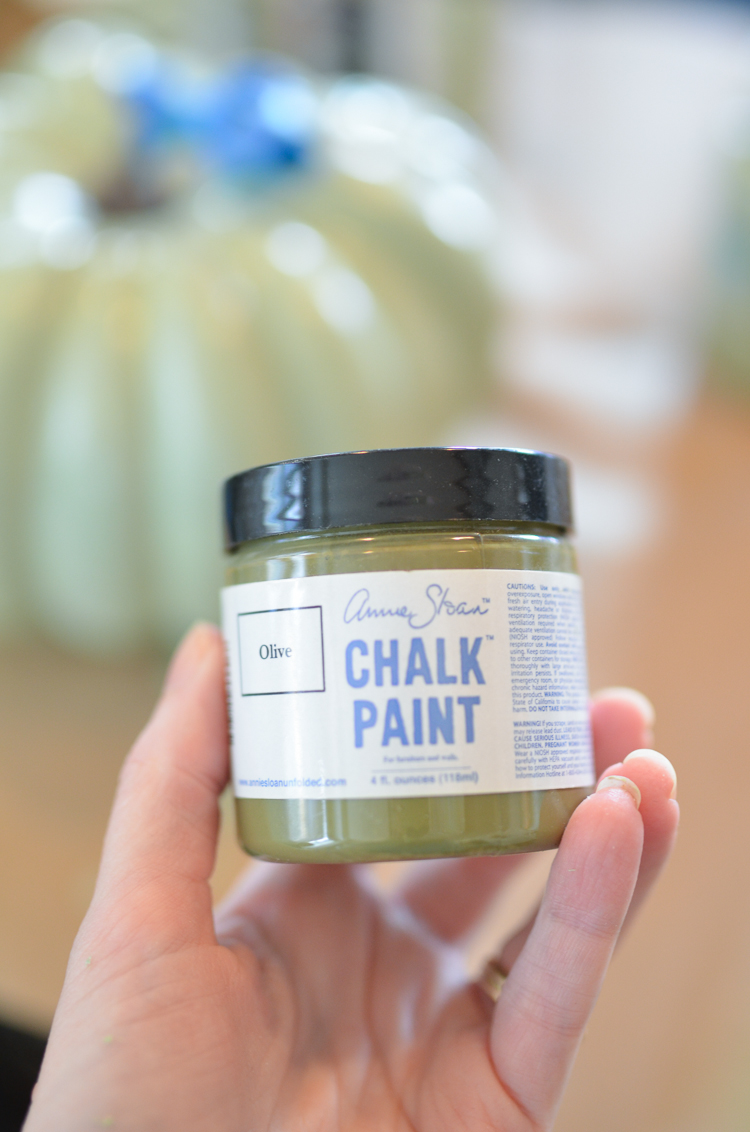
To create a layered look, you will dab on your second paint color. Chalk paint is wonderful for painting pumpkins, but if you don’t happen to have it on hand, acrylics work just as well and are cheaper. I had a sample of Olive chalk paint in my stash and knew it would look great on this pumpkin; however, all of my other pumpkins were painted with acrylic paints.
To create the second layer of paint, dab a folded corner of paper towel into your paint and blot off the excess paint. (This is the equivalent to “dry brushing” in furniture painting.)
Once your paper towel is almost dry of paint, lightly pepper your pumpkin with the second paint shade using a tapping motion. Continue doing this for approximately 1/4 of your pumpkin and then stop to blend the shades. You don’t want you paint to completely dry before you blend.
Step 4: Use a small dampened paint brush lightly dipped in your second paint shade to blend the crevices of the pumpkin.
This is where your individual artistry comes into play! There really is no right or wrong here. It’s all about playing with the paint until you are happy with the end result. Use a dampened paint brush to blend and soften the harsh lines between the different shades of paint. In the picture below, you can see where I have blended the paint on the right and not on the left.
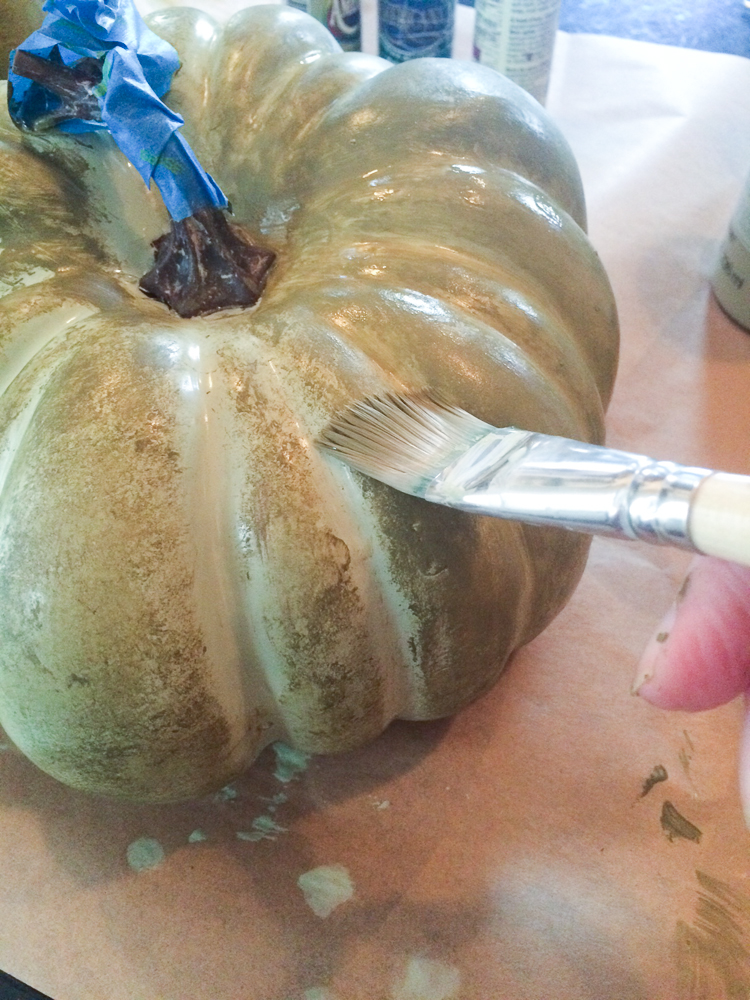
For this pumpkin, I wanted the crevices to appear highlighted with a rustic, mottled look. I used my damp paint brush to blend the two colors until I was happy with it and added more paint as needed. I love the way this one turned out!
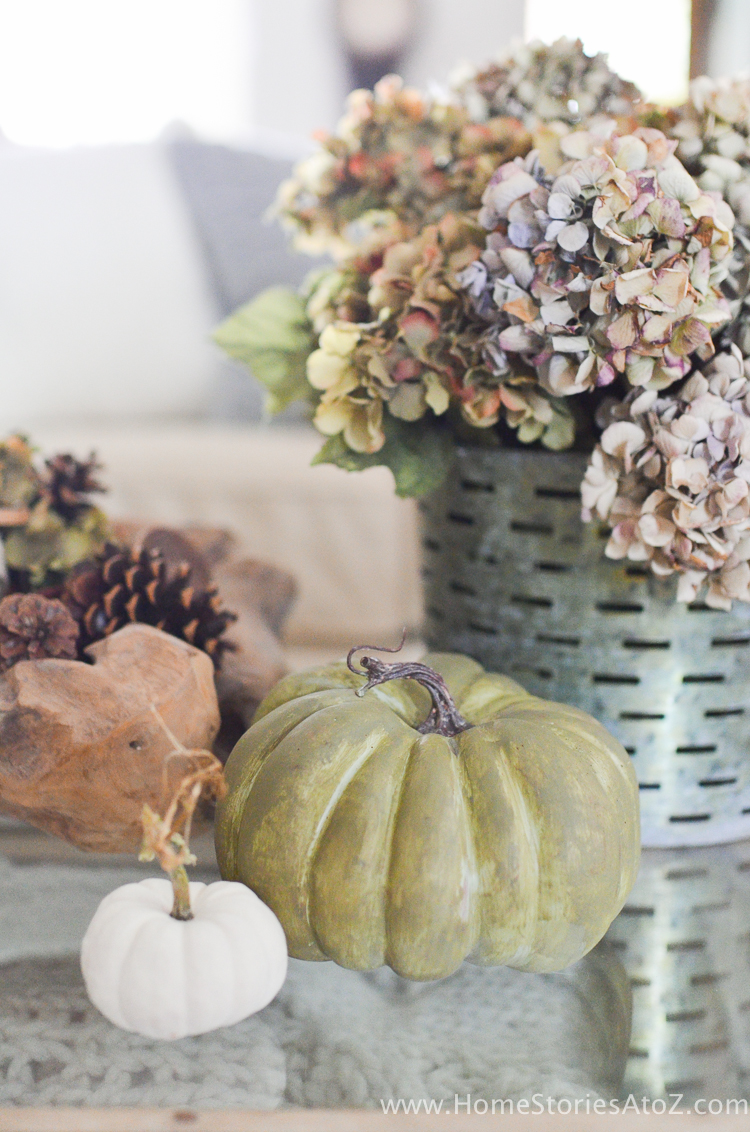
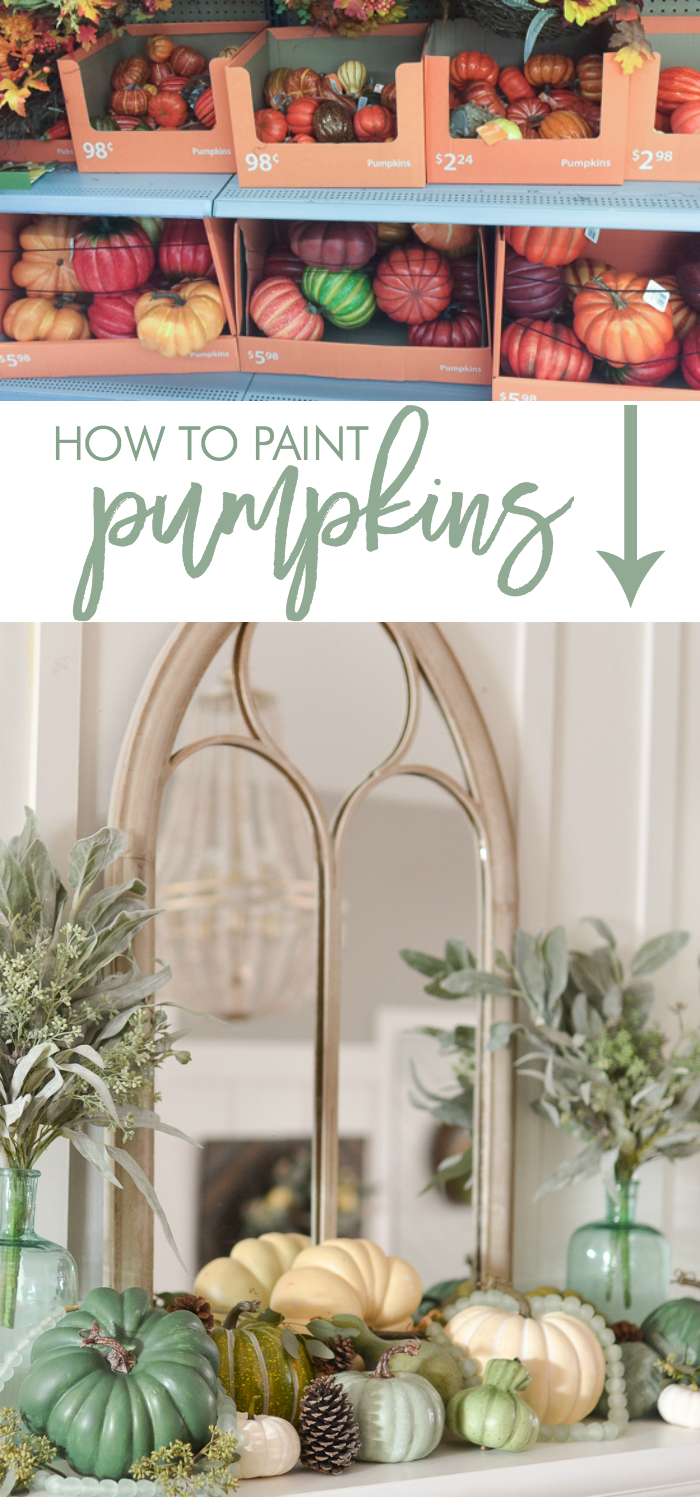
And here are a few of the other pumpkins I painted this year!
Painting Real Pumpkins
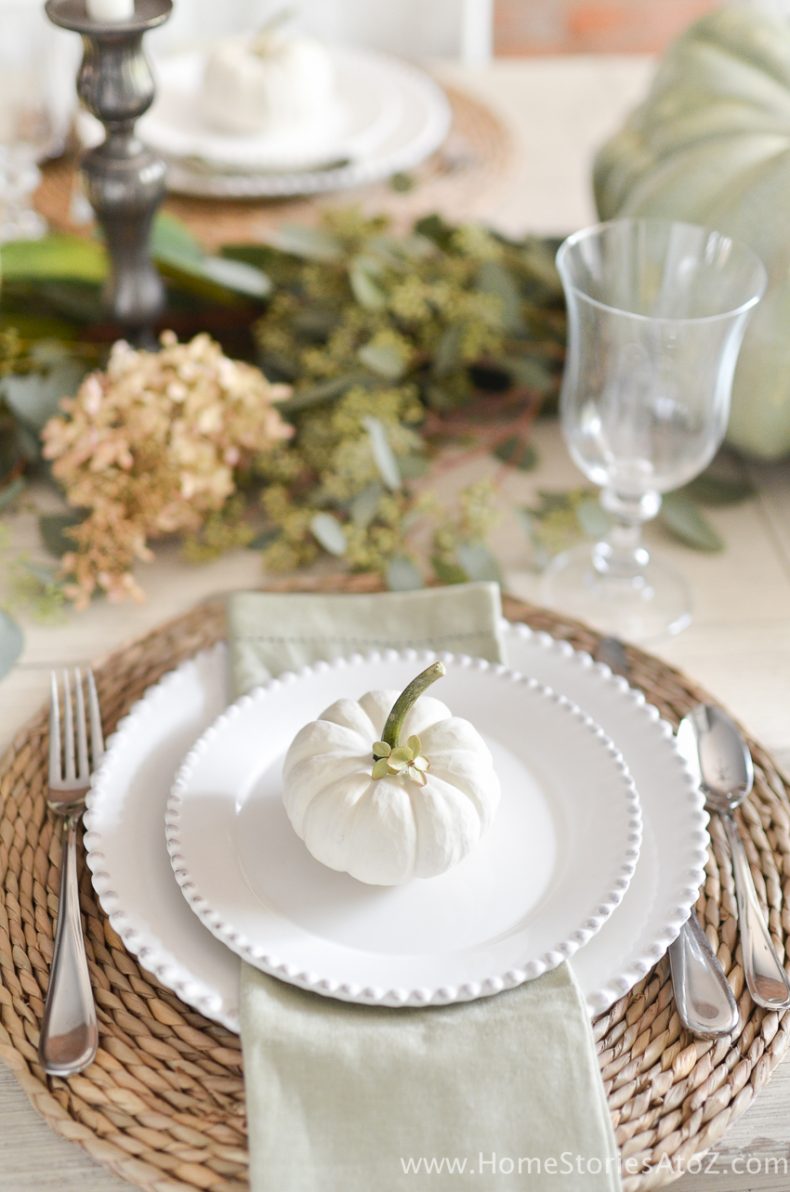
You CAN paint real pumpkins using chalk, acrylic, or latex paint. I wanted Baby Boo pumpkins for my fall home tour, and at the time they were nowhere to be found. I was able to find orange Jack-Be-Littles so painted them white using Folk Art’s Vintage White acrylic paint. It’s the perfect shade for white pumpkins!
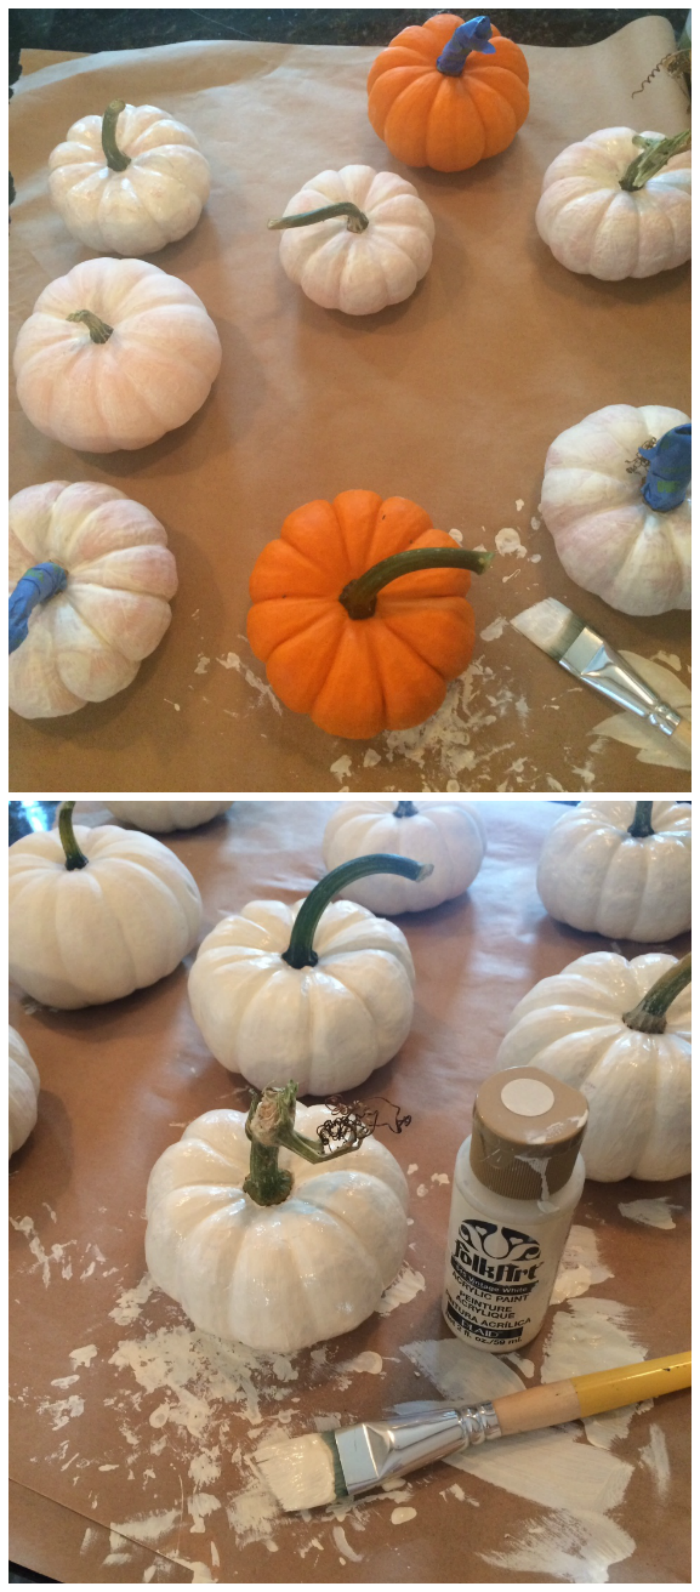
After two coats of Vintage White, they looked just as beautiful as the real deal!
I hope you found this tutorial helpful and inspiring for your fall decorating. You really can have a bevy of beautiful pumpkins in the colors you desire! If you liked this post, please be sure to pin it for later and check out my related posts below. Thanks for stopping by!
Beautiful Black and White Fall Porch with White Real Painted Pumpkins
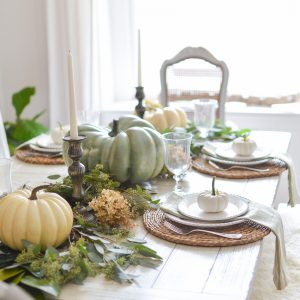
Beautiful and Bountiful Early Fall Tablescape
How to Style a Tiered Tray with Fall Faux Floral Arrangements


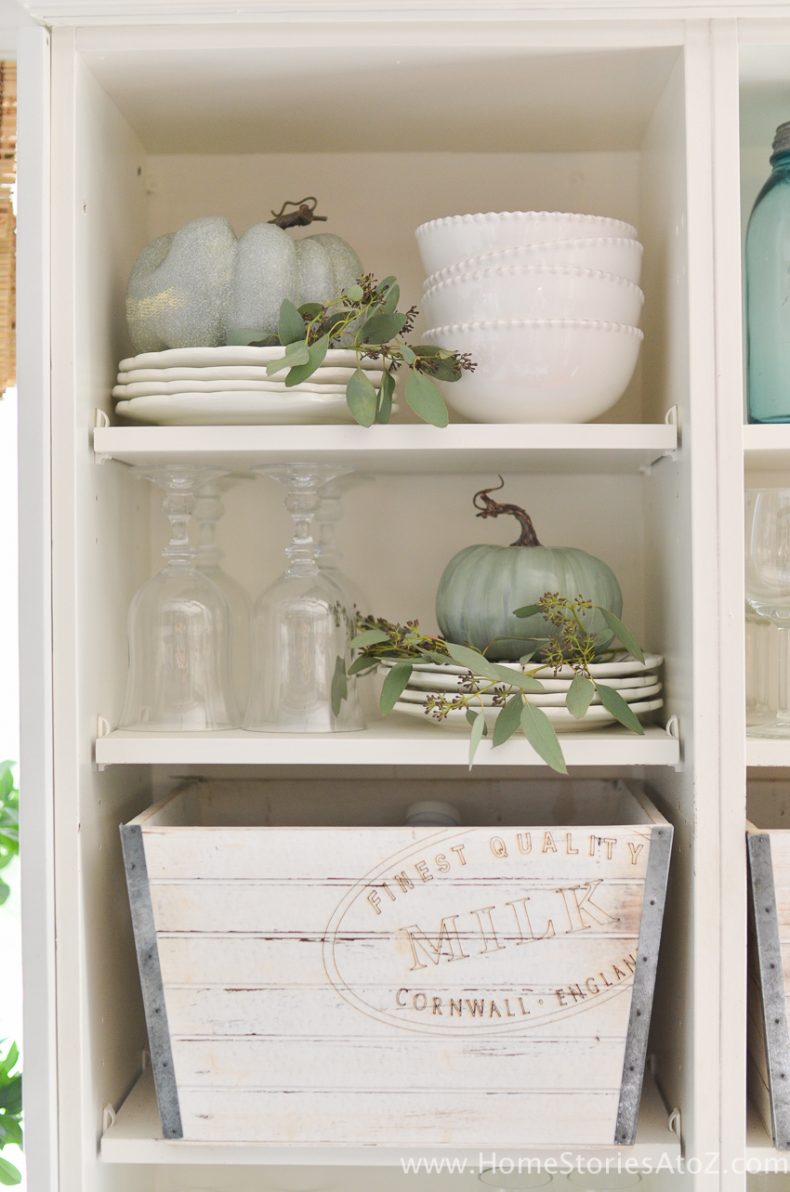
I absolutely love the white crate on the shelf.. I recently found my biological mother and father finding that my father’s last name is Coldwelland that they go all the way back to Caldwell, England.. I noticed that is the location on the crate.. finding all of this after 36 years is amazing.. I must know where you found the crate. Please,
Gorgeous pumpkins! Also hoping you can share the source of your sea glass bead strand. Thank you!
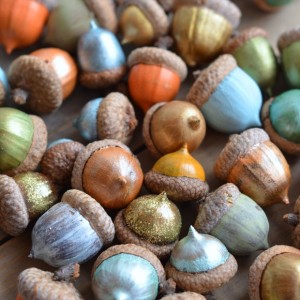
Your pumpkins are beautiful! Thanks for sharing such a detailed tutorial. I want to paint some pumpkins and this will be so helpful. I hadn’t planned on painting real pumpkins, but it is so good to know about the possible explosion! We have an abundance of acorns that fall from our trees. I will have to check out your acorn painting tutorial. Thanks for sharing!
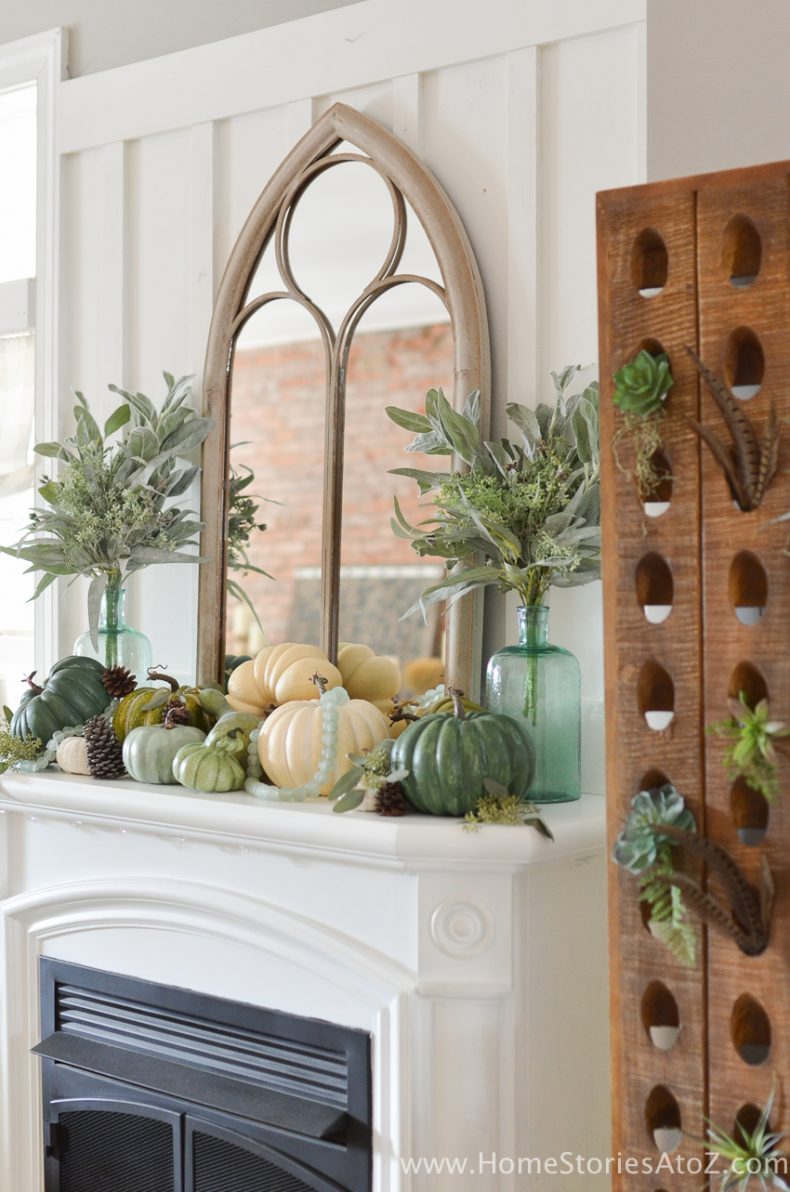
Love your mantel. I’m wondering if you can tell me where you found the mirror? I’m looking for either a mirror or window in that shape. Thank you.
Sure! Here is the link for my mirror: http://rstyle.me/n/b44ymvn7aw
Thank you so much for responding and sharing!
Yesterday, I bought some dark green acrylic paint at the craft store and painted a large black (thrift store) foam pumpkin that I got for $1.99. It turned out AMAZING! Thank you so much for the information and inspiration!!!!!
Yay!! I’m so glad to hear it. Enjoy and thanks for letting me know that it worked out for you. 🙂
Love the mantle and the china hutch!!!
Thank you!
I love your white plates. Could you give me the name of the design or where you bought them?
Sure! Here is a link to the plates I have from Birch Lane: http://rstyle.me/n/by5czin7aw
Where was this blog just over a week ago when my great nieces and nephew were here for Thanksgiving? We had three pumpkins outlined and coloured with washable markers as centrepieces. The kids would have loved the chalk paint. Canadian Thanksgiving is a lot earlier than American Thanksgiving as our harvest is so much earlier. I love your porch decor, it is very countrified. However, it would not last in my neighbourhood. The resident wildlife would be carting any thing remotely edible off at night.
I know it is still a bit early for you, but enjoy your Thanksgiving celebrations!
Thank you! Happy belated Thanksgiving to you too!
Clever and lovely!
Thanks so much Nancy!
These really do look good!
I’ve always had a soft spot for white pumpkins.
Love the touch of the hydrangea flowerettes in the last pic, Beth. And now I’m off to read the related article on painting acorns as I just collected a doggie bag full of them (walking home with Max, it looked like he had pooped a LOT, but it was just the bag of acorns!)
Thanks for the tip about oil paint on real pumpkins. That would be bad!
Hi Beth! I love your 2016 fall mantle decor and am curious where I can find the sea glass beads you draped over the pumpkins. I love any shade of green and would use those beads in many vignettes. Thank you for your assistance!
Your pumpkins are lovely! Thank you for sharing this with use. I look for ward to seeing more creative crafts from you.