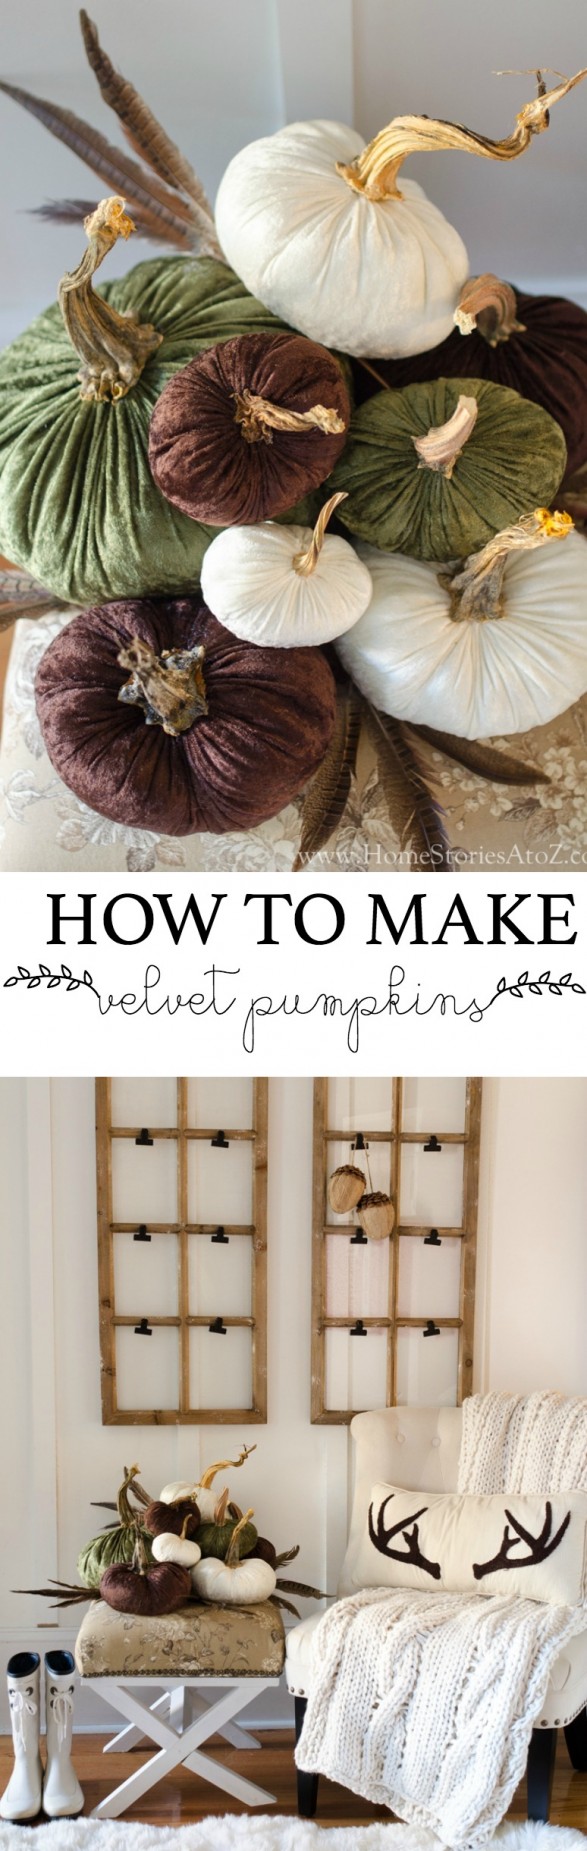
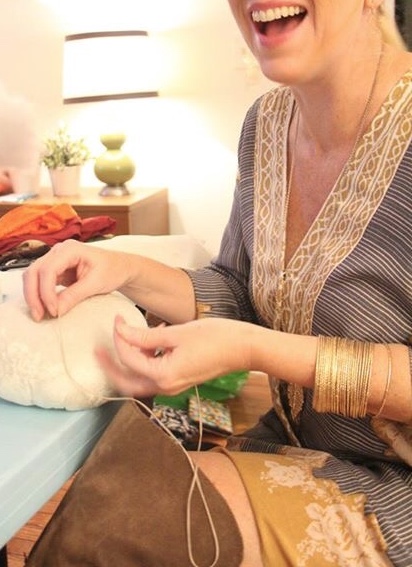
Every month, I meet up with a group of friends for craft night. We drink wine, laugh a lot, and create something cute together. Last month we made velvet pumpkins and they turned out lovely! These pumpkins are great because they will take you right through Thanksgiving, and this is the perfect time of year to make them!
All you need for this project are the following:
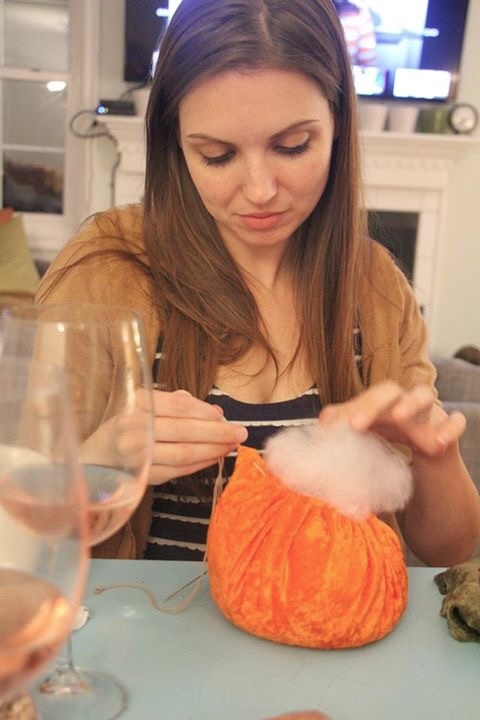
- Choice of fabric cut into various sized circles
- Large needle and heavy thread
- Dried beans or corn
- Polyfill stuffing
- Pumpkin stems
- Hot glue gun
For the full step-by-step picture tutorial on how to make velvet pumpkins, please click here and visit Grosgrain. She has some great money-saving tips on how to pull off this craft on-the-cheap. These are easy enough for anyone to make, and I think older children would be capable of crafting these as well. Look how happy I look while making my pumpkins! I told you we laugh a lot on craft nights. 🙂
The trickiest part of this craft is gathering and drying your pumpkin stems ahead of time. My friend Kathleen visited two different pumpkin orchards and asked the managers if she could take the stems from the rotting or damaged pumpkins. They were happy to oblige. Air-drying the stems produces the best results, but Kathleen has instructions on her post on how to bake the pumpkin stems in the oven to quickly dry them.
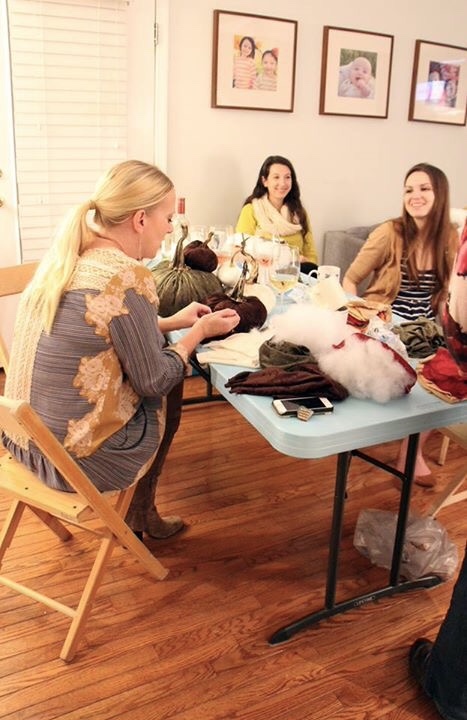
We chatted and sewed and each of us completed about 10 pumpkins each within two hours. If you can sew a running stitch, then you have the skills needed to make a velvet pumpkin…or ten!
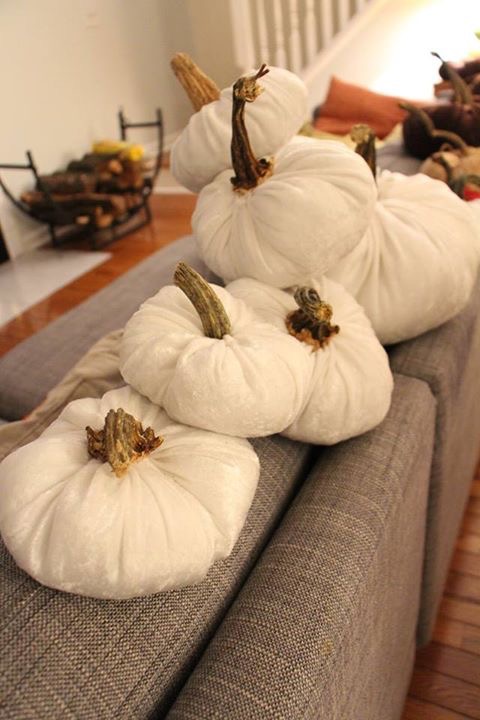
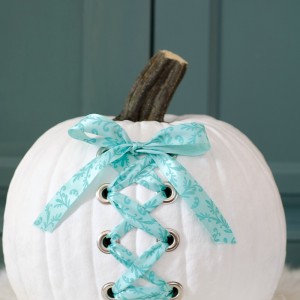
Here are some of the pumpkins that my friend Mandy made. She wanted all white for her decor, and I think they turned out so pretty!
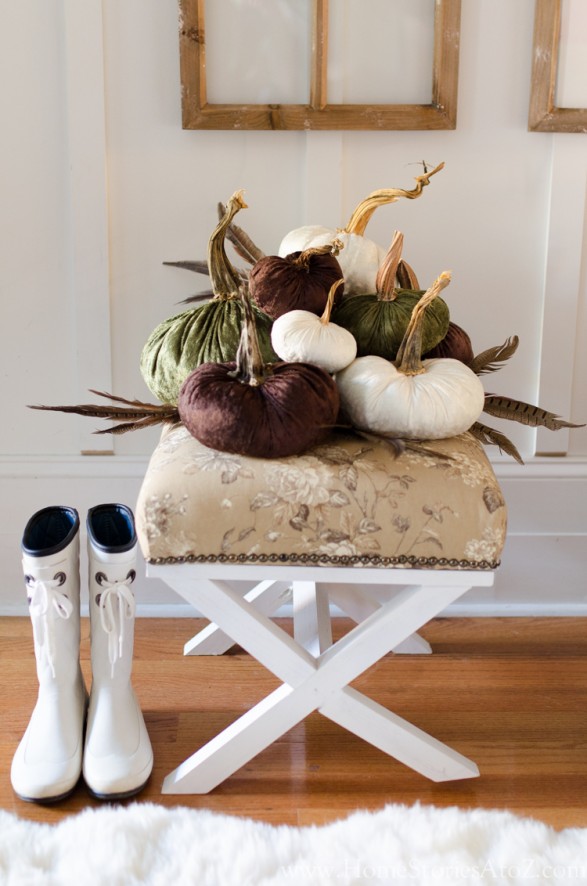
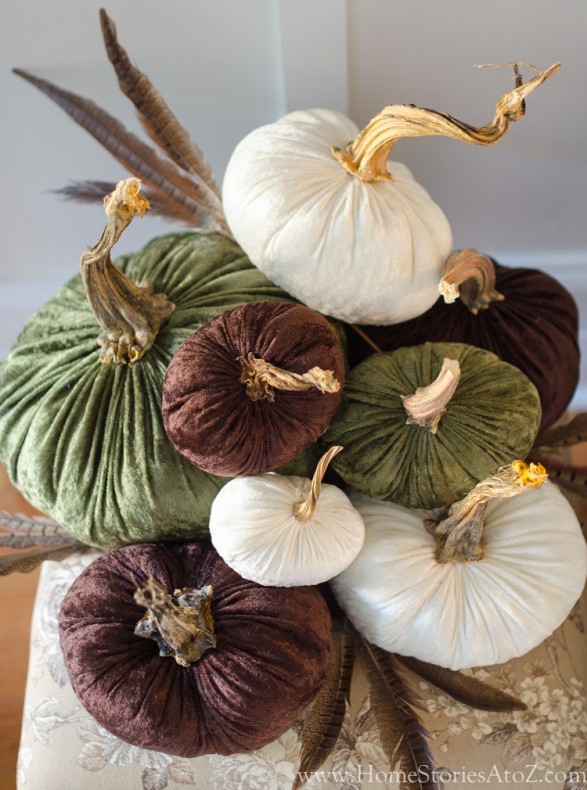
I chose a combination of brown, moss green, and white velvet and they are perfect for this little nook in my home.

The real pumpkin stems are what make the pumpkin, so before you throw out your pumpkins this year be sure to rescue the stems! Allow them to air dry, and store them with some silica packets so they don’t rot, and they will be good to go next year.
Feel free to pin this project for later and thanks for stopping by! You might like to check out some of the related crafts posted below.


I have been looking every where to see if any one is using the velvet pumpkin idea to make a snowman. My thought is to make 2 white pumpkins (the larger one on bottom without a stem) and put one on top of the other, add the stem on top. Then add eyes, nose and twigs for arms. Thank you for the tip on doing it myself…I think I will be trying it soon.
Sounds like a cute idea Julia!
These are lovely! I took florist’s foam, carved it into the shape of a stem, and wrapped/glued either package twine or burlap over it. Some I adorned with brads, Amber rhinestones or sequins, and most were left plain. Can also use raffeta (sp?) or something like a cream-colored or tea-dyed lace, or even corduroy to wrap it. Can also use gourd stems, twigs, straw, styrofoam, paper mache, etc., as the pumpkin stem.
To clarify, I was referring only to stem alternatives. Still used velvet for the pumpkin.
Wonderful ideas Rae! Thanks for taking the time to add them.
Hey Beth,
I’ve been on a particular site for a very long time & these velvet pumpkins are one of their big sellers—they are so expensive! I’ve drooled over them & knew they would be a simple construction but couldn’t decide where to get the stems. DUH! I can be so dense at times–thank you ever so much for this “how to”–really like your site.
Just love these. I wonder if something else could be used instead of pumpkin stems. I have no access to any.
Wow Beth ! Those are beautiful ! I love the colors you used. I think I’ll visit a local stand to find some pumpkin stems and then head for the fabric store!! Thanks !