
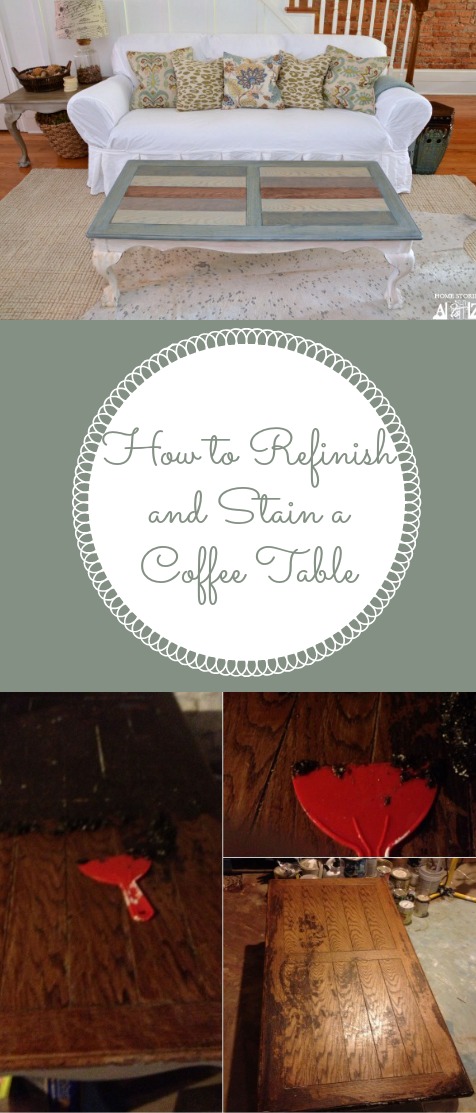
I was so tired of our boring, large coffee table in our living room that around six months ago I stashed it away in the basement. There it has sat collecting dust and housing cans of paint and random DIY project leftovers. I wasn’t sure what to do with it so did what I often do best—nothing. I am happy to say that inspiration finally struck, and today I’m sharing with you how to refinish and stain a table.
This poor second-hand table has had a few makeovers in its stay with me. I painted the legs and restained the top back in 2009. Wow, it is fun to see how much my house has changed over the years :). Then in 2011 I decided to paint the top without priming first. You can read all about that disaster in my post entitled, Do I Really Have to Prime. In case you are wondering, uh…yes, you do. After peeling off all that paint, I lost interest in the table and just let it be.
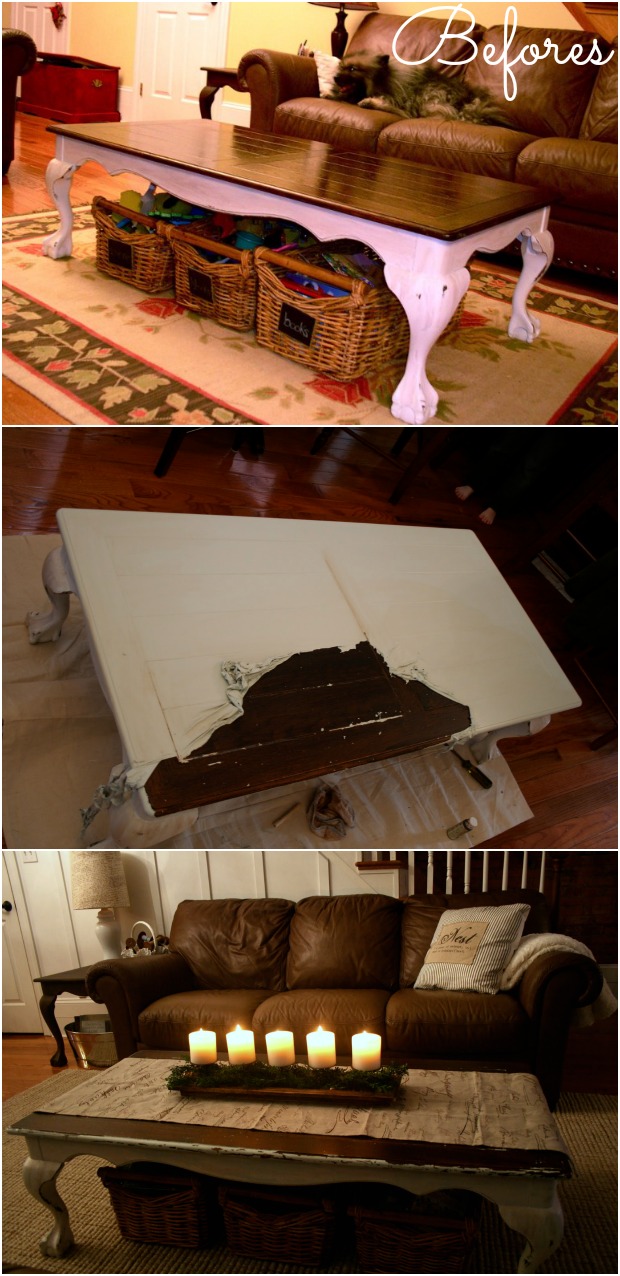
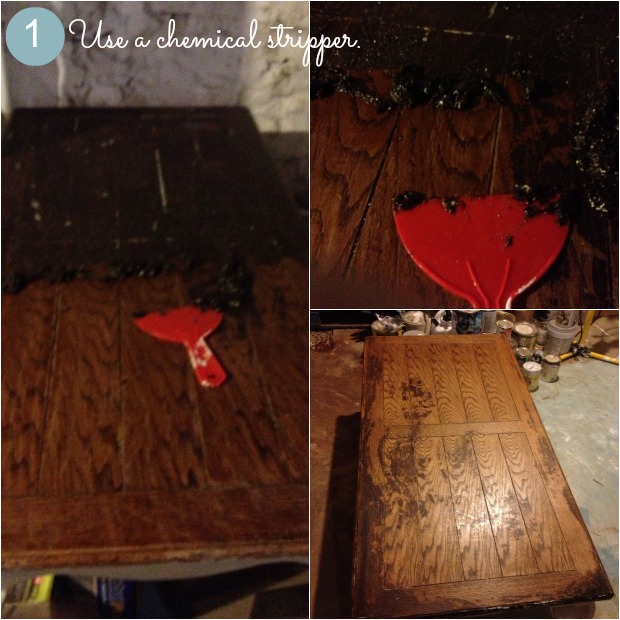
So here’s the low down on how I refinished and stained my table. When I “restained” the top of this table in 2009, I had no idea what I was doing. I didn’t want to sand anything so just used a very dark stain/poly mix as a paint so to speak. It worked great at the time, but I knew it was going to be no fun to sand off. Therefore, I chose to use a chemical stripper to take off all of the old stain. Be sure to follow the label’s directions and wear approved chemical gloves, eye protection, and a respirator while using the acid. This stuff is powerful and WILL burn your skin.
You can see in the picture below that the chemical stripper took off most of the stain and gave me a good starting place to sand.
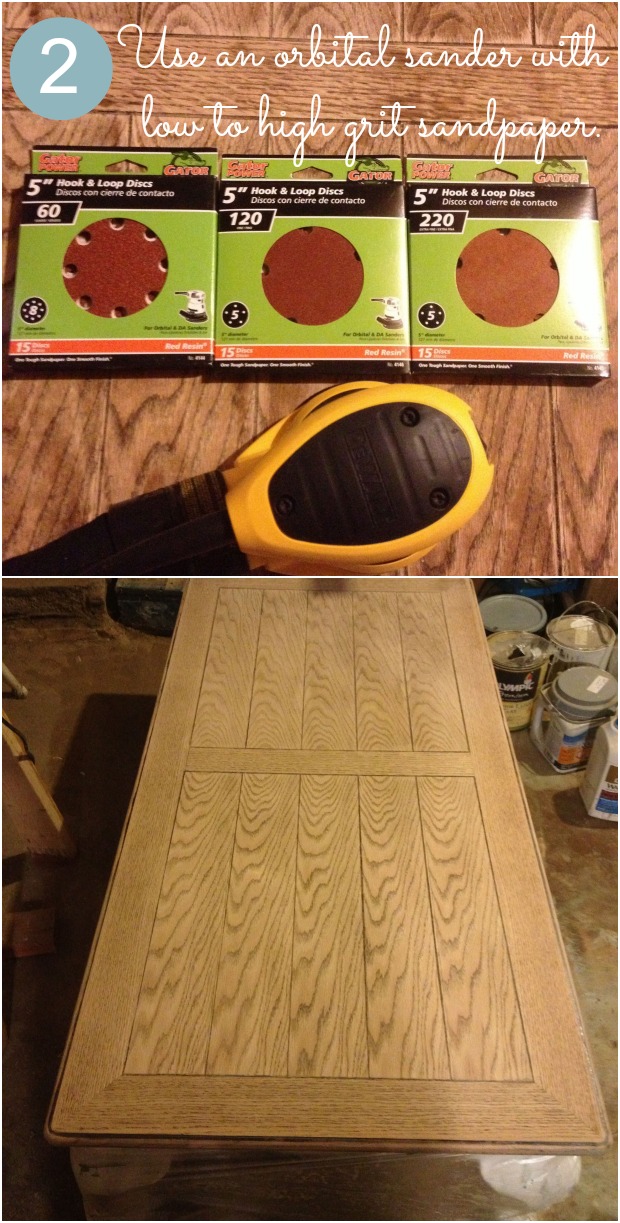
A quality orbital sander is a must for furniture refinishing. I currently own THREE palm sanders. I tried to go cheap when I first started out DIY’ing, and it’s just not worth it. Orbital sanders aren’t that expensive to begin with, so do yourself a favor and buy a good one from the start. You will end up saving yourself some money in the long run.
When sanding wood you want to start with a low grit sandpaper and work your way up to a high grit. Low grit is coarser and will take off the finish quickly and rough up the wood. Higher grit sand paper smooths out the wood. I started with a 60 grit, followed by 120, and then finished with 220. Be sure to wear a respirator and eye protection when you sand.
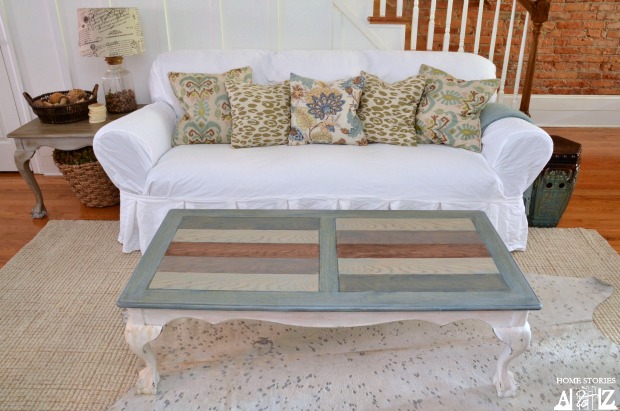
Isn’t it looking much better already? The hard part is over and now comes the fun part—stain! I chose to try out Cabot Premium Wood Finish in the following colors shown below: 1. Mussel Shell 2. Stormy Teal 3. Riverbed 4. Coffeehouse.
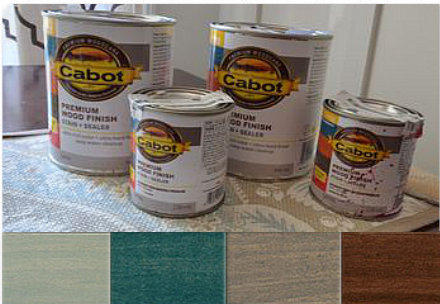
These stains are fun to work with and come in some great colors. They also have a quick dry time and no need for extra steps like a pre-conditioner or top coat. But what I loved most about them is their “H2Oil component” which means clean-up is easy- just use soap and water! Woohoo!
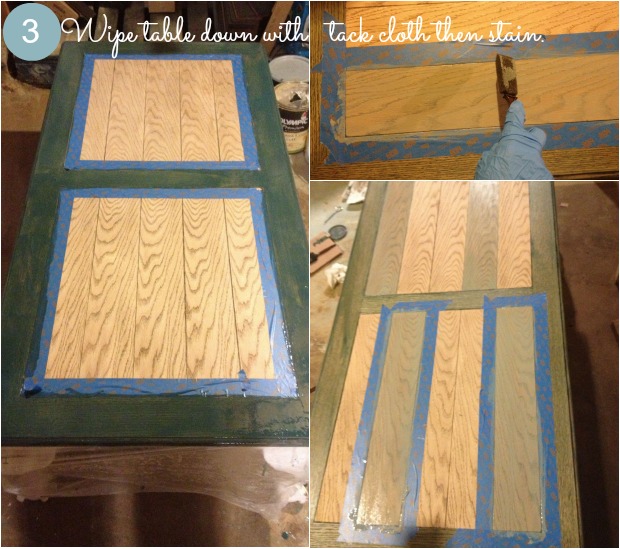
After sanding, use a tack cloth to wipe down your table to collect all of the dust. Tack cloths can be found in the same aisle as the staining supplies. If you’ve never used one before, it is just a super sticky cheesecloth which grabs all of the dust and gets the wood surface nice and clean. Since I was staining my table with various colors I chose to tape it off to make things easier. Once you’re ready to stain, use a foam brush to paint on your stain, allow it to sit for a few minutes, and then use a clean cheesecloth to remove the stain. With some of the lighter colors, I used a fresh foam brush to wipe off the stain instead of a cloth. I found I had more control this way and it allowed me to leave more stain on my table and achieve a richer color.
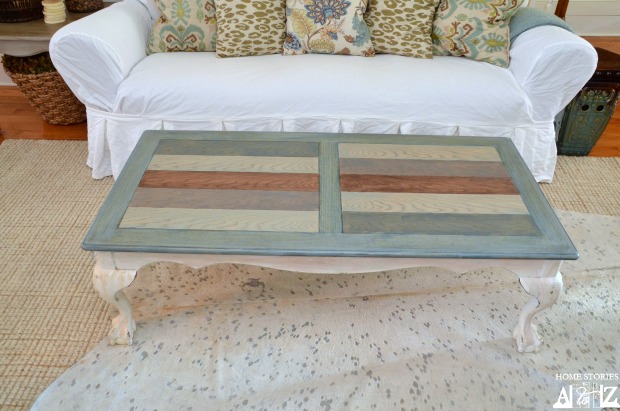
And here she is all pretty and finished! The Stormy Teal ended up being a little brighter than I wanted, so I top-coated it with the Mussel Shell. Don’t be scared to mix your stains together in a separate container to achieve the color that is perfect for you!
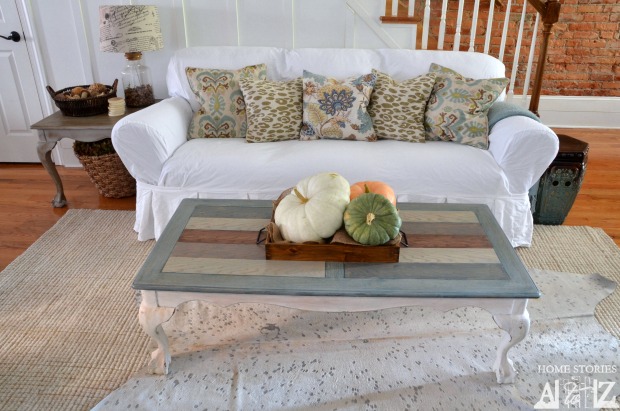
And here is what it looks like styled for fall :).
I hope this post inspires you to grab a sander and some colored Cabot stain and go crazy :).
This post is sponsored by Cabot Stain. Thanks Cabot for allowing me to try out your stains and share my tutorial! My opinions on products are always my own.


I’m looking forward refinishing a dresser and round coffee table that we just acquired. 🙂 Your pictures and post were helpful and I loved seeing the different colors of stain. I just saw an add for Lowe’s in our area and that they just began to carry this brand of stain! I think I’ll consider Riverbed as I’m hoping for a smooth weathered driftwood look while showing grain pattern. Can’t wait to start my sander! We already have a rectangle shaped instead of round handheld sander. Do you see anything wrong with that?
I’m about to sand my kitchen table as well and am looking forward to starting. 🙂 There is nothing wrong with a rectangle-shaped sander. The reason I prefer the Dewalt one over my others is because the circular head actually spins around rather than just vibrating back and forth. Most sanders just quickly vibrate rather than circulate. I find that the Dewalt one works so much faster than my other ones. Good luck on your project!
What is the color used for the legs of the table? I am IN LOVE with your table! You did such a great job! I am so happy I found your “how to” post! Thanks for sharing!
XO
Hi Desiree! I painted the legs with white chalk paint. Thanks for stopping by and leaving a sweet comment :).
Is there a certain brand you used? I have never used chalk paint before, so is there a trick? I bought a coffee table this morning off of Craigslist. It has great potential! And I am just in love with your table, so I am hoping the legs can turn out as great as yours did!
Thank you for your quick reply!
I just looked back at my previous post to see exactly what I used on the legs and I was wrong. I didn’t use chalk paint at all. These legs have actually been painted with spray paint in heirloom white, and then painted over with white paint, and then gone over again with various craft paints. I painted the legs and stained the top a solid color back in 2009 so my memory was a bit fuzzy of exactly what I did. You can see the post here if you’d like: http://www.homestoriesatoz.com/decorating/coffee-table-transformation.html
You are great! Thank you SO SO much!
Love how the coffee table turned out! I am working on a project with Cabot’s water-based stain too and love how easy it is to use! I was intimidated by staining until I tried it.
Great job Beth! It looks WONderful! You sure do some amazing work!! I enjoy seeing all the evolutions!
Thanks Wendy :).
It looks great, Beth! What a fun and creative treatment for your table; it looks great in your living room.
I was just thinking about how much fun it is to watch a person’s style evolve. You’re a long way now from your red and gold days (although I loved your red and gold back then, too!).
Yes, I’ve changed a bit from the golds and reds and I’m sure in another 5 years I will have changed a bit from the subdued blues :). It is fun to watch style evolve.
I have a coffee table that needs redone – would you like to come to my house? I’ll make some pie and coffee 🙂
~ Have a great weekend.
Ha! I do like pie and coffee ;).
Hi Beth, You and that coffee table have been through a lot together! Looks perfect now – great job.
Ha! We have been through a lot together :). I really want to rework my entire family room this year when the budget allows for it so this is the last hooray for me and this table.
That sure did turn out absolutely perfect for your decor…enjoy it!
JP
Thanks so much JP :).