


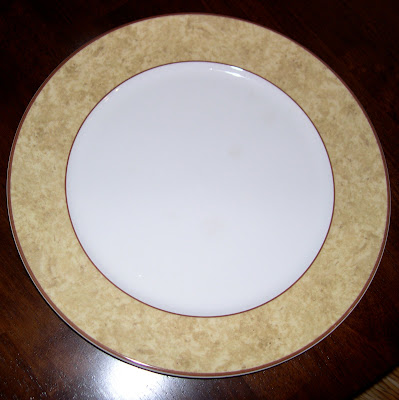
Step 1: Take an old thrift store plate or a plate you no longer use. The plate I chose is one of my 9 chargers. I can’t even seat 9 people at my dinner table (and honestly I can count on one hand how many times I’ve used these chargers in the past decade), so I thought I’d sacrifice one for this project.

Step 4: Play around with your print to get the look you like the best.

Step 5: Cover the area you want to cover with Mod Podge, place your cut out where you want it, and paint over it again. If you see an air bubble forming, just smooth it out with your finger. Allow each coat of Mod Podge to dry before applying more. When it is all dry, give it a good coat all over. I used a larger brush for this step and I used a circular stroke so that my brush strokes would dry in a “plate” pattern.

Step 6: Tell your plate not to be bashful as you conduct her first photo shoot.

Beautiful, now smile for me from way up there! That’s it….

Work it, work it…

Yes, beautiful. Think family…think beach and the wind flowing through your…uh..lettery lines.


Step 7: Stop anthropomorphizing your plate and go get some fresh air because obviously all of those spray paint fumes have gotten to you!


Beautiful – thanks for sharing the instructions!
Hey Megan, I had trouble on your site finding your email, just a comment form, so I'm hoping this gets to you this way. I have had trouble with Mod Podge running the ink on certain papers. If you print the paper off of your computer for the monogram, it will run. I just carefully added a thin coat on the back of my "H" and then used a small brush to carefully brush over the top. I mopped up any excess ink with a paper towel. Most quality scrapbook papers won't run. Hope this helps in the future!
Hi Beth!
A few friends and I tried this project this weekend. Did you have any problems with the ink from the letter running when you Mod Podged your plate? If so, how did you fix it? If not, do you have any suggestions?
Thanks!
Megan
Hi Beth! Just wanted to let you know that I have linked to your post! Thanks for sharing this tutorial! Mine didn't come out nearly as FAB as your's did though! BTW, love yours above the kitchen cabinets 😉
Hi Beth! Just wanted to let you know that I have linked to your post! Thanks for sharing this tutorial! Mine didn't come out nearly as FAB as your's did though! BTW, love yours above the kitchen cabinets 😉
What a great project – thanks for sharing it.
I've become a follower and just loved this so much I did one for myself, I posted about it and linked it back here so others can find you. Here's the link if you want to see it. Thanks for sharing this.
http://texasmonkey.blogspot.com/2009/10/met-monday-monogrammed-plate.html
Great tutorial! I've got to try that. I've become a follower too. Any blogger who can use "anthropromorphising", "PSSSSHHHHHHHHHHHHHHT" and "spray can onomatopoeia" in the same post has got my attention! lol
I also love it!
I probably haven't mode podge'd since I was a kid, but this has definitely inspired me to do so.
Thanks for the tutorial.
Mel
I am loving this plate. It is absolutely gorgeous and I love how well you explained how to do it. Thanks!
Love it! I love monograms – your plate is awesome and a perfect detail for each of those spaces!
Thanks for sharing!
Love it, and the peek into your home.
Great idea! Thanks!
Very shabby-chic! I love it! Thanks for the Tutorial… I am going to have to make one of these for my next wedding gift!
Neat tutorial!!! 🙂 I'm visiting from Kimba's party. I love the paper you chose. I may have to give Mod Podge another shot. 😉
so BEAUTIFUL!
I think I need to make one.
OH. MY. WORD. Where have you been all my life? (drama. I know.)
I have been working so hard to figure out how to get our "H" on a canister in my kitchen … tried stenciling, painting it free hand … nothing. Now I'm reminded of that beautiful thing called "MODGE PODGE"!
Thank you for the reminder that it really is "simple" that wins the race!!!
This will make the perfect anniversary gift for my friends. Thanks!
Love this! I have that same paper and love it! Your plate looks Awesome and I love the black and red! What a Great idea! Thanks for Sharing this!
This is such a cute project!! I just came over from Kimba's garden party roundup and your blog is clever and cute!!! I look forward to checking back in and seeing what you're up to 🙂
Ashley
If I was getting married, that is one gift I'd faint from excitement over getting! Too bad I'm happily married (tongue-in-cheek), and too bad "F" is such an ugly letter – especially in cursive. But God had me fall in love with an "F" guy. … Your plate is AMAZING!
GASP! Is that an exposed brick wall in your house????? I'm over here trying not to turn green with envy…. it's not working….