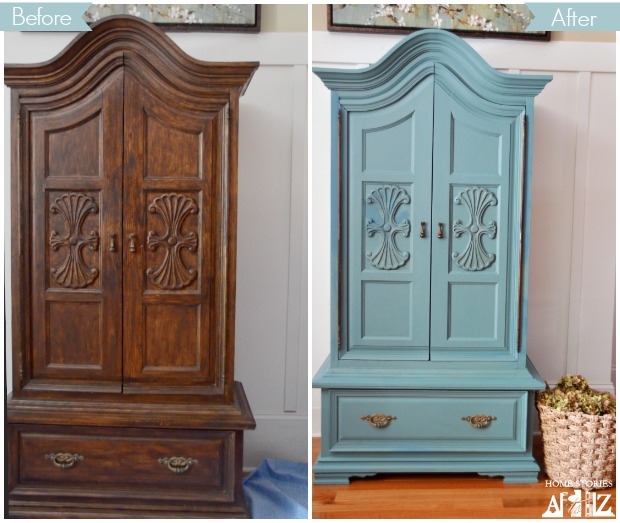
We inherited several items of vintage furniture from Matt’s grandparents, and over the years I have enjoyed giving them new life. One of the pieces we inherited was this dark wood vintage armoire. I have the piece sitting in my foyer, but I was ready for a change. It was time to paint it! Today we are talking about painting furniture. It’s a hot topic and there are several ways to go about painting furniture; however, they all share one thing in common—good prep is imperative to the outcome of your project. Today I will show you step-by-step how to prep a piece of wood furniture.
Is Prep Work Really Necessary?
Before we begin, let me share with you a few of my “live and learn” projects so that you understand why proper furniture prep is so important. A few years ago, I didn’t feel like priming or sanding or doing any prep at all. I had painted a few things in the past without priming and got lucky, so I decided to paint my coffee table sans any prep work. You can read about how that little experiment went in my post, Do I Really Have to Prime First?
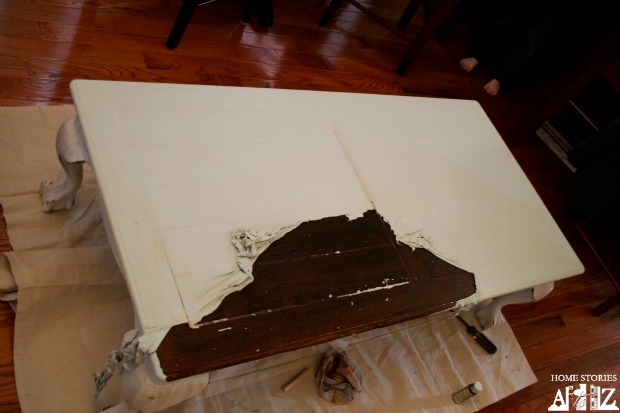
Yes Beth, but what about chalk paint? You don’t have to prime when you use chalk paint. No? Hmmmmm. Take a look at this piece of mahogany furniture that I properly cleaned and prepped and then painted with the original chalk paint. Priming first would have prevented this bleed through and saved me a ginormous headache and tons of money on additional coats of chalk paint.

Prepping your piece of furniture properly before you start painting will give you the best chance of an end product you adore! Let’s get to it.
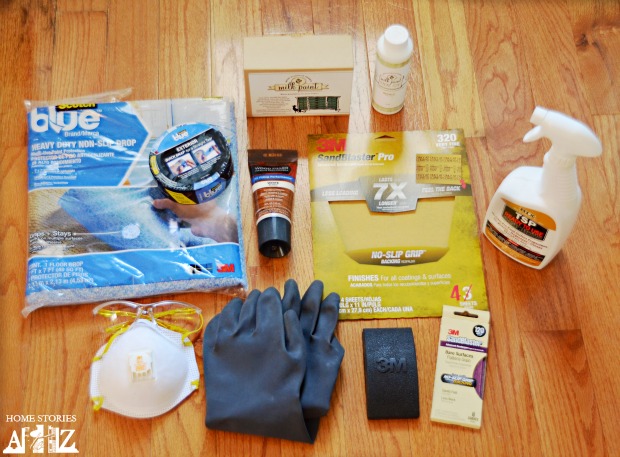
Here are the supplies you will need:
- 3M Tekk Protection Goggles
- 3M Tekk Protection Refinishing Gloves
- 3M Tekk Protection Respirator
- Scotch Blue Drop Cloth
- ScotchBlue™ Painter’s Tape
- 3M Advanced Abrasives Sand Paper (320) and sanding block
- 3M Wood Filler
- TSP
- Primer, paint, and brushes
The first steps of my project are in this very short 3 minute video. Sometimes it is so much easier to just watch someone do something than to read a step-by-step tutorial. In the video, I show you how to clean your piece of furniture with TSP, how to sand (don’t be scared it takes only a few minutes and is not to be feared or dreaded), and how to fill any gaps or dings. I also include a fantastic quick and easy tip on how to mix milk paint so that there are no lumps in your paint. It’s a great trick!
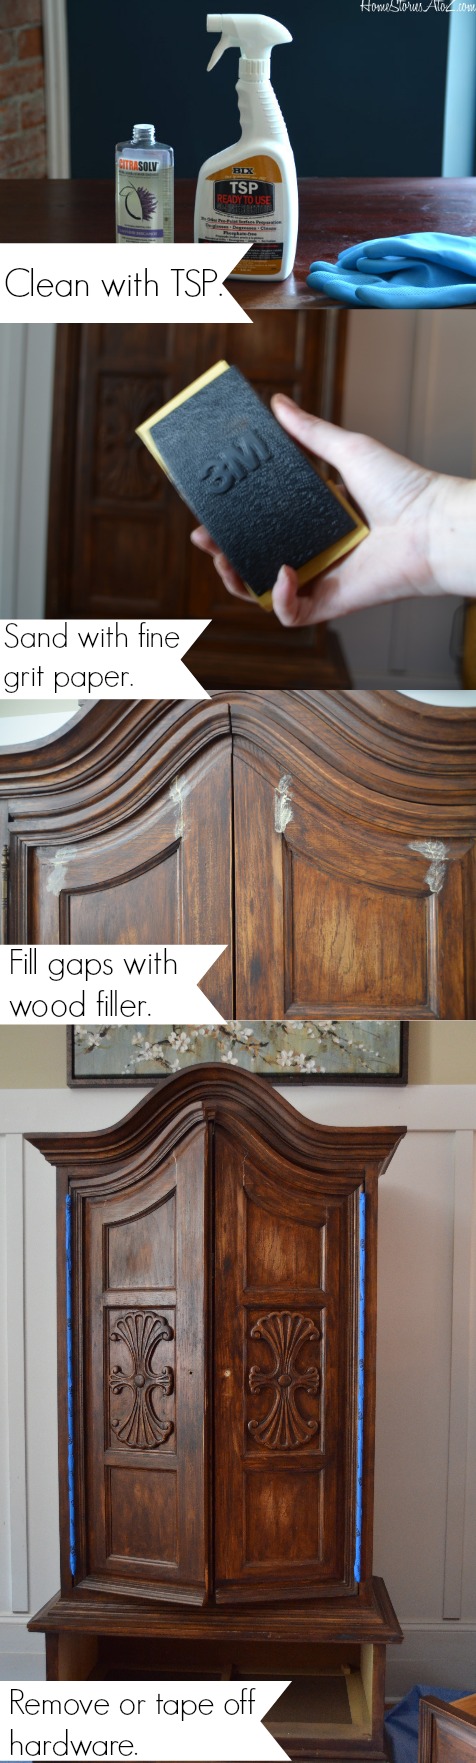
Be sure to wear your 3M Tekk Protection gloves, goggles, and respirator when working with chemicals. TSP will strip off any wax and grime on your piece and help prepare it for painting.
Next, sand your entire piece with a low grit sandpaper. I used 320 grit on this piece. Sanding will take off the sheen and allow a rougher surface for the paint to grip. I am incredibly sensitive to dust of all kinds, so I wear a respirator when I sand. If your piece of furniture is painted, you will want to be sure to test for lead and follow the proper safety precautions in working with lead paint.
Fill any gaps in your wood with 3M Wood Filler, allow to dry, and then sand and clean. Use a tack cloth (a cheese cloth that is tacky/sticky) to clean up all of the dust.
Remove any hardware and tape off anything you do not want to paint. I used ScotchBlue Painter’s Tape for Exterior Surfaces to tape off my hardware–even though I was obviously indoors. I really loved how the tape performed. It was perfect for taping off my hardware and I liked working with it better than the standard ScotchBlue tape.
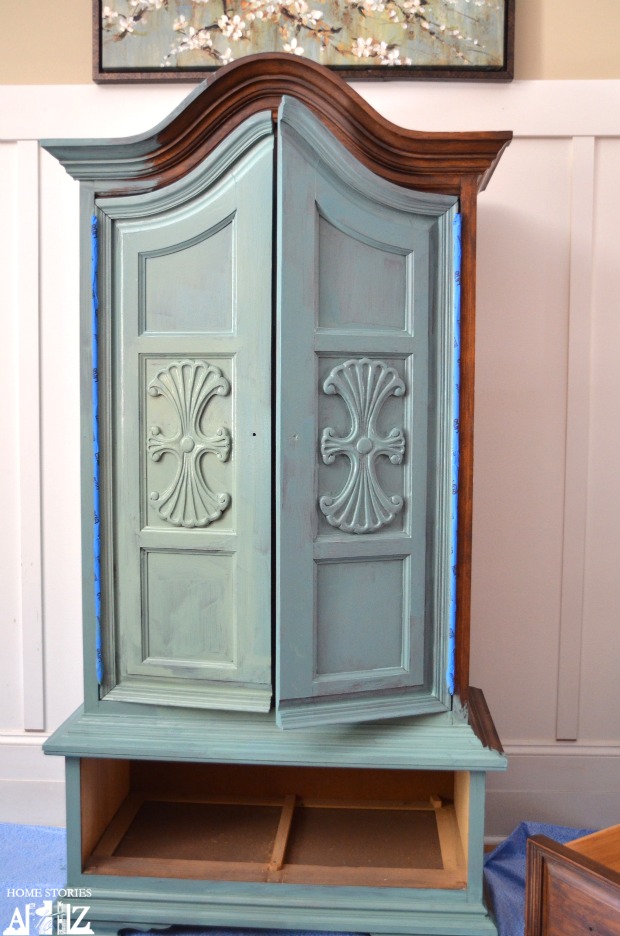
Congrats! You are now ready to paint! I used a Purdy 2.5 XL glide brush and Miss Mustard Seed’s milk paint in the color Kitchen Scale on my armoire. If you’ve never worked with milk paint before, the paint pigments come in a powder form that you mix with water to create paint. I didn’t prime my piece with a traditional primer but instead mixed in milk paint bonding agent to create a primer in the same color as my paint. I have no plans of distressing this piece so it was very important to me that the paint adhere appropriately. You can see below what it looked like with the milk paint primer coat. Once the piece was completely coated with two coats of paint, I removed the blue tape. You don’t want to make the mistake of allowing your paint to completely dry when using painter’s tape. If you do, you risk the chance of the tape pulling some of the paint away.
And here it is completely finished and looking gorgeous! I used Miss Mustard Seed’s wax to seal the paint and then used just a touch of the dark wax to highlight the medallions on the front of the doors. I am thrilled with how it turned out!
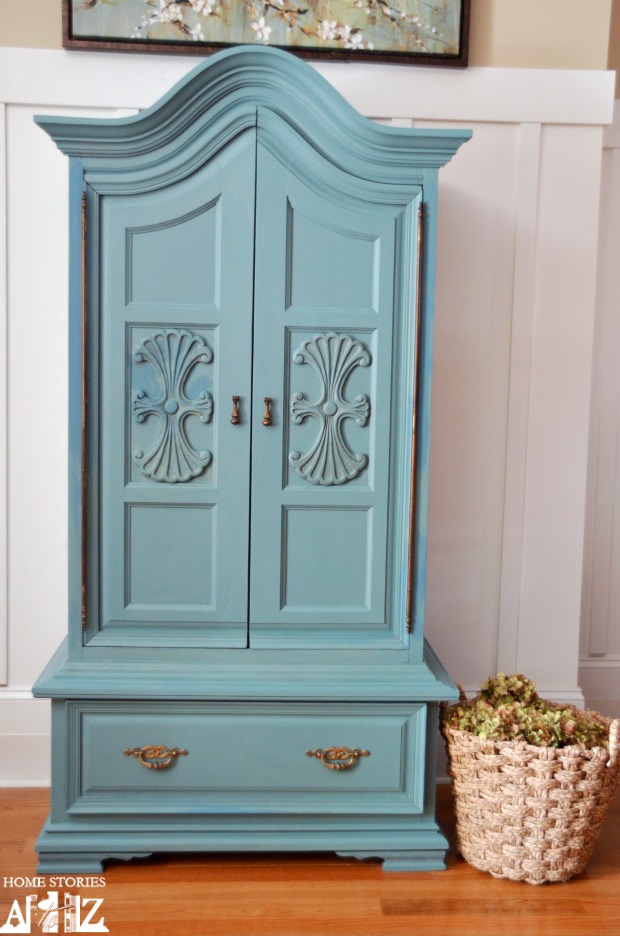
I love milk paint because the pigment varies a tad creating a really beautiful finish.


That is really all there is to it! It might seem like a lot of steps to get from before to painted-pretty-after, but as someone who loves to cut corners and do things as easily as possible I can tell you it just isn’t worth it in the end. Prepping your piece of furniture properly will save you time in the long run and will give you the results you desire!
A huge shout-out to 3M for sponsoring this post and supplying all of the necessary safety equipment needed for my project. I don’t promote companies on my site that I don’t love, and I truly love 3M products. 3M will be at the Haven Conference again this year, so if you are a Haven Maven be sure to stop by their booth and show them some love! You can follow 3M on twitter and facebook: 3M DIY Twitter Page, 3M DIY Facebook Page


This post is a collaboration with 3M DIY. To keep up-to-date on projects, products and sampling visit 3MDIY.com.
Linking to Miss Mustard Seed’s party.
Related Posts
 Annie Sloan Paris Gray End Table Makeover
 Two-toned Dresser with Card Catalog Pulls
 DIY Painted Furniture Trend
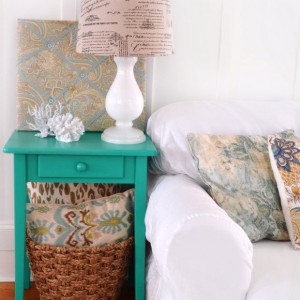 End Table Makeover: Valspar's PANTONE's Emerald Green Paint
 Inexpensive Coffee Table Buying Guide
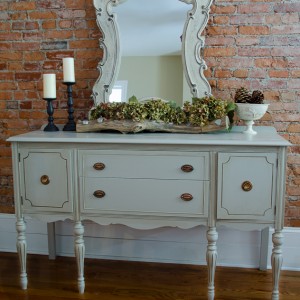 How to Paint a Vintage Buffet
 How to Flawlessly Spray Paint Furniture
 Gray Paint Color Ideas, Tips, and Examples

Thank you so much for your posts about painting furniture. I’m about to take on several furniture painting projects in my own home, and I wouldn’t even know where to begin without your ‘tutorials’. So THANK YOU! I hope they turn out as pretty as yours!
Beth, I have a question. Do you have to rinse the TSP off of the furniture??
Good question! My bottle says “no rinse” on it but other TSP products may require it. I usually take a damp rag and rub it over the surface of the furniture after using the cleaner.
Thank you! I need to find some in a spray bottle like you have.
Hi
Do you do the same prep if using chalk paint?
Irene
Hi Irene, yes, I would use the prep techniques on all wood furniture. It’s a great way to ensure you have a clean and ready surface for any paint. Many say you don’t have to do much to any prep work when using chalk paint (i.e. you don’t have to sand, prime, etc.) but I have not had good luck in following that advice. I’m always happier with the results when I take the time to prep.
Great post….Super helpful…. I’m a new follower from
http://dorothysueandmillieb.blogspot.com/
Suzie
Thanks so much Suzie!
Really helpful post! The furniture painting tips are great, and I loved seeing pictures of the paint peeling off the coffee table. I have a few furniture projects planned, and I am always trying to think of ways to streamline process. Will definitely heed your advice!
Yes, I love to cut corners any chance I get but in the end it’s worth it to just do it the right way first ;).
Beautiful Beth. I was thinking of painting an old desk to use with a sewing machine on top. I was wondering if chalk or milk paint, with or without wax, rub off on any fabric I might be moving across it? Thanks so much. I love reading your blog.
Hi Maureen, it’s completely a matter of preference on the look you are going for on the desk. To “seal” chalk or milk paint you typically use a furniture wax so that the paint is protected and doesn’t continue to flake off. That being said, milk and chalk paint are meant to age and distress with time so will chip and flake off with normal wear and tear—but when waxed it won’t be dramatic. If it were me, I would use a good bonding primer (I like Zinnser 123 primer) followed by an Acrylic Enamal paint (like Sherwin Williams Pro Classic). This won’t give the same depth and old world look to the piece, but it will withstand heavy and fabrics will slide across them beautifully.
Great tips and fabulous color. PInned 🙂
Wow this really looks fantastic. I really appreciate how you list all of the items needed, took a picture of them, and posted a video. It really helps-thanks.
I’m so glad it was helpful! I’m a visual girl so like options when I see tutorials.
Hi Beth,
Your furniture turned out beautiful! I love your tip about adding a whisk to your drill. Very clever. I usually just shake like crazy in a jar.
Thanks girl! Yes, I tried the shake like crazy method first but I still had lumps and tons of bubbles. The whisk is awesome.
beautiful color! I used to hate prepping too but a bad result sure does change one’s perspective!!
Yes it does :). I’ve had too many bad results from trying to cut corners over the years. I’m finally learning to just do it right the first time and be happy!
Very pretty transformation! The color you chose is beautiful and the armoire looks perfect in that space too. Nice job Bethy!
Thanks sis! Mwah!
Well! you have given me the strength and motivation to finally go ahead and try the milk paint on my grandmother’s secretary; it’s a piece that I intend to keep in the family forever, and it’s featured prominently in my living room, so why shouldn’t I paint it? I really like the way you left the drawers the original color, too.
*
Question: should the interior of the secretary be painted as well? There are countless little details inside… little secret drawers and such. The color of the current finish is called ‘dirtier than you’d think brown” and it does nothing for the decor, so I am very excited to give my fvery avorite piece my very best attempt at milk paint! Thank you!
I didn’t bother painting the interior of this piece. It has three drawers inside and then an open space on top. I like the dark wood in there so left it. I think it’s all about personal preference. If your secretary is going to be displayed open a lot, then I would go ahead and paint the interior. You’ll have to show me what it looks like when you are finished!
Beth, this is just beautiful. I love MMS’s paint colors, and I’m loving seeing the milk paint used on something that is not heavily distressed, since that is more my personal style in most cases.
xo
I’m kind of over the distressed look :). It’s still beautiful in small doses, but I’m definitely liking a cleaner look these days.