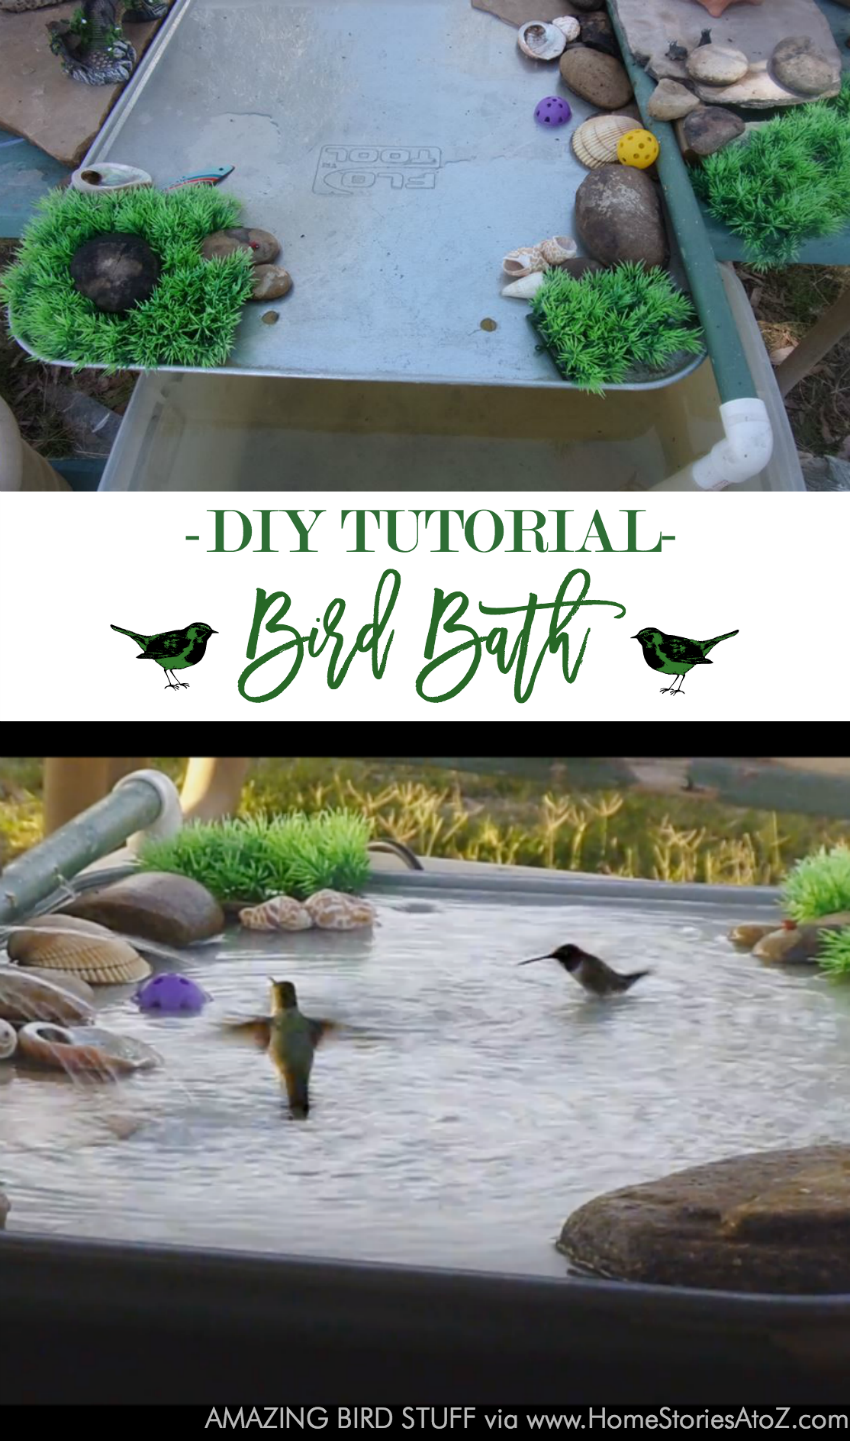
I shared yesterday that I was working on a diy garden project that was for the birds! Our Lowes Creative Ideas Network challenge this month was to create a diy bird feeder or birdbath. After Matt’s failed attempt at creating a bird feeder, I just went ahead and purchased a cute feeder from Lowes. However, I had this fun idea to create a planter and bird bath in one and today I’ll show you how to make your own!

Supplies needed:
NOTE: Please use your own measurements and judgement when recreating this project. These are guidelines to follow and you shouldn’t necessarily even want to copy my project exactly. Be creative and add your own flair, pot sizes, rebar size, birdbath top, paint color, etc.
- 1 8″ tall terracotta pot for the base
- 4 6″ tall pots
- 1 4″-5″ tall pot
- 62 inch piece of rebar (I bought a 10ft piece from Lowes and had Matt cut it to size with a hacksaw. Lowes will cut if for you if you ask.) **Edited to add: My Lowes said they could cut it for me; however, someone had trouble getting their rebar cut by Lowes so you might need to purchase a hacksaw for this project. It’s $5.
- Spray paint primer. (I used Valspar primer.)
- Spray paint in your color choice. (I used Valspar in Exotic Sea.)
- Discarded globe from “boob light”.
- Little ceramic bird (Optional but uber cute.)
- DAP Household/Aquatic Adhesive

Step 1: Prime all of your pots and then spray paint them in whichever color you choose. This was my first time using Valspar spray paint and I have to say that I wasn’t a huge fan of the primer, but I loved the paint! The primer seemed to splatter a bit out of the can and it took two cans of primer to thoroughly cover the pots. Granted, I didn’t seal the pots before painting so they were thirsty for the primer! However, I used less than one can of Valspar’s gloss spray paint in Exotic Sea on all of the pots and on the birdie. I love this fun color for the garden!

Step 2: Measure the height of all of your pots and then add 24 inches to that number to determine the length of your rebar. Cut your rebar to size using a hacksaw. Use a hammer to pound the rebar into the ground at least two feet down so that it will hold your heavy pots.

Step 3: Thread your pots onto the rebar and fill with soil. Alternately tilt each pot from right to left, filling with soil as you go.


Step 4: Take the globe from a flush-mount light (frequently found at second hand shops) and place it onto the top of the rebar. The bowl will be resting on the top flower pot but the rebar should thread all the way up into the birdbath bowl. I used DAP household/aquatic adhesive to attach the bird and to seal around the gap between the bowl and rebar hole. The adhesive takes a day to cure, so I’m not able to fill my bowl with water yet. If you do not have a globe from a flush mount light, you can use a bowl.

Step 5: Plant your flowers and enjoy!

Disclosure: Lowe’s provided me with a gift card to showcase this project this month as part of their Lowe’s Creative ideas Bloggers team.
If you enjoyed this post, you might also like the following:
Related Posts
 Compound Miter Saws and $100 Lowes Gift Card Giveaway #LowesCreator
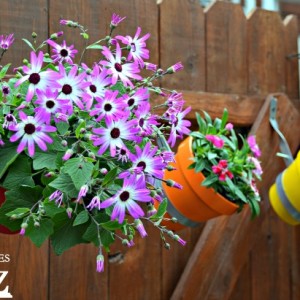 Urban Garden: Do It Yourself Fence Planter
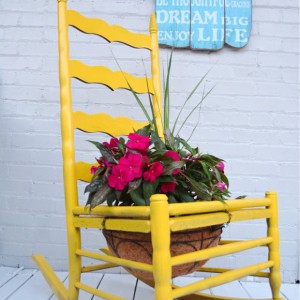 How to Make a Chair Planter #lowescreator
 How to Make an Outdoor Mirror
  How to Make a House Shaped Planter
 Spring Refresh with Lowe's: Let Me & Lowe's Come Over to Your House
 13 Unique DIY Raised Garden Beds

So cute! 🙂
Hi! I love this but would like to use this idea for indoor plants inside my apt. Any idea what to affix the rebar to for an indoor look?
-Erica
Hi Erica,
I would set the rebar in concrete in a planter and place it on a rolling plant stand for ease of movement.
This website was… how do I say it? Relevant!! Finally I’ve found something that helped me.
Kudos!
Excellent idea. I am not very good with creating things that require using sawing/cutting tools and the like. So this will be an easy, and unbelievably cool garden decoration idea for me to make. I can hardly wait.
This looks awesome! I keep going to lowes and they’re out of the 6″ pots! I found plastic ones online.. Wonder if this could be done with plastic?
You should be able to do it with plastic pots without a problem.
I have trouble keeping the top pot with the glass bowl on top flat. My pot with the bowl keeps falling sideways.
You can glue it into place if necessary.
How wide or thick is the Rebar? Our Lowes has 3 sizes.
My best advice is to grab a few pots that you will be using from the garden section at Lowe’s and manually fit it to the rebar. Sometimes the holes on the bottom of the pots are drilled differently.
First off this project is amazing and so fun! my mom loves flowers and as a crafty daughter I was running out of presents to make!! I’m about to go buy the supplies to make this for my mom for mothers days but I have a silly question! what the heck is a boob light????
Ha! Oops! I wrote this post several years ago and recently tried to edit the post to eliminate my silly slang. I must have missed a reference. A “boob light” is simply a flush mount light. (To me, it has the appearance of a single breast mounted to the ceiling, and I’m not a fan of them.) You can often find them at thrift stores. In place of the light globe, people have used bowls or planter saucers. Use whatever you think might work best for you, or eliminate the bird bath top all together and just top off with another pot of flowers. Enjoy!
I love this planter birdbath !I have everything i need to make something similar .Just discovered Pinterest a few days ago and already have more ideas than i have time for, so many great ways to use all that stuff i’ve saved “just in case it may be useful”.
Where can I buy one of these
Hi Eddie, this is a step-by-step tutorial on how to make one yourself. I came up with the idea and I don’t know if you can buy something like it.
i love this idea, it was my weekend project .my mess up on the project was i put in to much dirt and when i watered them the mud ran down the front of all of them. i plan on making lots of these they are so cute. instead of the bird bath on top i just planted more flowers. i dont know how to add my picture of mine.
very niceeeeee
Hi Beth, I saw your bird bath on Pinterest and new I had to make one. I bought all of the pots, rebar and paints at our Bunnings store but forgot to grab the paint. My wonderful hubby who won’t,let me pick paint (as for some reason I always pick one that I end up hating), so he picked up some paint on his way home from work for me.
He hadn’t seen your post of the bird bath so he had no idea of the colour you used, but guess what colour he came home with? Its is the same as you have done.
I am thrilled with the finished bird bath and it looks great in the garden. Thanks for having the wonderful idea and making it work out.
If you live near new home construction, you can probably pick up some rebar in the trash when they cut the post tension rebar after pouring the cement for the slab. May not be 6 feet long, but you can do the same idea with fewer pots and still look good.
Great tip Judi! Thanks for stopping by.
I absolutely love this! I tried making my own (without the bird bath on top) and its definitely now where near as awesome! I linked to your website on my blog though! Thanks for the great post!
LA Garden Girl
lagardengirl.wordpress.com
Thanks for the link!
I absolutely love this! I tried making my own (without the bird bath on top) and its definitely now where near as awesome! I linked to your website on my blog though! Thanks for the great post!
LA Garden Girl
lagardengirl.wordpress.com
This is THE cutest thing ever!!!I have a load of turquoise pots, mine are plastic but hopefully they will work.A must do to put in my latest garden beds!!
I saw this on facebook last year was dying to do this for my little patio garden I had also seen others like it, all very cute, but I had made a few changes. Since my garden is not on land but on a 2nd floor patio I added a base, just a piece of old flooring board, but it did the trick nicely. I also did not paint my pots love the untouched natural look. What I did to add a splash of color is I screwed in an old tin watering can.filled with fake flowers that thread down the rod making an illusion that the watering can is watering my pots, while hiding the rod … I have fake flowers that are glued into place to hide the screw holes too, its so beautiful looks magical too since the watering can is at an angle it looks like its floating in mid air … thanks for sharing!
Sounds cute! Glad you enjoyed it.
love this idea and finally got around to making one for myself… http://sundays-quilts.blogspot.com.au/2013/06/a-sunny-day-in-my-winter-garden.html
Great job Vikki!
Hi Beth! Can someone please give some ad vice on how to attach the birdie?? Mine has a flat bottom and the edge of the boob light is very slim… Thanks!
Hi Beth! I’m almost finished with this adorable bird bath! I have a question though, how did you attach the bird to the boob light? I have a flat bottom bird and a very slim edge on my boob light… I was going to hot glue it because i think that may dry the fastest but not sure that will hold in the rough weather we get in upstate NY… Any advice will be appreciated!! Thank you!
Hi Courtney. I think I hot glued it, but I can’t imagine that’s all I used. It’s still on and has stayed put for over a year now in all four seasons of rough weather. I would probably use Epoxy Glue (E-6000) to make sure it holds though.
Topsy turvy planter . What size rebarb is used?
Hi Vivian, I don’t remember but I had it cut to size. I think I mention the size in the post.
I tried to sign up for the free Lowe’s magazine and I couldn’t do it. It took me to a site where I could sign up free for a subscription. Sign up free? When did it ever cost to buy a magazine?
I love this but don’t no what a boob light is???? Looking forward to hearing back from you. Thank linda
Hi Linda, it’s just my own slang term for the builder-grade flushmount lights that resemble a breast hanging from the ceiling. We got rid of most of them in our home so I recycled the globe/dome part of the light as a bird bath. You could use a plant saucer or bowl-shaped planter on the top as well.
I LOVE this project, and I finally figured out a good spot for it. 🙂 Quick question, though — did the birds use it even though it has such a curved bottom? I love the light fixture idea, just wondering if the birds love it also. 🙂
Hi Nicole. No, the birds aren’t huge fans of it. The rim is probably too narrow for them to fully be comfortable landing on. If you keep the water in the bowl shallow they will use it as a puddle and splash around in it, but birds rarely use it.
I love this idea and all your other ones… we are a family of 6 and as you can imagine on a tight budget, what would really help out is knowing how much (and I know this wasnt much) you spent on the entire project. Thanks love the site
Hi Angela, I’m guessing between $25-$30. Maybe more depending on plants purchased to fill the pots and spray paint purchased.
I just stumbled upon your birdbath through Spoonful. I just wanted to say that I love that you call it a “boob light” too. I read that and I knew EXACTLY what you were talking about, knowing I have a couple of those in my ceiling that I would love to discard. haha
Thanks for stopping by Thea :). And yes, I still have a few of the unsightly things in my hallway that need to be replaced!
I just made this and it came out beautifully. I didn’t do the bird bath on the top, another flower instead. Thanks for the instructions!
I love love this! I am trying to make this for my mother on mother’s day. If I do not have a “boob” light what do you suggest I do? Or can I ask for one at Lowes? HELP
Hi Jamie, you don’t need a flush-mount light fixture to go on top. You can use any round planter. I’ve seen some people use the large “coffee mug” planters on top (that I think are at Walmart), a bowl (that they drilled a hole into), or just a large plant drainage plate. Good luck and send me some pictures when you’re done. I’d love to see it :).
Love this, just bought all the stuff for it. Spent 18 on pots, used a 12″ on the bottom and 5 8″ for the top. Alternated between yellow and purple paint at 3$ per can and 3$ for the rebar. Not sure what plants to use yet. Something the birds will enjoy tho and I’m going to use a deep dinner plate for the bath, I’m afraid the boob light might be too deep for the feathered friends:) so for any one wondering the structure itself with out dirt and plants 25$-30$ depending on the size pots if your doing it all brand new. Love this project so much! Thanks for the fabulous idea!
OMG this is such an awesome and cute garden idea. I will be doing this with my 4 year old daughter who has been asking me to plant a garden and build a bird house with her. Two birds one stone, perfect!! BTW I thought I was the only one that called those light covers “boob lights” my friends and family look at me like I’m crazy when I say they look like boobs.
You’re not alone Dolores :)! Enjoy creating your own garden planter and bird bath!
a brilliant idea!
I linked to your tutorial on my blog – thanks for sharing!
♥, doro von Hand zu Hand
Where can I find a “boob light” and do you know the approximate cost of the entire project, not including the paint? Very cute and creative!
It’s just the “globe” part of a flush-mount discarded light that I had. You can find one second hand at a thrift shop or Habitat Re-store. I really don’t remember the total cost of the project. I would guess around $25 but I’m not sure.
Do the pots need to be sealed or poly’d after painting?
What is a Boob light?
Hi Shanna, I was just being silly in the post. It’s a flush-mount light. I dedicated an entire post on the topic here if interested: http://www.homestoriesatoz.com/decorating/do-boob-light-fixture.html
je tiens a vous dire super toutes ses belle choses qui nous font rever, et surtout nous donner des idées
un petit bémol domage que ce ne sois pas en francais aussi
pour certaines explication
bonne journée et tres bonne continuation
tailleur nicole
Hi; I made the “tippy pott’s” from an idea I got from Birds & Blooms Magazine, but it did not have the bird bath on top, I am always looking for new ideas, and since I have been nagging my hubby for a bird bath this is the perfect solution to the problem. Now my birds can enjoy the flowers and take a bath at the same time. lol. Thanks for a great idea.
I saw this tutorial on pinterest but the link always lead back to random sites. I had finally given up on finding the original when I JUST today came across the image with your website printed on it. SO glad I finally found the right place. I’m excited to create one just like this for my garden.
Love it but how do you change the water every day?
I just used our garden hose to flush it out and cleaned it with a scrub brush when it was looking like it needed it.
OHMYGOSH!! I absolutely LOVE this!! Thanks for the great idea. I’m so excited to do one! Ps. Where did you get the little birdie?
Love love love this!!! What a great idea…..going on my to do list or sure! Thanks for sharing 😉
Love love love this idea!!!! It’s going on my to do list for sure! Thanks for sharing 🙂
I fell for this project as soon as I saw it on Pinterest, but the link was SPAM so I reported it. I used google image to find you, and just repinned! I think anyone would be happy to have this in their garden. Perfect Mother’s day or Father’s day gift. Just one question — What diameter rebar did you use?
I tried to make holes in my pots but only ended up breaking them. any tips?
Hey Beth, I know it has been a while, so I am wondering how your bird feeder/planter has held up?
It is still so cute, I haven’t made one, but just sent instructions to hubs on his computer, so he can be thinking about it all winter!
Hi Bernice,
It still looks brand new. It’s held up better than I thought it would! I need to take it apart for the winter because the pots will crack in the snow, but so far so good.
Hey Beth — we think this project was a great (and very unusual) idea! But when we saw your comment that our Aquarium Sealant was leaking, we asked one of our product experts for some advice, since this is an unexpected application for that product. Here’s what he suggested for future reference:
“Using the aquarium sealant alone may not be the best idea, as the bowl can keep moving. Plus, if the rebar is either bare or “primed” with a zinc coating, the acetic acid in the silicone will corrode those surfaces, thus rendering the seal unusable.
I would use a stainless steel threaded bar, and then use a rubber gasket with a stainless steel nut/bolt along with either our household adhesive or straight polyurethane sealant to create a better seal.”
Hope this helps!
Wanted to show you this and let you know about it if you did not already know. Sorry that this stuff happens… http://pinterest.com/pin/20618110764722189/
Hi Beth, was just wondering if you realize that someone has made a collage of your pics from this project and pinned it. Did not know if you were aware of it or not. I remembered seeing the original pin and knew that it was from a blog….Here is the pin addy… http://pinterest.com/pin/20618110764722189/
Absolutely gorgeous. I just pinned this to one of my boards (the pic without the instructions is being pinned from a bogus site – ugh). I don’t think birds will bathe in a bowl that deep, but either way this is sooooo inspiring. What a beautiful project you created.
Put aquarium gravel in the basin. Birds like a shallow bath.
Hi,
I am really wanting to make this but am having a really hard time finding the birdie. Where did you get yours or where did others get theirs? Any ideas of where to check?
Thanks!
Hi Cheryl, I found mine at Michaels a few years ago.
I think I’ll ask my sisters to make this for my new back yard view!
Hmmm……I don’t have any more “boob” lights in my house. How do you think it would sound if checked the local stores and asked if they ugly “boob” lights. LOL
I love this birdbath. What a pretty idea.
You can get those ceramic birds at Ace Hardware.
I put this on my Summer Bucket List!
http://arieloser.wordpress.com/2012/06/25/summer-bucket-list/
I’ll be sure to link it when I post about it after I make it as well. 🙂 Thanks so much… So cute!!
Love it!
I finished it yesterday……….so so cute!!! I did it exactly like yours. The Lowes I went to would NOT cut the rebar so I
had to buy a 6′ length and only put one foot of it in the ground. It leaned a little bit after it was planted so I wired it to the fence.
The little bird, I purchased at Michaels. He’s a stuffed little blue bird and will fade in time. His feet are attached to a tiny clothespin that just clips on the light fixture/bird bath. When I find a cute little ceramic bird to replace this one with, I will glue him to a regular size clothespin!!!
Absolutely love it!
I LOVE this idea…I found your exact pictures on this website http://www.duitang.com/people/mblog/31562258/detail/
Sorry to say but I think they stole your idea just wanted to make you aware!
Hi
Just wanted to give you a heads up. I saw this post a couple of days ago, then to my suprise saw it again today on this Chinese site
http://www.duitang.com/people/mblog/31562258/detail/
It is all over Pinterest today with the links going there. I know that others were having the same problem with this site but can’t remember which blogs it was.
Love this! On my to do list!
this is so funny that you refer to the bird basin as a “boob light” i thought i was the only one who thought those light fixtures looked like boobs. haha….great project! i plan on trying this soon!
Wonderful craft! I shared on the Norcal Ace Facebook page.
What size of boob light did you use, 11, 13,15 inches? Or would it matter? Thanks Cindy
So beautiful 🙂 I was also wondering, since I have a deck, have you got any suggestions for keeping this upright without hammering it down? Thanks and amazing inspiration on this site x
Hmmmmm. Well, if I was going to do it as a stand alone, I would increase the size of the pot base and I would mix concrete and pour it into the pot with the rebar in the center. Once set, I would cover with soil and hope it wouldn’t tip over ;).
How did you get the top planter to be straight? How do you keep the water in the bowl when there is a hole in the bottom of it? I love your idea and would love to give it a try!
The light globe on top holds the pot upright. The rebar is slightly raised in the middle of the light globe and the DAP Household/Aquarium glue around the rebar (with some caulk) keeps it water-tight.
I absolutely LOVE this!! Is there any way to print out the instructions…I will never be able to remember it all!! Thank you! I am looking forward to other projects!
How hilarious that you call that a boob light! When my son was a newborn he would focus on the light in our bedroom. We jokingly call it the boob lamp because he was breastfed. We assumed he was gazing at it longingly 🙂 I love this. I’m looking for a cheap bird bath for my yard. I’m surprised, though, at the price of terra cotta pots. It’s almost cheaper to just buy a bird bath.
I adore this project! I really want to make one but I live in an apartment so it would have to go on the balcony. Do you think there’s any way I could make this work without the ability to hammer the rebar into the ground? Any ideas? Thank you!
Thank you for the wonderful tutorial. I made 2 of these for our mom’s for mother’s day. I have seen them around town. You are an inspiration. Our moms loved them. I replaced the light bowl with a clay saucer for the bird seed and it worked great.
Just wondering….what keeps the top pot from tilting like the others? I didn’t see anyone mention what did, but I may have skimmed right over it 😉
The globe light fixture on the top keeps it from tilting.
Thank You!
just found your blog and this is so pretty thank you for the idea and the material list. looking forward to seeing you more often now. blessings from southeast iowa
Quite a refreshing idea for a bird bath. Your creativity level is above normal.
Hey Beth. this is super cute and very clever!!! I wish I had saved my boob lights from my kitchen remodel! hee hee!!!! 😉
I showed this to my husband when I first saw this and he happily agreed to let me make it for our garden! We went to Lowes this afternoon and purchased everything we needed. My only problem was my 4″ pot’s hole is too small for the rebar we bought so we’ll have to gently drill it out. My Lowes was more than happy to cut the rebar as well! Can’t wait to put it all together tomorrow.
Hi, we had the same problem. We simply used the rebar as a sanding tool and rotated it back and forth. It shaved off enough to let the rebar in.
LOVE this! I’m going to try this one for sure!
olha q fofo e fácil….
I’m working on building one of these for my patio, but when I brought all the pots home and took a second look at the picture, I realized that the top pot measurement must be off. No way that pot is 4in wide. Maybe it was measured by height? This is such a cute project though!
What an excellent idea. I am passing this one to my sister who has a small garden spot and this would be perfect for her. Love it.
It’s a great idea! I love it!
I will create one to my house and wait the birds (of course!)
Hugs from Brasil!
I love the use of the “boob light”. I’ve recently noticed that reference online and now want to take my bathroom fixture down. I love how this project came together. Thank you for the tutorial.
How did you get the top pot to stay upright and not tilt to one side like the others?
My next project for my garden
Limited from gardening this year but this is one project I think I will tackle. What a cute gift idea!!
I love this idea! I saw it last night on Pinterest and went to Lowe’s and got all the stuff today!! I already have the primer on the pots! ah! can’t wait to paint on the blue!! thank you so much for sharing! I am a new home owner and now a new gardener and this is going to look great out there!
I am so excited to make this and now have my mom on board to make one too!! Super cute and oh so creative!!!
I am deffinately making these for Mother’s Day…. My Mom, His Mom and My Granny…. they are gonna love it…..
I LOVE THIS!! I’m going to attempt to make this for my mom for mother’s day…only problem is where does one find a ‘boob light’ similar to the one you used? Otherwise I found the rest of the materials. Thanks!
This might be too late, but it might help others. I found a beautiful one at a thrift store.
Great idea. I’m thinking of using this idea for strawberries. Much cheaper, and better than those expensive strawberry posts you can buy.
What a great idea. Something I can get my daughter and grandson involved…..Great idea
I absolutely LOVE this!! I’m wondering if anyone has ideas on how to assemble this with some sort of base so it can be moved? Also, since water is leaking out of the light globe, maybe attach a regular wide & shallow bowl or cute pie plate or treated terra cotta saucer to the top. The top pot would need to be secured snugly to the rebar somehow so it doesn’t tip….so maybe fill it with styrofoam cut to fit snugly inside….or a disk of wood with drilled hole in the center and glued. Just thinking out loud! 🙂
I love this design so much. I will be making one this Saturday. I am planning to run drip irrigation hose up into the pots through the same holes along with the rebar.
I can’t wait to do this!! Looking at your pictures I could swear you were in my backyard! Our fence is the same as yours, stained the same color and we didn’t stain the very bottom either!! LOL…actually we did on the first couple panels but then realized that dirt was getting into the stain and brush. This project is just too cute!!
How adorable is this?? I love it!! Trying to think of a good spot for one in our yard!
I have been doing this design for about 5 years now, I love where i can move it around my yard if i need, I did find that trailing plants look really pretty in here, Moss Roses on the bottom made it look so pretty, Just so you know,, you do NOT have to paint the clay pots if you do not want to, I do not, and i do not put a bird bath on top, i put flowers.
So how do you move it around or store it? Do you have the 2 feet out the bottom?
Hi Tracy, I don’t move mine around at all. It’s a semi-permanent fixture. In the winter, I will “unthread” the pots and store them in the basement until next Spring but the rebar will stay where it is.
Does water stay in the “boob light” bird feeder or does it drain through hole?
I used DAP Household/Aquatic adhesive (which can be used for aquariums) to seal up the gap between the bowl and the rebar. That being said, my water leaked out :(. I don’t know if I didn’t use enough or if I didn’t let the glue cure long enough. I’m going to try again and might need to do several layers with curing time between. I’d love to hear others thoughts on what else might provide a water tight seal.
Maybe caulking it
Well…I just bought the materials today and I’m pretty excited to make this project.
I purchased the flat plate bottom of the clay pot and will attempt to use that for the bird bath.
Birds like puddle deep water.
Hey,
Just found your blog by way of facebook, love it! you def have a new follower!
door251.com
Awesome idea! I’ve spent the morning shopping for all the supplies and. Any seem to find a ceramic Birdy:( any help on where I could find one would be awesome, I’ve tried joAnns and hobby lobby with no luck. Thanks in advance
Dollar tree has the little birds and so does Dollar General in there garden art department.
I found a birdie at Michael’s!! On clearance!
Dollar Tree has them too.
Beth, fantastic idea, found thru a mislabeled pin thankfully you watermarked so i could find it
keep up the great ideas, and dont let others put you down.
Dayna
I had to show Lowe’s this blog before they would cut the rebar for me. Otherwise, they said this.. “We don’t cut rebar.” Get your facts straight, please.
Sorry you were put out by it Bethany. My Lowes offered to cut it for me as I was struggling with a 10 ft piece on my shopping cart. Perhaps it’s not standard practice. I’ve updated my post to reflect this.
Perhaps a different approach to a comment could have been that you were frustrated to find out your Lowe’s store would not comply with your request. Not all stores/personnel follow the same procedure.
Beth would not purposely cause chaos between customers and nationwide Lowe’s stores. What did you LIKE about the post that attracted you to Beth’s post?
Lowes would not cut the rebar for me, so I went to Menards. Menards cut the rebar at no charge
I would love to try this for my yard this summer. (I have pinned one of your photos to my PI page; if you’d like it removed, please let me know.)
totally cute, Beth! Love the addition of the bird bath. I am featuring this at somedaycrafts.blogspot.com.
Oh I LOVE it! I made one a couple of years ago but now I want a water dish at the top…super cute and my birds with LOVE it!
Hey!! I am so excited for this project. I found it on pinterest and spent all day shopping/planning and starting this project!! have to admit I am more comfortable in a craft store than in a hardware store but am looking forward to the challenge! Thank you for this wonderful idea!!
This is so cute!! I love it!
My flower bed will be rocking one of these very soon.Best part is it’s super easy and I already have all of the supplies.Thanks
I was reading through the list of supplies and got to “boob light” and cracked up!!!!! I didn’t realize there were people (outside of my family) that called them that! Thanks for the how to on this. I’ve seen them a bunch and was never quite sure how they went together.
Very cute – love the turquoise paint!!
Found your site through pinterest…LOVE this! Can’t wait to try it in our back yard. Seems like the perfect thing to add some major impact in a small space – which is exactly what our back yard is. Thanks for sharing this wonderful idea!
I think the pots sizes are wrong isnt it 1-6″ and 4-4″ pots? thats what it looks like in the picture?
Nope. The bottom is an 8″. The middle (main pots) are 6″ and the top is a 4″ or 5″ but really you can mix it up and do whatever you want.
Wow…TOTALLY creative!! Looks like it belongs in Whoo-ville & that’s a compliment 😉 I love seeing things that are SUPER cute & VERY original!! No wonder you’re Lowe’s go to girl 🙂
THE best idea I’ve seen in a long time! love it~
love…love…love this! Great idea! so creative!
Very cute. I made a stacked planter a few years ago.
The addition of the bird bath is clever.
I found you via a pin on pinterest honestly this is brilliant and I LOVE your site! So glad I found your site! I love super clever creative ideas!
That is seriously adorable. Saw the word rebar and was curious on how it would turn out but it looks great!
Beth that is seriously the cutest thing ever! I absolutely love it.
This is so adorable and creative! I showed it to my husband and even he was impressed (He’s not the type that would typically be impressed by a birdbath).
Beth,
This is so sweet. I am going to make one for my studio! Thank you for sharing your creative and clever ideas with us.
Your Friend,
Deborah
Oh my, this is awesome! I’m showing this one to my hubby and maybe he’ll help me with one for our yard! Pinning it!
Super Cute!
This is adorable! I think I will make one for my front flowerbed thanks for sharing!
Seriously? I love everything about it! What a fun and colorful project for your patio! Gosh. It’s adorable.
So cute! May have to use this idea when I get the bush pulled out in front of my house.
Awesome!
I love it, Beth! Adorable and whimsical!
This is so fun, pretty, and functional! Those birds will be bathing in style!
Oh my gosh Beth that is adorable. I pinned it. Way to go above and beyond!
This is so cute! What a creative idea – thanks so much for sharing!
That is super cute!!! I love the paint color and the little bird. Now watch – this will have started a new blogger trend “how to reuse discarded boob lights” ; )
Great reuse of those ugly boob light globes. May get me to take down the last one I have and complete this project.
Oh my goodness this is the BOMB! LOVE it. When I saw the picture, I was like, “how the heck did she get them to stay like that?” then a big “ahaaaa” when I saw the rebar :O)
Pretty! I love those kinds of flowers 🙂 Great color you chose too
This project looks adorable – so bright and cheery! And I really like that you’ve found a use for the globe from the boob light.
BETH…this is adorable! I love it! Thanks so much for sharing!
I love this!!! Seriously the best one I have seen. Darling 🙂
A-dorable!!! and love the recycled boob light!!!!!
This is so stinkin’ cute! I absolutely love it! I can’t wait to see pictures later in the season when the flowers are overflowing ! Great idea Beth! I’m tweeting, FB, & Pinning this one!
Brilliant! Not only is this such a cute idea, I love the hit of turquoise. If I were a bird, I’d appreciate the fancy spa treatment you’ve got going on!