

Tips for Creating a Gallery Wall
Today we have Emily A. Clark designer extraordinaire with us to continue our discussion on How to Create a Gallery Wall. I think you’ll find that her approach has some similarities to Shelley’s but her technique is also quite different….which is what I love! This series is about gleaning tips that work for YOU and your style, not about following a bunch of rigid rules.
However, one rule remains true: gallery walls require an artistic eye and hands down Emily has one, or..er…two! Here is just a small sampling of those artist-eyes hard at work:
Make Your Gallery Wall Personal
I’m a big believer in creating gallery walls to fill lots of wall space without spending lots of money. It’s also a wonderful way to mix personal momentos with pretty pieces of art.
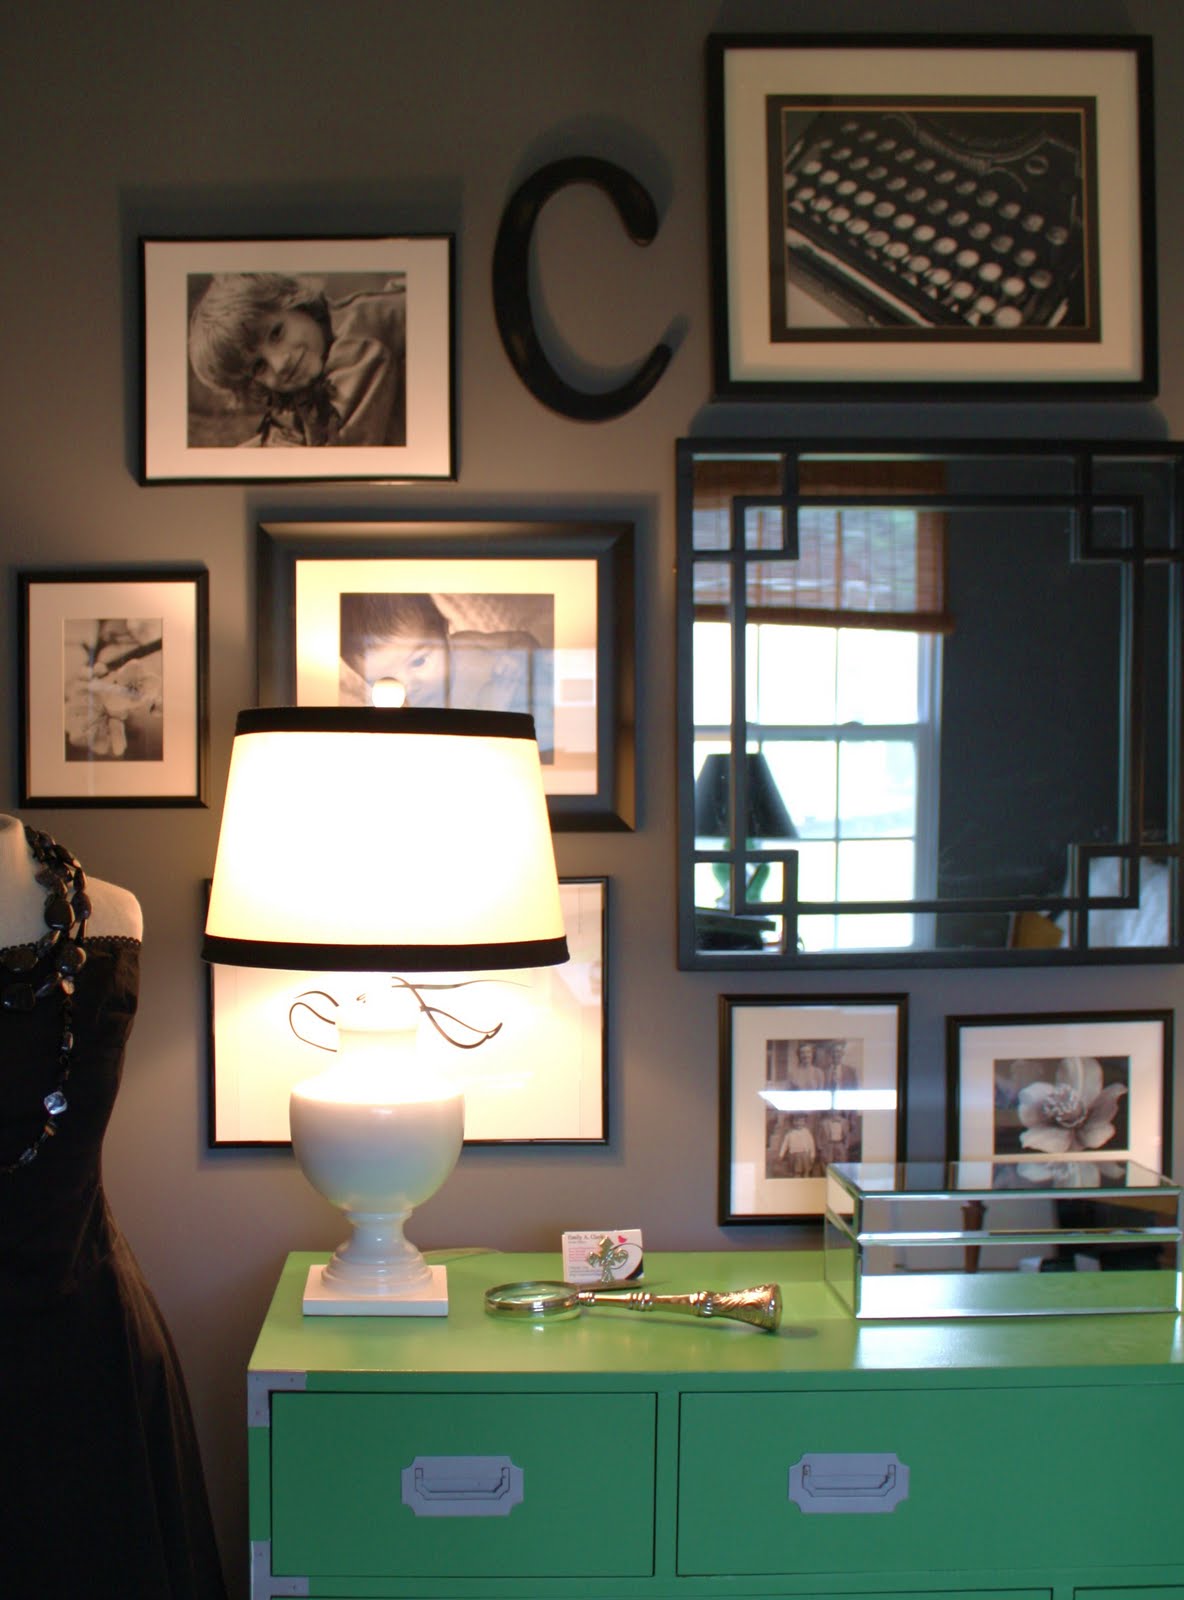
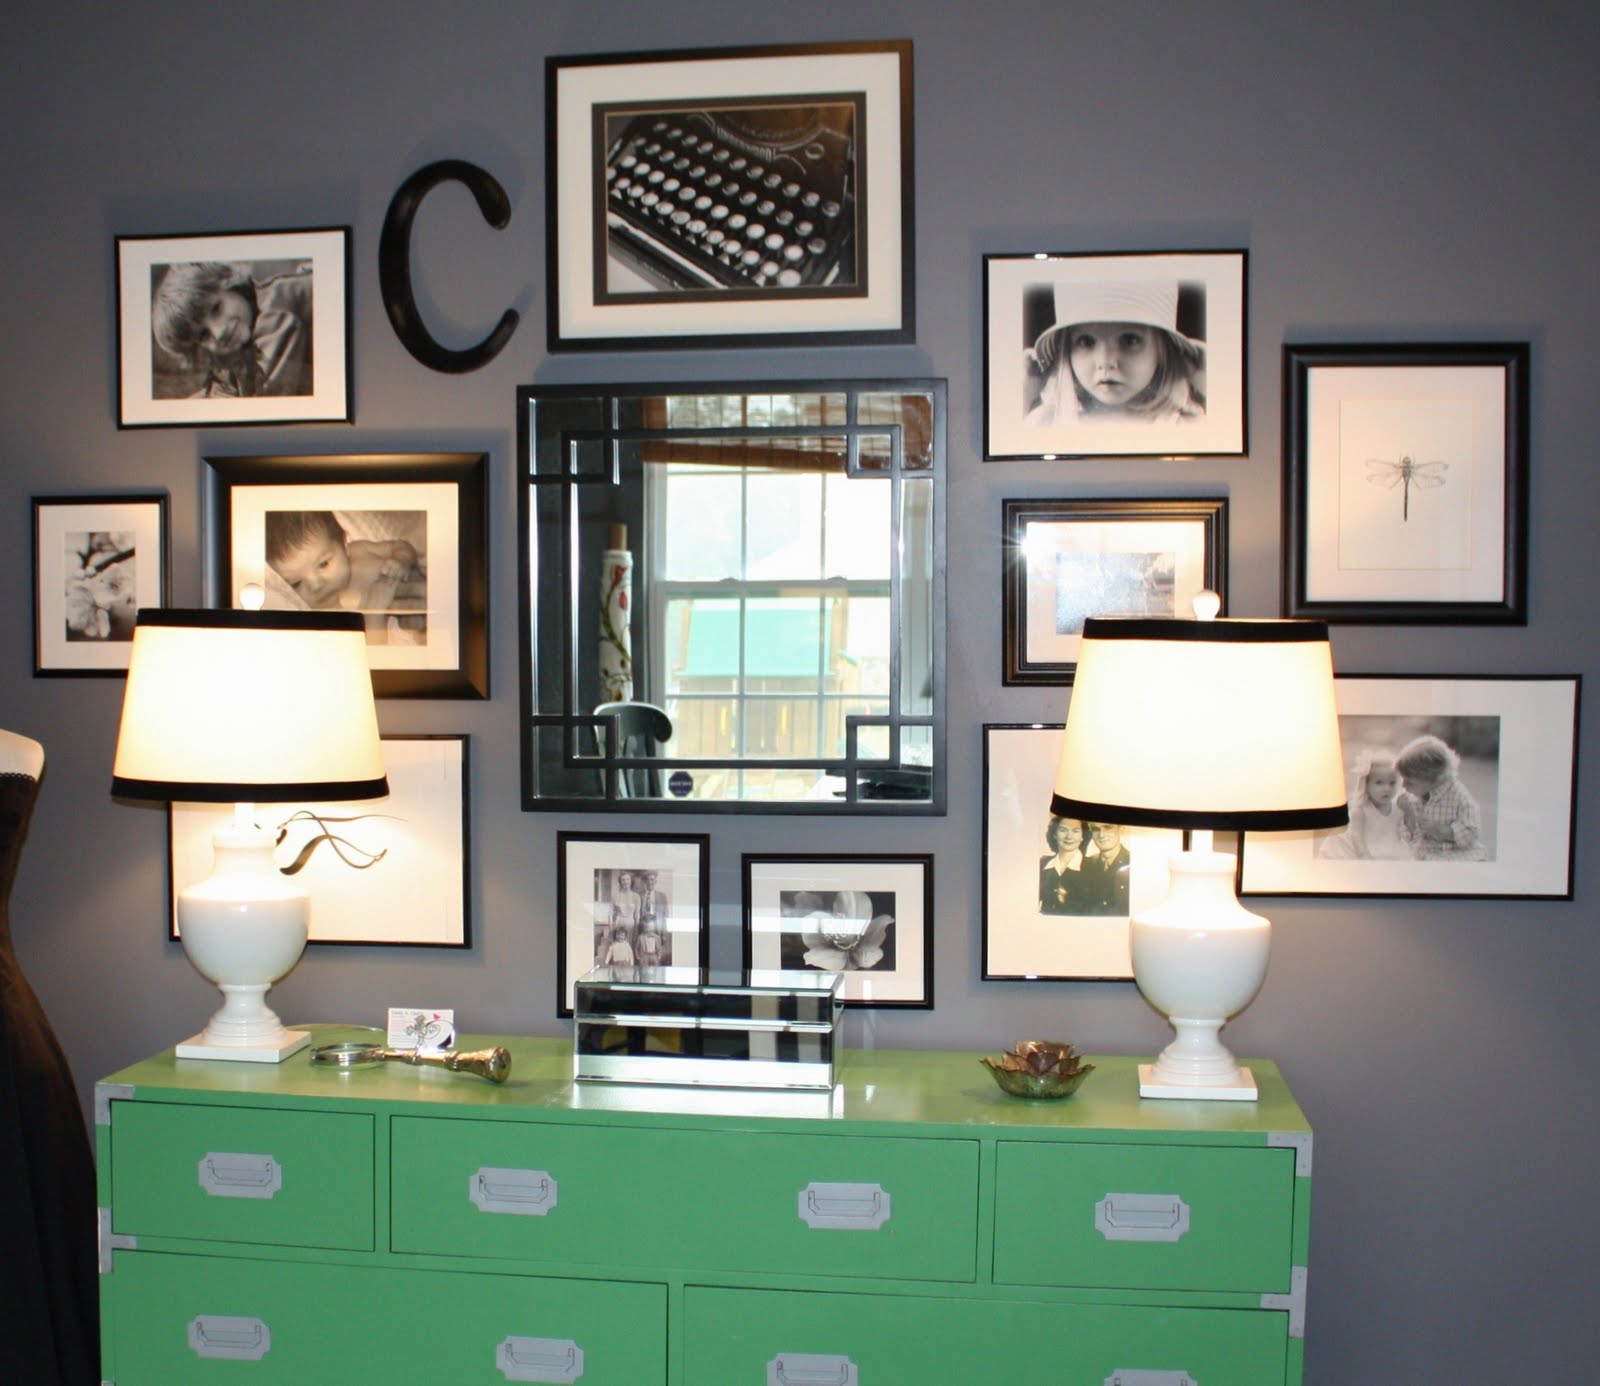
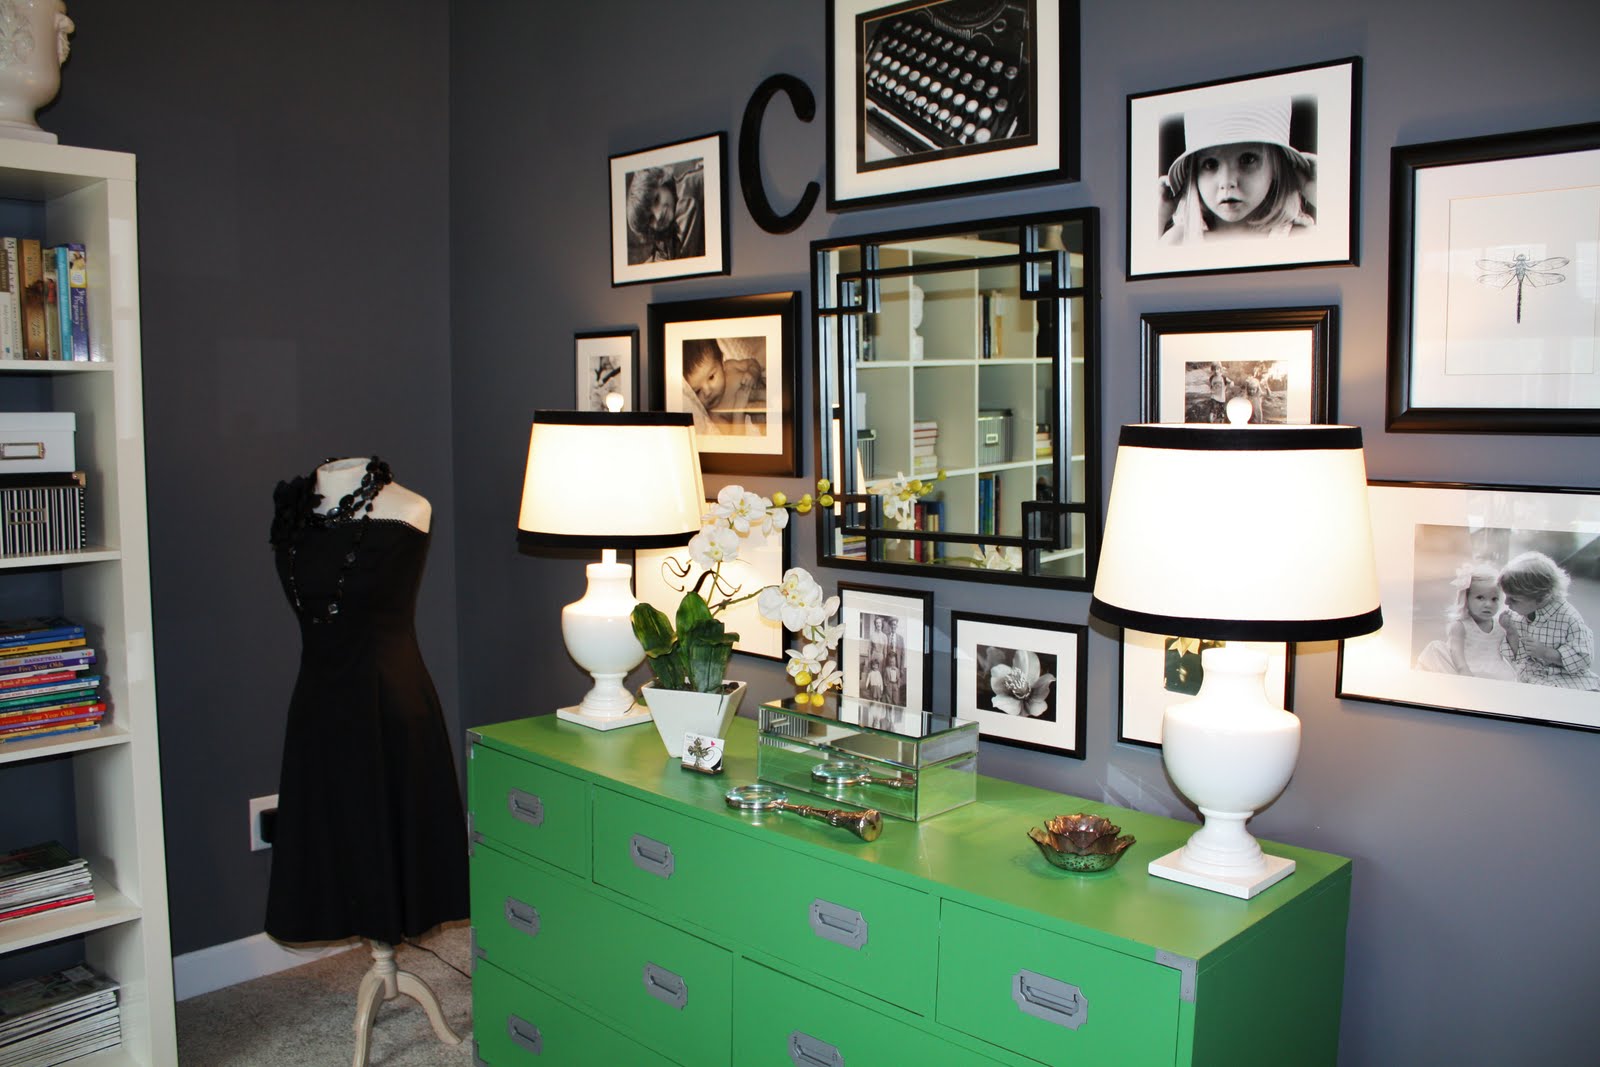
Last year when I designed our home office, I decided to include a gallery wall and documented the process. Although there’s no right or wrong way to arrange the elements, this is how mine evolved.
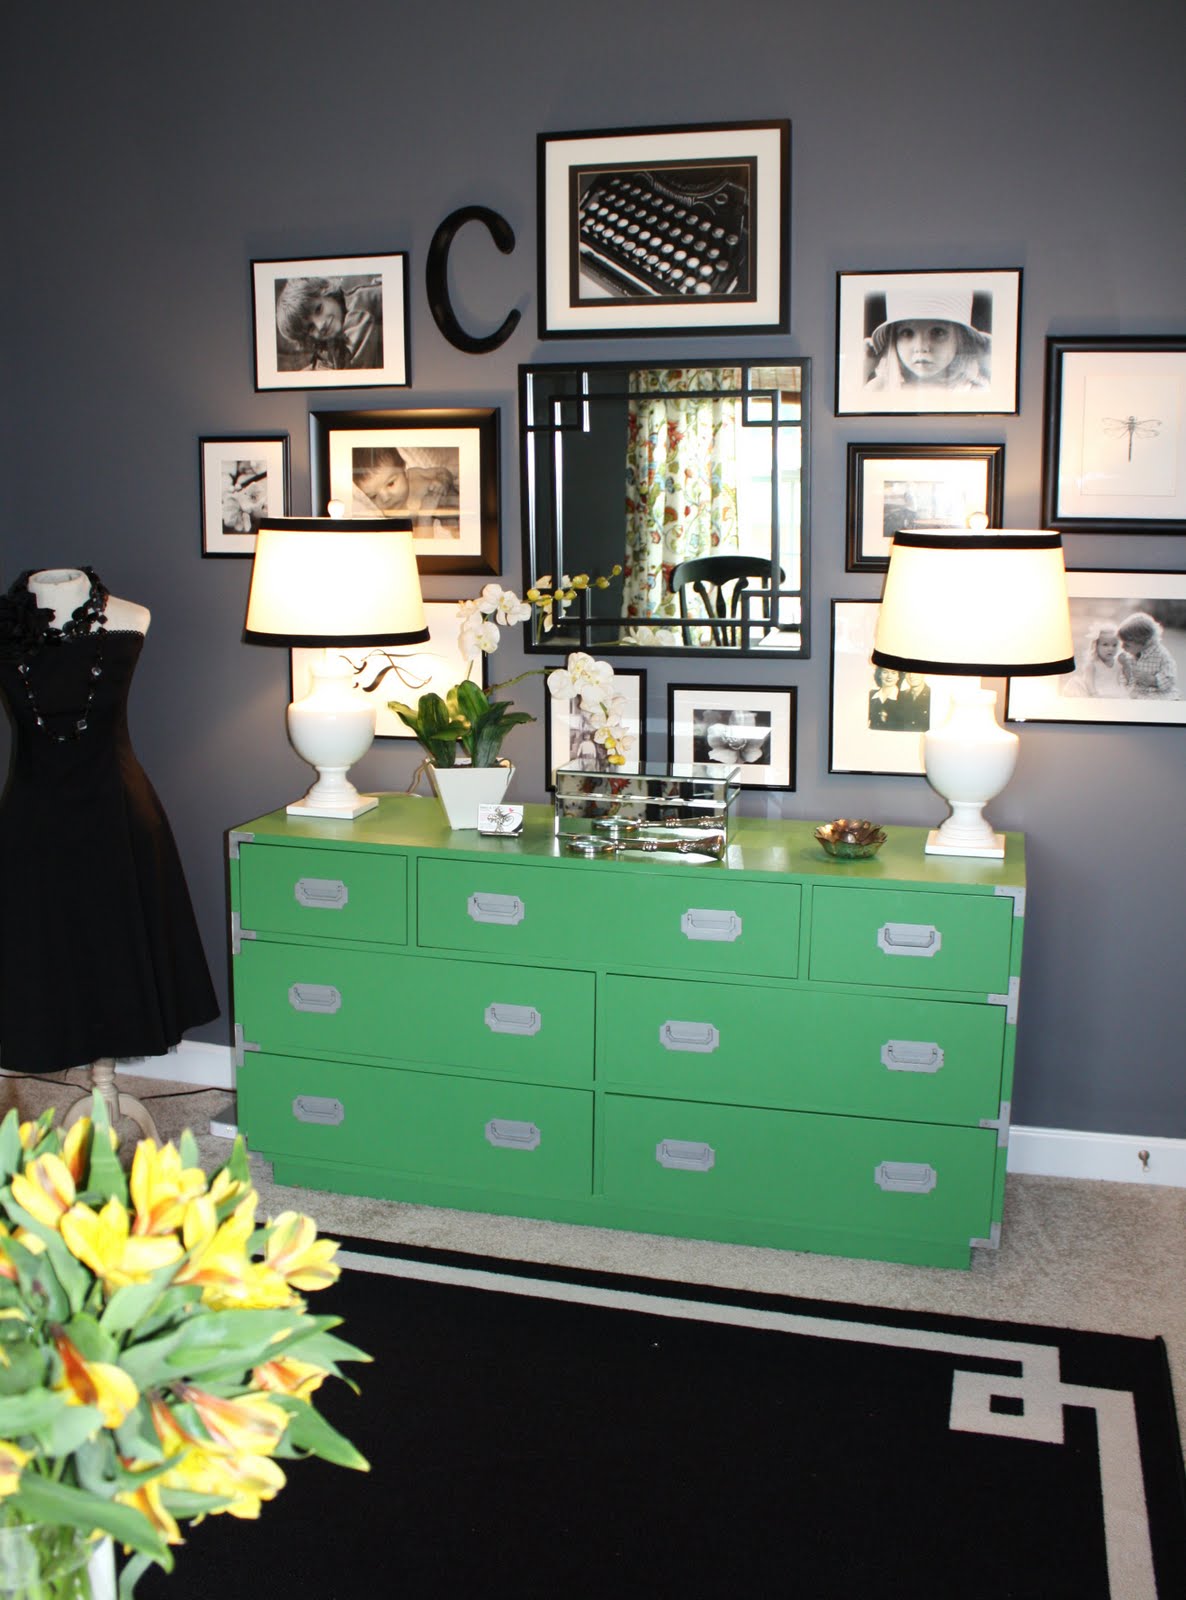
Gallery Wall Tip: Start with a Focal Object
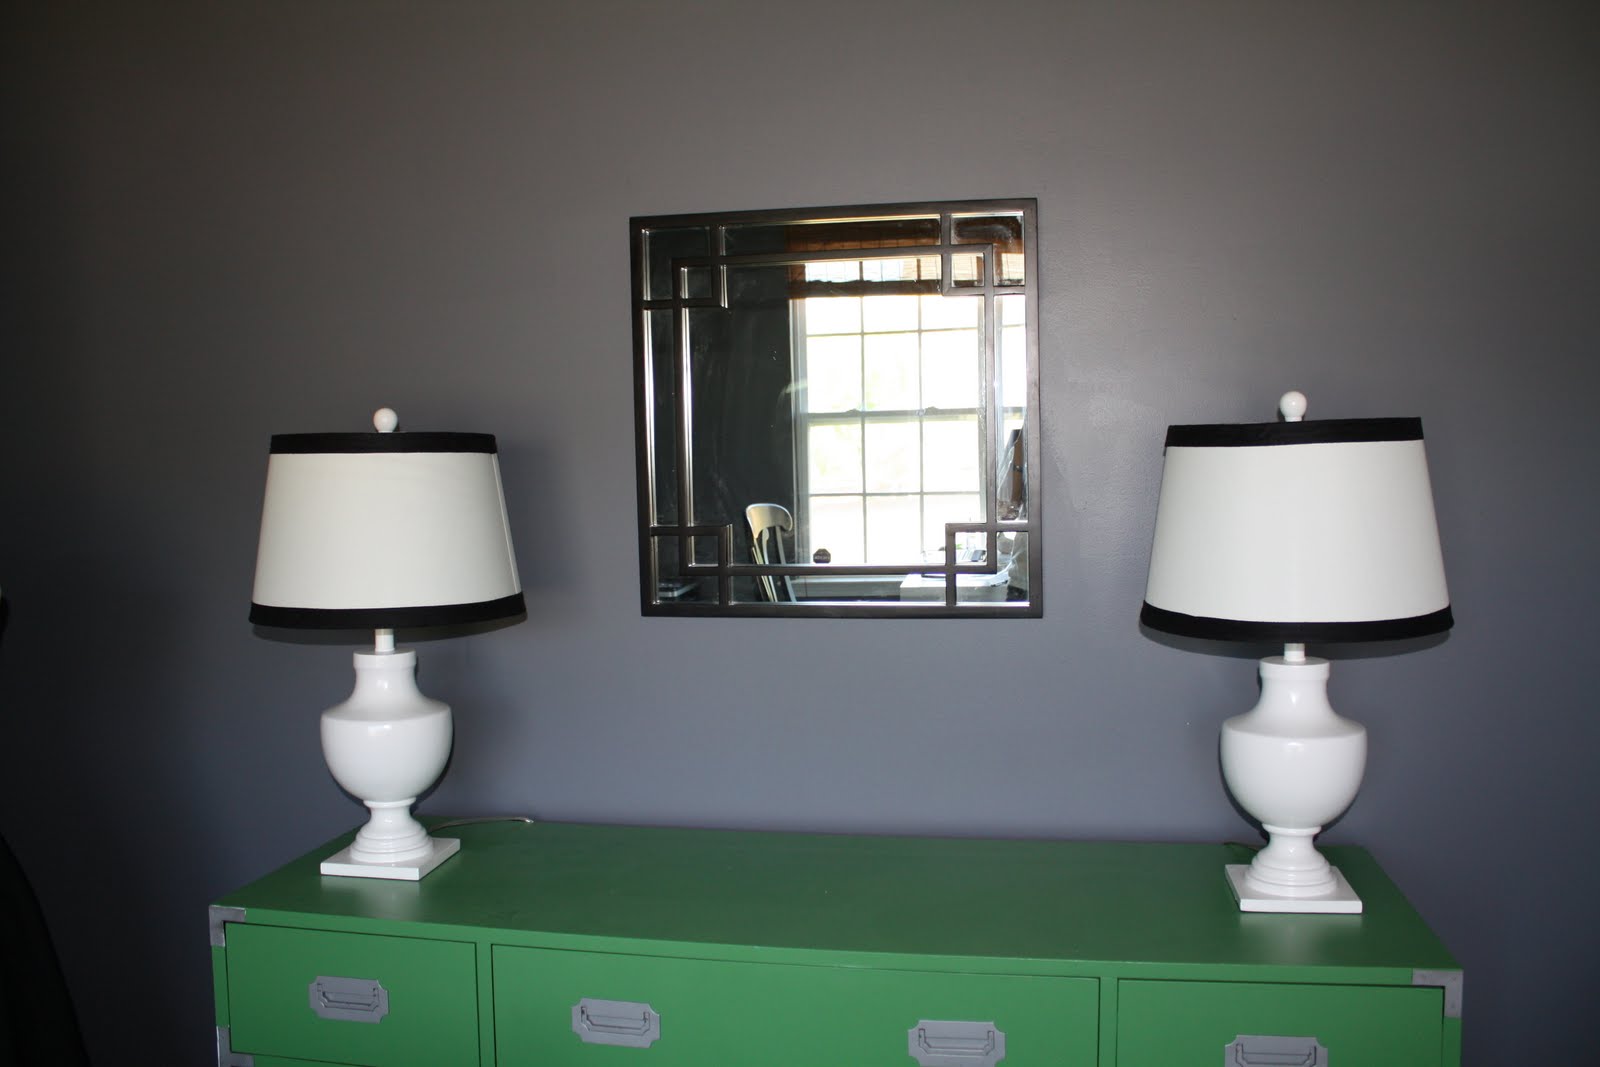
I started by hanging this mirror smack in the middle. It was a HomeGoods purchase that had been sitting around, not being used, for way too long. It was small, but I thought a mirror might lighten the dark wall up a bit:
Hang Items in a Pattern
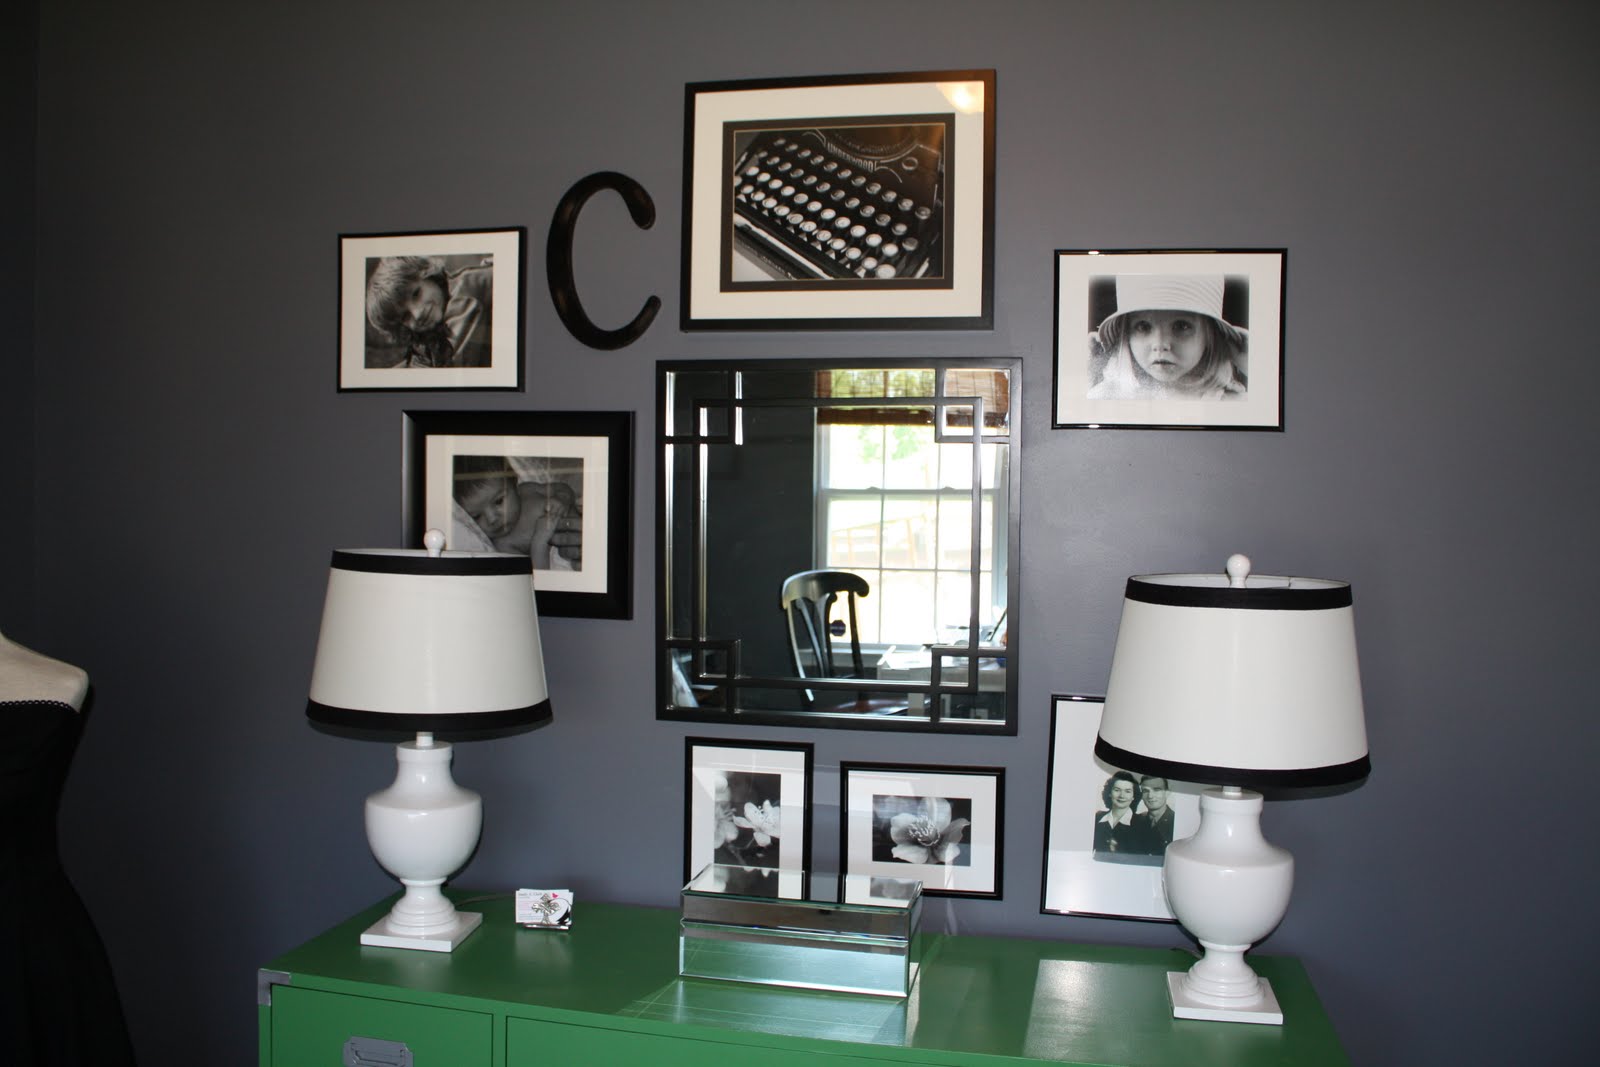
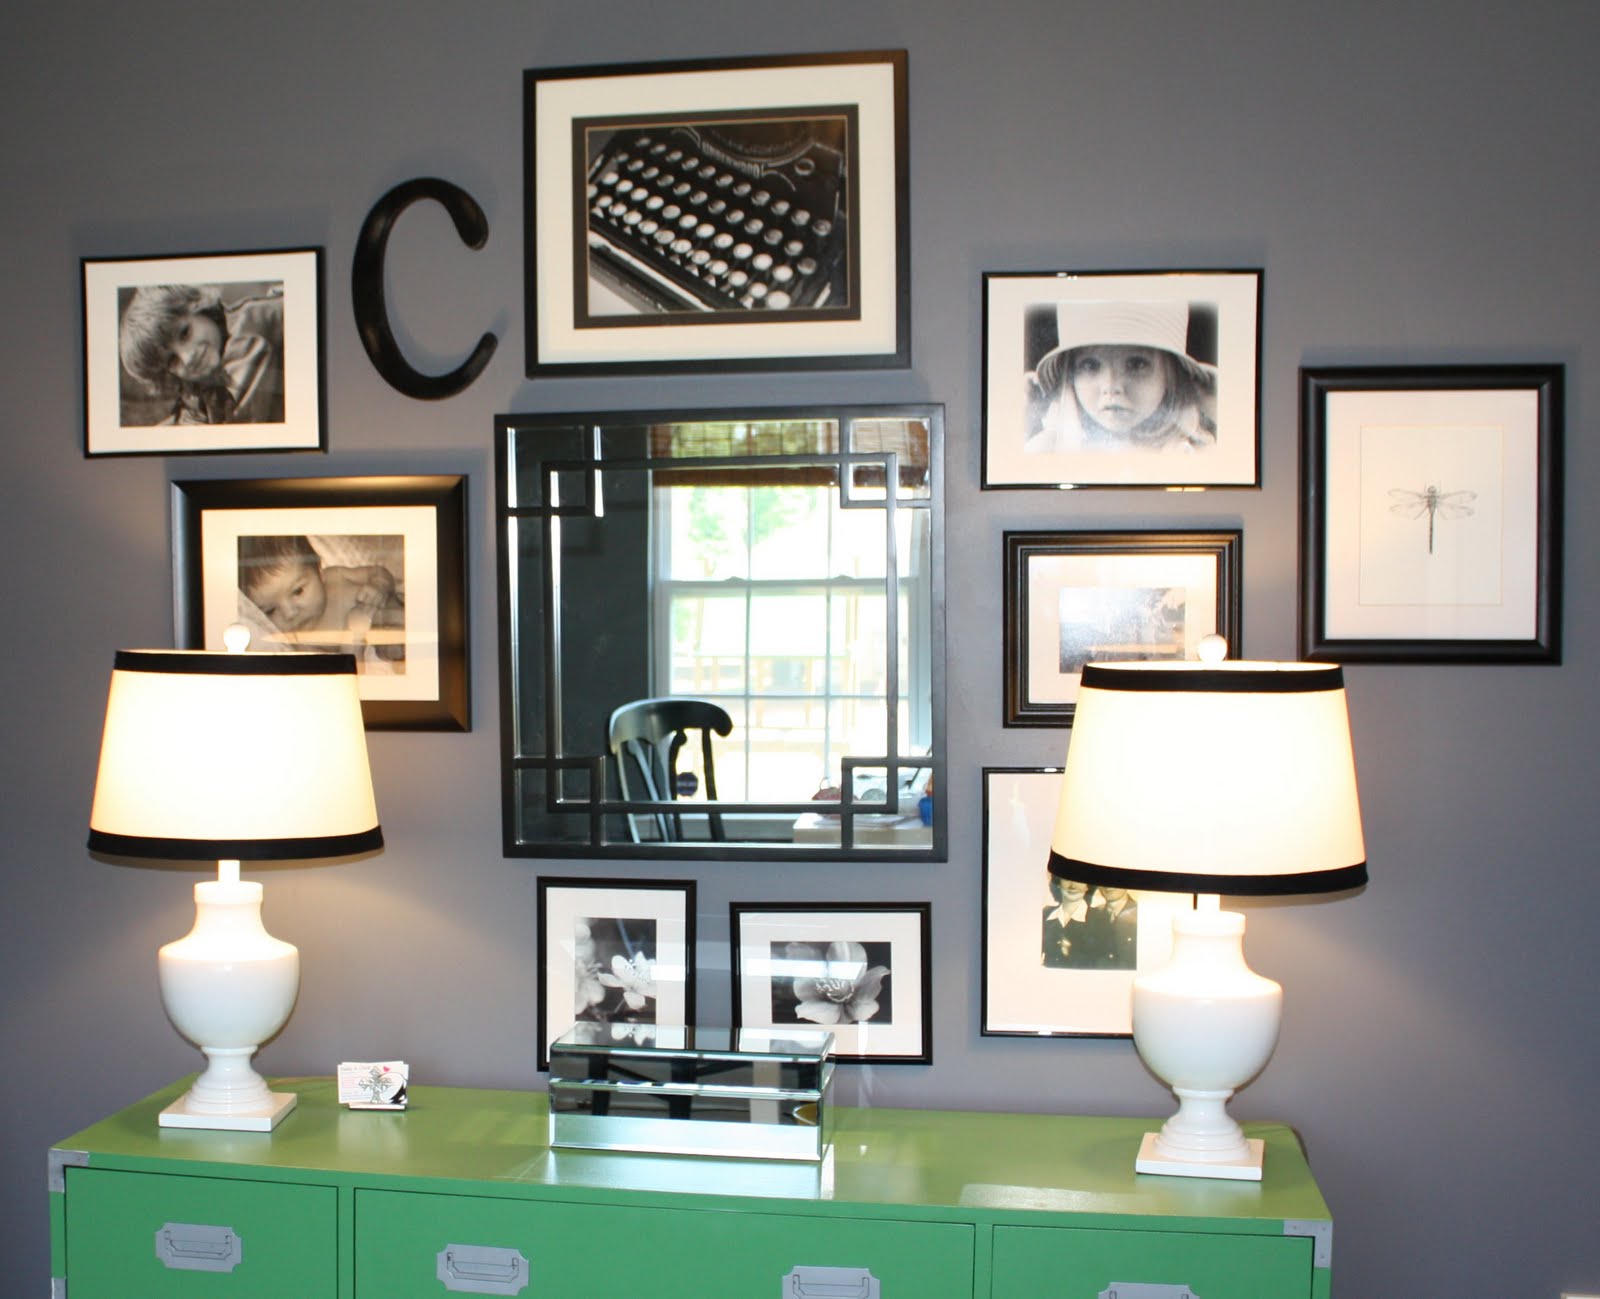
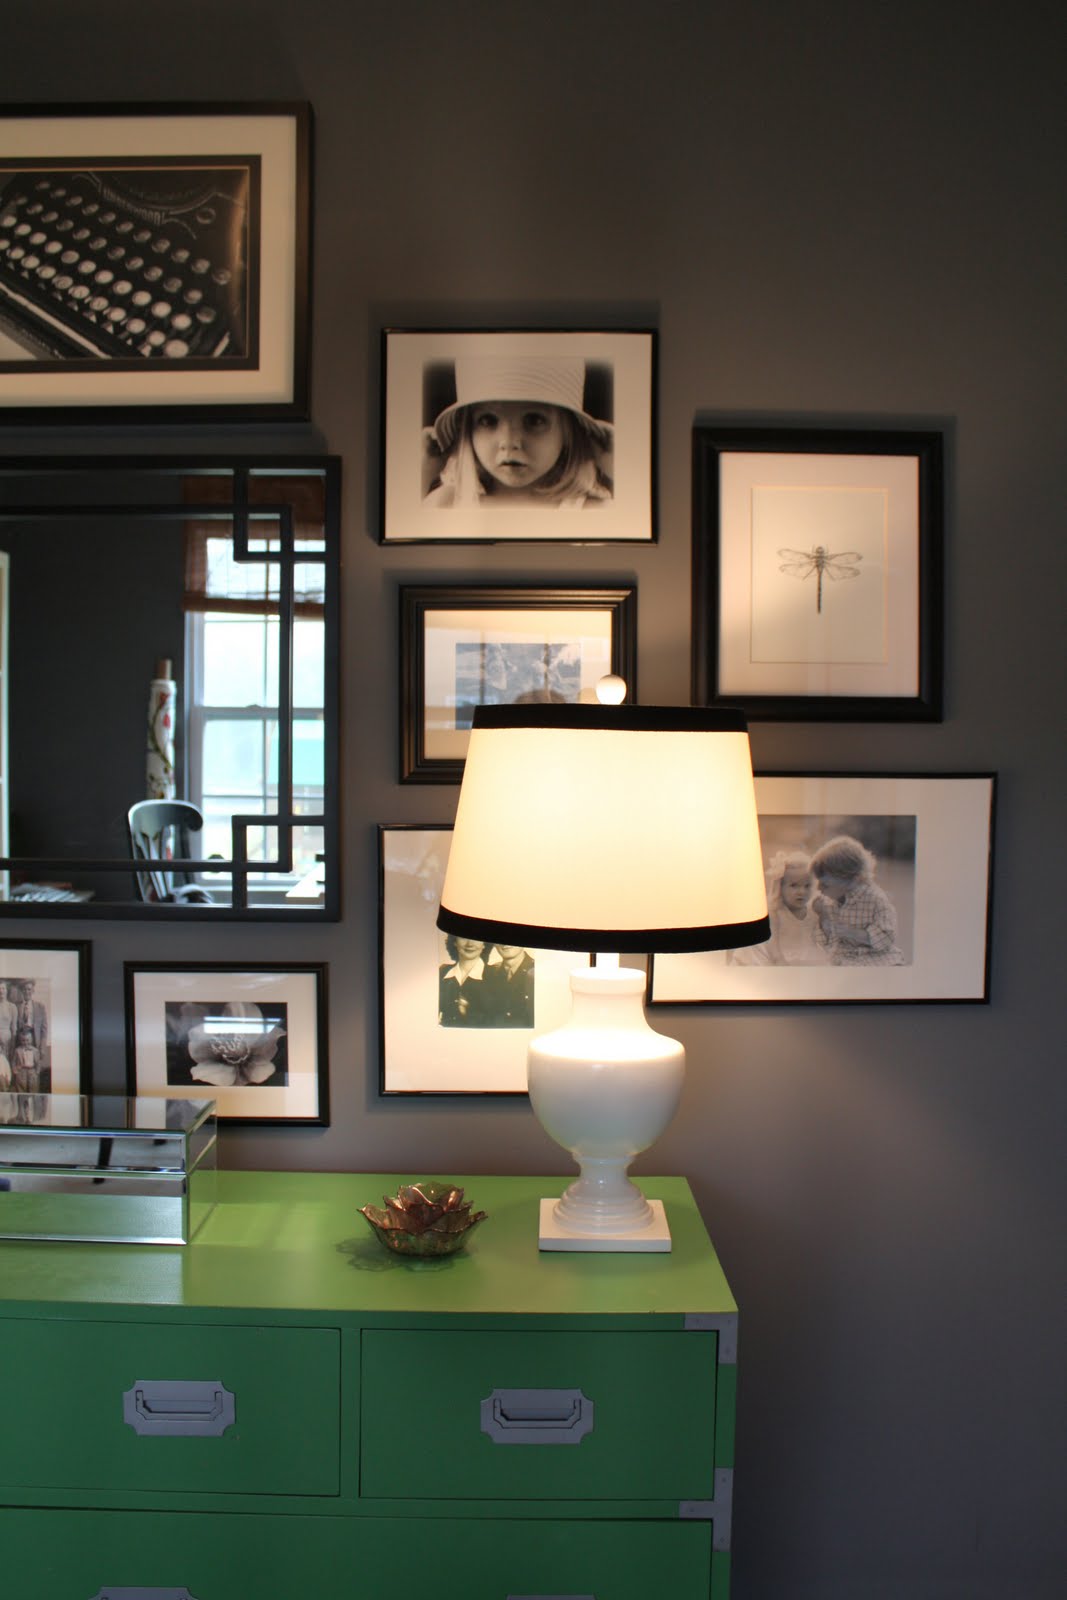
No rhyme or reason here. I chose my next biggest frame (a beautiful vintage typewriter photograph) and hung it above the mirror to add some height to this display. Then, I chose three of my favorite photographs of the kids and started working my way out. I also like mixing in unexpected elements–like the “C”–to add interest.
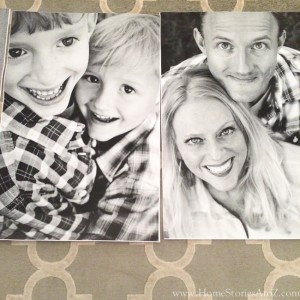
Collect a Mix of Photos and Art
Start in Middle of Wall and Work Out
Related Posts


This gallery wall is beautiful! I love the paint color on the wall–would you mind to share the kind and paint color name? It looks like the perfect mix between blue and grey.
The wall collection looks great. I love the green cabinet, too. Can you tell me where it came from?
Where did you get that rug? I love it!
I adore photo gallery walls, and I love seeing the process! Thanks for sharing. I’m not one to create a template; I like to just go for it, too!
Great process. I love how simple you made it to create a wall gallery. I’m going to give it a try! Thanks so much.
Gallery walls look awesome! I like the wall art very much. This post has great inspiration for us. Thanks for sharing such good creativity.
I’m a just go for it girl too! So far, it’s worked out, and for me, my gallery wall is always growing and changing!
It’s so funny that Shelley said to create a template first but Emily says to just go for it. That just proves that we all use different processes to achieve the same result and different methods work best for different work styles. Well, and Shelley was going for more of a precise look while Emily was just trying to keep things visually balanced while creating an appealing installation. Personally, I like both!