I really want a white kitchen. If we stay in this house long enough, the kitchen will turn white. But for now, I keep trying to make it work by making small tweaks. This very long post is dedicated to a very easy tweak!
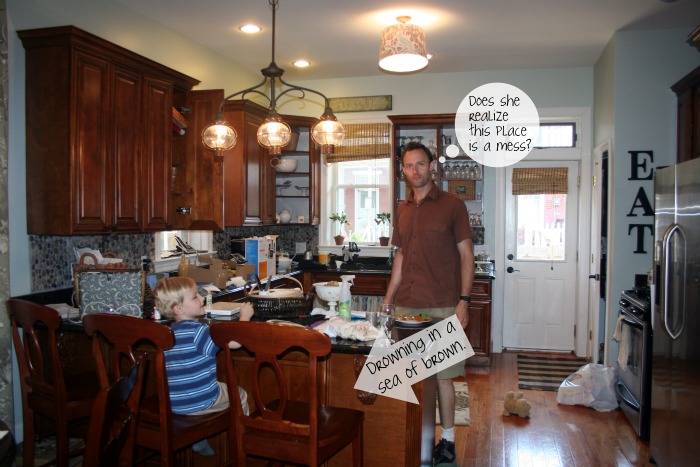
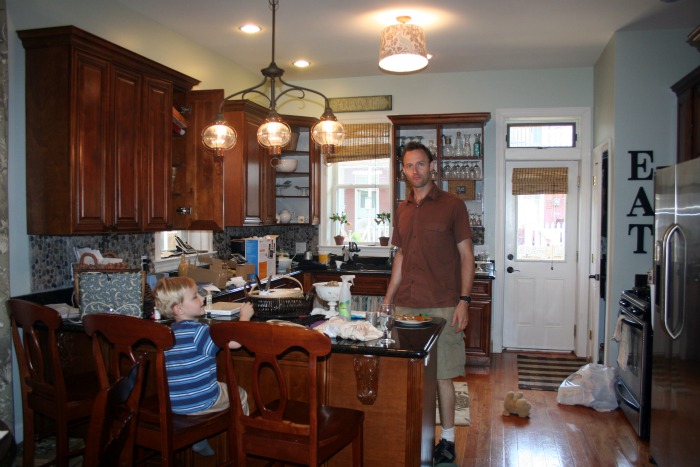
Here is my kitchen before the small tweak:
I was so proud of myself when I bought these stools online and matched them perfectly to my cabinets. But now, all I see everywhere I turn is reddish-brown wood. Blech. I sanded the stools down with my homemade sanding sponge.
And then I spray painted the chairs with Zinsser primer and Rustoleum gloss white. (Sorry for the lack of product pics, but seriously at this point there are about 8,397,403,526,763,164 tutorials on how to spray paint something white. The world doesn’t need one more.)
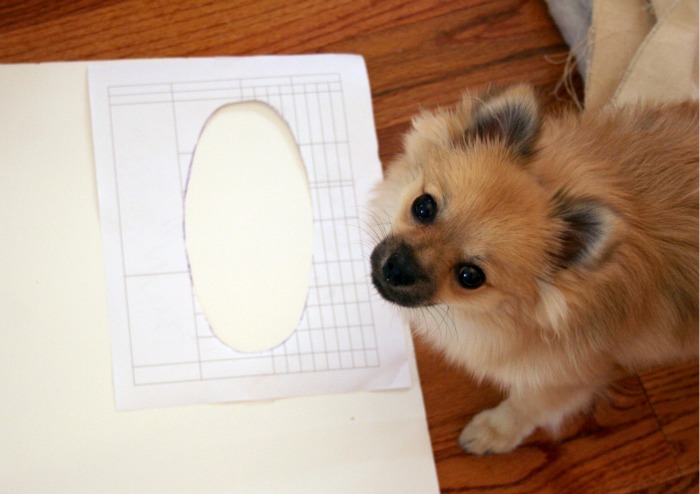
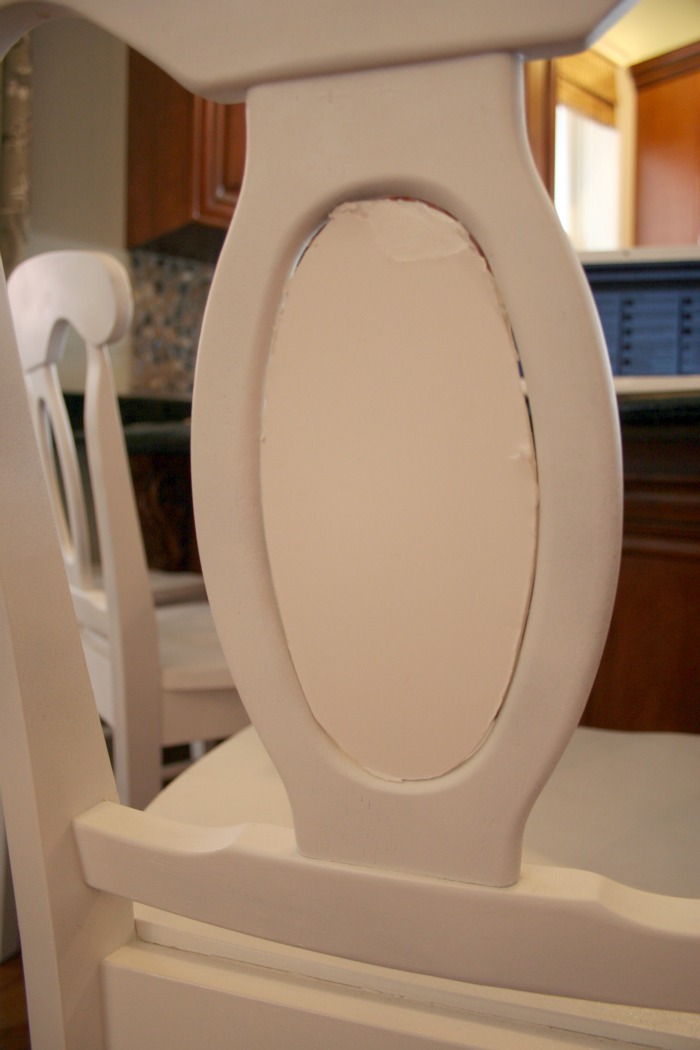
Painting them white was a step in the right direction but they still looked blah. So I decided to “upholster” the inside of the chairs! I traced the inside using a scrap piece of paper and then cut out the center to create my stencil.
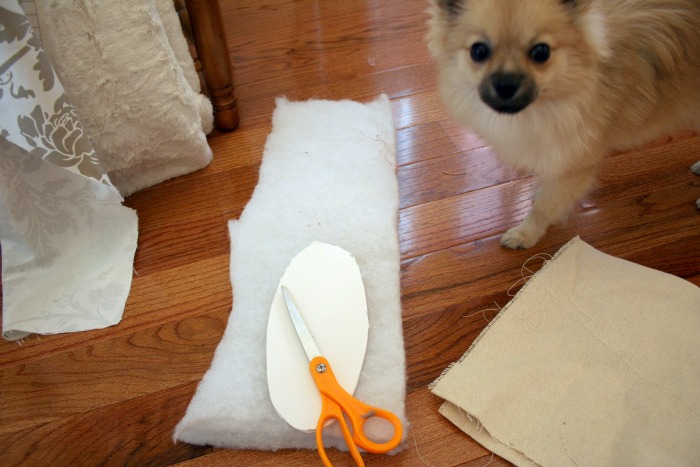
Next, I traced my stencil onto some foam board. My helper was very excited to have me working on the floor.
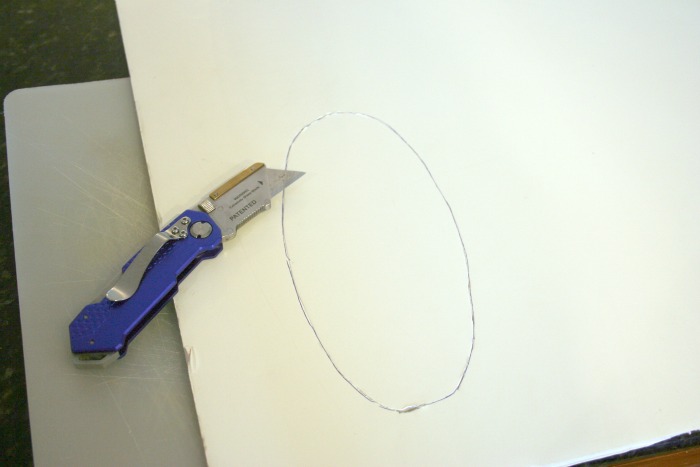
Deciding I really didn’t want to cut into my wood floor, I moved to the kitchen counter and placed a cutting board behind the foam.
When the foam is cut out, it will fit loosely in the hole. You don’t want it to be too snug.
Using my foam as a template, I cut out some batting and fabric.
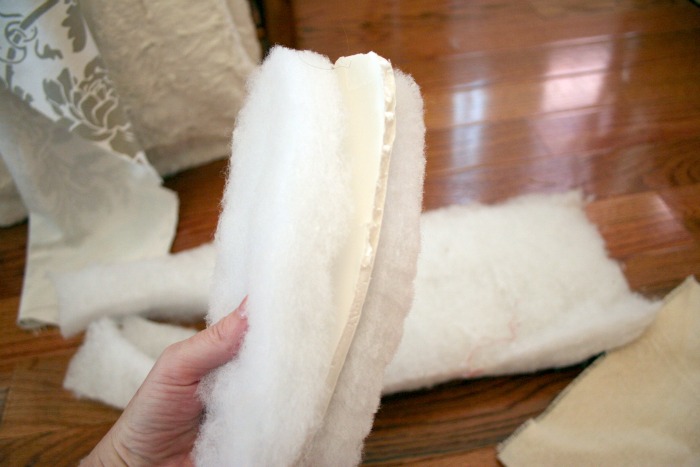
You’ll be making a foam and fabric sandwich.
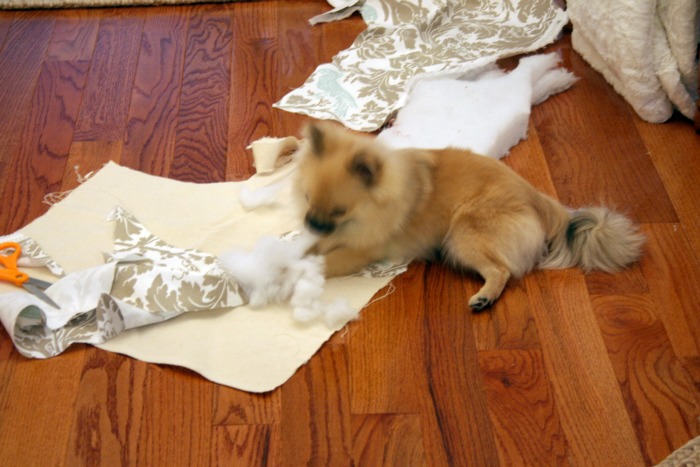
Tip: Don’t leave your batting unattended or your helper might get a bit carried away.
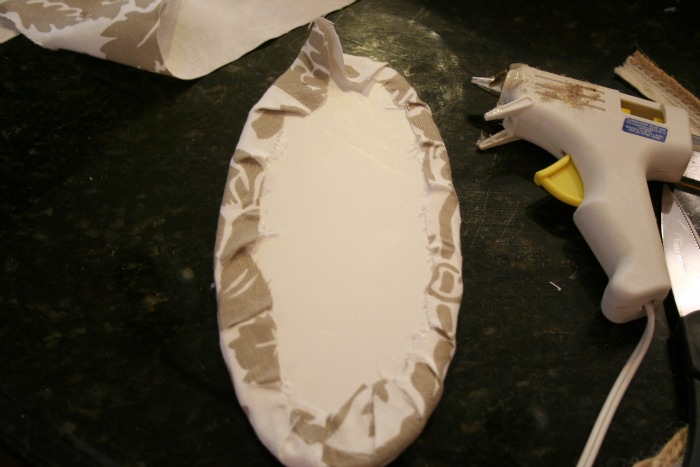
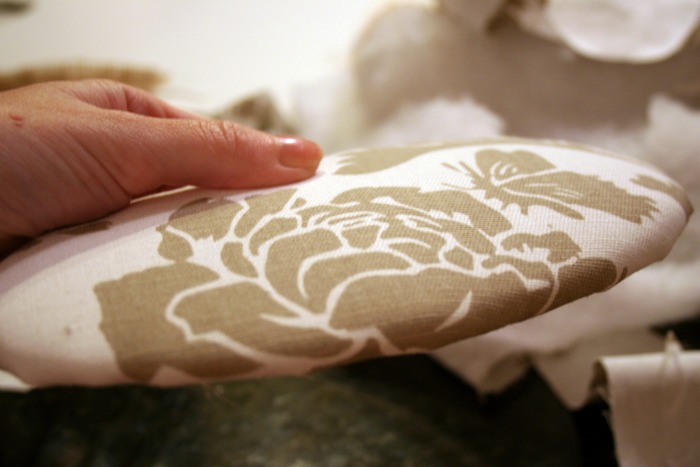
Wrap your fabric around the foam and batting and secure the fabric with hot glue. Place the other piece of batting and foam on top and glue in place.
When you’re done, it will look like a large button. Cover the seam on the backside with trim and place trim around the front of your “button”.
These will pop into place (and can also pop out of place with some effort). If you’ve done it right, they shouldn’t pop out when someone leans back in the chair.
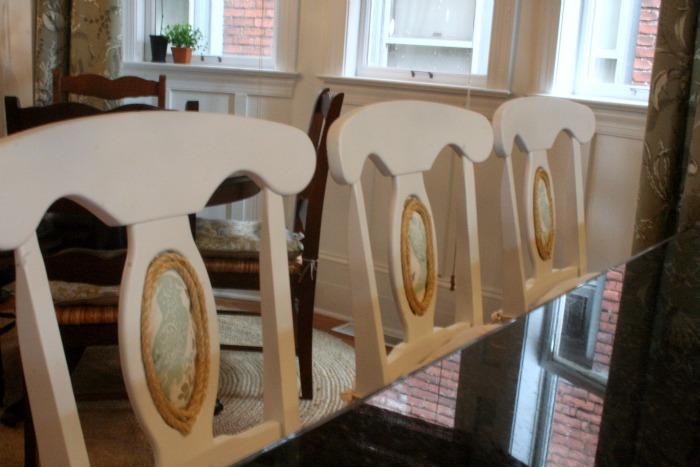
Here is a pic of the inside of the chair. I used two circles of rope on the inside to provide some extra non-popping-out security.
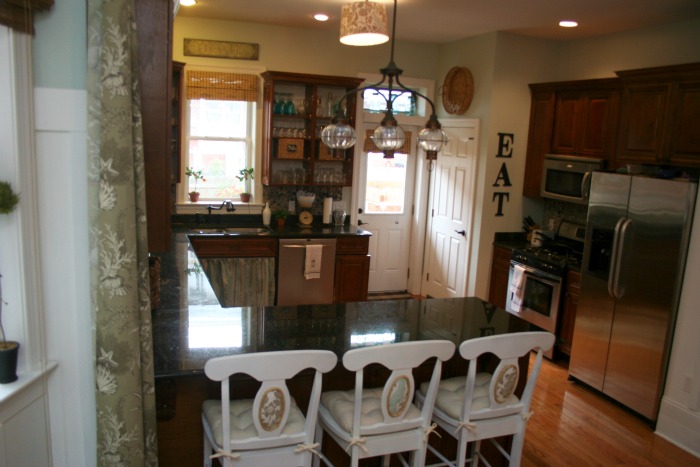
So much better! I also have some fun plans for the kitchen peninsula, but they will have to wait until I can open the windows to ventilate.
Let’s review. Here is the very messy and brown before:
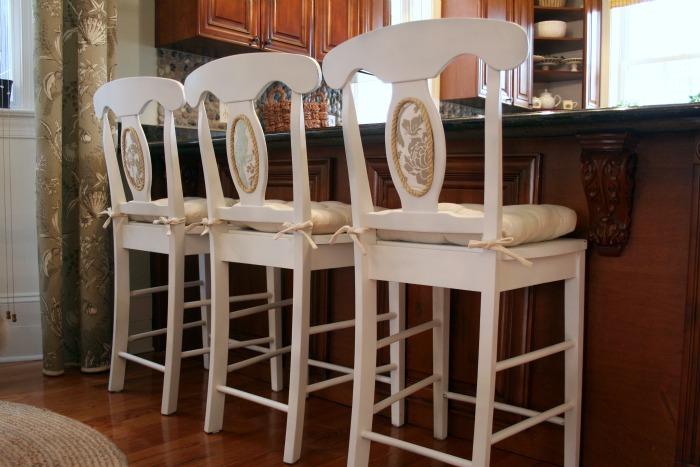
And the much cleaner and brighter after!









Where online did you find those stools? I know its been awhile now.. I have 2 of them I have been trying to find a match for. Thanks!
These chairs are beautiful and bring balance to your kitchen. It looks like you had a complete makeover!
You are my kind of woman, spray paint, glue gun and foam..Yes!!! Really well done!!! Love it!!
Your dog had me cracking up!
Very creative idea and it turned out great!!!
That little touch of white you added to those barstools made my eye take in ALL of your kitchen! It just made everything flooooowww 🙂
I’m pinning this too Litttle Bit
So cute! love it. Little Bit from DecorateWithaLittleBit.com
Adorable! So creative – I wish I had a chair with a hole in the back!
I love, love, love the chairs! I just found your blog today and have already found a few things I am going to do. But first on my list is this project! I have some wonderfully sturdy chairs but the back had pineapples in the middle (doesn’t quite fit the contemporaneity look of our house). I made my husband (notice the word made) my husband cut out the pineapples and now I just have huge holes in the back. Actually didn’t know what to do with it so probably was just going to leave it blank. But now I am SO doing this! This is a great idea!!
Hi Beth, I linked to this post today! Thanks to your post, I got the itch and freshened my bar stools up with a nice new coat of black. Thank you so much for the nudge!
http://roomtoinspire.blogspot.com/2011/08/power-of-paint.html
Chelsea
Gorgeous ! I have beautiful cherry cabinets that I love love love but u knew I didn’t want brown chairs to go at the bar do I found nice black almost the same barstools. Iwas thinking of making cushions byut it think that this little “insert” is 1)much easiersnd 2) would gave a lot more impact. I’ll shoot you an email with my beautified French country barstool.
What a great makeover Beth! Love that fabric, I’ve been eyeing it for a while for my bedroom. Like the touch of white. My kitchen is all wood too and could use some white.
Those turned out so nice! And I love the oval embellishments you did! Visiting from T&J!
I would like the name/color of your wall paint and the fabric of your window treatments. My den is so dark – I cannot bare another winter in this dungen. This is a perfect color. Thank you for your blog – I enjoy it so much.
Wow!!! So simple, but what an effect!!! You are awesome!!
I can also appreciate the change in brightness to your kitchen area. Great job and thanks for the tut.. I am also one of those who missed all the other hints/tuts on spray painting furniture (probably because I wasn’t interested in it at the time, but am now, so appreciate the link). As for that adorable helper, he just looks like he saw what might have been one of his ancestors, and was just saying hello. Too cute.
YOu and your helper did a fine job!! 🙂 ~wendy
Beth, your kitchen is looking fantastic. Love the tutorial, and your helper is so cute. 🙂
This is beautiful – I wish I could hang out with you!
Well done! It’s amazing what that simple change made in the lightness and brightness factor of your kitchen! So inspiring!
Love them! Your kitchen looks great!
Sheila
onecharmingthing.blogspot.com
FANTASTIC!!!!! This has to be one of the most brilliant ideas I’ve seen!
How pretty!
I love the blue bird on the fabric! Great job!
Your kitchen is really nice, I especially love the light fixture, is it vintage?
Ha! I was cracking up at your hubby’s expression! I seem to see that face at my house too. “Oh No”! I LOVE your hanging light over your penisula. Where did you find it? BTW- the chairs are great!
I made them:). http://www.homestoriesatoz.com/2011/05/diy-lantern-light-diy-light.html
Wow, these chair look beautiful! Foam board is probably in my “top 5” most useful items in the world. I love it. Oh, and THANK YOU for sparing us yet another “how to spraypaint” tutorial – that made me laugh! 🙂
I don’t know how recently you did this but I’m curious how it is holding up to everyday wear and tear. Definitely like the contrasting white stools with the dark wood in your kitchen.
There are a few dings where the boys bang the chairs together at the top, but so far so good. Yes, if you paint hi-use furniture it will ding and nick (which is one of the reasons I haven’t painted my kitchen white yet) but so far so good!
Oh my gosh. You are ingenious. So clever and creative. I absolutely love it. (I am also slowly working my way towards a white kitchen. 😉
I love this, it looks so much better! Not so match matchy. Love your little helper, I can see how it may get carried away 😉
Xoxo
Kristina
@Pearlgateway
These look Amazing!
Thanks for such a great tutorial!
xoxo
They look great Beth, I’ve been contemplating something similar for my barstools.
You’ve done a wonderful job! The fabric is adorable.
What a great idea! The look great…I have the fabric you used…love it;)
wow, LOVE this – so creative, great job!
Very cute! I love your kitchen!
Wow! Love how they turned out and how they look against your darker pieces in the kitchen. How clever on the backs!! Your helper is too adorable!!
This is such a great idea Beth! Love how they turned out. I too dream of having a white kitchen. . . someday. 🙂
I have the same chairs and could do this….what a clever idea! Lurve it.
They look great! I love that fabric and using the rope!
I hit submit before I was finished! lol I have that same fabric and I just love that too!!
Lou Cinda
I’m done now 🙂
Beth, this looks GREAT! I love the chairs white and I love the middle upholstered! Great idea
Hi Beth-
The chairs came out great and truly add a nice contrast now to the wood tone cabinets. Such a little tweak, but a huge difference. I have a little helper who likes to lay on my fabric that I am working with, too – but he is a cat. He loves the camera and I swear as soon as I get it out he is right there – ALWAYS. Gotta love him. He is also the one that ate a fabric covered button off of my work table. He ended up having to have it surgically removed along with a $1,200 vet bill.
My best- Diane
FAbulous idea, I love them. Such a great idea. Hugs, Marty
I love the way the white chairs look in your kitchen. I have the same problem- brown everything! I’m currently making new curtains and pillows to brighten up the family room and kitchen.
That is much better but your kitchen would really be fabulous painted white. The shape of it is so nice…white paint would make it a stand out. You know this….but oh…I’d love to see it.
Me too!!!
That looks nice. It really brightened up the space.
I LOVE your cute little helper 🙂
I love the fabric inserts but I think the chairs being white makes a huge difference! {I love the drum shade light in the kitchen too!} Great job! 🙂
I love it!
And i love that it isn’t permenant, either, so you can change it up if/when the mood strikes you.
And, your Helper is a fluffy ball of extreme CUTE. 🙂
Great idea!! 🙂 Love love love your little helper tearing things up!! 🙂
These look great! I’m lovin on your little puppy! She/he’s so cute. I have a Pom that looks like a white version of that. Same expressions.
Okay three things:
1) Your kitchen looks very much like mine with all of the brown! (I am presently painting my cabinets white to get rid of it
2) I LOVE THOSE CHAIRS!!! I need to do this to my dining room charis
3) Did I see a Pom? LOVE POMS <3
🙂 Thank you for sharing this awesome project!
Love the idea! (And love you little helper too!) Tip- using an exacto knife works much more smoothly (and less dangerously) on foam core than a box cutter! Chalk it up to three years of model making in design school 🙂
I love your homemade sanding sponge. Great idea! And I really like the chairs. But, what I came to comment on was your dh’s facial expression. In our house, that looks means “Oh no! What the heck is she thinking about changing next?!”
-Brittany
just the right touch!!! love the white contrast!
These look wonderful! I agree the white is a great improvement. Love how you centered the bird from the fabric so nicely on each chair 🙂 Attention to detail is obviously your forte!
These chairs turned out great. Your helper ripping up the batting made me laugh out loud 🙂
Beth those chairs are gorgeous!!! Very clever idea!
OK…I missed the first 8,397,403,526,763,164 tutorials on how to spray paint chairs! Darn it! I want to paint mine black and distress and then put new fabric on the seats. I love all your ideas and tips. Love your idea for the sandpaper and your suggestion of spray primer and paint manufacturer. Can you please point me to a good tutorial on the painting? I’m not sure where I should do it, how I should prepare the area and a good technique. I’m so afraid of runs. Any help would be grateful!
Ellen
Here’s a good tutorial that Sarah did on chairs: http://thriftydecorchick.blogspot.com/2011/05/its-black-its-white.html Also check out Kate’s blog. I’m sure under her Project Gallery she will have a bunch of spray painting tips.
Genius!! They look amazing in your kitchen! 🙂
Beth that made such a huge difference! I think they look great! I can’t wait until it is cool enough to open the windows at my house – its miserable!
Very creative update on the stools!
So, so pretty! I love the transformation and I love that the outside of the middle chair has a bird on the fabric. Also, your helper is adorable.