
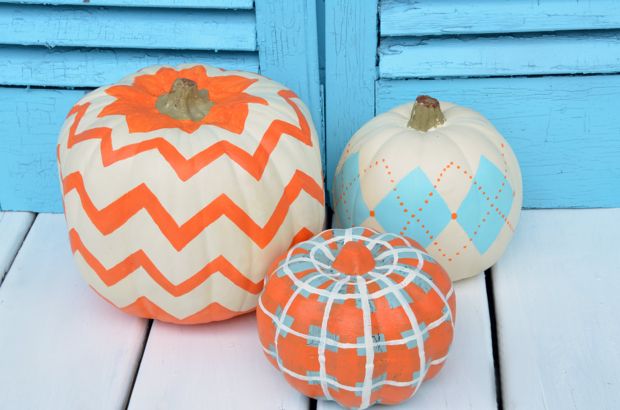
The temperatures here in SouthCentral PA are dropping in the evenings, and I am loving the chilly nip in the air. To celebrate the arrival of fall, I thought it would be fun to paint some pumpkins for our back porch. My front porch usually gets the most attention when seasonal decorating, but my blue shudders on the back porch inspired me to show it some seasonal love as well! Today I’m going to teach you how to paint chevron, plaid, and argyle designs on pumpkins in case you want to paint some for yourself.
Supplies Needed:
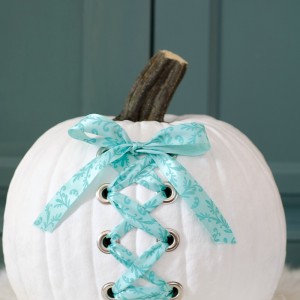
Chances are good that you have all the supplies you need on hand. I had all of these faux pumpkins knocking around in my basement. The blue crackle pumpkin was left over from a craft project a few years ago. You can read my Blue Pumpkins post if you’d like to see how I created those.
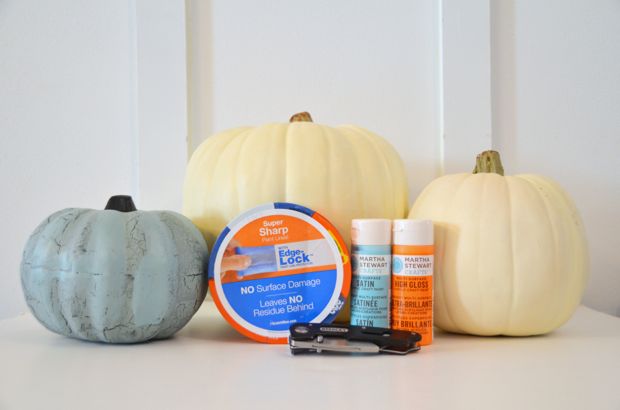
1. Real or faux pumpkins.
2. 1” ScotchBlue™ Painter’s Tape
3. Acrylic paints in your choice of colors and paint brush.
4. Scissors or utility knife.
5. Sewing measuring tape.
General Instructions:
1. If desired, paint your pumpkins in the base color of your choice using acrylic paint.
2. Use your ScotchBlue 1” Tape to create geometric designs.
3. Paint within the lines of the tape and immediately peel off the tape to reveal your design.
Chevron Pumpkin Instructions
![]()
1. Find the widest point on your pumpkin and begin placing 21/2 inch pieces of tape on your pumpkin in a zig-zag pattern. You will overlap each piece of tape. Be sure to smooth as you go to ensure a tight adhesion.Cut tape with scissors or lightly with a utility knife to achieve a sharp edge.
![]()
2. Create another zig-zag row of ScotchBlue tape but this time cut your pieces to match the angle patterned in the row above.
![]()
3. Once your entire pumpkin is taped off, paint the pumpkin in the color of your choice and carefully remove the tape. You do not want to wait until the paint is dry. Remove the ScotchBlue Tape immediately.
![]()
Plaid Pumpkin Instructions:
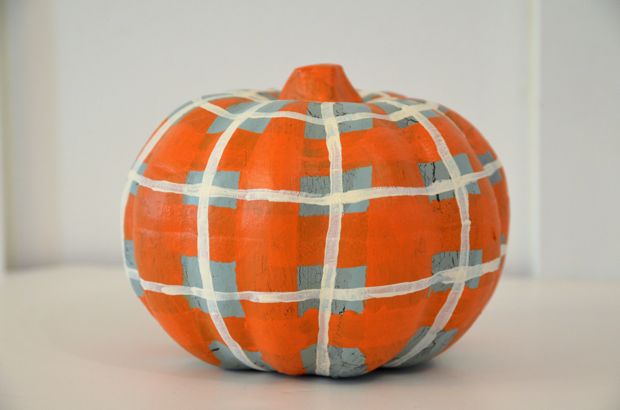
1. Follow the natural ridges in your pumpkin and evenly tape off each ridge smoothing out all bubbles as you go.
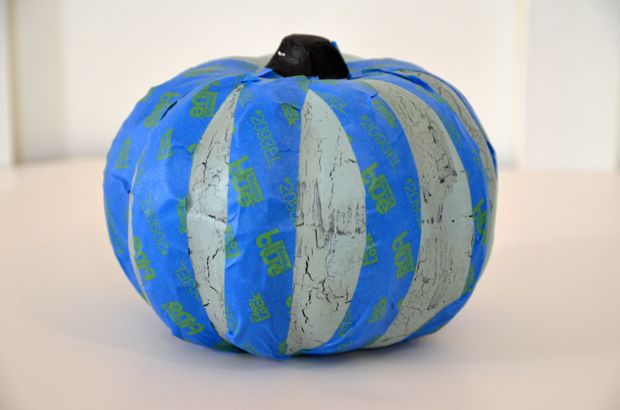
2. Paint your pumpkin and remove tape immediately. Allow to dry.

3. To create a plaid pattern, place 2 pieces of ScotchBlue 1” tape horizontally around the widest point of your pumpkin. Paint, remove tape, and allow to dry. Once dry, repeat this process at the top and bottom of your pumpkin to create two more horizontal stripes.

4. Freehand paint white lines (as shown in the final picture) to complete the plaid effect.
Argyle Pumpkin Instructions
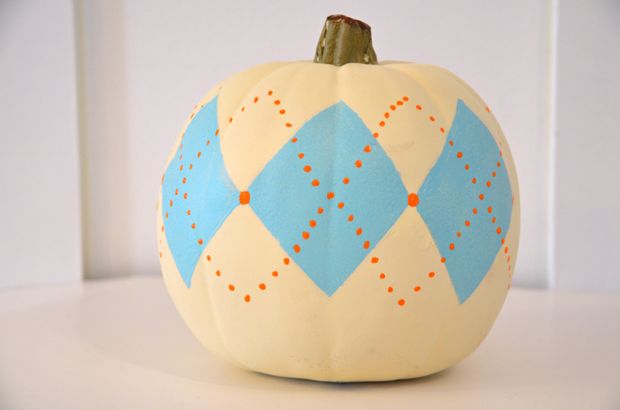
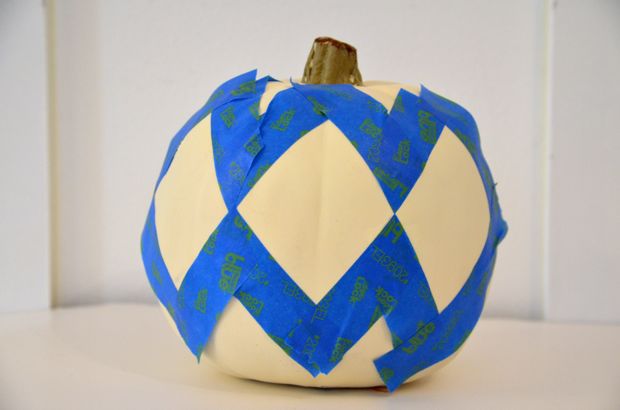
1. Using a sewing measuring tape as a straight-edge, draw three diamonds across the front of your pumpkin. Place ScotchBlue tape over your lines and paint inside your stencil. Immediately remove the tape and allow the diamonds to completely dry.
2. Freehand paint or tape off 3 more overlapping diamonds, and dot on a contrasting color of paint.
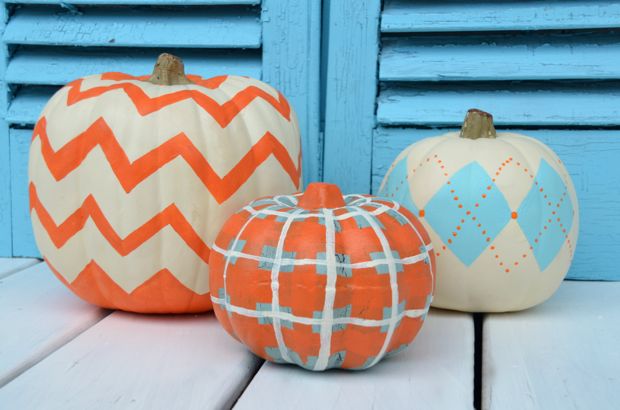
Aren’t they cute? I love how they look on our back porch and the touch of fall that they add to that space.
Thanks so much to ScotchBlue™ Painter’s Tape! This post is in collaboration with 3M DIY. To keep up-to-date on projects, products and sampling visit 3MDIY.com.
Related Posts


These are so cute Beth!! Pinning a few times!
So, I made the chevron one & DID NOT remove the tape until it was dry. I now have many areas that have leaked. Do you know how I would get that off?
Hi Ricki, when using any kind of painter’s tape to create a design it is imperative that you smooth over the tape to create a tight seal before painting and that you remove the tape while the paint is still wet in order to avoid the paint drying to the tape and peeling away from your surface upon removal. If some has leaked onto the pumpkin, you might be able to lightly scrape it off the surface or use Goof-off (on some q-tips) to attempt to remove it from the unwanted areas. So sorry for the leaks! You might also try painting off where it has leaked and choosing another paint color for the alternating zig-zags in order to cover up the mistakes.
One more thing: You can see on my bottom row of my Chevron pumpkin that there is a thicker line around the edge. I messed up here so simply created a straight and smooth line by hand to hide that mishap. That might also be an option for you. Hope that helps!
Love how your pumpkins turned out! 🙂
Thanks girl!
These are too sweet! Pinning for when I get my hands on some pumpkins to paint.
Thanks so much Lauren! 🙂
Thanks for the instructions – I’m going to make some of these. Love your blog!
Thanks Anne!
These are all lovely. I never thought pumpkin can be a great decor. Great idea.
They are all cute, but that argyle one is my favorite!! So adorable.
Truly adorable, what a great use of pumpkins. I bet this is better than any decorative item that can be bought from markets.
These are so great! I really don’t decorate for fall at all but these pumpkins really caught my eye. Especially love the chevron and argyle ones.
These are adorable!!!! I can’t wait to try a few with paint this fall.
Thanks so much :).
Doesn’t frogtape make a chevron tape?
They do! They have shape tape that would work.