
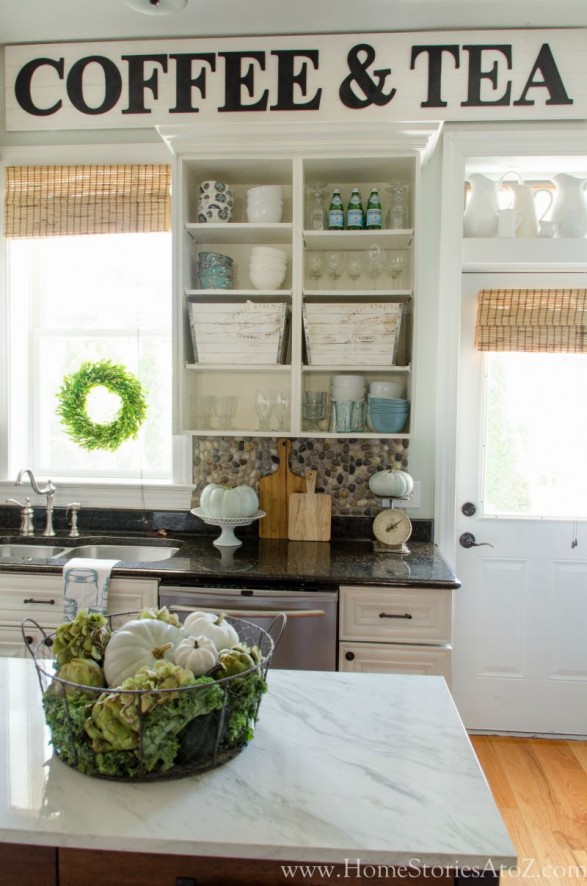
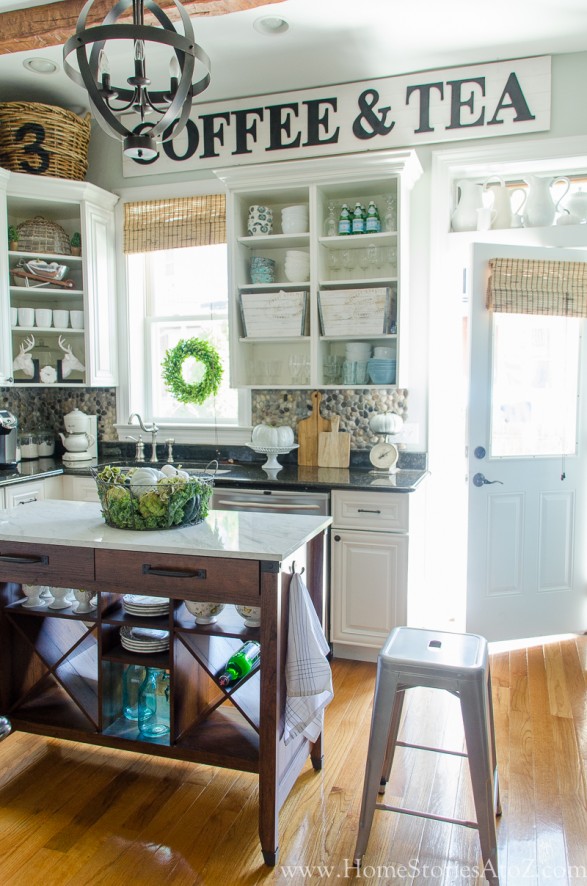
In my fall home tour last week (click on the link if you missed it because I think you’ll enjoy it), I showed off my new “vintage” kitchen sign. It was so easy to make and today I’m going to share the full tutorial on how to make a vintage kitchen sign!
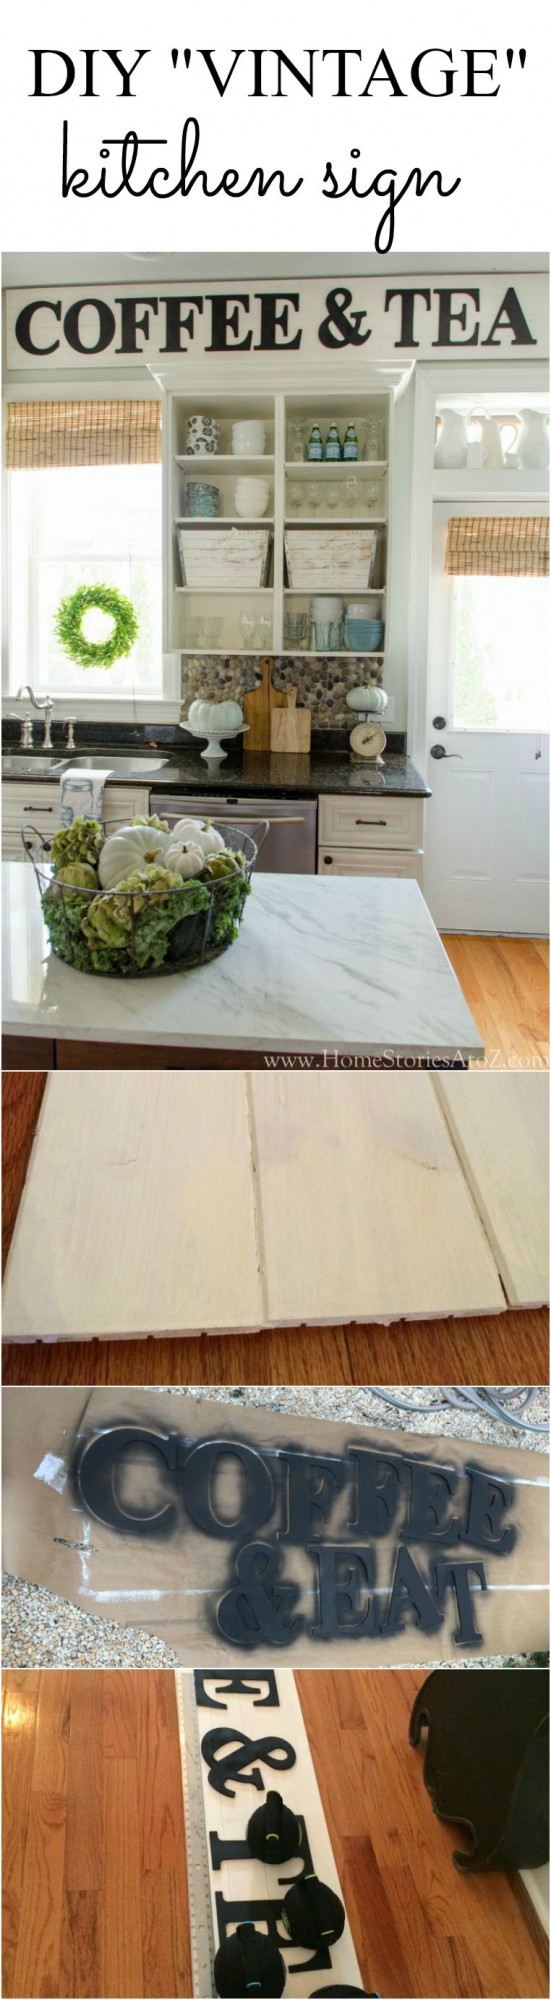
I love the look of vintage kitchen signs and I’m definitely not alone! Here are some of my favorites from other bloggers and shelter mags. Most of these are “real” vintage or antique signs but you can easily make and customize your own. I was most inspired by Joanna Gaines SUPERMARKET sign and wanted something with the same bold graphic flare. I have had the word “EAT” in my kitchen for years so thought it would be fun to switch things up and change it to “TEA”. My husband and I LOVE coffee & tea so the words are perfect for our space.
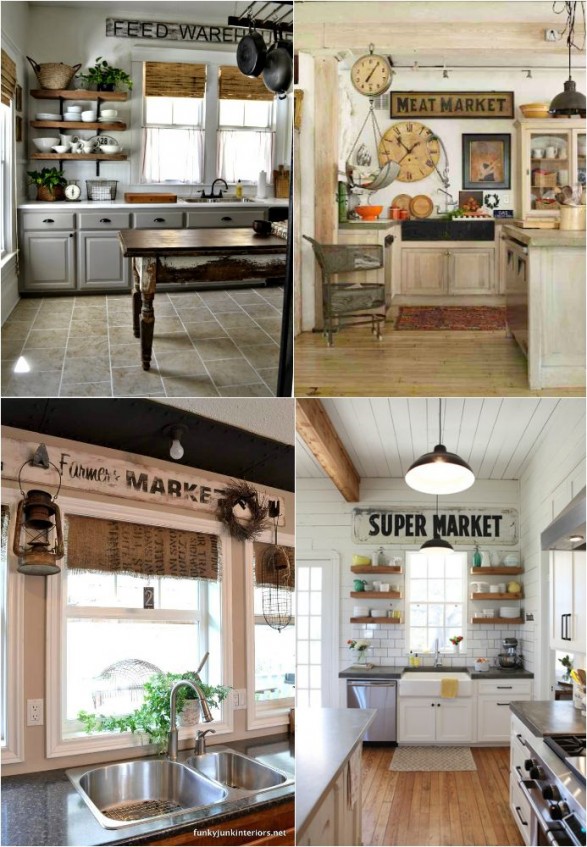
Sources: 1. Our Vintage Home 2. An Urban Cottage 3. Funky Junk Interiors 4. Magnolia Homes
How to Make a “Vintage” Kitchen Sign
MATERIALS NEEDED:
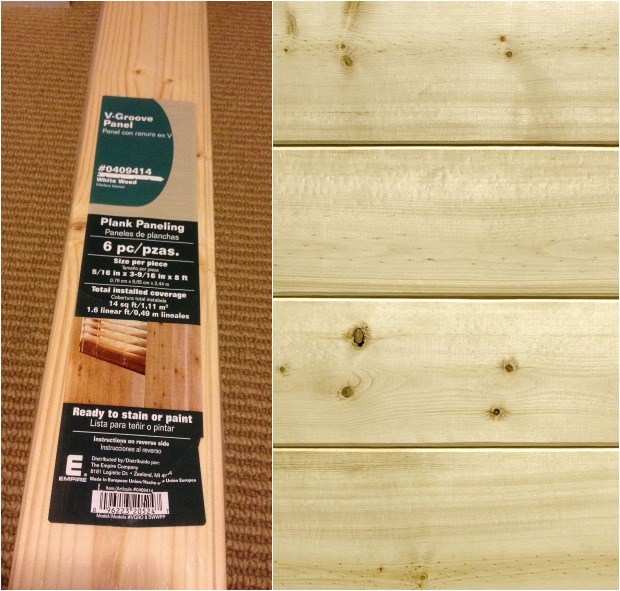
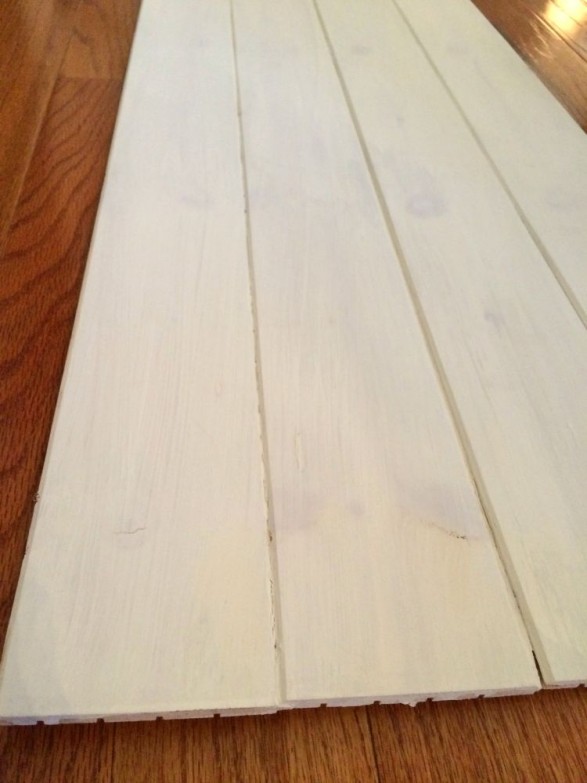
- 4 V-Groove panel boards (I found mine at Lowe’s. These were the same boards I used on my DIY plank wall.)
- Wood glue
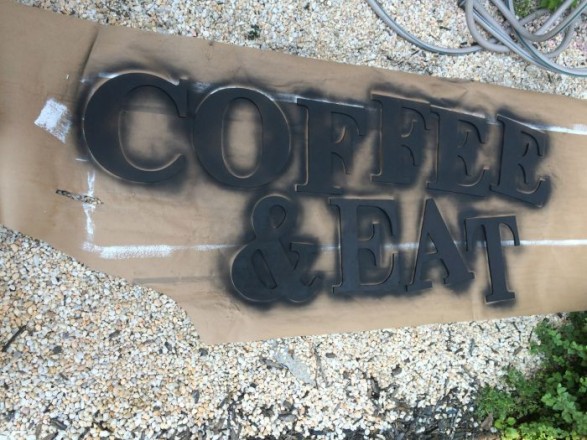
- Craft letters (I used 9.5″ letters from the craft store.)
- Black flat spray paint
- D-ring picture hangers
- White paint
Step 1: Line up four planks and place wood glue in the grooves of each plank. Push planks together and allow to dry. You will not need to secure with nails.
Step 2: Paint or stain the wood planks.
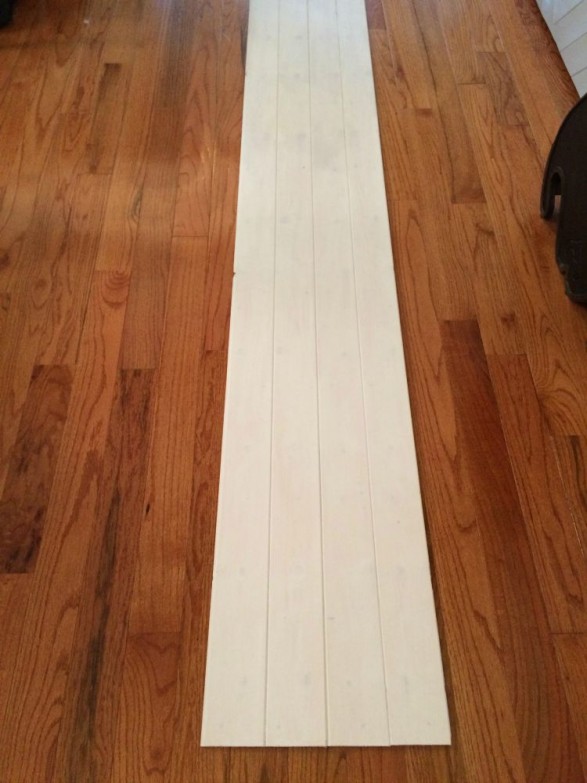
I white-washed my boards using some watered-down white chalk paint and it gave me the exact look I was going for. You can still see some of the wood grain through the paint.
Step 3: Spray paint your letters.
Using a flat spray paint will help your letters look less new and polished. I typically prefer a flat black because it looks better in photos.
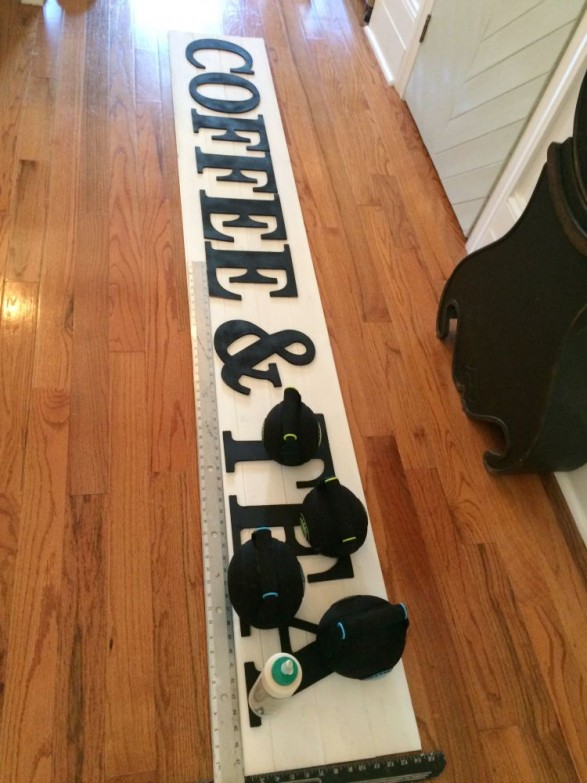
Step 4: Adhere your letters to the sign with wood glue and allow to dry.
I used a T-square to ensure my letters were straight. I also used weights on the letters to help them fully adhere to the boards.
Step 5: Attach four wood blocks to back of sign with wood glue and then attach D-ring picture hooks to the two top corners.
The wood I used for the sign is very thin and light. In order to secure the D-ring hardware, I needed to make the wood thicker in the corners. I cut up a scrap board into small squares and attached one to each corner. This allowed the D-ring screw to have enough wood to grip. I drilled screws into the studs and hung my sign! Voila!
I had most of the supplies for this project already on hand, but you could easily make this entire sign for less than $50. Not too shabby for something with a big impact!
Feel free to pin this project to save for later or to share with your followers! If you liked this project, you might also enjoy the related projects below.


I love your coffee and tea sign. Can you tell me the dimensions of the sign?
Hi Jenni,
I no longer have this sign as I didn’t have a place for it in our new home so sold it to a friend. I believe each board was 8 feet long. I’m not sure of the width but probably around 16 inches or so.
Can you tell me the dimensions of the coffee and tea sign that you made?
Thanks! This has given me an idea for my husband’s man cave/office.
Thanks great ides, & questions already have the boards
I was wondering what you did on the last piece..with the tongue? Did you just leave it like that? I couldn’t tell from the photo…does it look weird close up?
I don’t think it looks weird at all–close up or from a distance. But it could easily be sawed off with a jigsaw if you preferred it without.
That looks GREAT ! What a neat idea ! I’ll have to look around and/or devise something like you have here!!
I’ve always wanted to have a vintage sign in my kitchen. Thanks for the tutorial. Now I have to decide what to write on my sign. Any ideas?