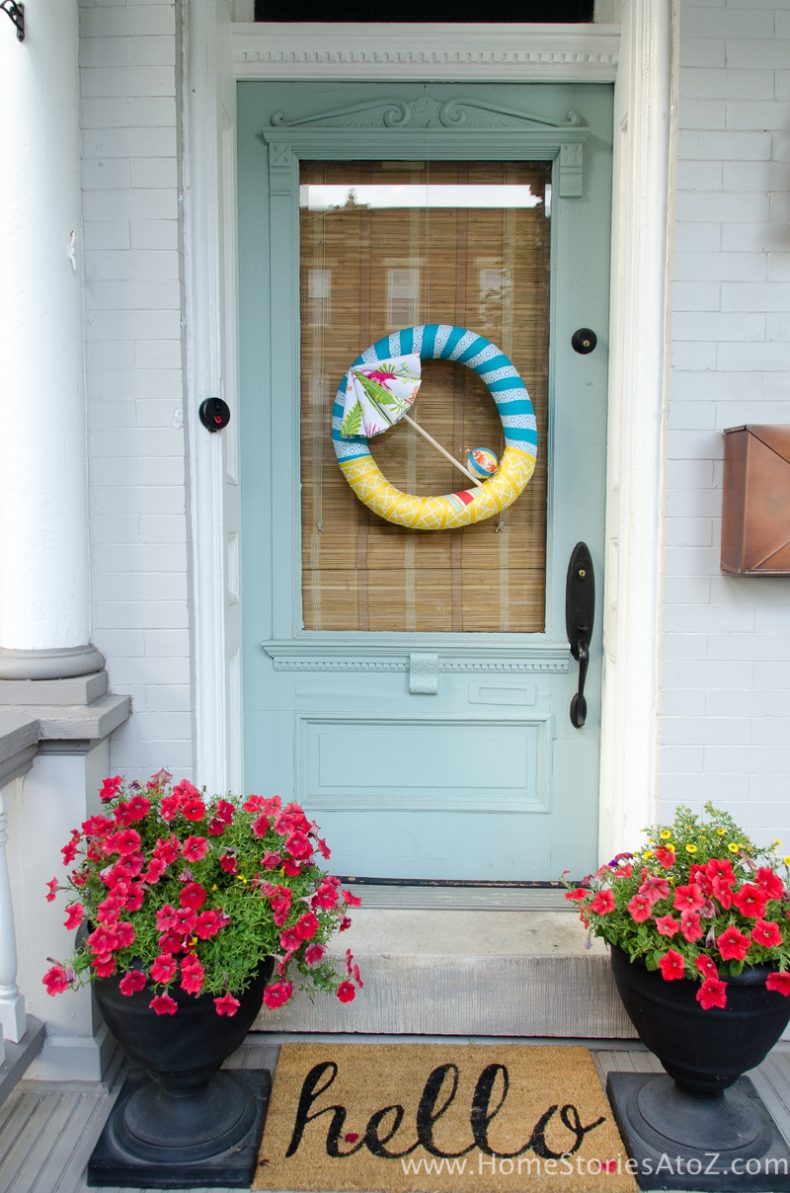
Last week I revealed our front porch all decked out for summer with Waverly fabrics! You can see the full summer porch reveal here if you’d like. My Beach Umbrella Wreath was the star of the show and today I want to teach you how to make your very own! My wreath was inspired by a similar painted wreath found over on Crafts Unleashed. Check that one out too if you are looking for more simple summer wreath ideas!
Summer Wreath Idea: Beach Umbrella Wreath Tutorial
Gather Supplies:
- Pool noodle
- Packing tape
- Fabrics
- Ribbon
- Sewing pins
- Hot glue
- 5 Party hats
- Dowel rod
- Skewer
- Styrofoam ball
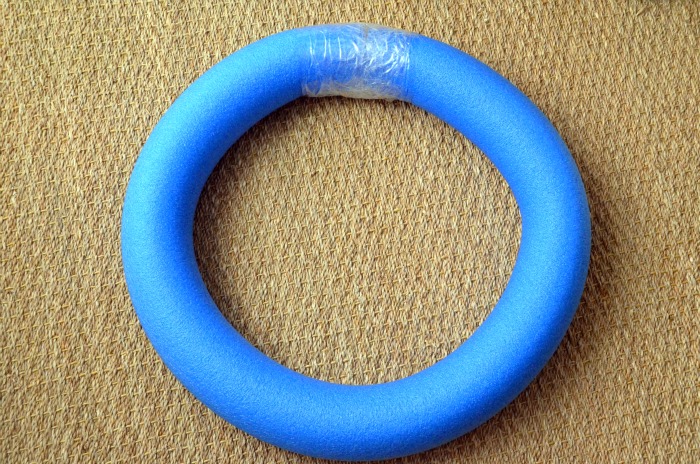
Step 1: Cut your pool noodle to size and tape to create a wreath form.
It can be tricky to create a perfectly round wreath form with a pool noodle! The advantage of using a pool noodle is the price. Large foam wreath forms cost around $10 (and up) depending on the size, whereas a pool noodle costs around $1. You can see that my form ended up being a tiny bit misshapen on the right side. I change my decor so frequently that I was okay with this small imperfection for a seasonal decoration. If money is not an issue for you (or if OCD is an issue) ;-), feel free to skip this step and splurge on a large foam wreath form.
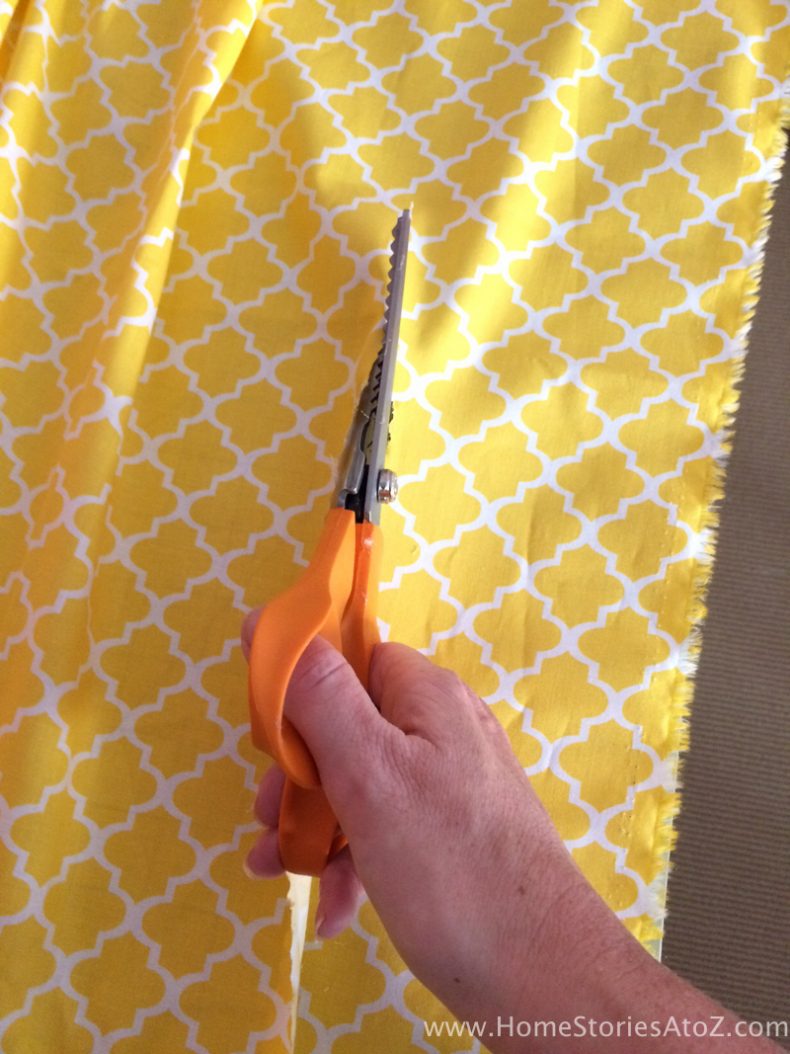
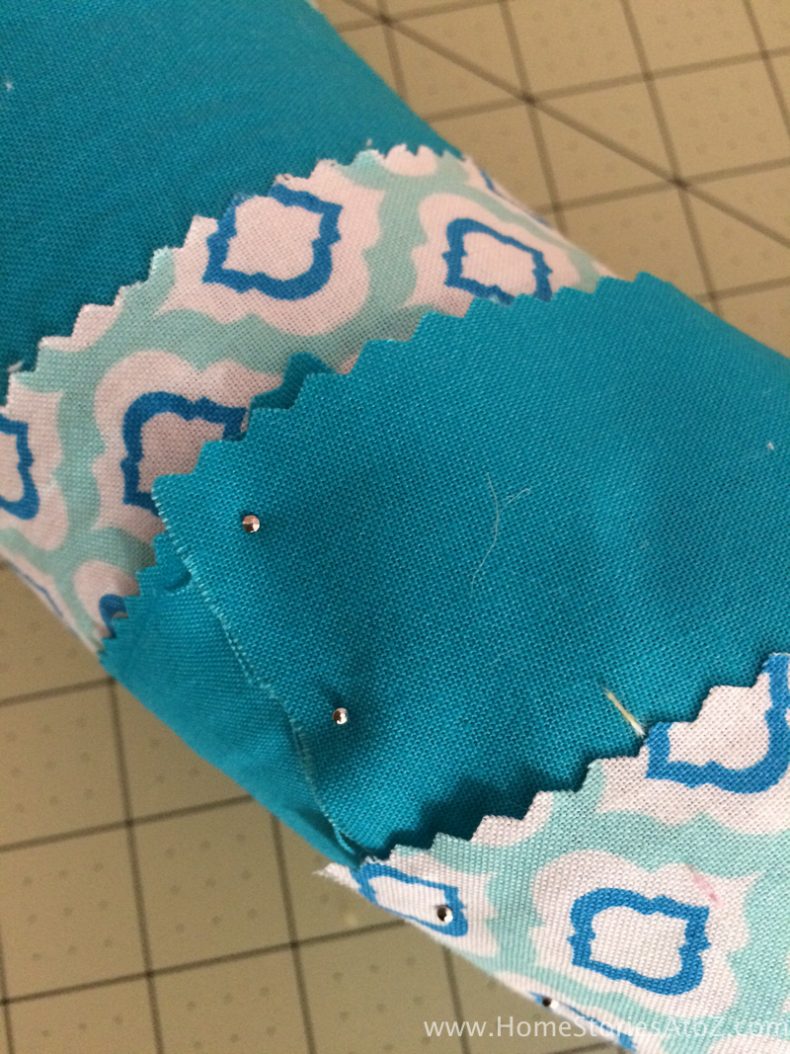
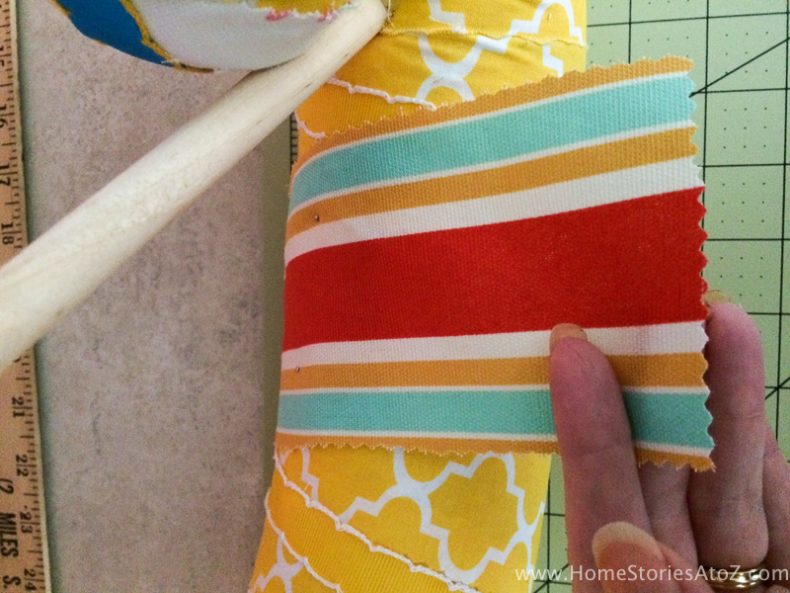
Step 2: Cut strips of fabric into two inch strips using pinking shears.
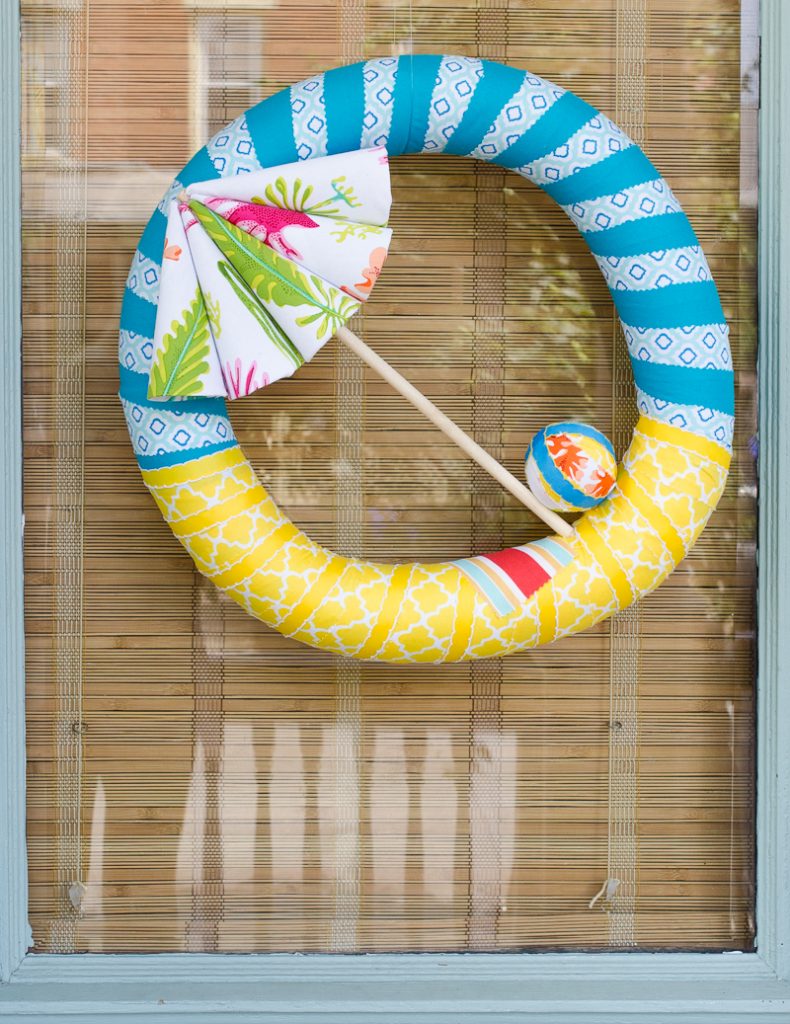
All of the fabrics I used on wreath are Waverly Inspirations fabrics found at Walmart. I used yellow fabric and ribbon for the sand and blue fabrics for the water and sky.
Step 3: Wrap the fabric around the wreath and secure with sewing pins.
Begin your fabric strip where you want the “sand” to start and secure the strip to the back of the form using sewing pins.

Step 4: Line up and secure another strip of fabric to the ends of your strip until the wreath form is completely covered.
Once you come to the end of the length of your fabric, simply secure another strip of fabric to the back of your wreath form and continue wrapping the fabric around the wreath until it is completely covered. I prefer to use sewing pins to secure the strips instead of hot glue. If you make a mistake or change your mind about your fabric choices or placement, it is very easy to correct your mistake by removing the sewing pins and repositioning your fabric.
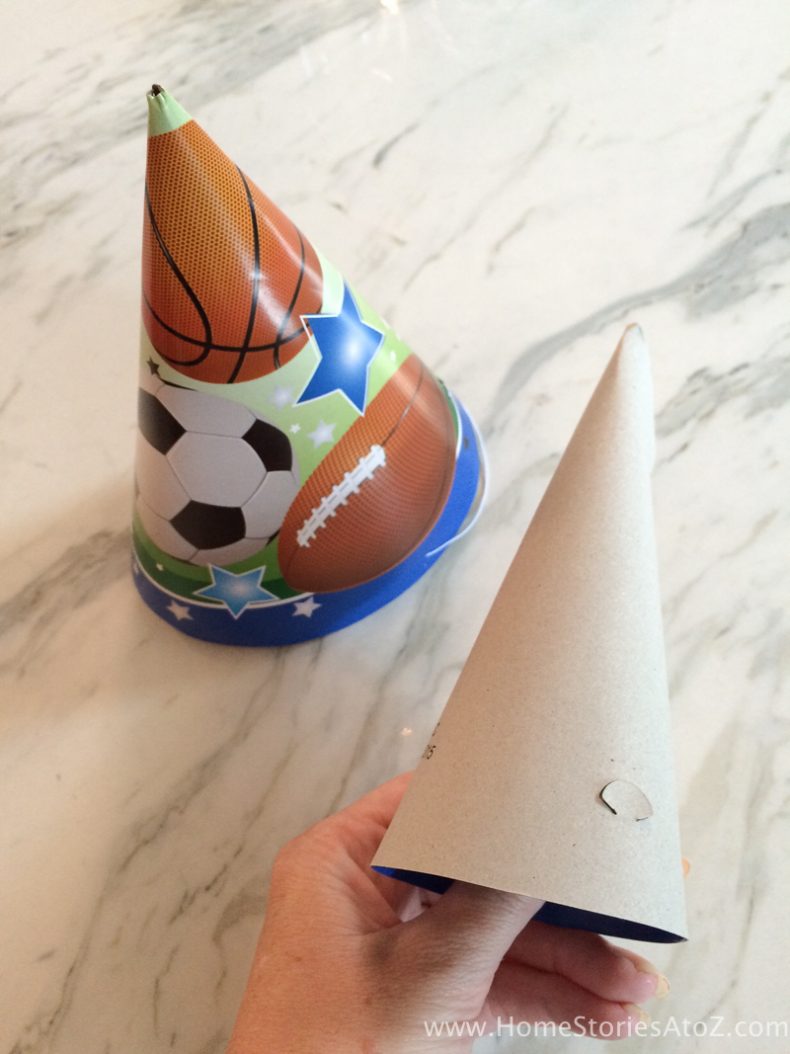
Step 5: Disassemble party hats and re-glue inside out.
The designs on your party hats may show through your fabric. This is easily solved by carefully taking the hats apart and re-gluing them inside out. You also want to glue the cone together tighter to create a smaller cone. See the picture below for reference. Use hot glue to secure the cones.
Step 6: Hot glue fabric to the cones–covering each completely.
Wrap your fabric around your cone and cut to size. Use hot glue to secure the fabric to the cone. Be sure to leave enough fabric to fold underneath each cone as this area will be visible on your wreath.
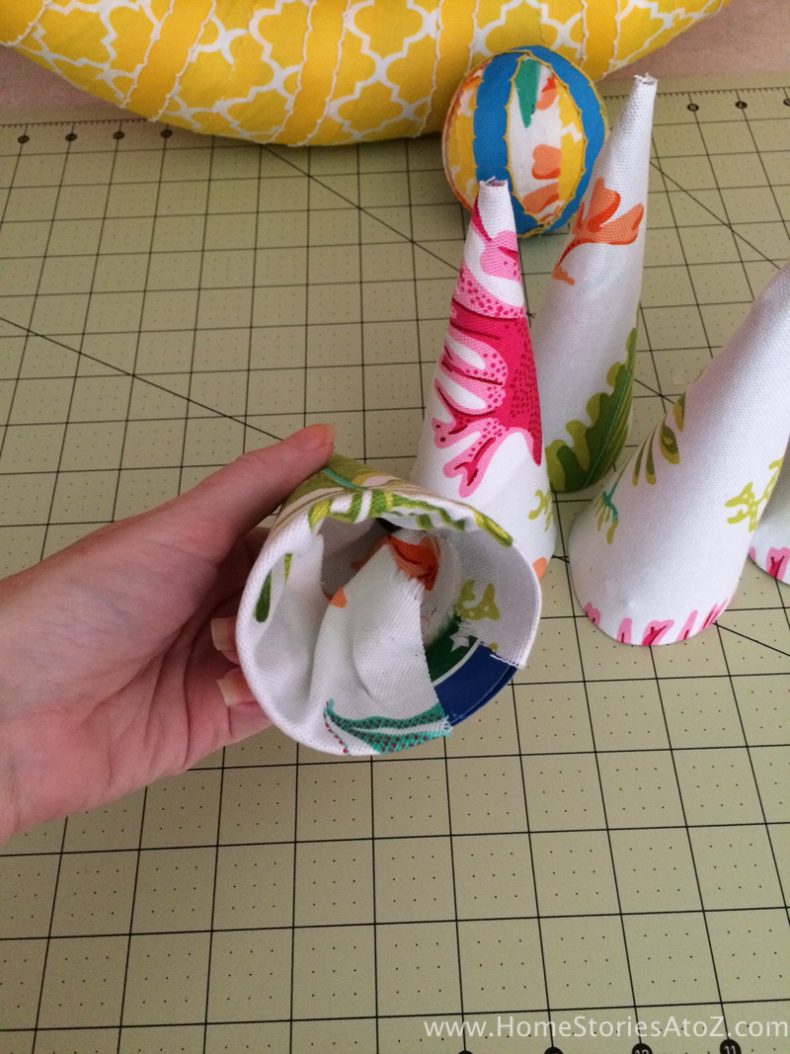
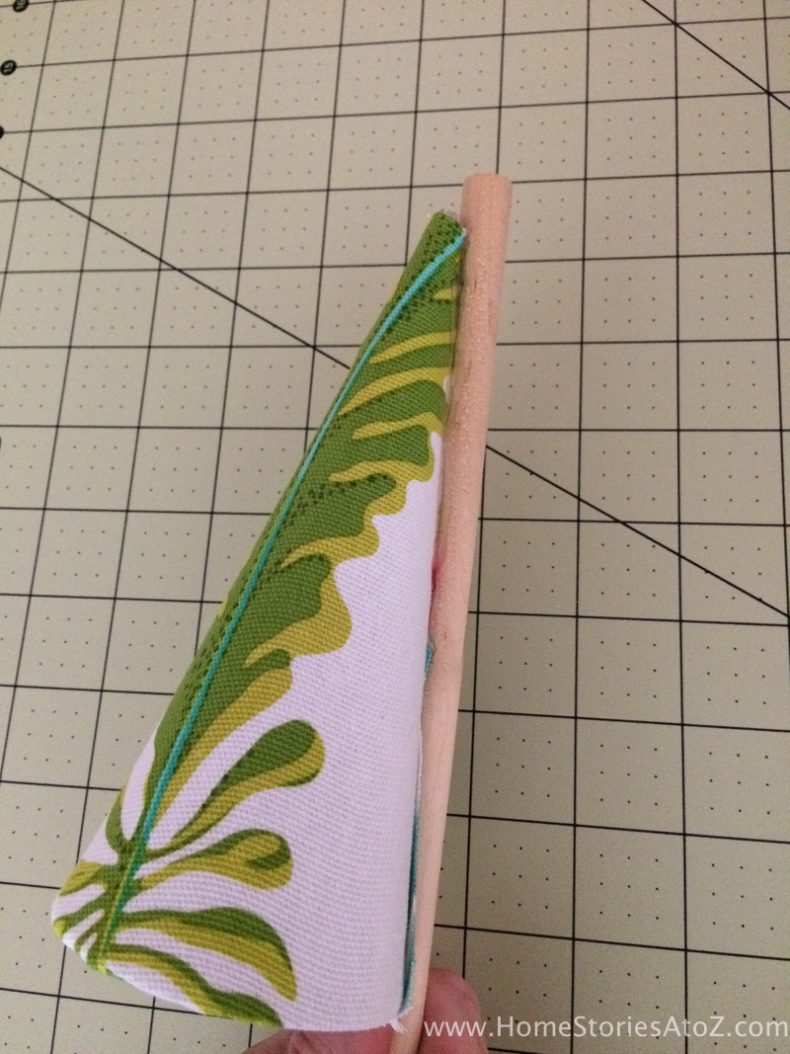
Step 7: To create your beach umbrella, glue a cone to the top of a dowel rod and then glue two cones to each side of the center cone.
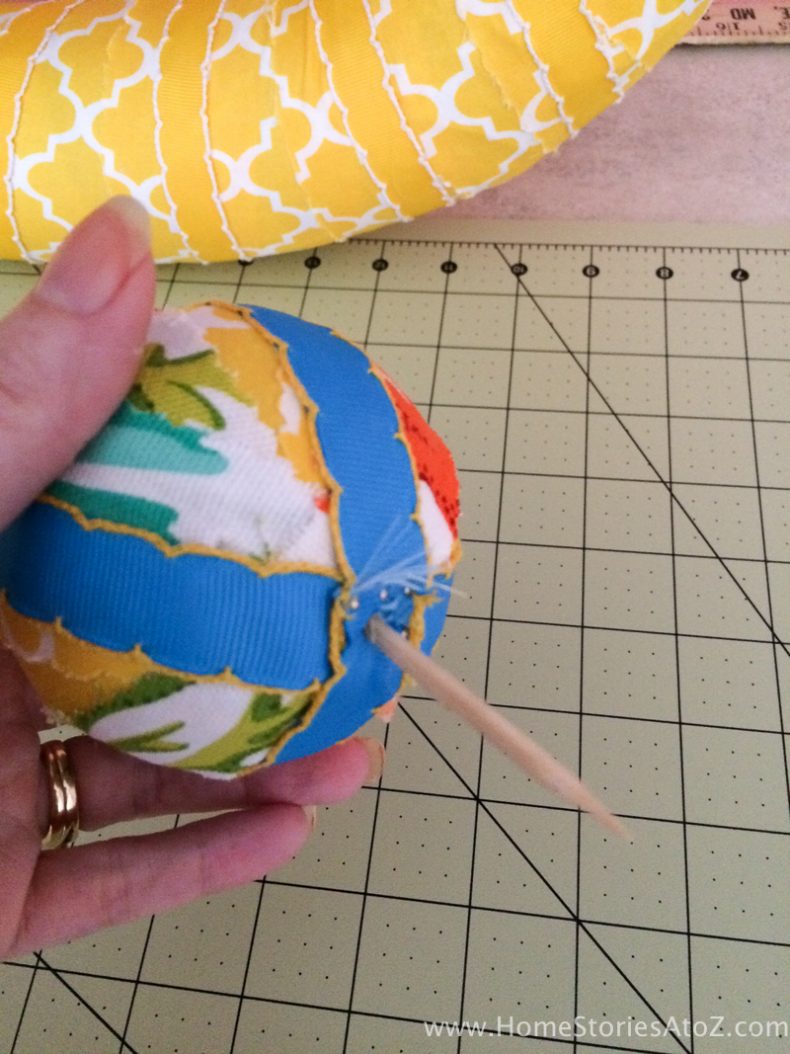
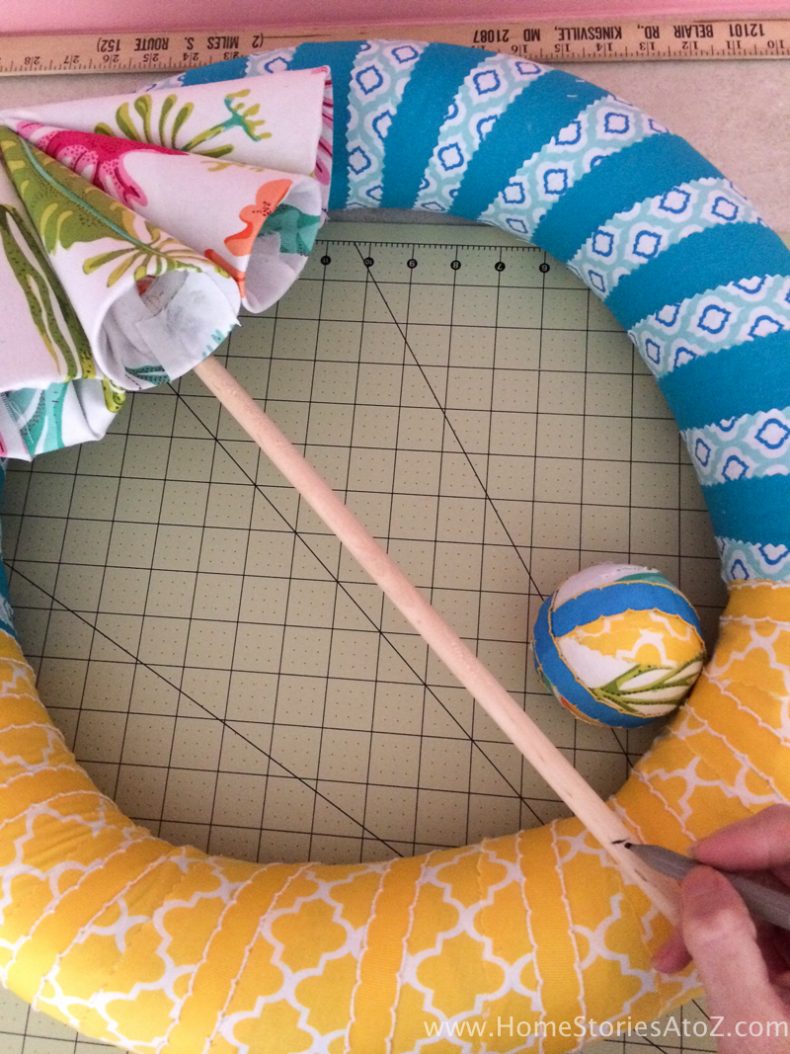
Step 8: Cut 1 inch strips of fabric with pinking shears to cover the styrofoam ball. Use a skewer cut to size to secure the ball to the wreath.
Step 9: Measure and cut your dowel rod to size. I used a hacksaw to make this simple cut. Once cut, hot glue the rod to the wreath.
Step 10: Cut a piece of fabric with pinking shears to create a beach towel. Glue or secure in place with sewing pins.
And that is all there is to it! Enjoy your new wreath! I hung my wreath using a piece of fishing line attached to a nail at the top of my door. From a distance the fishing line disappears and all you see is the cute wreath.


[…] 24. Beach Themed Summer Wreath for Front Doors […]