
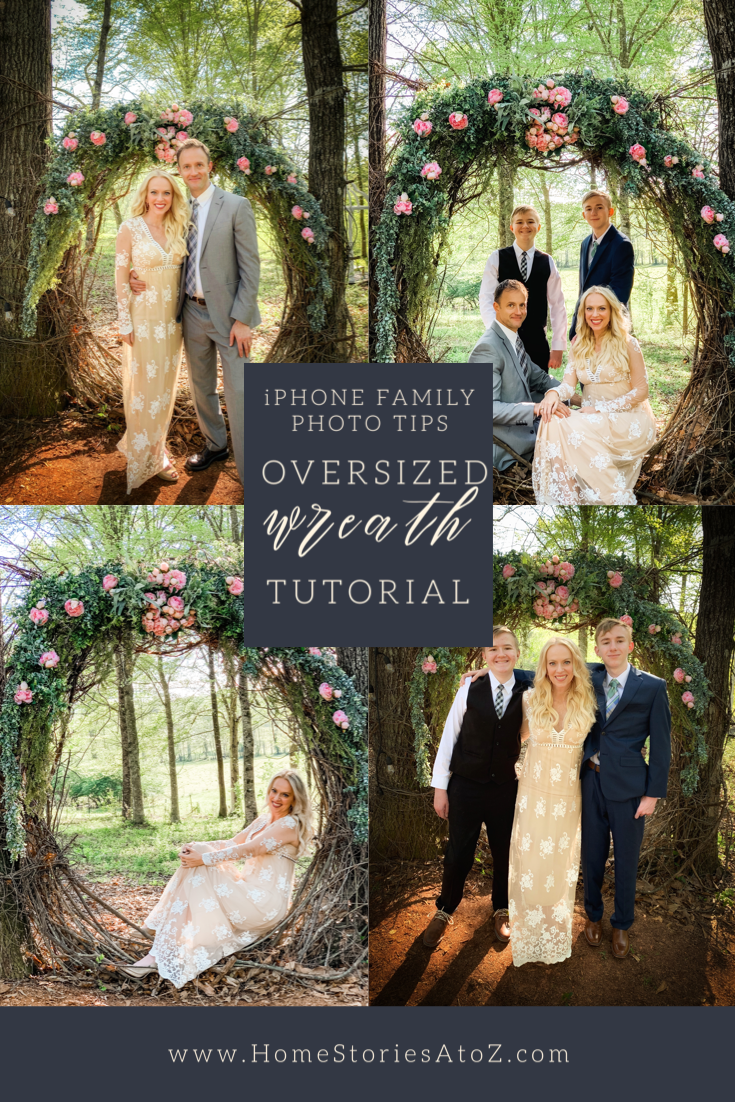
Tips on how to create beautiful family photos at home using just your iPhone. Also tips on how to create an oversized outdoor wreath to use as a photo backdrop!
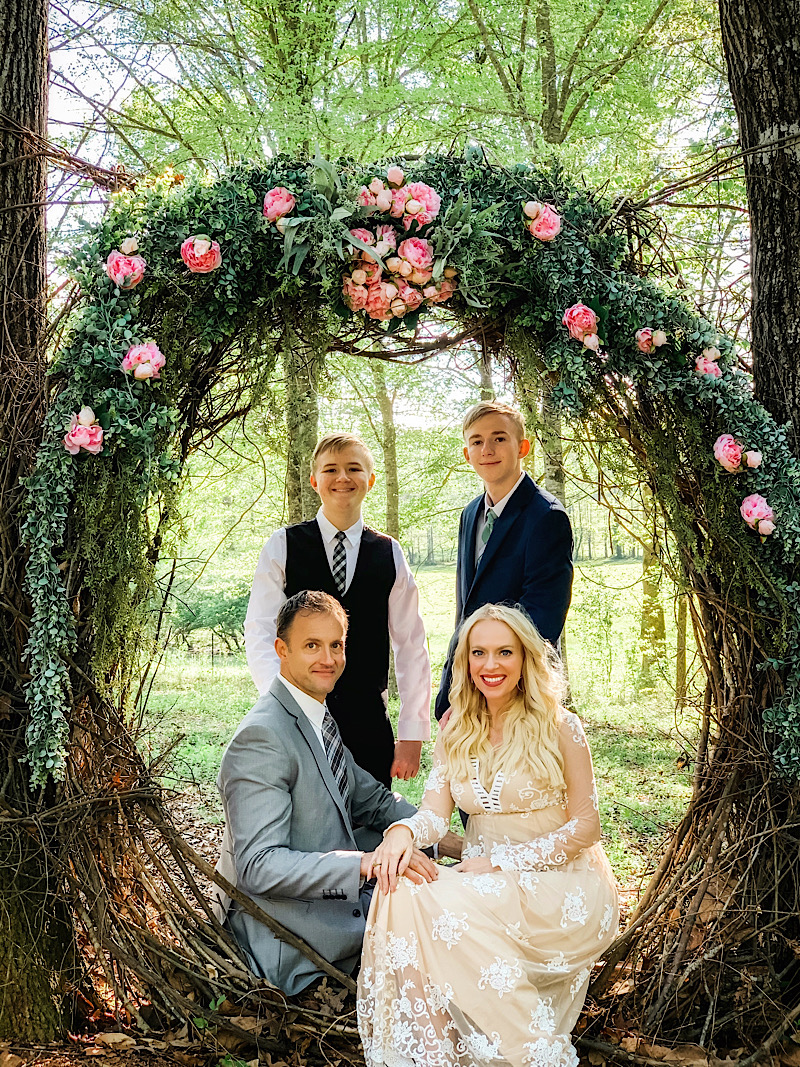
This Easter looked a bit different for us since we couldn’t travel to Virginia to be with our extended family. Typically we all head to my mom’s house on the Chesapeake Bay, get dressed up for church, and then do a huge extended family photoshoot on the deck while dinner is being prepared. My boys love spending time with their cousins but would happily skip the photoshoot! The photos are precious to me, and I love having them to look back on. I didn’t want this year’s “pandemic Easter” to go unrecorded, so I convinced my crew to humor me for a quick family Easter shoot. I normally take family portraits using my Nikon d810 and 35mm lens; however, it’s very time consuming and tricky for me to play both photog and model with my DSLR. I know my boys’ patience level (LOW), so I opted to just make do with iPhone pics this year.
Today I’ll share some tips on how to create beautiful family photos at home using just your iPhone. I’ll also share how we created this oversized outdoor wreath to use as a photo backdrop!
Oversized Outdoor Wreath Tutorial
Video Music: Early Hours Musician: @iksonofficial
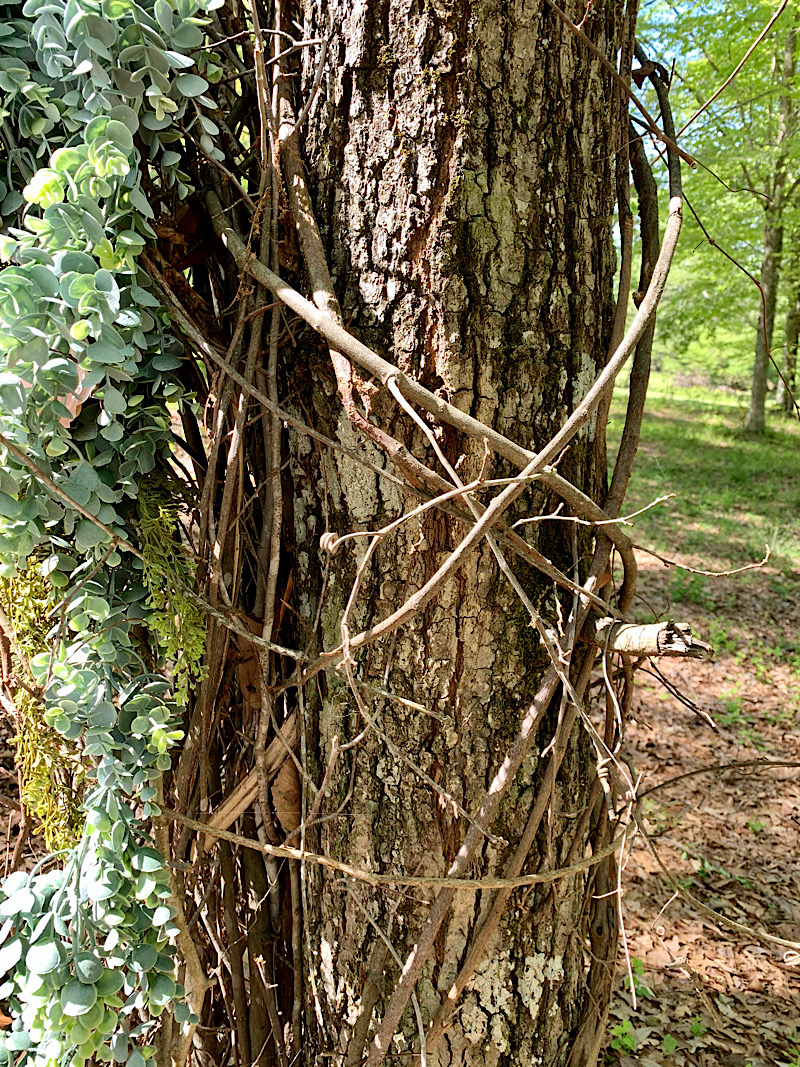
My husband Matt loves to spontaneously create things and rarely documents his creative process, so unfortunately I don’t have a full step-by-step photo tutorial for you on how to create an oversized grapevine wreath. It’s a pretty straightforward process; however, and if you own wooded property with saplings and invasive wild vines such as Virginia creeper you can easily make one yourself!
Step 1: Find two trees growing around 5 feet apart. The width between your trees will determine the size of your wreath.
Step 2: Place a log between the two trees to act as a base for your wreath. This is also helpful for photography purposes to allow a substantial place to sit.
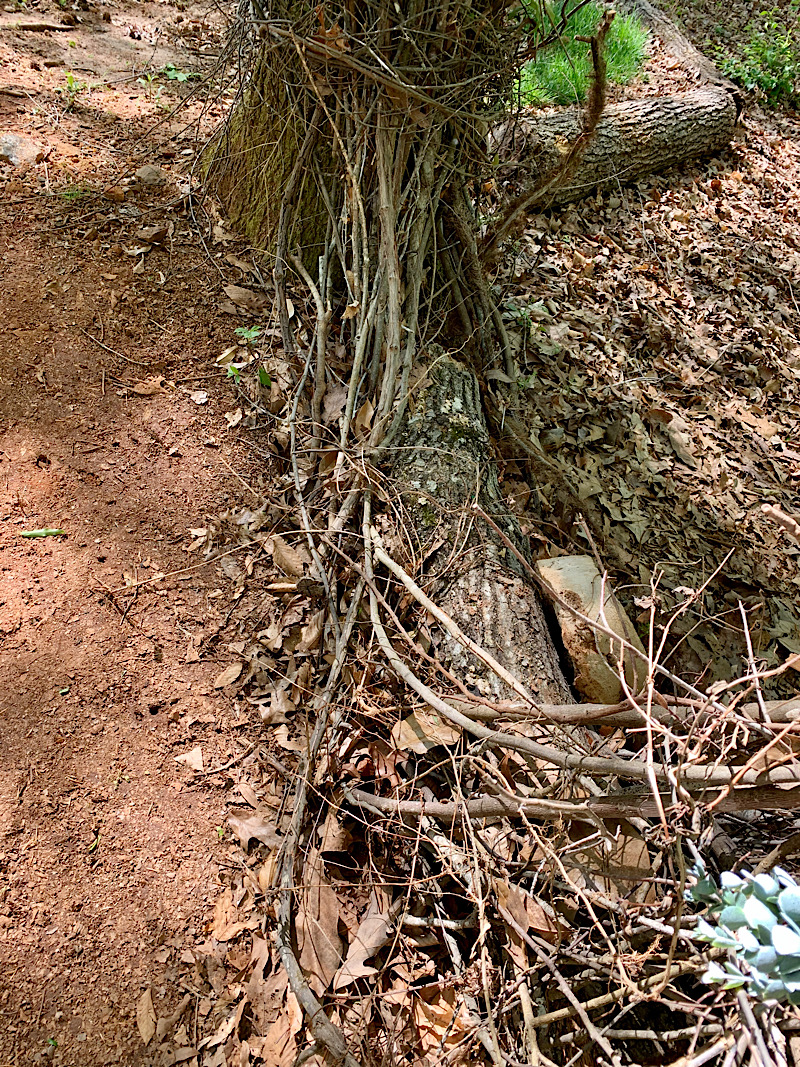
Step 3: Find two skinny saplings that are around 8-10 feet tall that can be lodged between the two trees to form a circle. The sapling circle will act as your wreath form base. Repeat this step a few times to create a solid circle base.
Our property is very thickly wooded and has a ton of brush, weeds, and small saplings under the trees that need to be cleared out every year. Be careful that you aren’t using any poison ivy or poisonous vine when creating your wreath! We have done a lot of online research on what is poisonous to touch on our property. I have a good blog post on apps to help you identify plants and trees: 4 Best Apps to Help Identify Plants and Trees. If you aren’t sure, just let it be!
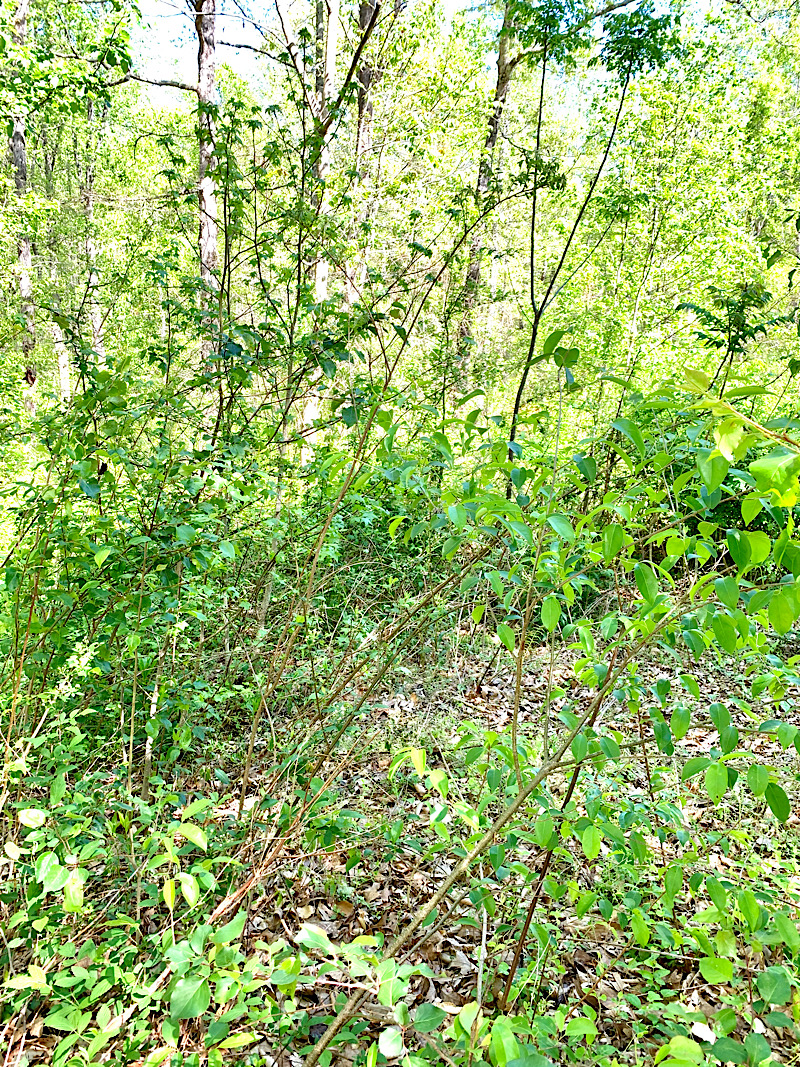 Step 4: Weave vines, saplings, and pliable sticks around your base and trees to form the wreath. Just keep weaving and adding until you have a solid wreath. Use vines around the trees to secure. You can also use jute twine in a pinch.
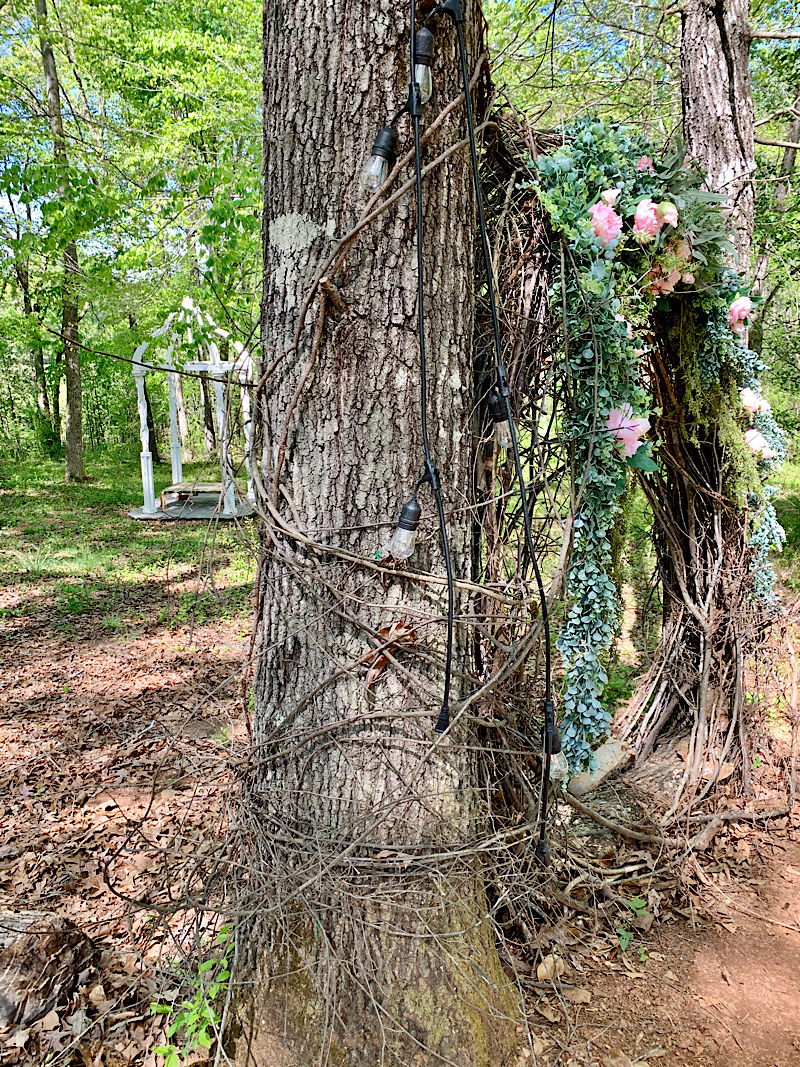
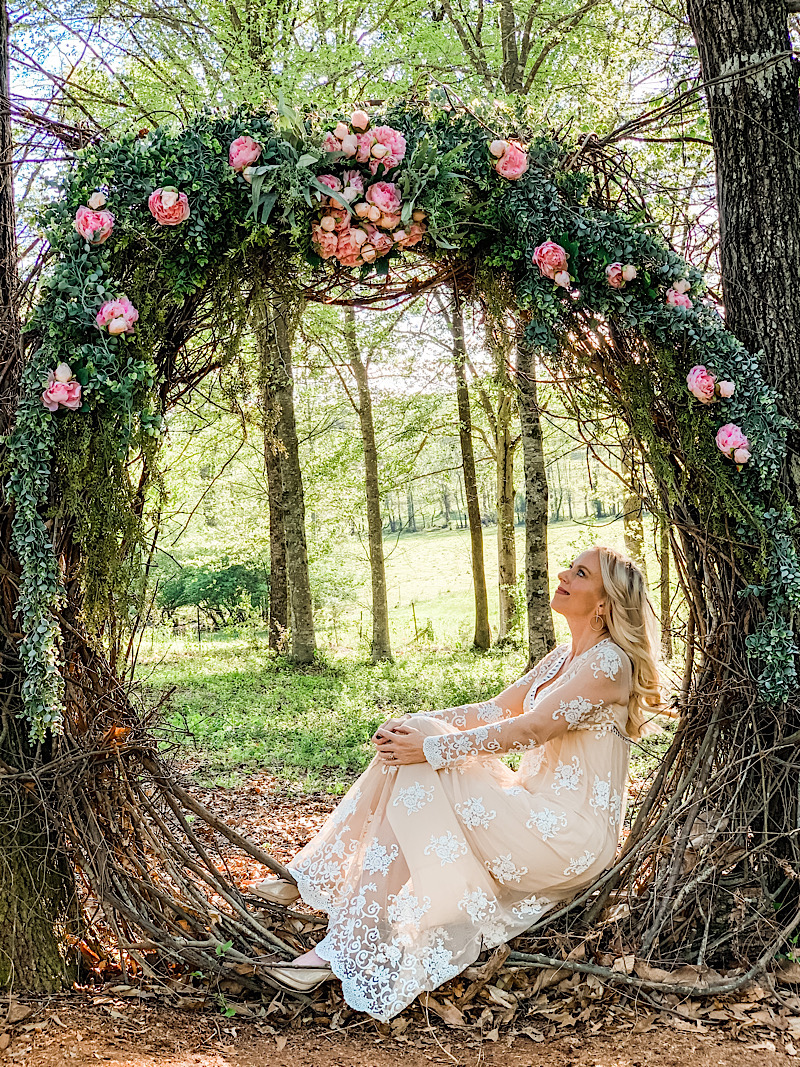
Step 5: Decorate the wreath with faux or real greenery and florals and enjoy! I used faux garlands I had on hand from Hobby Lobby as well as faux peonies from Pottery Barn. I use these faux peonies over and over again in my decorating! They are beautiful and very realistic looking. Shop the affiliate link here. I secured the garland in a few place with floral wire but for the most part just shoved it into the vines.
Family Photography Tips
The most recent iPhone’s have the best cameras! If you have an iPhone 10 or 11 you’ll have the best luck creating beautiful photos, but even older phone models have the ability to capture beautiful shots. These tips will help you do the best with what you have to work with.
Tip 1: Dress up! Choose Your Family Photo Outfits Carefully
I know your family is very comfortable in sweats and joggers. I know that jeans are “dressy” for everyone on most days and dress clothes aren’t really you. I know your kids and husband most likely detest dressing up. My family can completely relate! Working from home as a blogger and teaching Zumba throughout the week, I typically only wear leggings and tanks. But here is an insider tip! Most professional photographers send their clients something called a “style guide” before their session with examples, tips, and tricks on how to dress your best for your photos. Photographers know that your photos are going to look so much better and more polished if everyone is dressed up. They know that if you look your best they will have an easier time delivering you quality pictures you love!
This doesn’t mean you have to go out and spend a fortune on all new clothes for the family. My dress was on sale for $20 at Forever 21 and my guys simply wore their Sunday best from their closets. Pick outfits that look decent together and coordinate with your backdrop.

Tip 2: Take Your Photos at Golden Hour
The sunlight becomes golden and gorgeous an hour or two before sunset. Place your family with their backs facing the sun and make sure your camera is set in a small spot of shade to avoid any lens flare from the sun.
Tip 3: Use a Tripod with Remote
This tip is a MUST for painless family photos! My tripod adjusts to fit my iPhone 10 Max even with the case on and comes with a bluetooth remote that pairs with my phone. I simply set up the tripod, jump into position, and click the remote as many times as I want to take the picture. Click here for the affiliate linked tripod and remote I currently use. You can see the remote in my hand in many of the pictures. It’s not too hard to hide it but apparently I need to work on this skill!🤪
Tip 4: Utilize Your Phone’s Portrait Mode
To create Bokeh in the background of your photos, use the portrait mode feature on the camera. This will allow you to create a beautiful blurred background and give your photos more depth of field.

Tip 6: Pose Your Family
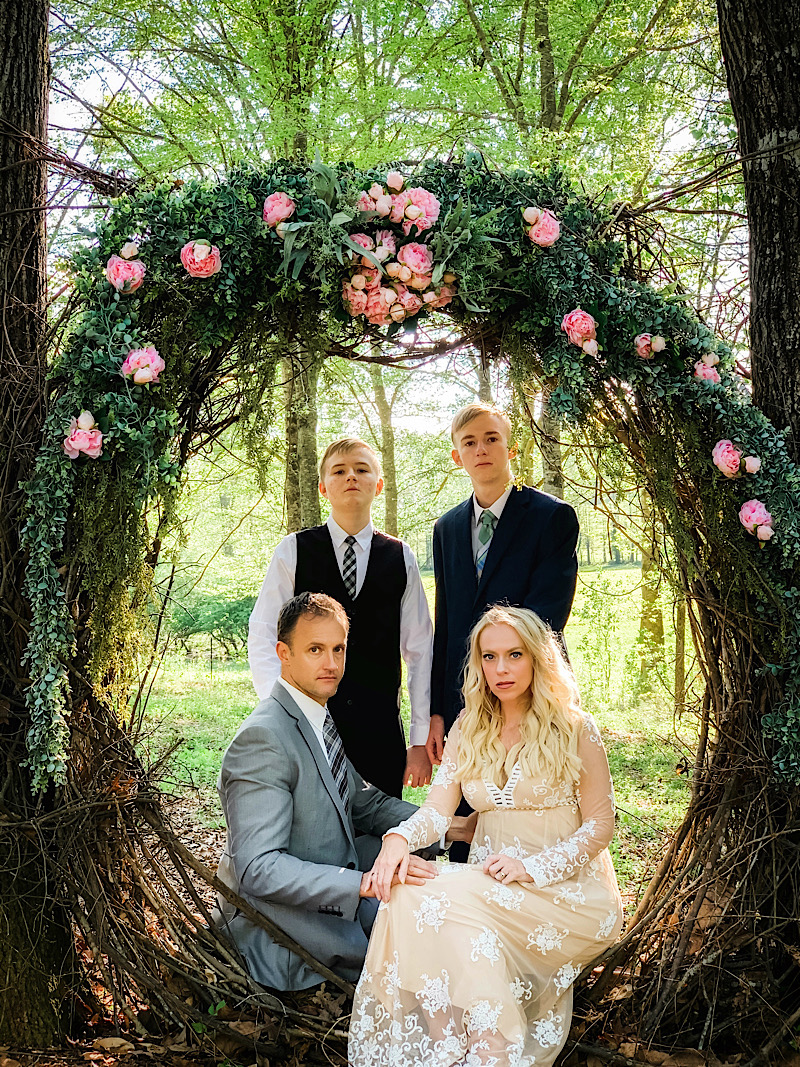
Your family members will need firm but kind direction on where and how to stand. Everyone just standing in a line in front of your backdrop gets tiresome after a few shots. Frequently run and check your phone and do test shots of your family before jumping into place to join the picture. Tell family members exactly where to stand and where to place their hands. Things often appear different through the lens than in real life and as photographer it’s your job to call it out! Pro Tip: Families look more loving and connected when everyone is touching in some way for the photo.
Tip 7: Edit Your Photos with Editing Apps!
Your photos straight out of camera can almost always be improved with some editing. There are tons of presets and filters out there to use but I prefer to manually edit my photos. I use the free version of the LightRoom app on my phone for editing. I also use the SnapSeed app and sometimes PicMonkey. All editing apps have a learning curve and take some time to learn but are well worth the effort! I won’t go into great detail in this post on how exactly I edit my photos, but I will share some quick tried and true tips! Please Note: Editing is a personal preference endeavor. Some people like a dark and moody style, some people like light and airy, and others prefer saturated and vibrant. Photography is art and when it comes to preferences there are no rights or wrongs! My style tends more towards a light and airy style and you may prefer something different. It’s okay to like different looks!
MY QUICK LIGHTROOM EDITING TIPS
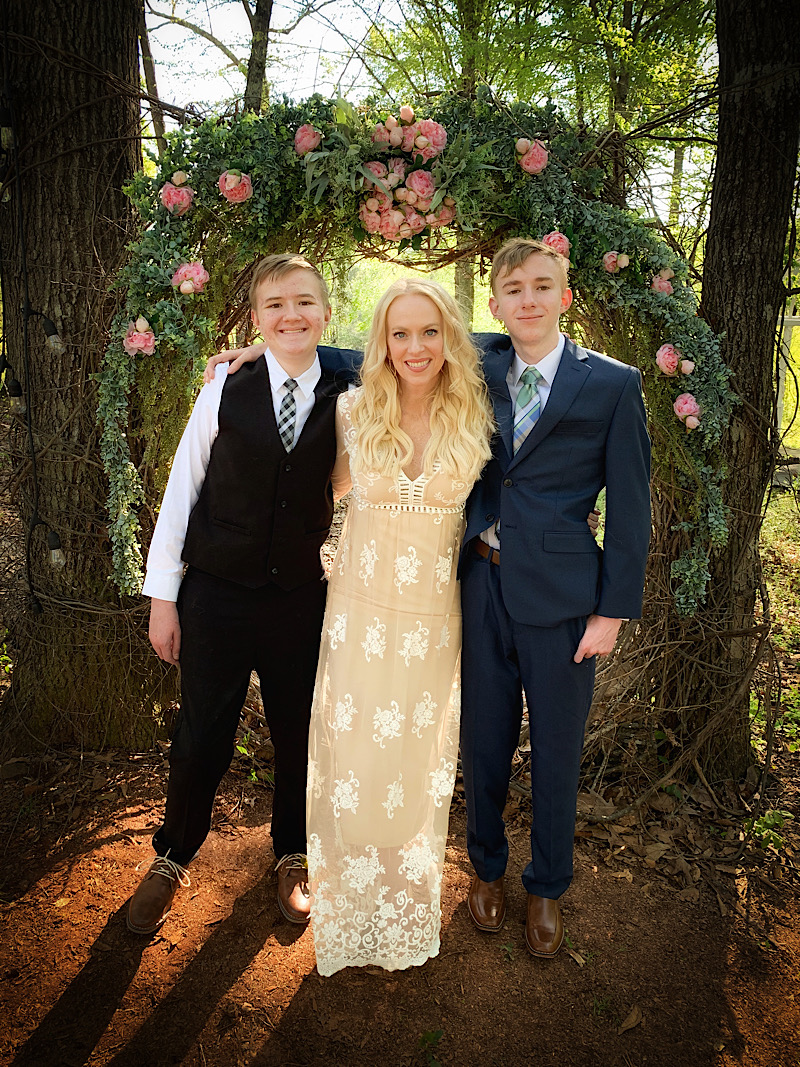
Below you can see the straight of camera shot of me and my boys on the left and the edited version on the right. Some of you may prefer the straight out of camera shot and there is nothing wrong with that! I prefer a brighter look so I almost always lower my highlights, increase my shadows, increase my whites and lower my blacks. I also go into each color and mess with the saturation and luminance of each. When shooting outdoors, I pay particular attention to the saturation and luminance of orange, yellow, and green.

I don’t typically vignette my photos but I liked the darkened edges for most of these photos as they accentuated the wreath and placed more focus on our faces. In the picture below, I stuck more towards my normal “light and airy” editing style by desaturating the greens and yellows and increasing the luminance on both. 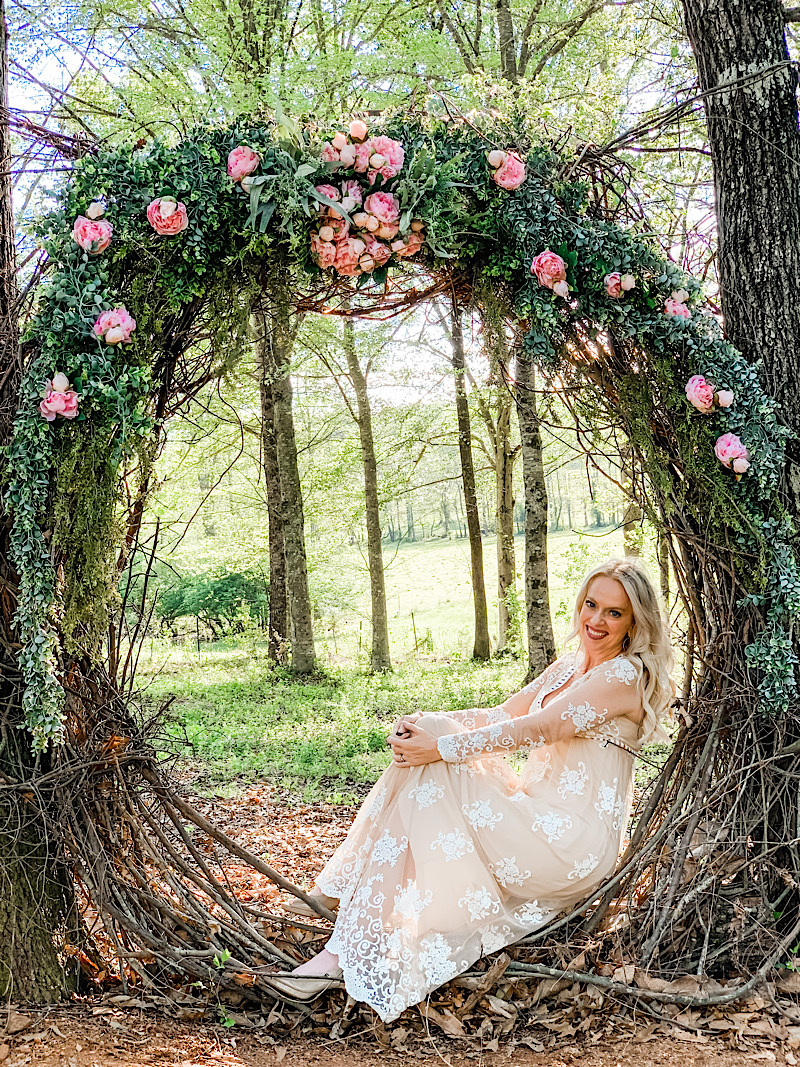
I hope this post inspires you to just have fun capturing some pictures of your family! It doesn’t have to be perfect to be treasured! Please pin this post for later reference!
You might also enjoy these photography posts:
Photography Tips: How to Take Your Own Self-Portraits with a DSLR Camera
Snow Photography and My Camera Equipment


So fun to look at these over and over again. I don’t have to make an appointment to see you all!! :). Beautiful job all of you!!
What a tremendously great idea! Your photos are divine!
Thank you so much!
This is genius and your pictures are stunning.