
How to Build a Box Beam Mantel
No mantel? No problem! Create your own box beam mantel with this step-by-step tutorial showing you how to build a box beam mantel.
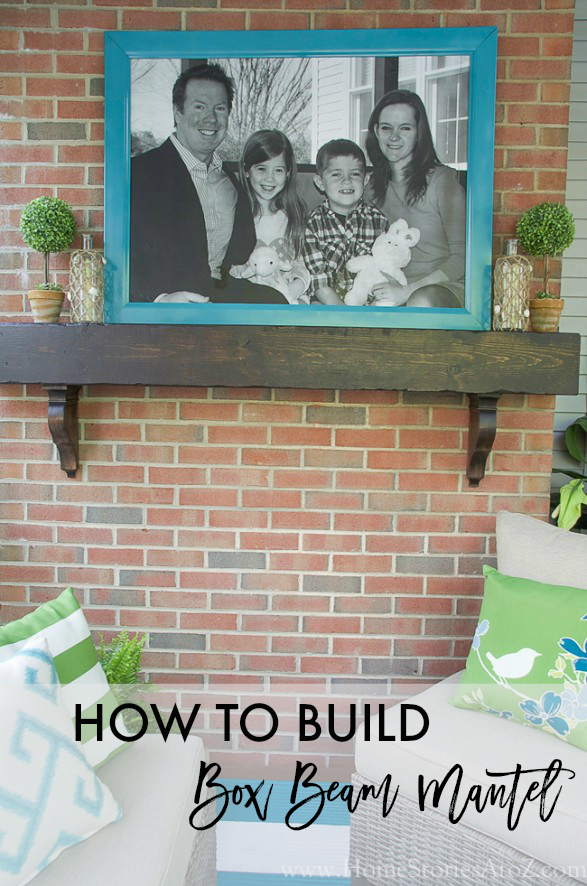
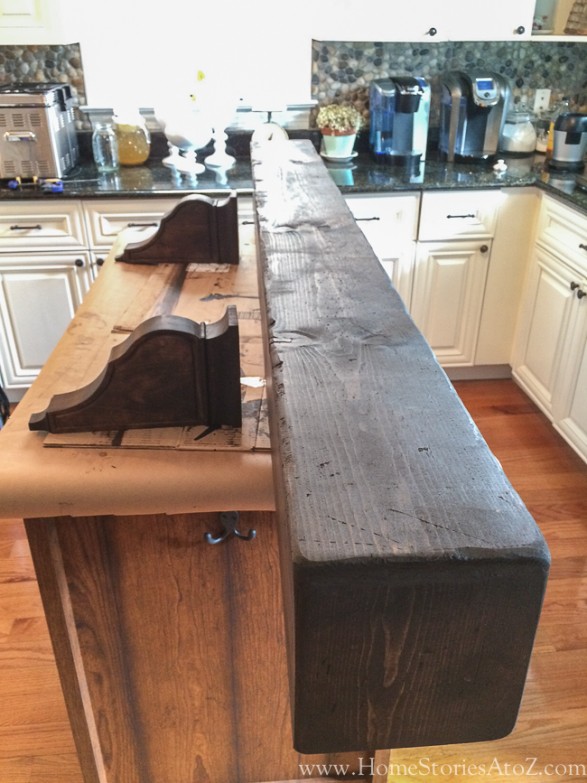
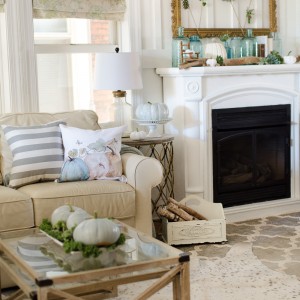
What do you do when your order for a beam mantel, that you really need STAT for a home makeover, is mysteriously canceled? You forge ahead and make your own! Today I’m going to show you step-by-step how to build a box beam mantel. This mantel has the look of a rustic beam and is relatively easy and inexpensive to build. The back of the mantel is left open and hung on to the wall using a cleat. You can use decorative corbels to customize your look. As an Amazon Associate I earn from qualifying purchases.
Materials Needed for 6′ Box Mantel:
- 2 1x8x6 white pine boards
- 1 1x8x8 white pine board (I had the store cut it down to a 1x8x6 for me and saved the excess for the end caps.)
- Chop saw
- Wood glue
- Nail gun
- Chisels, chains, nails, hammer, etc. to create aged effect
- Wood putty
- Stain and poly (I used Rustoleum stain in Ebony and a poly in a satin sheen.)
- Sander and sand paper.
Materials Needed to Hang Box Beam Mantel on Brick:
- 2x4x6 (Cleat should be cut a bit shorter than mantel before hanging.)
- 5 Tapcon 3/16-in x 2.25-in Self-Tapping Concrete Screws
- Hammer drill with appropriate bits
- Normal drill
- Wood screws
Instructions to Build Box Beam Mantel:
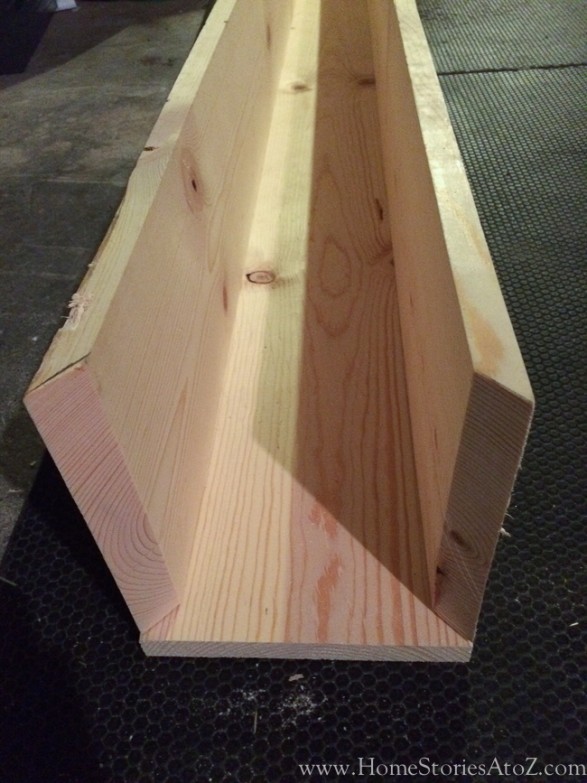
Step 1: Cut 45• miter cuts at each end on two of your 1x8x6 boards.
To make your box beam mantel, you can use a table saw or a chop saw to make 45• cuts on the ends of two of your boards. I used my double bevel Dewalt saw to make the cuts.
Step 2: Glue and nail the boards in place.
This step is easiest done with two people, so grab a helper if you can find one! Place wood glue on the edge of your boards and nail boards in place. If you have clamps, use them to hold the boards in place until the wood glue dries.
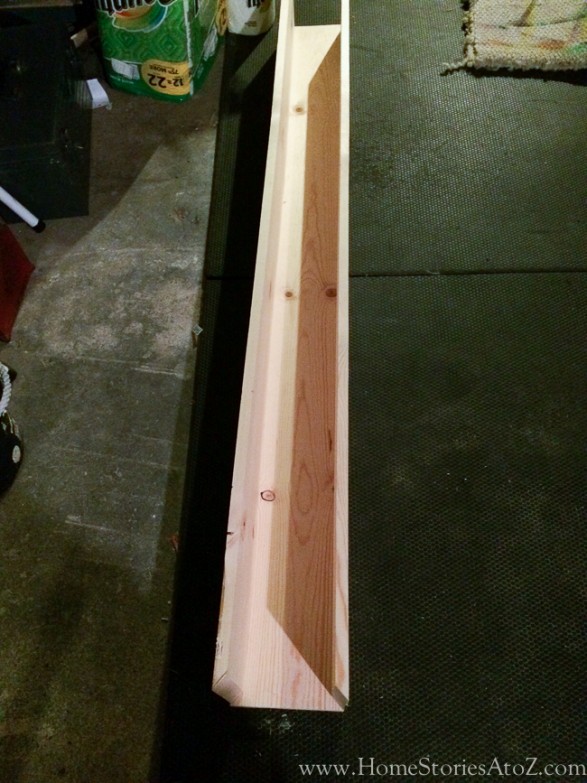
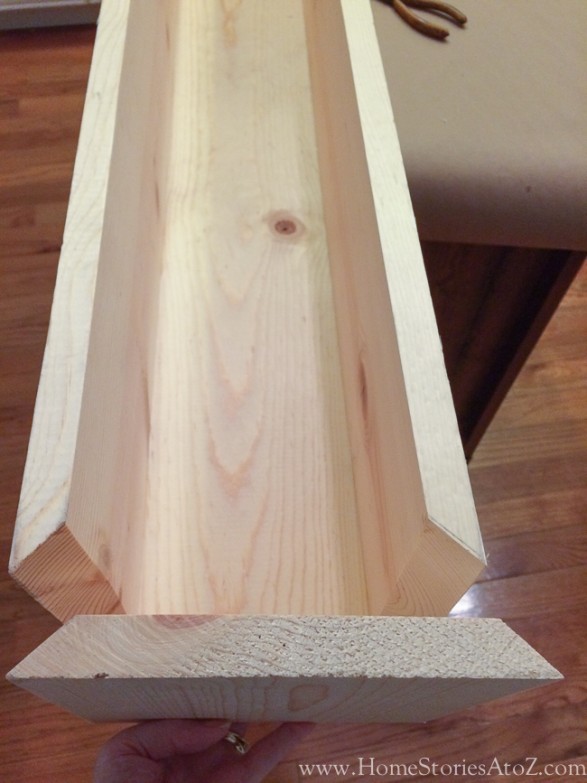
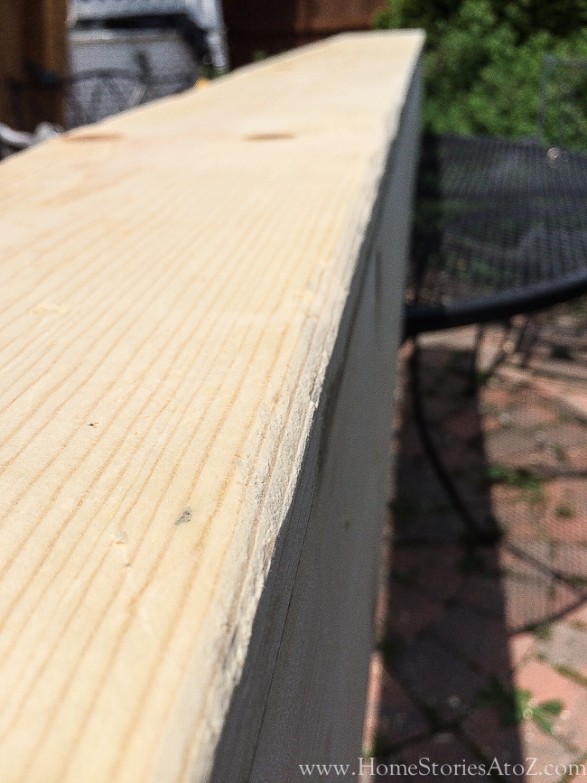
Step 3: Measure and cut your end caps to size. Make 45• cuts on two sides of your end caps. Glue and nail into place.
The mitered end caps will give your box beam a smooth and nearly seamless appearance. This looks much better than just using square cuts, but it is much easier than mitering ALL sides of your wood to create a truly seamless box. If you have a fantastic table-saw, you could miter every side of your wood to create an even better looking beam.
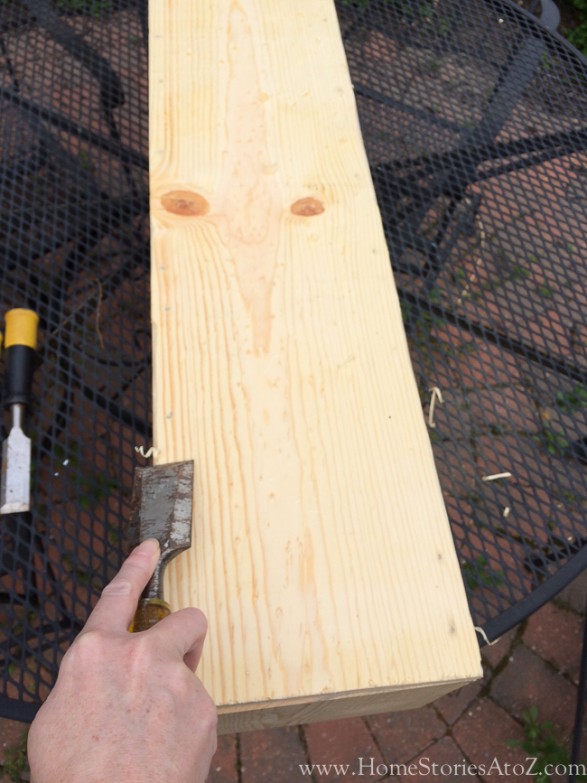
Step 4: Distress your beam.
Distressing your beam is a matter of taste. In my opinion it’s an important step towards creating a realistic look but if you prefer a more modern look, then omit this step. I used a metal chain, chisel set, screw tip, hammer, and paint key to create faux wormholes, scratches, dents, and dings in my wood. The level of distressing is completely a matter of personal preference. I found chiseling chunks of wood off the sides of the mantel created the look I was going for.
Step 5: Fill the wood seam on your box beam mantel with wood putty.
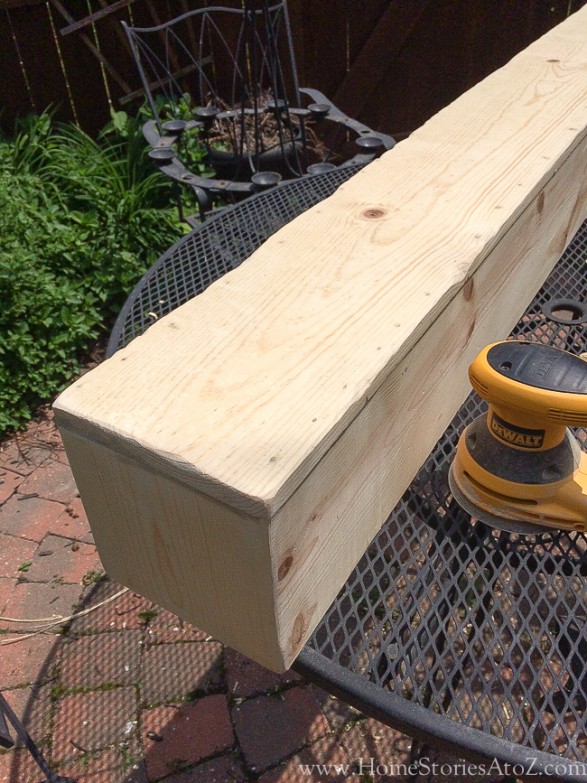
Step 6: Sand your beam.
I used a coarse grit paper on my Dewalt orbital sander to smooth out my chisel marks and create further dips in the sides of my beam. I also rounded the corners a bit to give a more worn look.
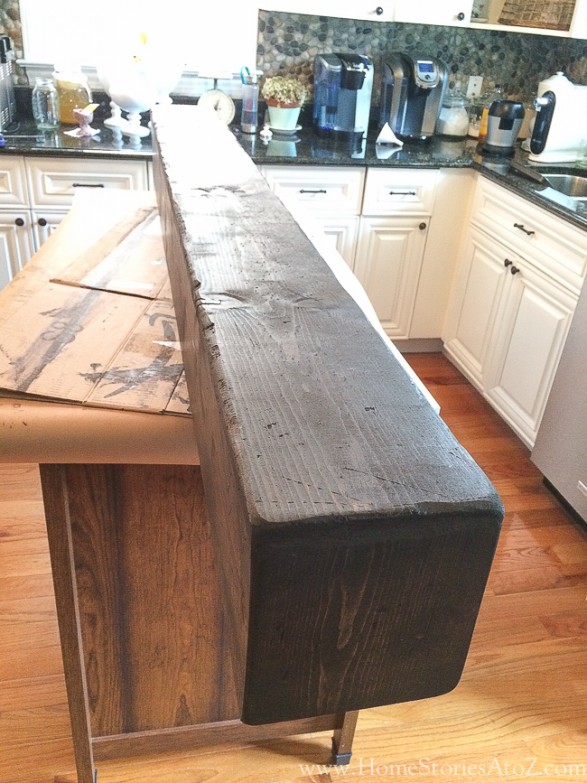
Step 7: Stain your wood following the packaging directions.
I like to use disposable foam brushes to apply my stain. I simply brush on the stain, wait a few minutes, and then use a clean lint free rag to remove the excess stain. Once the stain is dry, apply several coats of poly leaving the appropriate dry time between coats.
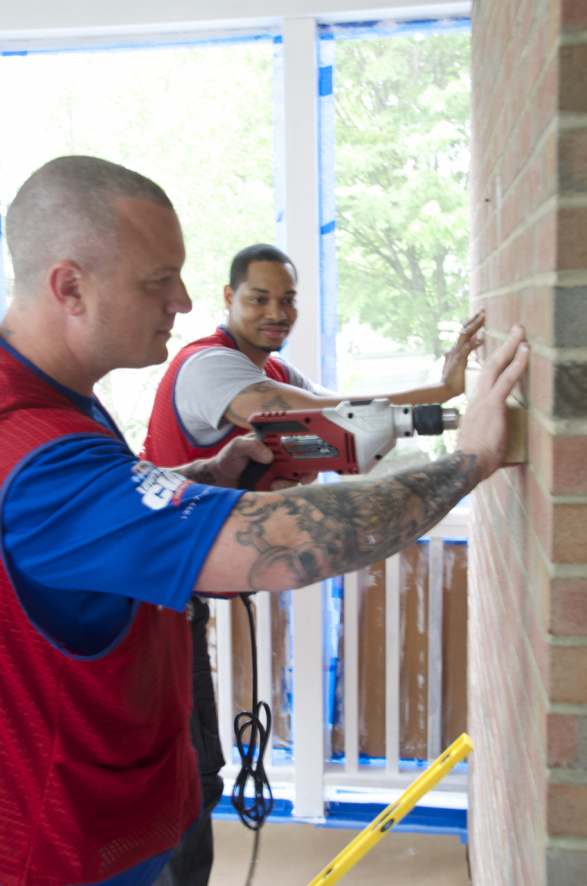
How to Hang Your Box Beam Mantel Cleat on Brick
Hanging things on brick is one of my all-time least favorite activities! I live in a home with 100-yr-old brick walls in nearly every room, and while I love the look of exposed brick, it is not fun to drill into. I took advantage of having two strong men at my disposal and asked them to follow my instructions to hang the mantel.
Tip: If you are hanging corbels, be sure to hang those FIRST before securing your mantel to the wall. Many corbels use a keyhole hanging mechanism and will need room to move up in order to slip over the screw.”
First, pre-drill holes into your cleat. Mark your holes on the brick, avoiding any grout lines. Use a hammer drill to pre-drill into the brick. Secure the cleat to the wall using Tapcon screws. Place the mantel over the cleat and secure the mantel to the cleat using wood screws.
You can counter-sink your wood screws and fill the holes with putty and stain, or you can just let them be. If you choose black wood screws, they will not be very noticeable.
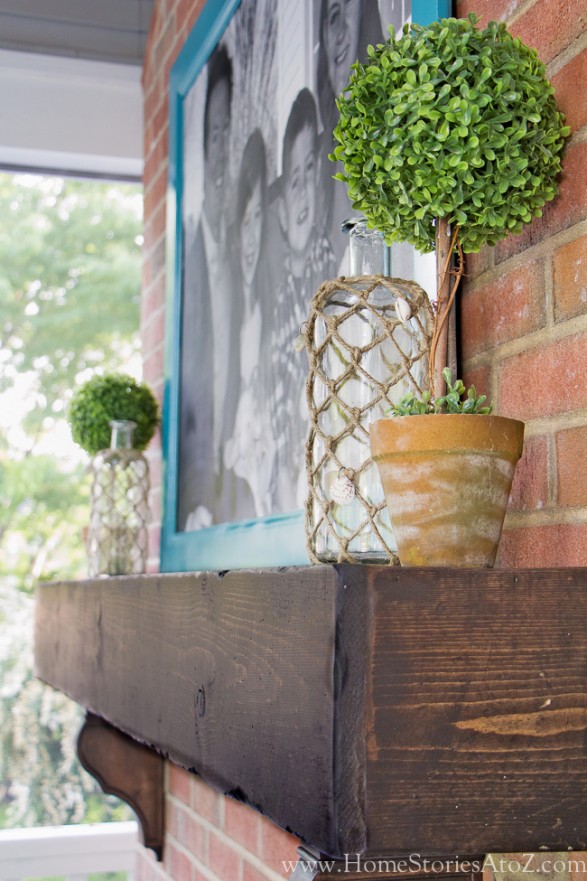
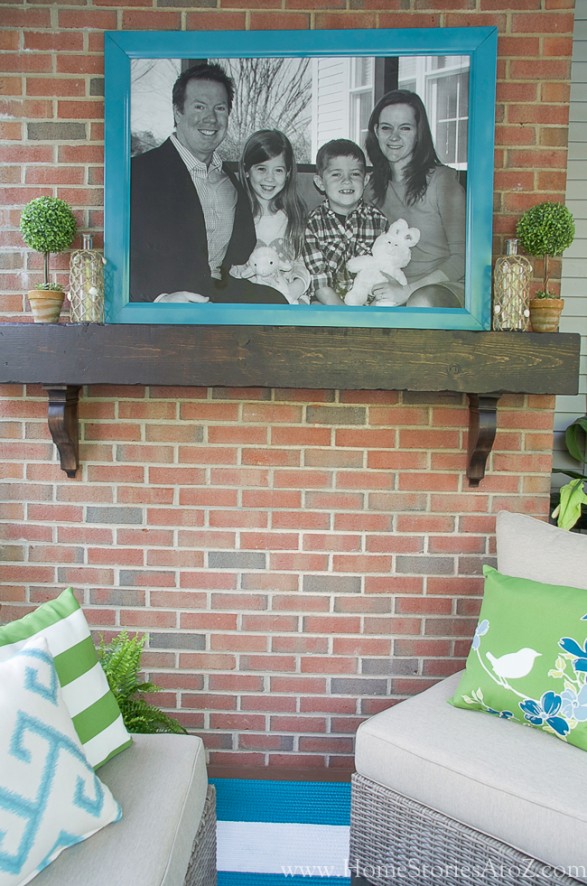
Enjoy your handiwork! You now have a fantastic looking beam mantel!

Here are two posts I found helpful in informing my project:
- DIY Rough Hewn Wood Fireplace Mantel by Addicted 2 Decorating
- Build a Rustic Faux Beam Mantel
If you liked this post, you might also want to check out my related posts below.
Beautiful DIY Faux Wood Beam Room Divider Tutorial
DIY Projects: 15+ Simple Building Projects Using 2×4 Lumber
DIY Building Projects: Small Projects You Can Finish in a Weekend
Lowes Screen Porch & Deck Makeover Reveal


Just finished mine. It turned out fantastic! Thanks for sharing all the details.
I am planning to make one of these to fit over my existing fancy mantel, we installed shiplap above our fireplace so we need a more rustic mantel!
Where did you get the brackets underneath?
Brackets? Do you mean the wood corbels? I found them at Lowe’s. They are purely decorative.
I think we had one of those in our last house and I just loved it! I miss having I and no room in our apartment now, but it is a good memory!
This turned out fabulous !
We have plans to install faux wood beams on the living room ( and possibly kitchen ) in the fall – so I’m pinning –
Thanks so much for sharing !
Perfect timing! We just ripped off our old mantel this weekend, and this is just what I’m planning to do (minus the brackets). Pinned!
Wonderful! I’m glad you found it helpful and thanks for the pin. 🙂