
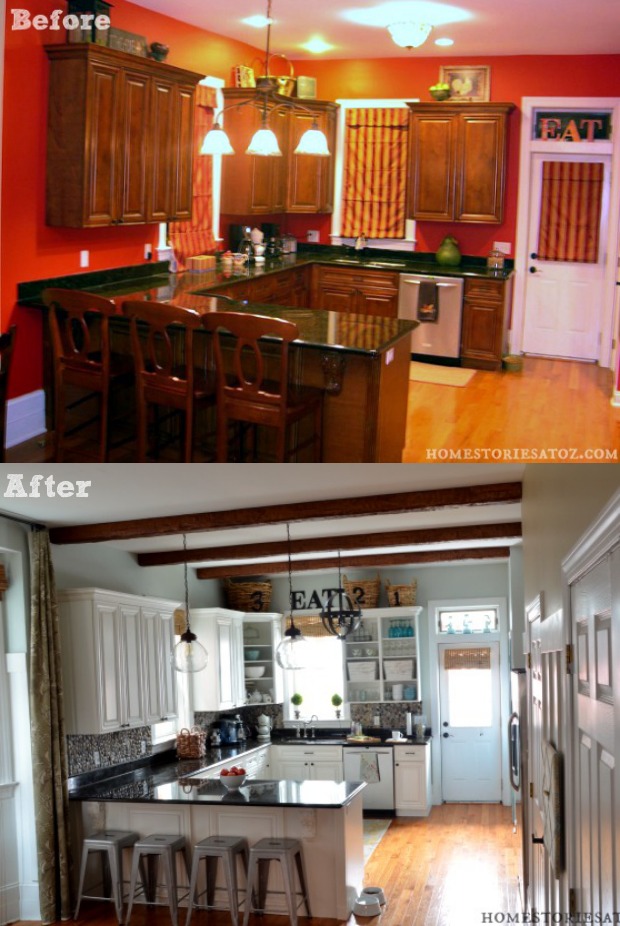
Kitchen living is a way of life for us. We literally live in our kitchen and spend a great deal of time during the day in the kitchen or near the kitchen. Our row home has a VERY open concept floor plan so the kitchen, the bar, and the kitchen table are all high traffic areas. When we remodeled our home six years ago, I was committed to our previous home’s color scheme of dark wood, reds, and golds. Sadly my commitment waned approximately one year later and I ended up hating my cherry-colored cabinets, tiffany light fixtures, and screaming red walls. I felt panicky and sick over it. How could I justify the expense of changing everything in my kitchen when it was all brand new? Perhaps you too long to change everything in your kitchen but just don’t think it’s possible due to the expense. The transformation of my kitchen from what it was–to what it is now–was a very slow and gradual process. Today I will show you stage-by-stage all the ways I “diy’ed” my way to a kitchen I now adore!
1: Change the paint color on the walls
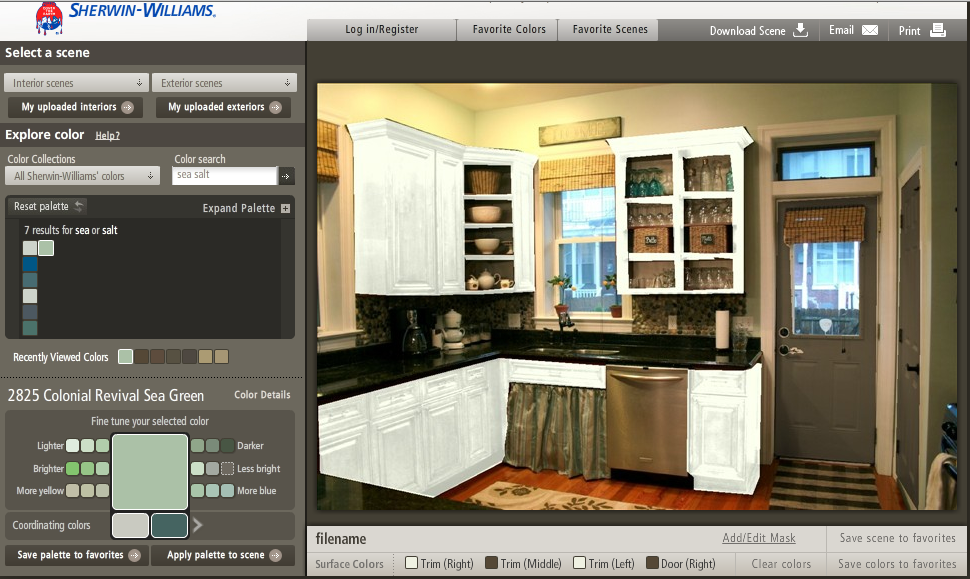
My reddish cabinets, red walls, and reddish-toned floor just were not working. I really wanted to paint the cabinets white, but I wasn’t ready for that commitment. Changing the wall color seemed like an easy fix. The picture below is a photoshopped picture of what my kitchen might look like with blue walls. Many paint companies offer free online software that will help you test a paint color before actually applying paint to your walls.

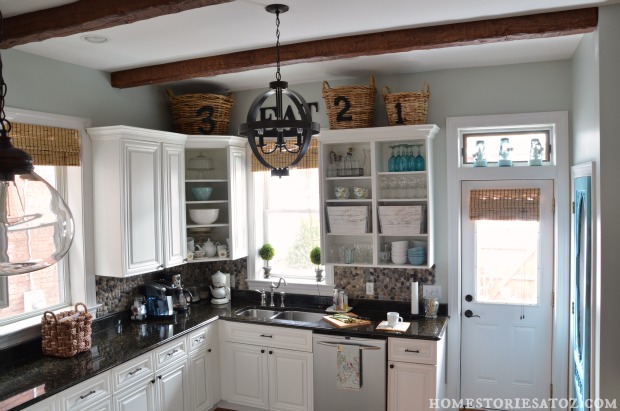
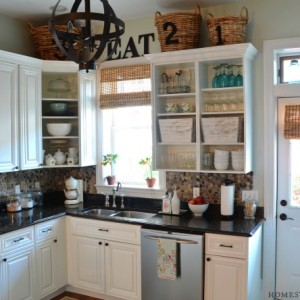
After seeing how much brighter my kitchen looked with different paint, I chose to paint my walls Sherwin Williams Sea Salt. This small change made a big improvement in the overall appearance of my kitchen.
2: Take off cabinet doors & add character
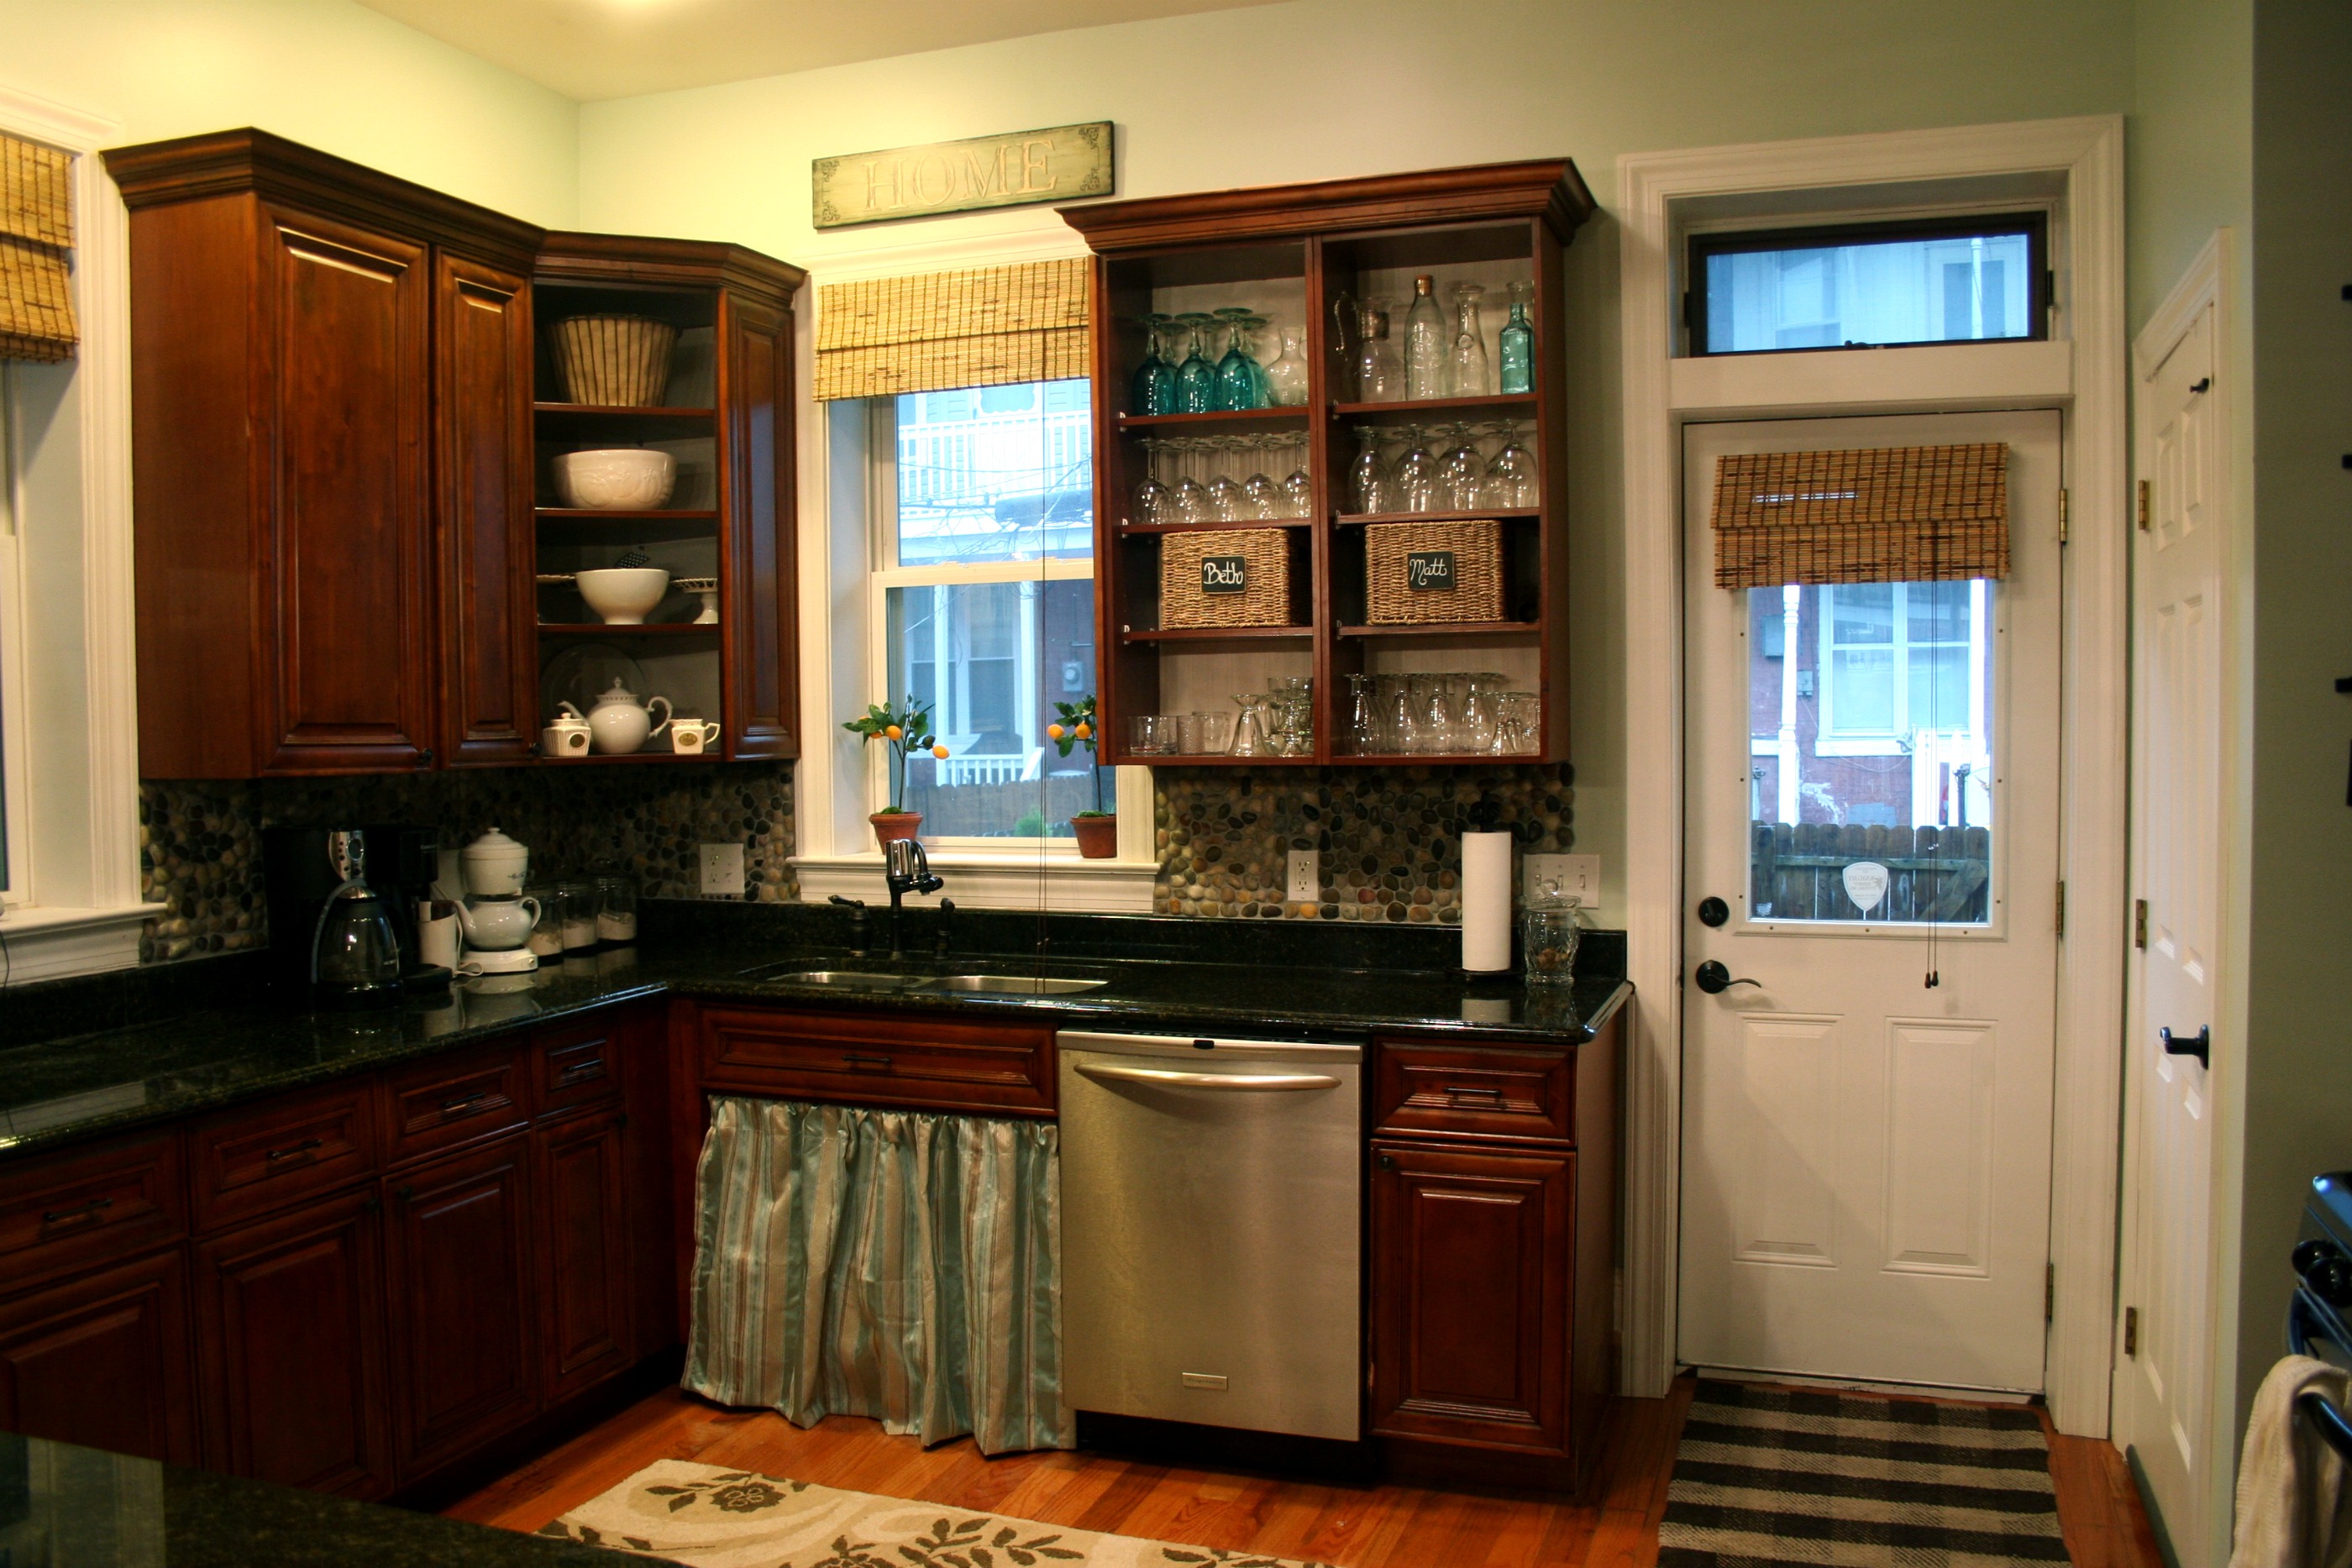
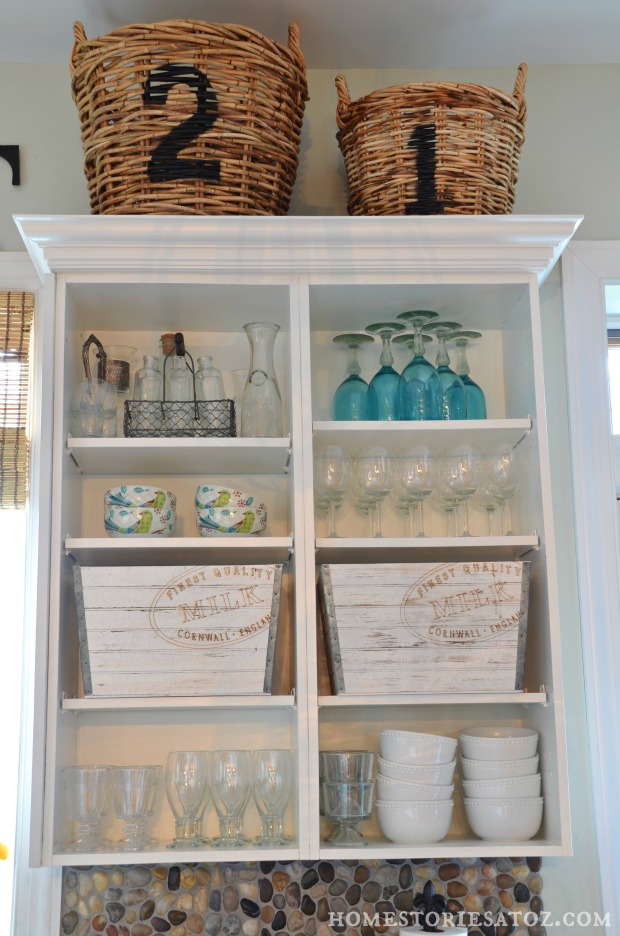
I really wanted a cottage kitchen with an “open shelf” look, but couldn’t justify the expense of taking down cabinets to add kitchen shelves. An easy solution was to remove a few of the cabinet doors. I backed the cabinets with white beadboard wallpaper (taped in place for quick removal) to help set off the dishes. Taking off the cabinet doors cost me nothing and helped me obtain a more cottage kitchen look that I desired.
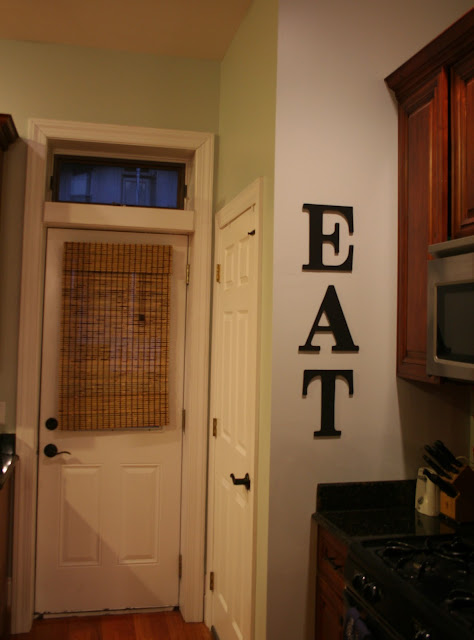
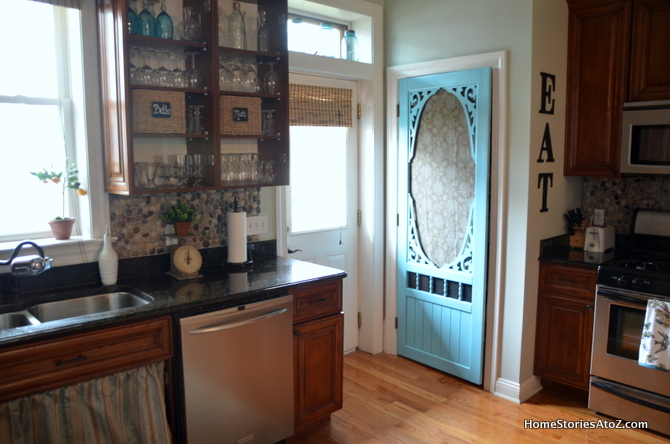
I longed for more character in my kitchen, so I replaced the pantry door with a screen door painted in a fun turquoise blue. My kitchen was finally starting to feel more like me with just a few simple updates.
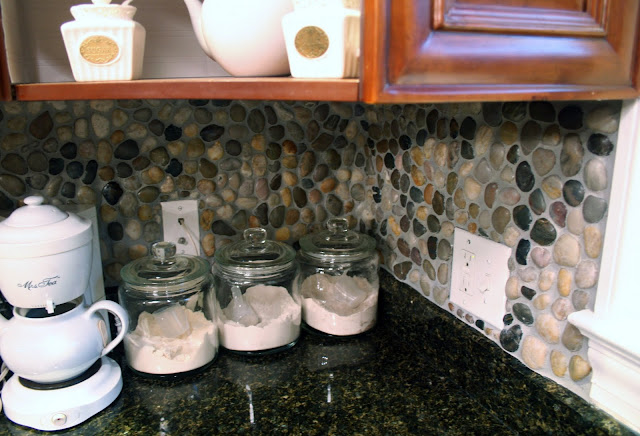
3: Install a new backsplash
I found some outdoor garden stone tiles at a discount store for around $2.50 a square foot. They weren’t intended to be used as a backsplash, but I knew they would work. I think it cost around $75 total in stones for the entire kitchen on all three walls. Not too shabby ![]() . Thinking outside the box always helps when it comes decorating on a budget!
. Thinking outside the box always helps when it comes decorating on a budget!
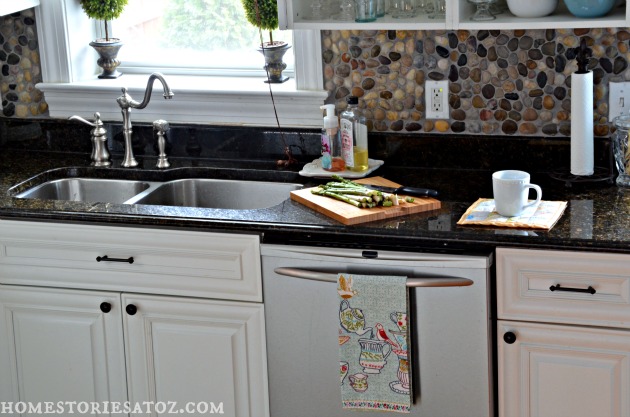
4: Update appliances and hardware
New appliances, faucets, knobs and pulls make a dramatic difference in the look and feel of your kitchen. I changed our faucet from an oil-rubbed bronze to a satin nickel that matched the stainless steel on my dishwasher. This small changed helped spruce up my sink area.
5: Paint the cabinetry
This was the absolute scariest step for me, so I eased into it by taking baby steps. I first painted just the peninsula and lived with it for awhile.
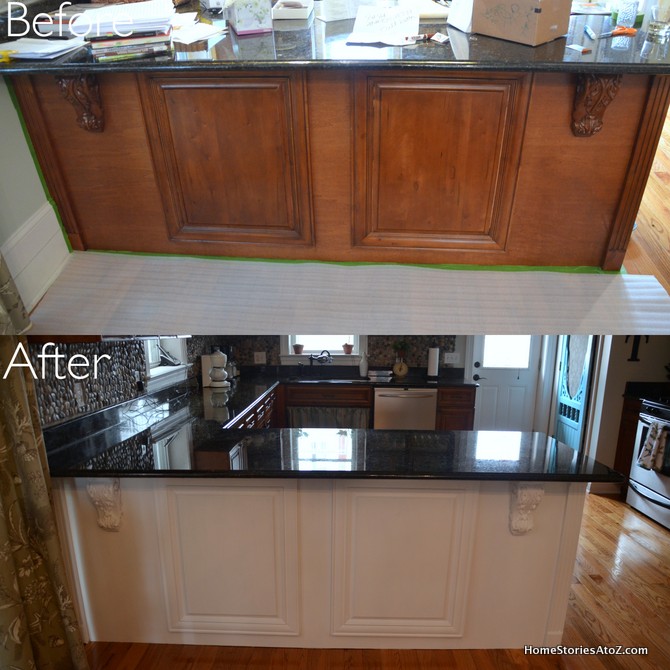
After seeing how great the cabinetry looked in white, there was no turning back!
We finally took the plunge and updated the light fixtures and had the cabinets fully painted. We also added faux beams this last year. I finally had a kitchen that I adored. Of course, I would have loved to have been able to have my kitchen look like this a few years ago but finances prohibited it.
If you are on a tight budget and yet still want to make changes in your kitchen, I hope my kitchen story inspires you to make small changes as you can afford them. Each small change will get you one step closer to a kitchen that feels like YOU!


Stumbled onto your blog and this caught my eye! Gorgeous makeover!! Now, I’m tempted to use that color in my kitchen – already have it in an upstairs bath. 🙂 However, my kitchen flows into the whole living/entry area (townhome dweller here, too!) There’s just no “easy” way to cut off the color. It’s also making me want to attempt a small cabinet painting job in that same bathroom. Hmmm. LOL!
Love it!
Can you tell me where you bought the light fixtures, especially the clear ones that hang down (over your peninsula )
Thanks a bunch
Thanks Pam! All of the lighting in the kitchen was purchased at Lowe’s.
Love your kitchen! What color and brand did you use for the cabinet paint?
Thanks! I used Benjamin Moore White Dove in an oil based paint. I can’t remember the exact name of the paint but the store was helpful in pointing me to a trim/cabinet paint. It has held-up great over the years.
So this is too funny …. I’m redoing a bazillion things all at once but the main thing is the kitchen (minor reno). I loved the look of your redo and in particular the paint color on the walls. I thought “OK – I love the current color of the kitchen but this looks like a good option!” Turns out – it’s the same color – Sea Salt. I picked it for an accent wall in 2005 and have now used it in 2 houses. It’s such a great color! Not too dark, not too light …!
Ha! Yes, Sea Salt is a great color! I love it.
I absolutely LOVE your kitchen. Can I ask where you got the EAT letters? And did you number the baskets yourself? Thanks so much!
Thanks Jamie! I bought the unfinished letters at a craft store and painted them. The baskets are from HomeGoods and came with the numbers.
how did you solve the challenge of the wall shared with another room I have an open concept floor plan like you and the one wall shares with a big wall connecting my living room and dining area thanks !! and I love it faux beams and all
I haven’t entirely solved the problem. Our rooms just flow into each other. I will soon be rearranging our living room that hopefully will offer a bit more structure to that “room” and separate it a bit from the others. Our first floor is a bowling alley and without construction it won’t change.
I am so glad I found your post through Pinterest. I love everything about your kitchen! I have been contemplating the same thing for months and I haven’t made the leap yet. It’s not in the budget to hire someone to paint the cabinets so we’ll be doing it ourselves. I’ve seen the Rustoleum product and I think I might paint my island first and see how that goes. Hopefully this winter we will be following your lead.
Good luck Michelle! I don’t regret it one bit :).
Great job! I’m wondering where you got the faux ceiling beams and pantry door? Thanks!
Thanks Patty! The ceiling beams cam from AZ Faux Beams and the pantry door is just a screen door from Lowes that I primed and spray painted.
Beth, I do love the new look for the kitchen.There are so many things I love about yours, the faux beams, the pantry door and the open cabinet look to name a few.
I want to paint our cabinets myself since budget is very limited. They are currently oak. Just don’t know if I should tackle such a big project on my own.
One of these days I’m just going to start and then there will be no stopping me. Hubby warned that if I screw it up he’s not hiring anyone to fix it though. 🙂
Hi Melanie! You can definitely do it yourself and your hubs will be amazed at your mad skills ;). There are a ton of fantastic blog posts with step-by-step tutorials on exactly how to achieve great looking painted cabinets. Here are some tips that might be helpful if you choose to dive in: http://www.homestoriesatoz.com/decorating/best-paint-for-kitchen-cabinets.html .
Love your kitchen! It’s so light and airy. I, like you, used to love the reds/golds and also sages for me. However, when we moved to our new home in May, I decided it was going to be brighter and lighter vs warm and cozy. I still love warm and cozy, and my bedroom is darker grays with pops of color to make for the warmth.
Ok….so where did you get the numbered baskets and the white crates in your cabinets? LOVE!!!
Thanks Melissa! I love my bright kitchen :). The numbered baskets came from HomeGoods and the white baskets came from Target (their Privet House line which is now discontinued).
Hi, Beth. I LOVE your kitchen. The “before” pictures look a lot like what my kitchen currently looks like, and the “after” are spot-on to what I envision my kitchen to be…someday. I like the idea of easing into painting the cabinets by painting the penninsula first. Did you paint the front, back and side of the penninsula?
Hi Beth
Your kitchen is beautiful! My existing kitchen is almost exactly like your “old” one. I am craving a makeover, and like you, pretty nervous of painting my cabinets! How did you know the steps to take? I’m sure I can manage, but just want them done correct!! Love your budget tips, patience and your style is Fab!
Laurie
Thanks Laurie! I compiled a post of all of the best tips on how to paint cabinets here: http://www.homestoriesatoz.com/decorating/best-paint-for-kitchen-cabinets.html I actually used Rustoleum’s cabinet kit to paint my peninsula (http://www.homestoriesatoz.com/decorating/white-painted-kitchen-island-pantry-screen-door-100-lowes-giftcard-giveaway.html) which turned out great but convinced me that I really wanted them professionally painted. In the end, I hired out and am so glad that I did!
I love it! We just moved into our new home….I like the kitchen. But I don’t LOVE it. Thanks for the inspiration! 🙂
Hello lovely,
I love it Beth! You did an outstanding job! I just also wanted to tell you how much I enjoy your blog, & I especially appreciate your interaction with your followers/fans. You always respond & answer questions. It really is a great trait that you have. Just wanted to tell you that for awhile.
Yours ’til my next swim, Raquel
What a sweet comment to receive Raquel! I so appreciate you taking the time to stop by and visit me. Thanks for the encouragement :).
Your kitchen looks great and I truly admire your step-by-step patience. It’s hard to just let things evolve but that does truly seem to be the best way to do it. Do a little fix/change, live with it, make another and, soon enough, you have a space like yours. Well done!
Thank you David! It was a long process and I was impatient during much of it but sticking to our budget and what we could afford at the time definitely was worth it.
I think you did a fabulous job!! I have always wanted to replace my pantry door with a screen door. Can you see through yours? My pantry never stays tidy and I’m not sure I want everyone to be able to see all that 🙂
Thanks Chrissy! Yes, you can see through the pantry door. I originally had fabric up on the door so that you couldn’t see the mess but now you can just see in. I try to keep an organized pantry but it’s ready for a makeover!
WOW – LOVE LOVE LOVE what you have done to your kitchen – it is gorgeous. I love how you have shared how you have done this step by step, so that we can all see that we can all be frustrated but we too can do this. I would love to know which box store you purchased the stone tiles from that you have used as your backsplash. I live in a little town of 3400 but would be more than willing to drive to one of these stores if I knew who carried them . . . Thank you for sharing with the rest of us that we too are capable of doing this!
Thanks Judi! I found the garden stones on mesh sheets as a store called the Christmas Tree Shop. I don’t think I saw them there this summer though. You could do it with individual stones but it would be a lot more work. You can see my post on my backsplash here if you’d like: http://www.homestoriesatoz.com/uncategorized/garden-stone-kitchen-backsplash-tutorial-how-to-backsplash.html
Where did you get your stools from?
I found them on Overstock.com.
Rome wasn’t built in a day, and neither are renovations!
Looks fantastic! You did a great job and glad to see the timeline on how long it takes!
Thanks Marie Roxanne!
Fantastic looking kitchen! I completely understand your issue with painting the work paint…once you go there, you can’t get back. But it was well worth the leap! Great Job!!!
Thanks Beth :). It was a super scary decision because I do like the look of wood, but I have zero regrets in painting them white.
Love how bright your kitchen is! How is the paint on the cabinets holding up? we will be painting ours next month.
Yes, it is sooooo much brighter and makes me happier! I’m a girl who needs a lot of light and in a row home we only have windows on one side of our home so it can feel like a cave in here. The paint has held up great. It’s been a full year since they were painted and only our sliding garbage bin cabinet door (the one that gets the most use) has some chipping that I should touch up. A good adhesion primer followed by Benjamin Moore oil-based paint makes a big difference in the longevity of the paint job.
What a difference! Your kitchen has so much character and personality now. Love the back splash idea and those light fixtures are fab.
Wow such a difference! Painting my cabinets is on my list too. What a difference it made in your kitchen!
Such a beautiful kitchen!
Beautiful!!
WOW… I remember the first time I “stumbled” onto your blog…. I absolutely loved the row home and what you had done to it and it’s “twin”!! lol ..BUT WOW…… this transformation is amazing!!!!!!!!!!!! Your process is something that is do-able for someone who is on a tight budget (like me.. 🙂 ) … Patience is the key I guess….. but even before it was finished …. the small changes were amazing!!!! Thank you so much for sharing
Hi Beth, Makes me want to grab a paintbrush and start painting my cabinets! Love how your kitchen turned out. Thanks so much for your lovely blog.
I might add that my favorite renos are those that use what is already there, and make them better and truly “ours.” It’s (relatively) easy to demo a room and start from scratch, but to use what’s in place and make it better than ever takes talent and a different kind of creativity. Great job!
Thank you so much Cindy :)!
In love with your “new” kitchen! So many clever ideas!
Beth, I always love looking at your house pictures. It really looks charming, and I LOVE the baskets with numbers! One question…did you raise your ceiling? It looks higher. I always said I wanted to raise our ceiling when we do a kitchen reno, so could I ask how high your ceilings are?
Thanks Susan! And no, the ceilings are the same height in both pictures. Our ceilings are 10 feet on our first floor.
Oh I LOVE your kitchen makeover. You gave it so much character just by changing the color and adding little touches like open shelving. It looks great!
We live in our kitchen too – small changes really make a big difference! Cheers my friend to your fabulous space!
Kelly
Looks fabulous! We are in the middle of the same process so I love seeing someone else at the end! Where did you get your lighting fixtures? Gorgeous!
Thanks Megan! They are from Lowe’s.
VERY inspiring!!! And I love the outcome. Good things come to those who wait!!!
Beth, your kitchen is beautiful! I love how you transformed it with your paintbrush, giving it an expensive new, custom look! I want your faucet! Thanks for sharing!
fabulous…….i need to paint over our outdated cabinets and am terrified……you said you “had” yours painted, does that mean you did it or hired someone?
I painted the peninsula myself to get a feel for what I wanted and then I paid a professional painter to spray all of the cabinets. I wanted oil-based paint and a professional finish and am incredibly pleased that I hired out for that part.
WOW! I can’t even believe that’s the same kitchen! The after is a.ma.zing Beth!
Jeanine
Thanks Jeanine! I love it now :).
Your kitchen is beautiful, Beth! Your changes and timeline are realistic because not everyone can make changes in one fell swoop. I like that you broke it all down in your post and shared the changes that you made over time. The lighter walls and painting your cabinets white really made a huge difference to the feel of the space.
Thanks so much Kathy!