
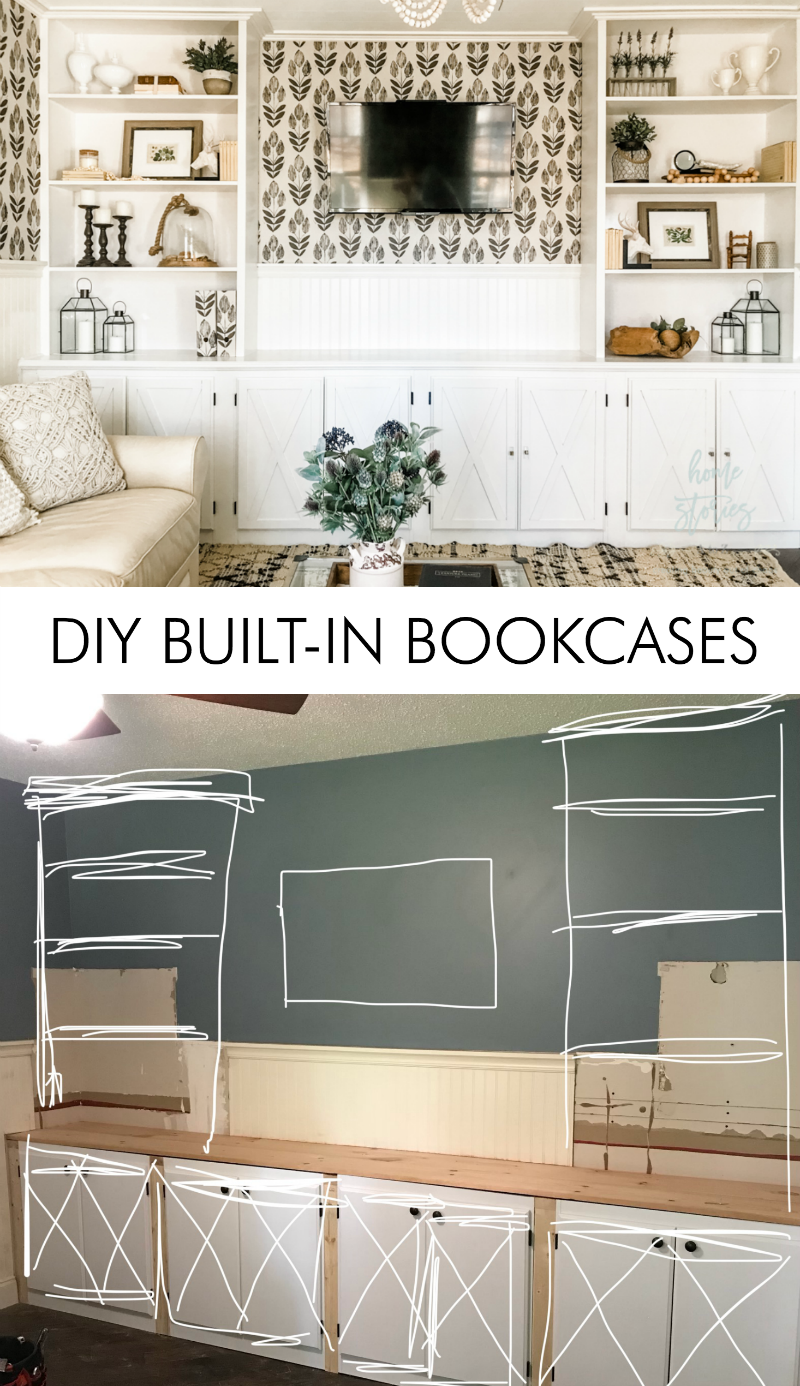
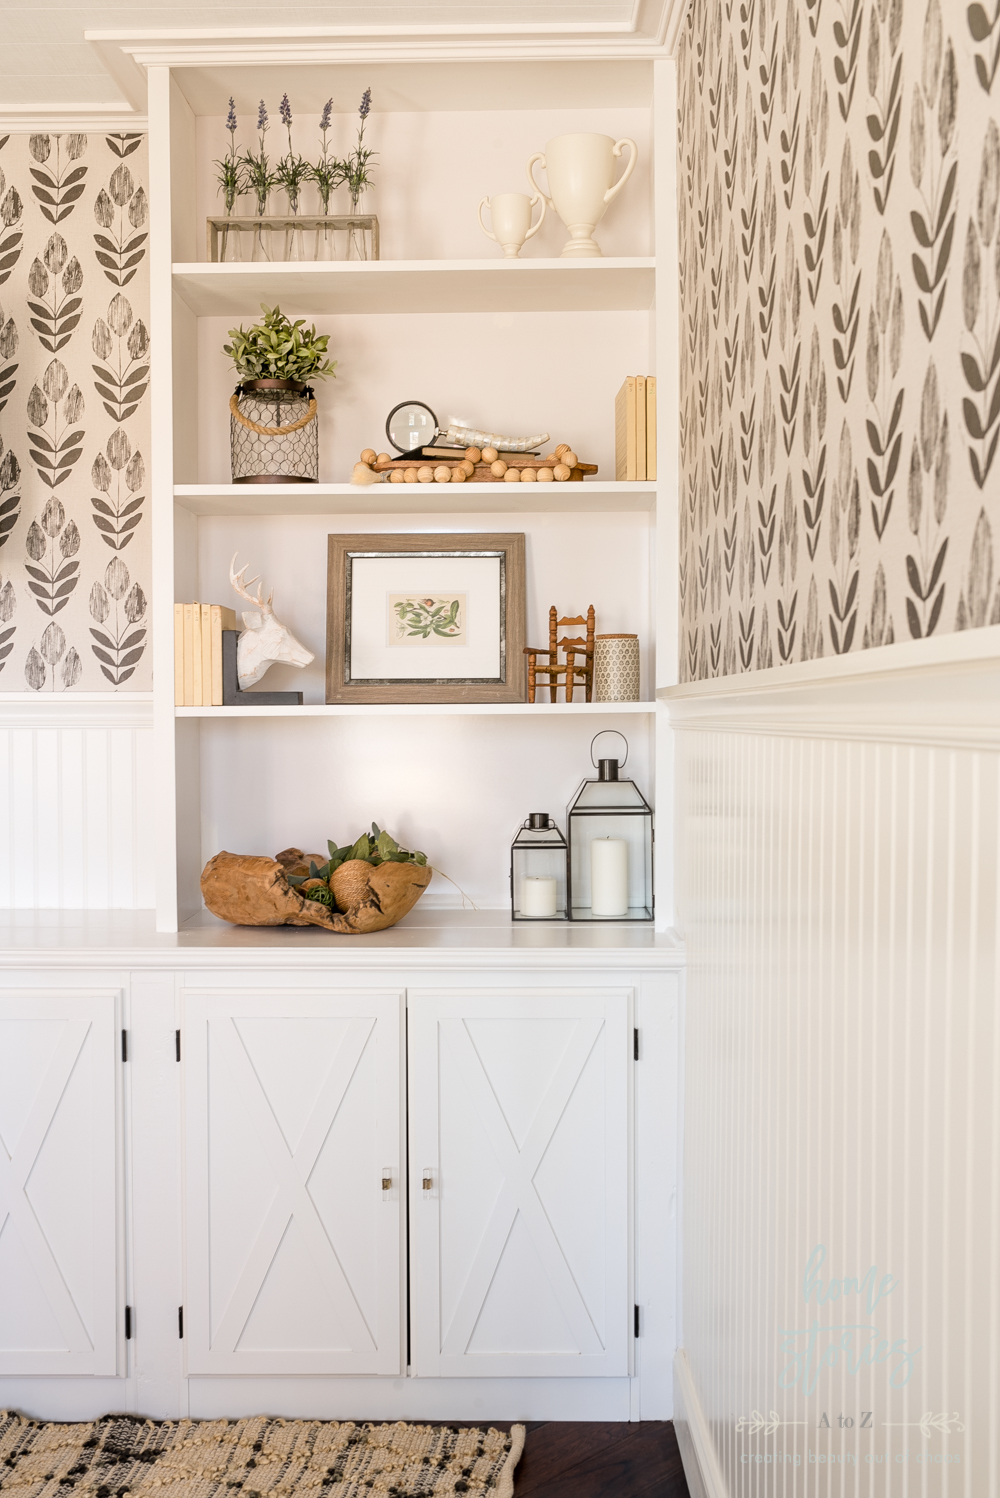
Get inspired to create your own built-in bookcase and cabinets utilizing these tips! Watch the video to see how we used prefab cabinets, wood, and trim to create our own custom media center!
Watch this Short Video to See How We Did It!
How We Built Our Bookcases: The Disclaimer and Before Pictures
Before I dive into the details on how we built our bookcases, I feel the need to begin with a disclaimer. If you are a professional or perfectionist, feel free to click away. This post is really just meant for the lazy DIY’er who wants to save money and get the look of custom cabinetry for less. This post won’t be a step-by-step tutorial you can simply plug in and follow for yourselves, but it will provide inspiration and ideas for tackling your own custom DIY bookcase build!
Matt and I are NOT great carpenters and when it comes to building we always just sort of wing it. This works well for us! Our philosophy in approaching builds is to make it as easy and stress-free as possible. Here is a picture below of what the room looked like when we first moved in. The room had short and very narrow built-in bookshelves which were created by the previous owners. The shelves were cute but not very deep and didn’t provide as much storage as we needed. We began by ripping out these builtins and starting from scratch!

Start with Base Cabinets and Wood
Matt and I always like to do semi-diy builds, meaning we start with some sort of prefab piece of furniture as the base and work from there. While it’s not always the cheapest way to go, it does save time and gives you a great base to start with! I measured the length of our room and settled on four of these white laminate cabinets with adjustable shelves to use as our base cabinets. We left off the tops of the cabinets so that we could create one seamless top.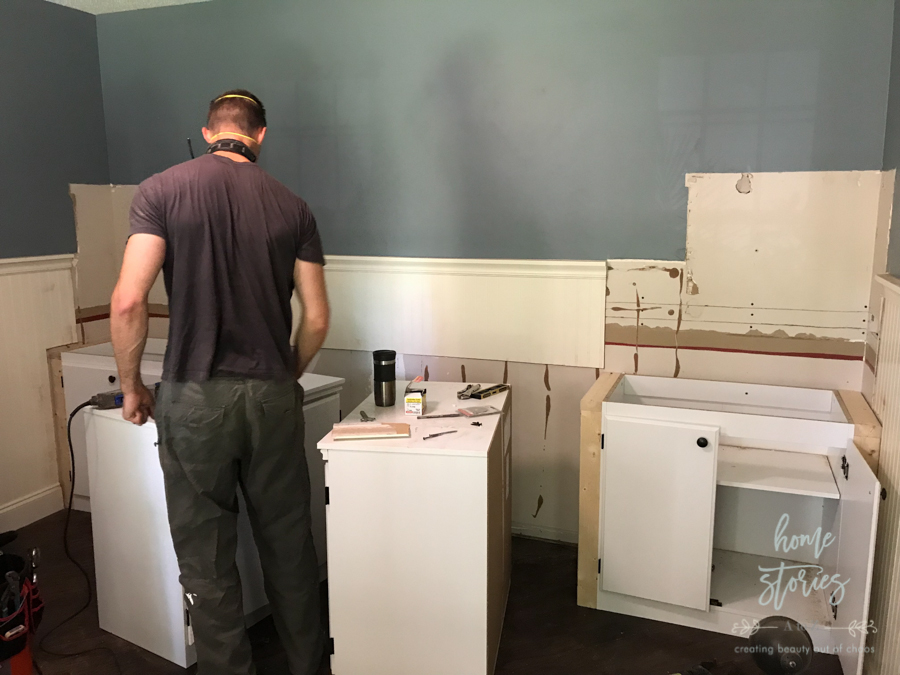
Click to Shop Base Cabinets.
Next we picked up some wood at Home Depot to create the spacers between the cabinets and two boards to create a top for the cabinetry. Our goal was to spend as little as possible on this part of the project! After pricing countertop options, I decided that I could live with the seam on two cheap boards placed side by side.
Matt and I have also found that our best laid building plans rarely go according to plan, and we tend to change our minds as we begin the project. Instead of purchasing all of the wood we think we need ahead of time, we take things step-by-step. Our creative process doesn’t seem to work as well when we feel overwhelmed with buying supplies for the entire build. If you are wired similarly, give yourself grace to do things one step at a time! Sure it may mean a few more trips to the store, but if it helps you stay happy (and married 😂) while DIY’ing I say it’s worth it!

Create Spacers between Cabinets for a Seamless Look
We measured the length of our space minus the cabinets and determined the size of wood that needed to surround each cabinet to give it a built-in look. 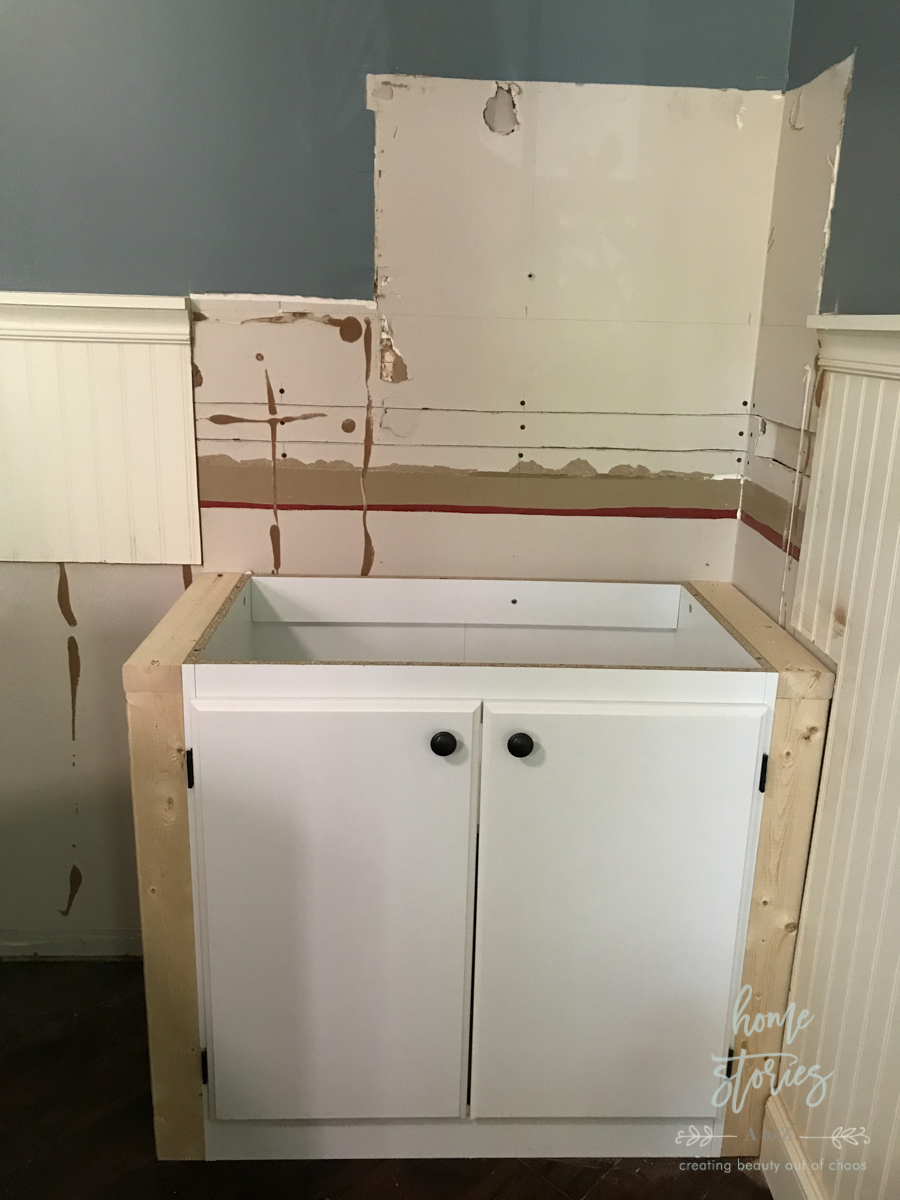
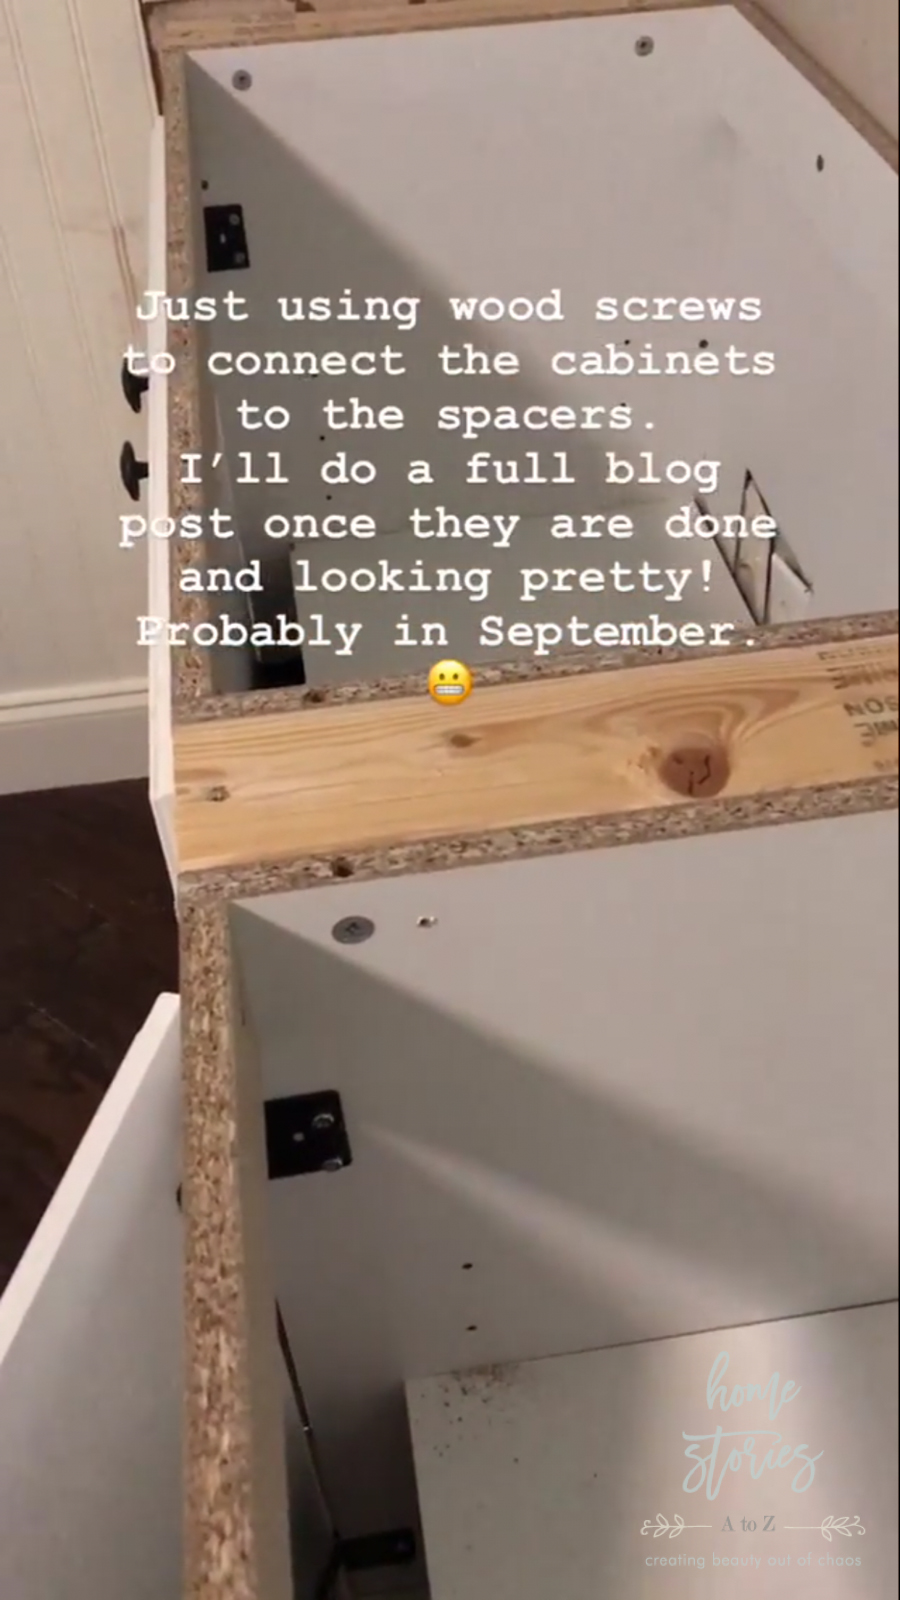
Matt ripped the boards down to size and we attached the spacer boards to the cabinets using wood screws.
With the base cabinets in place it was easier for me to visualize what I wanted to do next, and I created the very professional to scale sketch below!
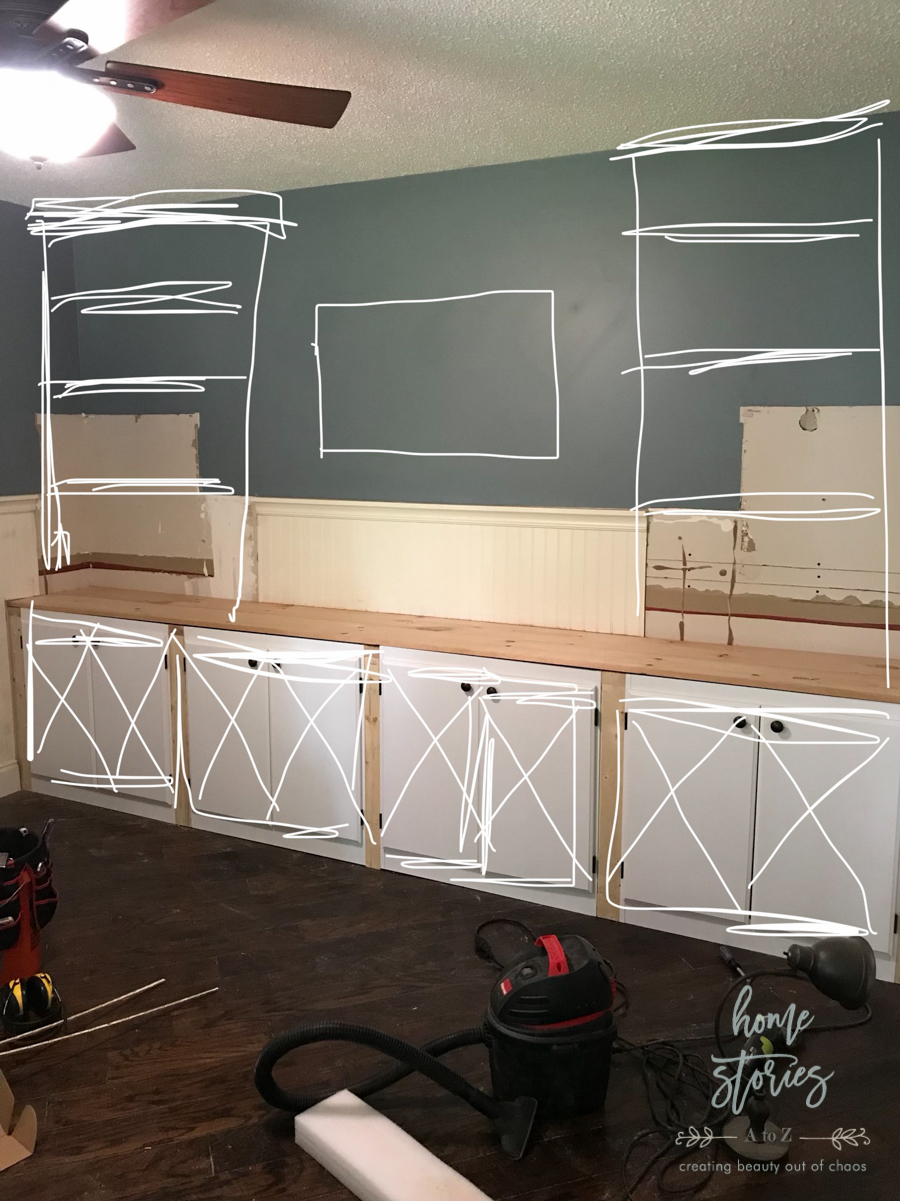
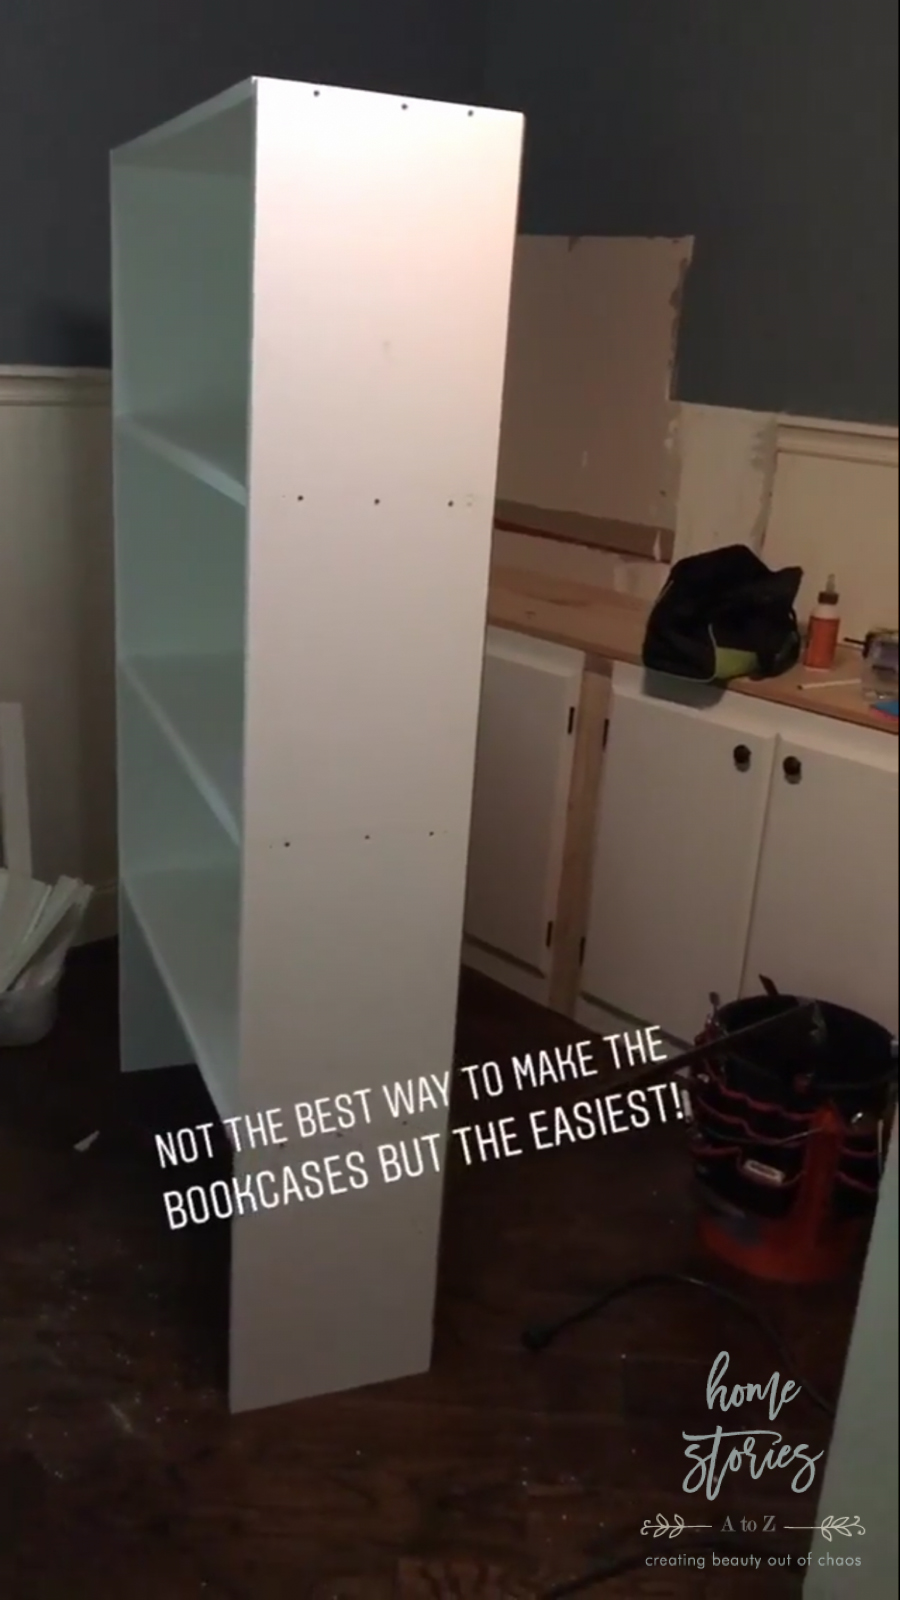
Using my silly sketch, we proceeded to build the bookshelves with the three boards evenly spaced. Again, we took the easiest route possible to build both of these and chose not to create adjustable shelving or to use pocket holes. We secured the shelves the easiest way possible and I puttied the holes later.
Tip: Think Outside the Box for Trim & Molding
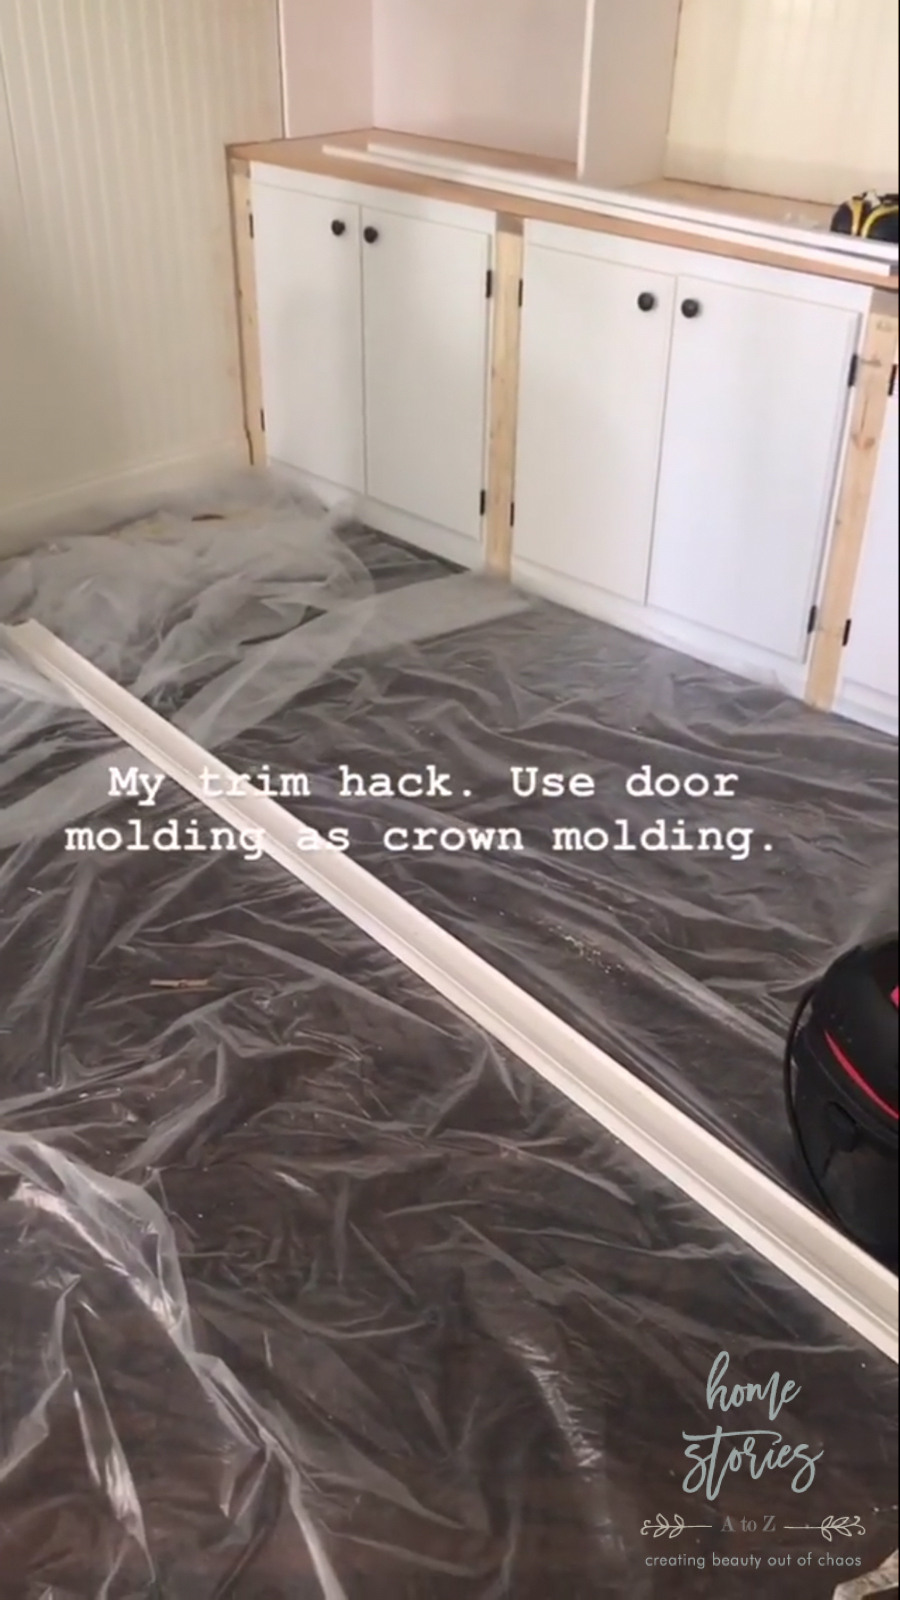
Here is another unconventional tip for you! We covered the popcorn ceiling with Armstrong Ceiling planks. You can read my tutorial on the installation process for those here: How to Cover a Popcorn Ceiling Using Beautiful Armstrong WoodHaven Planks. Since the ceilings are rather low in this room I didn’t want to use a heavy crown molding. Instead, I chose to use door molding nailed directly into the ceiling to fake the appearance of crown. This worked beautifully!
I also used shoe molding around where the cabinets meet the bead board. This worked well to disguise some imperfections that were created from demo-ing the former bookshelves. Don’t be afraid to think outside the box when you build!
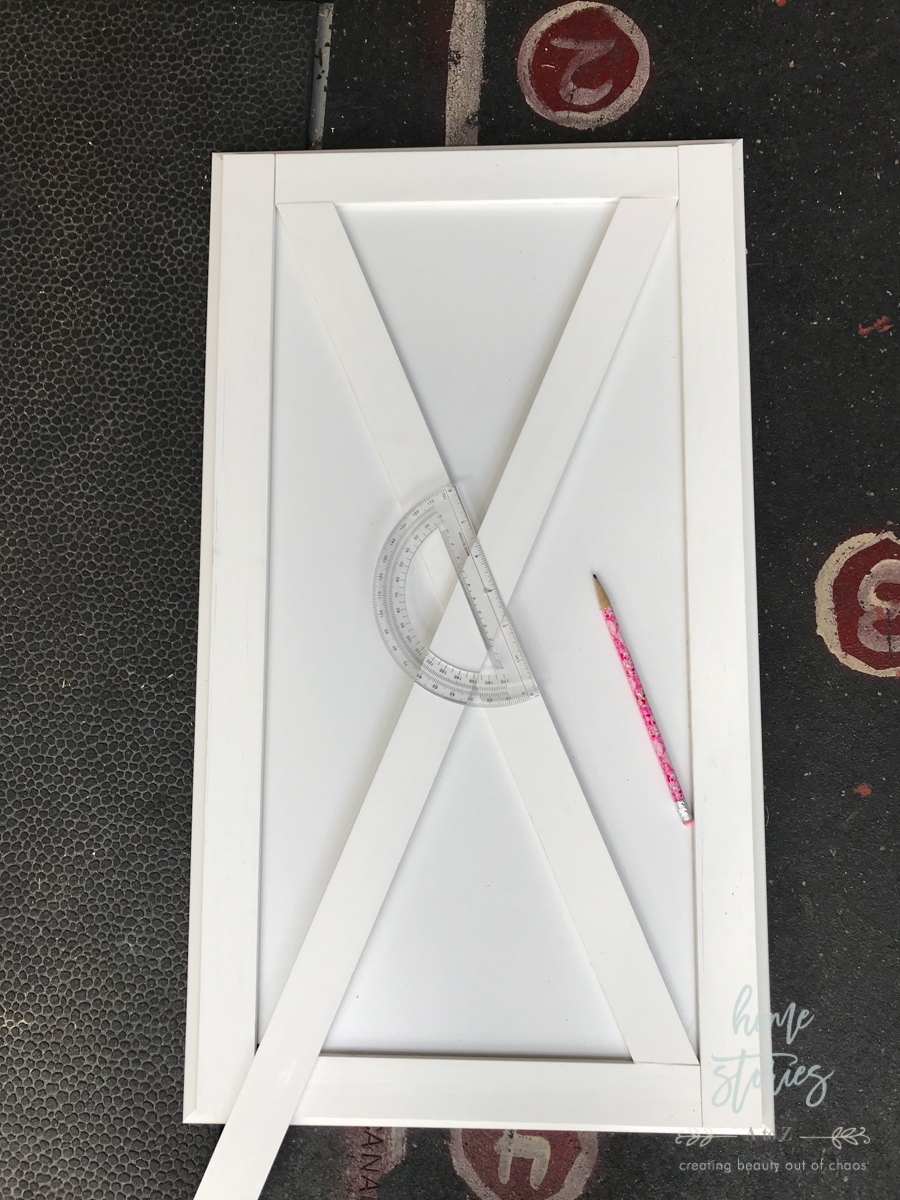
Spice Up Plain Cabinet Doors with Lattice Trim
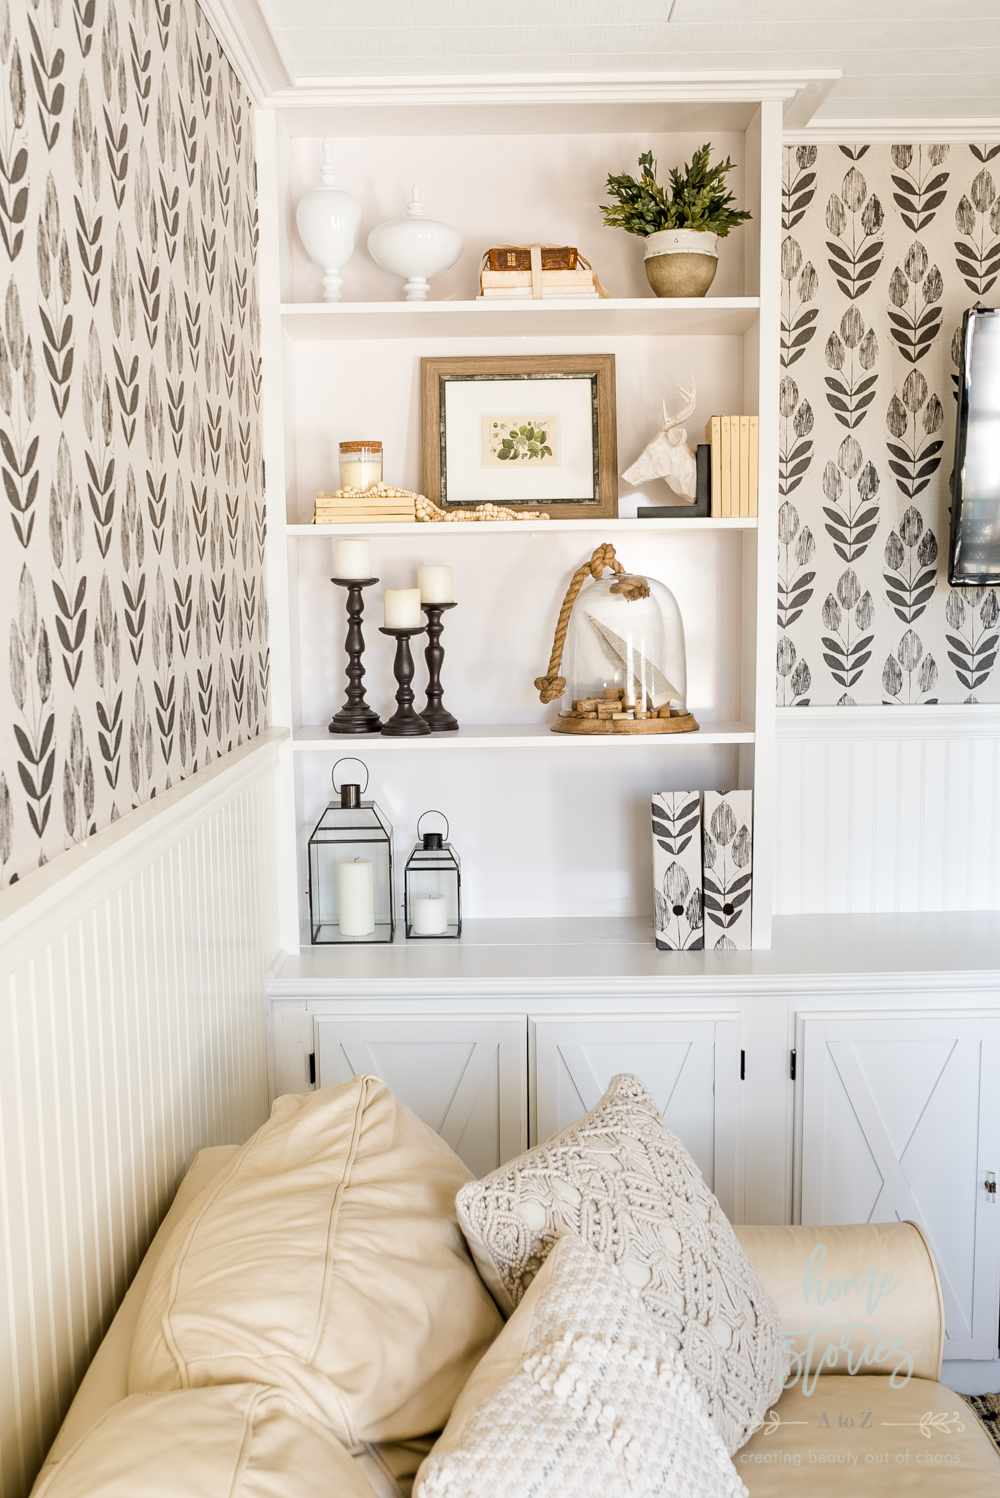
To create more interest to our cabinets, I used lattice trim to create a box with an X on each cabinet door.
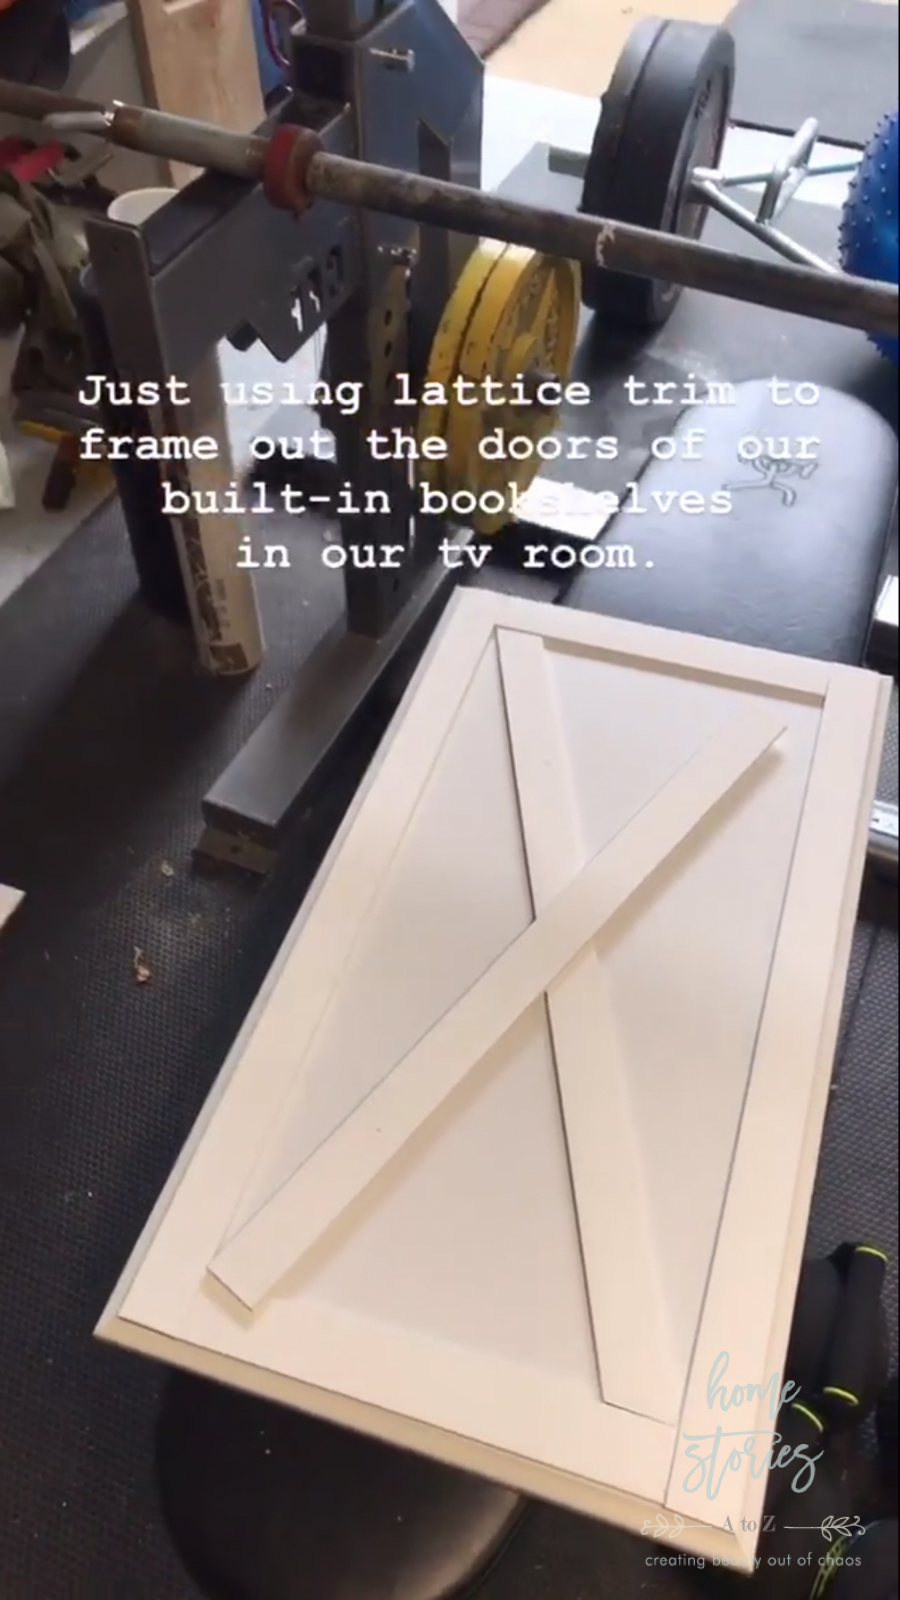
I measured and marked each piece and cut the lattice trim using my chop saw. I then used liquid nails to adhere the pieces to the doors.
Paint and Caulk Everything
Painter’s caulk is your best friend in hiding small imperfections and creating a more professional look! Use that stuff liberally wherever needed! You also want to invest in a quality paint like Benjamin Moore’s Advance. To save time, I brought a cabinet door to Benjamin Moore and had them color match my paint to the face of the doors. I didn’t want the hassle of priming and painting all of the cabinet doors. Color matching my paint to the doors allowed me to get away with just painting the pre-primed lattice trim on the door fronts.
Add Beautiful Hardware
If you haven’t already, I encourage you to watch the video at the beginning of the post to see how I used a laser level to quickly drill even holes for my hardware installation. Adding beautiful hardware elevates your build and is the frosting on the cake!
For more inspiration on other built-ins and wood builds I’ve completed over the years, check out the following related posts:
Breakfast Room Makeover: Cube Storage Hack
Ikea Hack: Billy Built-in Bookshelves (Part 1)
How to Build Bathroom Shelves Next to Shower
How to Build Open Shelves the Easy Way
How to Create a Shiplap Wall with Wood Boards
DIY Plank Wall Tongue and Groove Tutorial


I’m so glad to see this blog post. I’ve been planning something similar for our dining room and you’ve given me some great ideas.
This looks amazing!